

(Written by William)
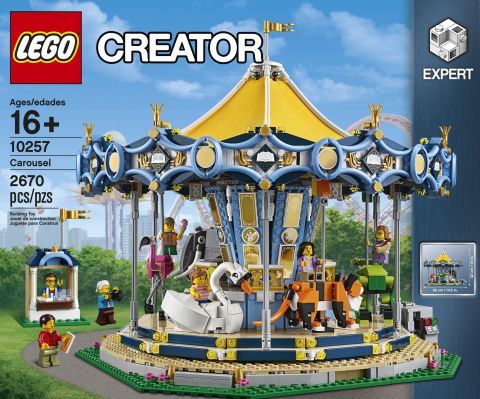
One of my favorite series in the LEGO Creator line is the fairground rides sets. This includes the #10244 LEGO Creator Fairground Mixer from 2014, the #10247 LEGO Creator Ferris Wheel from 2015, and the newly released #10257 LEGO Creator Carousel. They are beautifully detailed, and are functional with a rotating action (either manually or with LEGO Power Functions). The first two sets were designed by Jamie Berard, so I became a little concerned when I heard that Mike Psiaki too over as lead designer for the LEGO Creator Carousel. However, having built the set, I’m happy to report that Mike is now added to my list of favorite designers. 🙂
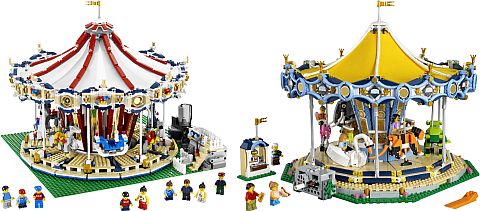
An obvious question that will come up when discussing the #10257 LEGO Creator Carousel, is how it compares to the #10196 LEGO Grand Carousel released in 2009. First off, the new set is less traditional in design by taking a more Mother Goose type fairytale approach. A second major difference is that the Grand Carousel was built on a very large baseplate, while the new set sits on a brick-built frame. Because baseplates tend to flex, they can create problems with mechanical functions that must align properly to work. Yet another difference is that while the Grand Carousel used a tire from underneath to propel the ride, the new carousel takes advantage of a strong gear-driven base that I think is much more dependable. While both sets are beautiful, I would say that the new carousel took some of the best features of the previous design and fixed the issues the older release had. Now, like we always do in this Brick Breakdown series, let’s take a look at some of the interesting building techniques.
➡ USING TORQUE WITH LEGO
When I first saw the #10257 LEGO Creator Carousel, I thought the entire ride would rotate on the fixed base. In reality, much of the center structure is stationary, with only the platform with the rides and the roof rotating. This significantly reduces the mass that needs to move, which also means a lot less torque. Torque is the measurement of power used by a machine to apply pressure. A model this size would more than likely burn out a motor, or make it really tiring to crank by hand.
In order to eliminate the need for more torque, you simply require less resistance. In the case of the LEGO Creator Carousel, hollowing out the center and putting it up on wheels, and smoothing out the surface the wheels roll over, are both great examples of reducing resistance. Additionally, by connecting the structure up at the top to the fixed center section, the mechanism becomes more balanced.
Using these techniques also significantly reduces the number of pieces you need, because less stress is applied to activate the moving parts. As an example of what not to do, I built my own Ferris Wheel before LEGO released their own version, and in my design, I had the wheel driven by the center. When I was done with the model, I not only stressed out pieces from moving all that weight, but I burst some batteries twice because of how much power the motor needed to rotate the whole thing. In short, the less you need torque the better.
➡ CIRCULAR FRAMES WITH LEGO
Having built a number of circular frames over the years, I would like to point out that the LEGO Creator Carousel is a really good example of what I believe are the two most important requirements for building such structures; a frame to hold the weight, and pieces to secure the shape. You can have a design that fulfills both requirements at the same time, but splitting up the jobs may be a little easier to understand.
As you know, LEGO is a bit limited when it comes to perfectly rounded curves, so when you need to make something that is circle shaped, problems can come up. Because of this, some LEGO fans shy away from building circles, however in this set there are two examples of circular frames that you might find useful in your own building.
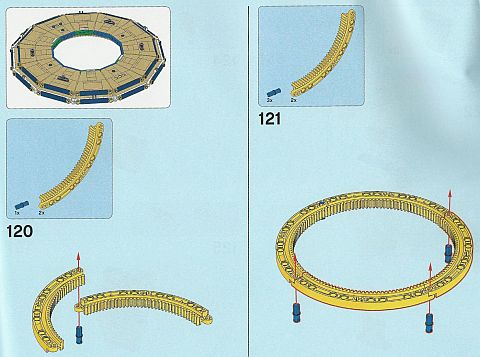
The base of the LEGO Creator Carousel uses four curved modified lift-arms, which do make a perfect circle frame. In addition, the roof is built off of three-pronged propeller-looking plates, which create a circular shape with twelve sides – remember, the more sides you add to a shape, the closer it will look like a circle.
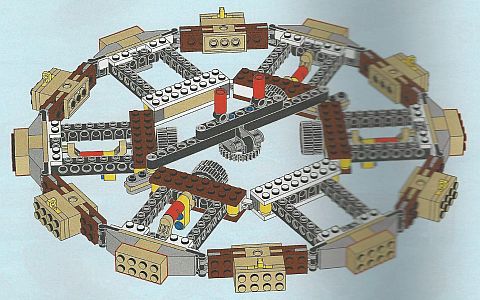
Once you build on these circular frames, you will need to secure the shape. In both examples, the securing is done with bar and clip plates. This type of connection is great, because bars and clips have a very fluid way of moving, so they look smooth when filling in gaps.
There are, of course, many ways to form frames and secure shapes, and your own model may have different needs. However, the techniques used here are fairly easy to duplicate, so they are a good starting point to approach a circular frame design when you need one.
➡ STRIP DOWN MODELING WITH LEGO
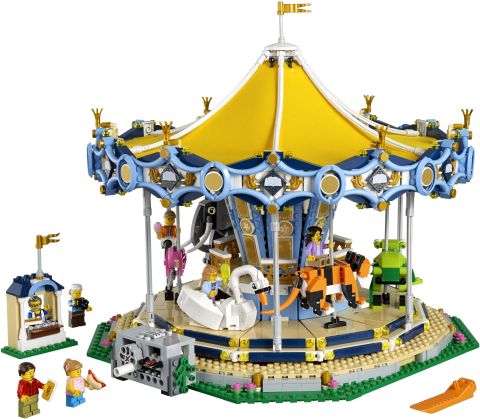
It would be a crime not to mention the animals on this ride. They are adorable, and extremely cleverly built. While following the building steps for nearly every one of them, I found myself wondering how they are going to turn into a particular creature. Then, at some point in the building process, they just came together, and I was blown away. Which made me think; how would I go about designing one of these specialized carousel rides? So, I came up with a method to help create more animals suitable for the carousel.
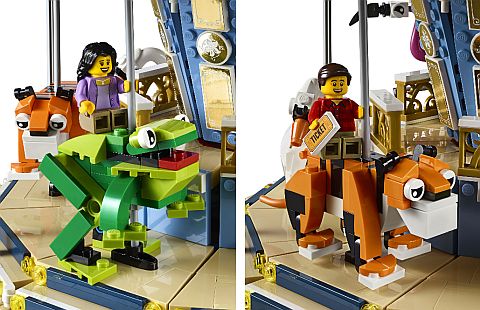
I call the process Strip Down Modeling, because we take the finished design we are trying to imitate, and strip away features until we are left with the core requirements. In the case of the carousel, all the animals come with a long pole that secures them into the ride. However, because the pole is attached to each of the animals a little differently, we can assert that how they are connected is not a core requirement, and we can figure out this step later in the building process. So let’s strip it from our own list of requirements.
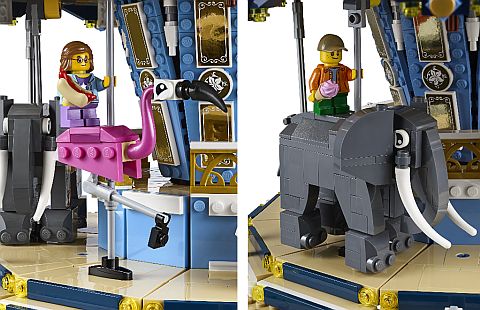
Next, we look at the scale. The frog, tiger, swan, flamingo, and elephant are not scaled to each other, so we can conclude that scale only needs to apply to the animal itself. However, we do need to pay attention to the overall size to make sure the animal is not too big for the ride. If we take a rough measurement of the elephant or the tiger (the two largest rides), we get a good sense of what actual constraints our creation needs to follow.
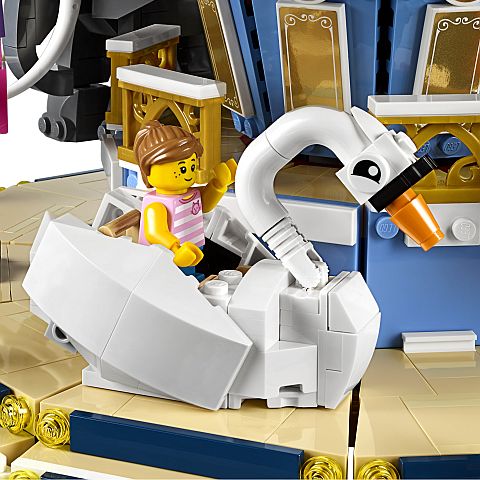
So all is pretty much left to be concerned about is the style. Notice that all the creatures are brick-built, so, whether you want to build other animals, or replace them with something else (like for example, spaceships) you would want to stay with a similar brick-built style to give the rides a cohesive look.
Once you build something you like, and match the style of the carousel, you can figure out how to add the pole, select appropriate colors, etc. The idea is to make very complex changes manageable, and only focus on the core requirement first, before adding back the secondary features. This makes the whole modeling process much less intimidating and more manageable.
➡ APPLYING WHAT YOU LEARN
The challenge with any LEGO model with motorized features is whether or not the motor is being used effectively. When it is not, you run into issues like burning out the motor or damaging elements that are used for support. Anything you can do to lessen the amount of work a motor has to do to get the same job done will make your model much more efficient.
LEGO pieces are not typically made to be round, but it’s not too hard to make things look round when you need to. The two major obstacles with unusual shapes are always going to involve handling the weight of the structure and how to keep its shape. Figure these issues out and you can apply this building style to more than just circles.
Finally, no matter how complex a design is, you can always find ways to strip it down to the essentials. A perfect design usually doesn’t come out from your very first attempt. Therefore, identify some of the smaller obstacles and put them aside until later in the building process, and focus on the one or two most essential issues. This will make problem-solving a lot less daunting and more manageable.

What do you think? How do you like the #10257 LEGO Creator Carousel? And how did you like the building techniques mentioned here? Did you find any other interesting techniques in the sets? Feel free to share in the comment section below! 😉
And you might also like to check out the following related posts:


Very nice set. Interesting what you said about torque. I would have also put the motor in the middle, but it makes sense to drive the mechanism from the side.
Yeah, a bit of engineering skill helps with problems like that. 🙂
It’s great that the carousel uses the same colors as the Ferris wheel. I like the section on building other animal rides. Will definitely check that out again when I have a chance to get the set.
Making your own rides is definitely a fun possibility. 🙂
Thoughtful review. The techniques discussed are very useful, especially the one about torque and building circle bases.
Being mindful about the building techniques as you build a new set is an excellent way to learn! 😀
Too bad the music block is missing from the new set. A carousel really needs some clever music while riding.
Oh! That would have been nice! But sadly, those sound bricks haven’t been in use for a long time now…