

(Written by William)
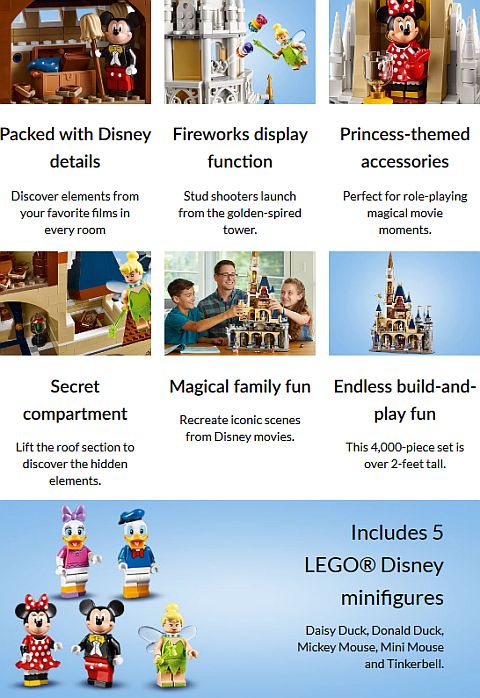
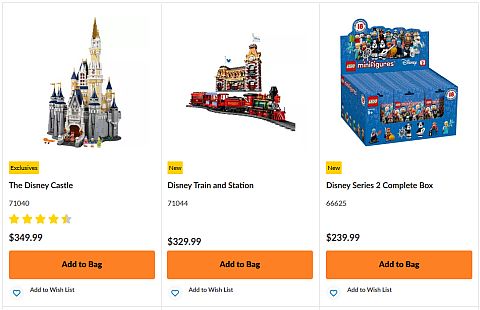
The largest LEGO Disney set, the #71040 LEGO Disney Castle, was first released back in 2016. It’s a super popular set with Disney fans. LEGO recently added a second large set that goes perfectly with the castle, the #71044 LEGO Disney Train and Station. Most Disney fans would have purchased and built the castle first and then the train, but I did it backwards. As you know from my previous review (see: Brick Breakdown: LEGO Disney Train & Station), I wasn’t blown away by the train set, so was a little worried the castle wouldn’t live up to my expectations as an adult LEGO fan either.

Thankfully my father-in-law, who had us build the #71044 LEGO Disney Train and Station for him, also wanted the castle. Since we already had the castle from a previous purchase but never opened it, I figured I build the one we have, and if we don’t like it, we will sell it to him. It was a plan befitting any evil genius, I must admit. But it turns out we absolutely love the #71040 LEGO Disney Castle, so now I need to purchase a second one. Fortunately, with the holiday coming around, I’m qualified for some freebies from LEGO, so I will still come out ahead. Like I said; evil genius!
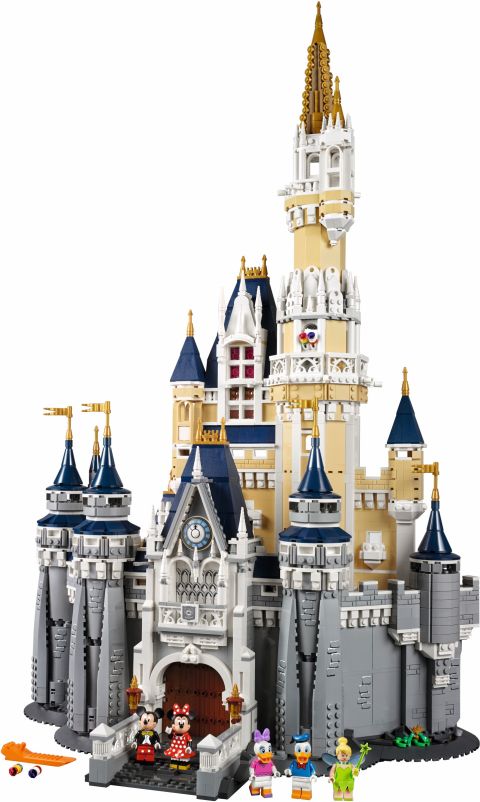
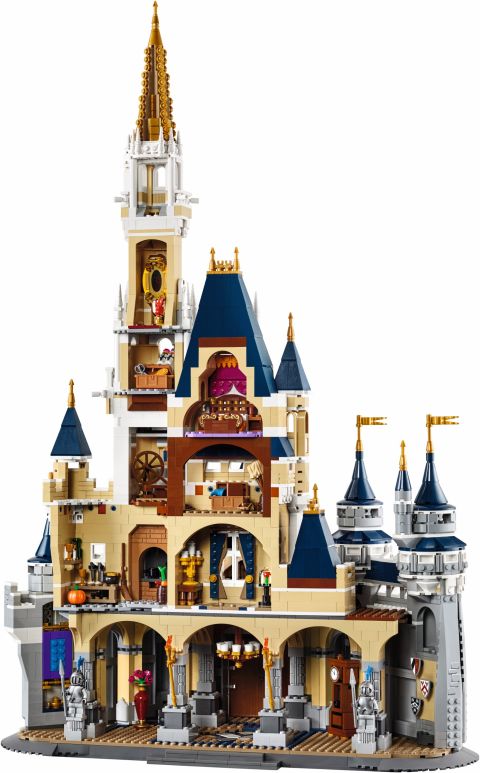
But seriously, if you are planning to get and build both sets, assembling them in the order I did is much more satisfying for an adult LEGO fan. As I mentioned in my review, the train and station are simple builds, which makes them great for families, but not so interesting for adult LEGO fans. On the other hand, the castle is packed with all sorts of interesting angles, details, and lots and lots of useful parts. The finished model is massive, playable, and looks good on display. It surely feels like you get your $350 out of it.
Another upside of building such a large structure is that we can talk about techniques related to large builds. I wish I knew some of these techniques when I was building my own first large custom models! It’s amazing how increasing the scale introduces so many new techniques that we don’t see in smaller models. In the video below, I will share some other overall thoughts on the castle, then let’s dive in and talk about the interesting building techniques in this set!
BUILDING LARGE HINGES WITH LEGO
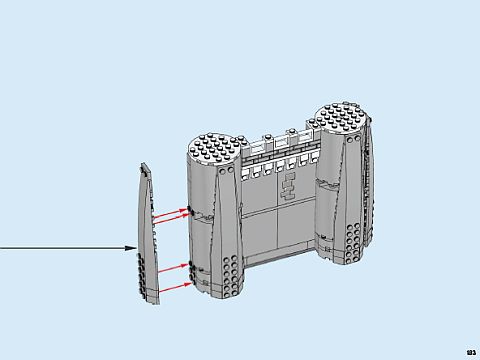
One of the more striking building techniques of the #71040 LEGO Disney Castle is how the sidewalls at the front are attached to the main structure. For the most part, these outer walls simply rest on tiles at the base of the model. The major connection points are what can only be described as a large brick-built hinge.
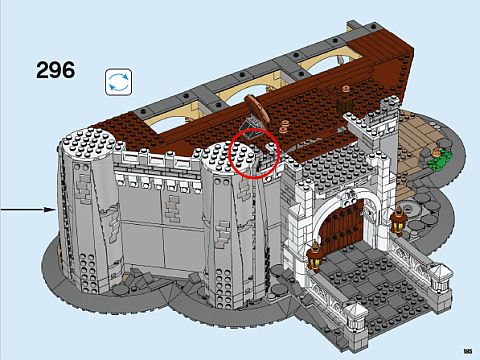
To be specific, the front of each tower attaches to a large 4×4 turntable base. Then, near the top of the wall is a smaller turntable with a plate built off of it. This plate then attaches to the central gate of the castle. Pretty much the only thing preventing these walls from moving are the various pieces and studs that are in the way.
So what can we learn from all of this? Well, there are two major uses for building large hinge structures. If you are only trying to achieve an interesting angle, you just need to make sure the hinge is solidly connected – mostly at the extremes of whatever it is you are attaching. In this case, a wall is connected at the base and near the top of the wall.
Now, going back to the #71042 Pirates of the Caribbean The Silent Mary we reviewed a few years ago, we had a much different large hinge both in its use and design. The Silent Mary had a functional large hinge that could be operated for play. To achieve this, LEGO designers heavily reinforced the hinge so that it could handle the weight.
The takeaway here is that a large hinge only need to be reinforced based on the functionality you want out of it. If your goal is nothing more than decorative in nature and the hinge doesn’t need to hold any weight, just secure the ends and save yourself a lot of headache. But if you need something functional, you have a lot of engineering in your future.
CREATING BREAK POINTS IN LARGE STRUCTURES
This is a concept many LEGO fans learn the hard way. The larger you make a model, the tougher it is to transport it. Many tears and hours of rebuilding go into repairing accidents that happen while moving a large creation even just short distances. Thankfully, the #71040 LEGO Disney Castle gives us a good example of how to overcome this limitation.
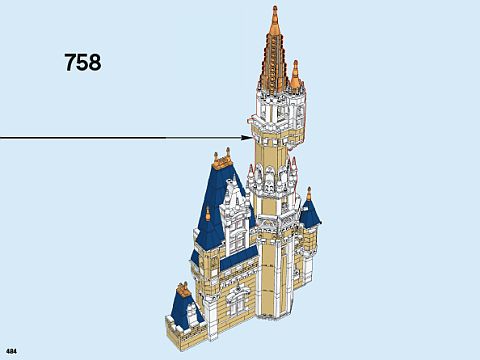
It works well if you can design points in your model that allow it to be broken up into smaller sections. These “break points” can be pretty much anywhere, but you may want to consider the following for determining just where to make those break points.
First off, is the section that breaks away built on a stable foundation of its own? Many times, we are removing a section from what we consider the foundation of the creation. If the smaller section lacks in stability, you might just be creating an accident ready to happen rather than preventing one. Additionally, the reverse is also true. If you take away a section, does it compromise the stability of what it was removed from?
After stability, the next criteria you want to prioritize is convenience. Can you easily reattach or even detach the section? Remember, the whole point of this is to make it easier to move a large model. If you have a 3-foot wide model and have trouble reaching the center where you need a middle piece to go, you might not have helped anything by creating a break point.
Finally, consider carefully if you are using the right amount of connection points for your break point. Things tend to fall apart when they aren’t adequately secured, so you don’t want to skimp on not having enough studs. However, if you have too many connection points, you might end up ripping your model apart when the clutch power of the studs refuses to let go. To be honest, there’s no right number for a given surface area equation I can give you here. My personal advice is to put a stud near corners you really don’t want moving and tricky areas where it’s necessary for bricks to line up. Otherwise, it’s going to be a trial and error process.
ROTATED TILE FLOOR WITH LEGO
So I wasn’t expecting to see this in the #71040 LEGO Disney Castle, and probably won’t see it in an official set for quite some time, but LEGO designers managed to rotate a tile floor. Now for this to actually work, they needed five plates of thickness. To understand it, we’ll break down each level and discuss the point of each layer.
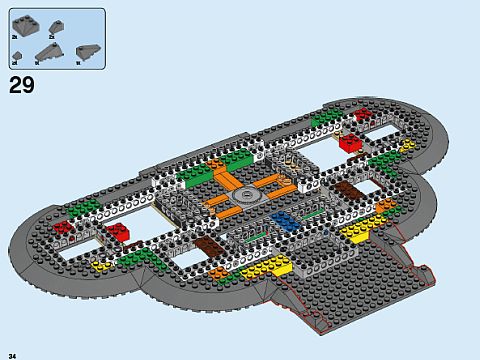
The first layer is the base. We need this to serve as a foundation. The next layer has the turntable, tiles for parts to rest on, and general elements that will frame where the floor goes. The turntable is the most important since this contraption needs to rotate, while the tiles provide a solid foundation without having studs in the way.
The third layer is the base for the floor. After all, the tiles can’t all be directly connected to the turntable base. So once again, we have another foundational section. This level is also a good place to start putting in locking elements. In other words, these are the pieces that get in the way so that the floor doesn’t spin, but instead stays solidly in one orientation.

The fourth level is, finally, the tiles for the floor. This is where you can play with color and shape to make interesting patterns. It is the layer that will be rotated to an otherwise impossible angle. As for the parts that lock the floor into place, they can appear either at this level or at the level below it.
Finally, the fifth layer is used to cover up any glaring issues with the floor. Primarily we’re looking to cover weird gaps usually found at the edges. And there you have it. This is a lot of work to achieve something so understated. But I must admit, for those with building knowledge, it’s a real delight.
BRINGING OUT LINES OF INTEREST WITH LEGO
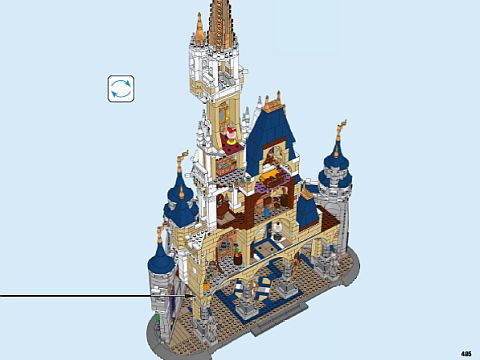
In previous reviews, we’ve spoken a bit about methods to direct a person’s eye. It is absolutely a crucial skill to learn to prevent people from fixating on imperfections in your LEGO model. I have to say that the #71040 LEGO Disney Castle has a crazy amount of ugly gaps and weird shapes that normally would drive someone nuts if they really noticed it. But that’s where this set takes a sneaky approach to directing your interest away.
Much of the odd gaps are so close to something fancy like a spire or sharp slope. What’s even more interesting is that they are able to direct you eyes where they want them to go. Being perfectly honest, the #71040 LEGO Disney Castle uses these techniques a bit heavy handed, but that just makes this set all the better to use as an example.
Everything in the #71040 LEGO Disney Castle tells you to look up. The horns and roofs are arrows directing you. It’s so natural that you can’t be bothered by the odd gap or unconnected section. This is done in part by having a bling factor to the detail work. Techniques include using interesting colors that stands out from the surroundings, having an interesting organic shape alongside very straight and inorganic structures, or something is made to look so intricate that you can’t help but get fixated on it.
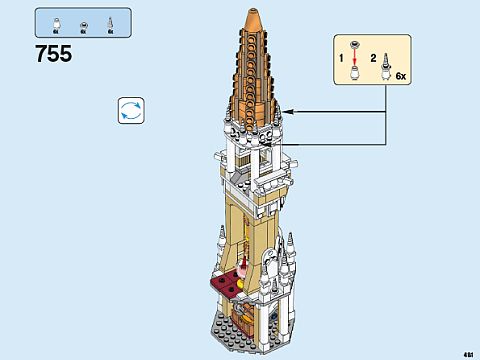
I think one of the most surprising things about all of this bling is that even though LEGO designers used the techniques extensively, it doesn’t feel too much. You might think that just the sheer number of unicorn horns would make the set look gaudy, but it’s not the case. This is because offsetting all the bling is quite a bit of symmetry. Having these fancy pieces evenly spaced counter-balances the sense of overindulgence. So, even though I didn’t think it would work, using excessive bling can be an effective way to direct lines of interest.
APPLYING WHAT YOU LEARN
Creating a really big model has its challenges. We often over think features that end up being not such a big deal (like working with large hinges), and forget about much more important issues, like how to transport a large model. You have to consider a whole set of priorities the uninitiated is ill equipped to handle, much less expect.
However, along with potential headaches also come blessings; like having so much space to work with. This means you can incorporate highly impractical designs, like a rotated tile floor that wouldn’t be possible or practical in a smaller model.
Added to this is the fact that detail work operates a bit differently when you increase the size of a model. In smaller creations, too many blinged-out elements comes off as garish and rather unpleasant. However, in a larger scale, they help the whole thing flow better. This is probably due to the fact that the parts themselves aren’t up-scaled versions. So having lots of small details on a large frame doesn’t cause a person to automatically think what you built is too much. Instead, if you do it right, these details simply help to direct the viewer to where you wanted them to look.
If you have been building mostly small sets and custom models, I encourage you to at least once try building something big. You can start by building one of the larger sets like the #71040 LEGO Disney Castle, and learning the techniques and then incorporating them in your own builds. Building big is awesome!


Breaking points are very important in large builds. I learned that the hard way. There are things I like about this set and things I don’t. I like the tan part, but those turrets on the outer wall don’t work for me. They look too futuristic.
I have learned that the hard way too. You build a moc, then add more and more to it, then one day you have to move it. It’s painful.
I know what you mean in regards to the turrets, but like Will said, in real life it’s not that bad. The gaps merge together and yoru eyes are directed upward.
I wish I could get this set. It’s beautiful. I didn’t realize it had a rotating floor. I would love to see how that works.
I don’t know if it’s considered a technique but another feature that could be talked about is sizing. The thing about this set is that even though it’s big, it doesn’t have a big footprint. It can comfortably fit in a wide variety of spaces and right against the wall. Some other sets like the Hogwarts Castle, or the big Star Wars sets are great builds, but storing and displaying them is a headache.
The hinges technique is an interesting one. It’s useful when you want to achieve unusual angles. And like Will said, you don’t have to overengineer it. And yes, breakpoints are important. I’m not clear on why they made the floor rotating though. With all the angled tiles they have these days, they can make a detailed floor without adding such a complicated mechanism.