

(Written by William)
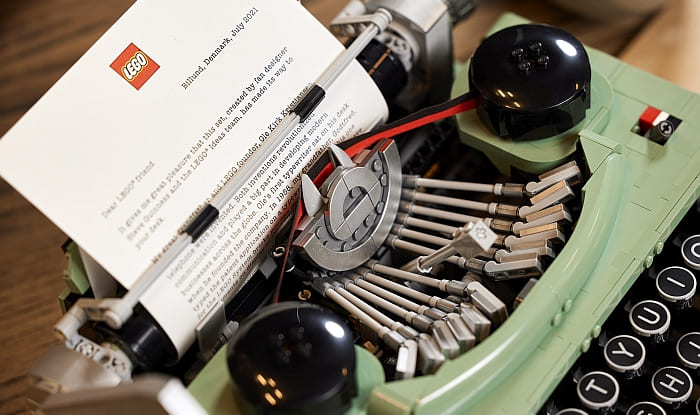
When LEGO decided to make the typewriter that was submitted to the LEGO Ideas platform, I was already very interested. There’s something absorbing about a model that recreates something from real life. The #71374 LEGO Nintendo Entertainment System is another good example of this (we reviewed this set previously – see links at the end of this post). Then, when the press-release mentioned that there is a functional element in the #21327 LEGO Ideas Typewriter, it became a must buy for me.
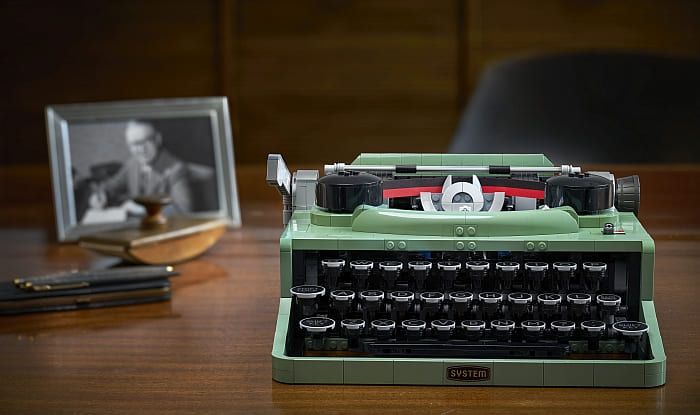
And I even got more excited when I saw the designer-video for this model. We didn’t get just one designer working on the functional elements, but two. I was curious if there was going to be any difference in the building experience with two designers. Thankfully, the build is seamless, but there are entirely different functional obstacles each section of the model. This created an extremely engaging building experience that kept me guessing every step of the way.
The end result is a model that looks great, is complex beyond expectations, and showed me just how much more I could do with LEGO elements. If this set has any downsides, it is the fact at $200 USD, it might price out many from experiencing what it has to offer. But let’s see if I can convince those who do have the funds to purchase this set over some of the other currently available great options. (LEGO has been really spoiling us lately with some wonderful sets!)
LEGO TYPEWRITER – PINNING WITH AXLES
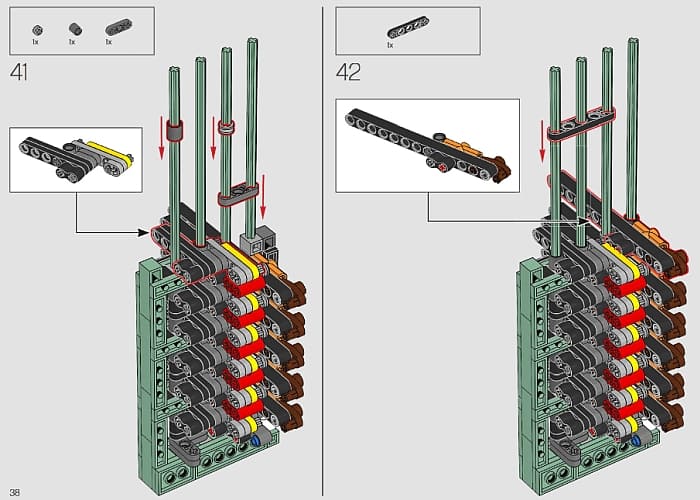
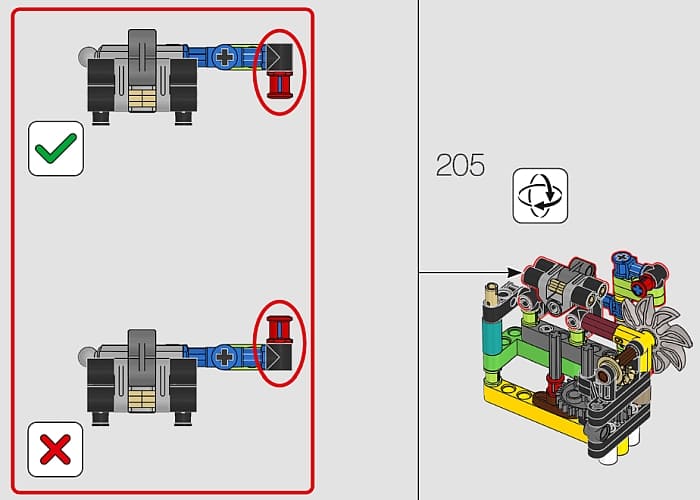
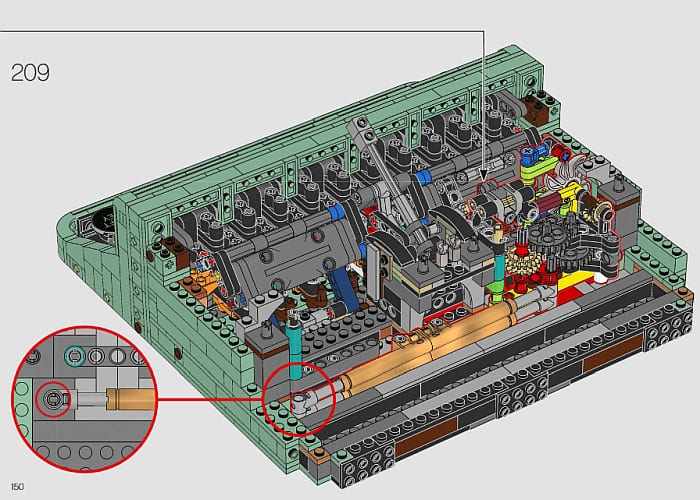
One common technique used in LEGO Technic sets involves building functional elements separately, then pinning them together at a later stage. This is commonly done with a pin bush piece since the bush portion is easy to push against. However, when LEGO designers really want something pinned together, they will use an axle.

Usually, this axle has a stopper on one end. The stopper of the axle makes the element rather difficult to pull out especially if you can’t get to the other end of it and push it. Combine this fact with the relatively new 1×1 Technic brick with axle hole, and you can practically choose the perfect spot to pin any axle.
Given the fact that a couple of designers worked on different aspects of this model, this technique is rather brilliant. Normally, your average LEGO system elements aren’t so sturdy when it comes to horizontal connections. This is especially true when it involves something that weighs a fair bit, like the typewriter. However, horizontal connections are the bread and butter of LEGO Technic, so it makes sense that it is used here.
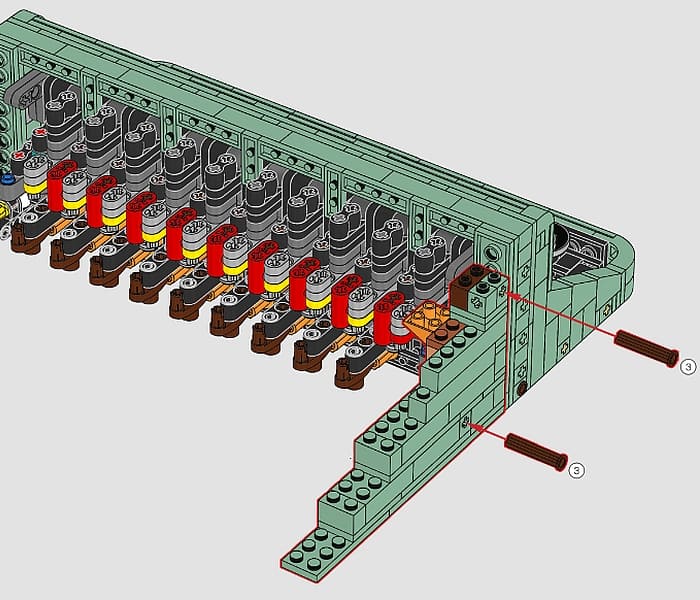
The difference here is that with the new small LEGO Technic brick, the very industrial look that LEGO Technic has is greatly minimized. Given the fact that the typewriter is a machine, the heads of the axles sort of look like a desired detail. It is not unusual to see a bolt or two on the side of a machine like this, so it fits. Plus, this technique can allow you to attach sections at ninety-degree angles without losing stability.
LEGO TYPEWRITER – THE KEYBOARD
According to the designer-video, the bulk of the design process was split between the keyboard section and the typewriter’s carriage. In order to dig into what’s going on, I figured I’d also split up these two sections in order to understand them more fully. What we’ll be examining is not a single technique, but rather a series of techniques that will form a system. Systems are what build complex machines, which is something fairly rare to see outside of pure LEGO Technic and LEGO MINDSTORMS sets.
The basis of a good system is the ability to outline specific goals/functions you want to achieve. This allows you to break down each element and tackle it in a much more manageable way. Keep in mind, you may not be able achieve all of your goals, since the effort may become too impractical. However, it is up to you how much time and effort it is worth to make it work the way you’d like.
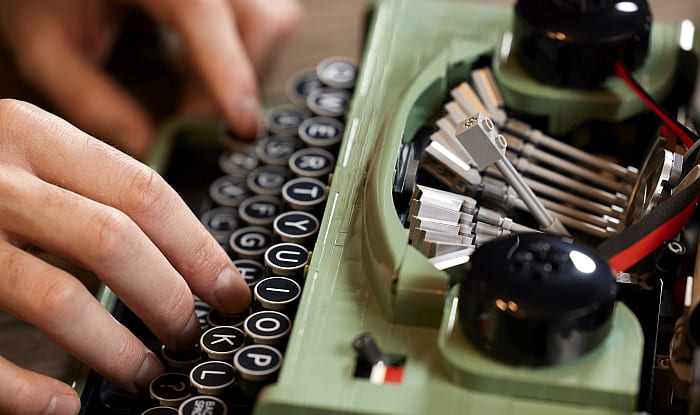
Let’s take a look at some possible goals the keyboard might have had. First, it should have all the major keys of a real keyboard. Second, each key should be able to be pressed and return to its original position. Third, the keys should operate something. Ideally, this should be one of the striking arms that we are used to seeing when a typewriter works. Finally, the pressing of the keys should interact with the carriage in a meaningful way. Armed with these goals, we can now examine how they were achieved.
Turns out, the keys were a simple solution. Since each key needed to spring back into place, it was necessary to figure out what part would accomplish this. There is a small two stud long rubber connector in LEGO Technic that has been used for this type of purpose. The only trick was to create levers that would use this rubber element in the correct way. This was done by having a frame of four-long axles all next to one another. Levers can swivel independently on this frame and the rubber elements can press against whatever the next layer has above it. Since the keys are offset, no key would interfere with any other key.
Next, we needed each key to interact with that working striker and the carriage in back. That is why we then build a large LEGO Technic frame with bars. The bars sit just above the levers for each key lever. This means, when a key is pressed, the lever in back goes up and bumps the LEGO Technic frame causing it to move. This frame contains a small protrusion on one side, which is all we need to interact with the carriage.
The moving hammer is a little trickier. There is a specific movement for the striking hammer. It needs to lay on its back, then flip up and forward in order to look right. What we have to work with is a LEGO Technic bar frame that slightly moves towards the back of the typewriter. As long as you have movement, you can typically redirect it in almost any type of movement you wish, provided you have the right gearing and connections. This particular mechanism can best be described as a rectangular box. The top and bottom of this rectangle mostly remains flat, and the sides of the box tilt left and right.
When you fix the bottom to stay in place, you can then push and pull the top. In doing so, you will move the sides from tilting left to tilting right. In this case, the right side holds the striker and gives us the action we want. The reason why it looks so complex is that LEGO designers extended some of the sides of the box in order to add extra connections. But the core of the design is all about shifting a box left and right.
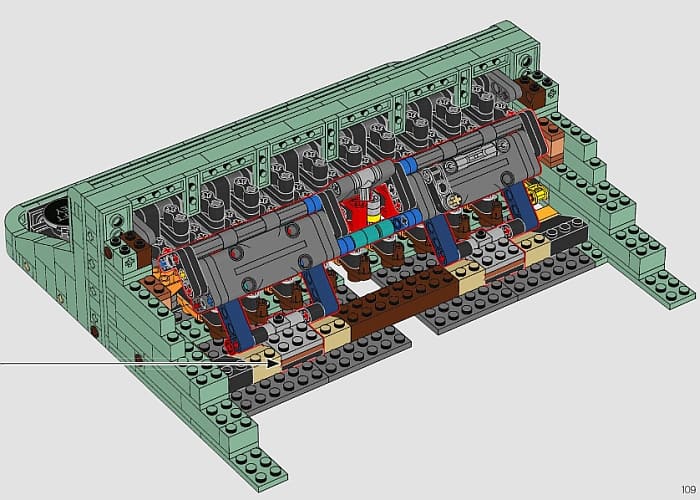
LEGO TYPEWRITER – CARRIAGE ASSEMBLY
As with the keyboard, we need to identify what elements are important. For instance, the carriage needs to interact with the small protrusion on the LEGO Technic frame. It also needs to be able to be pushed to the right and then incrementally moved with every key strike. Oh, and it should hold and roll paper. We’ll look at the last issue first.
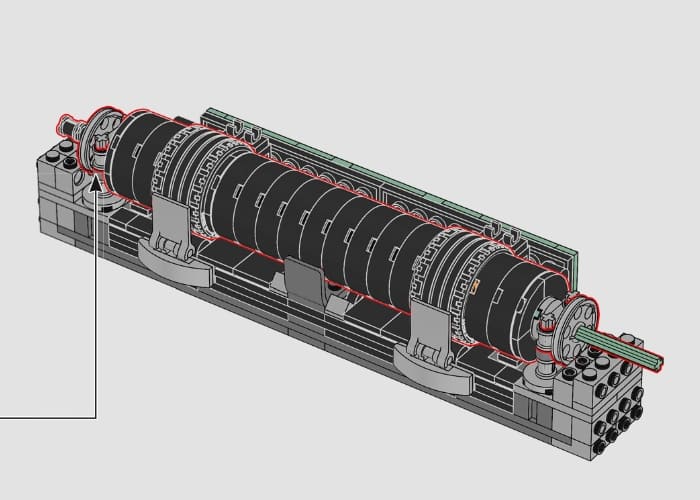
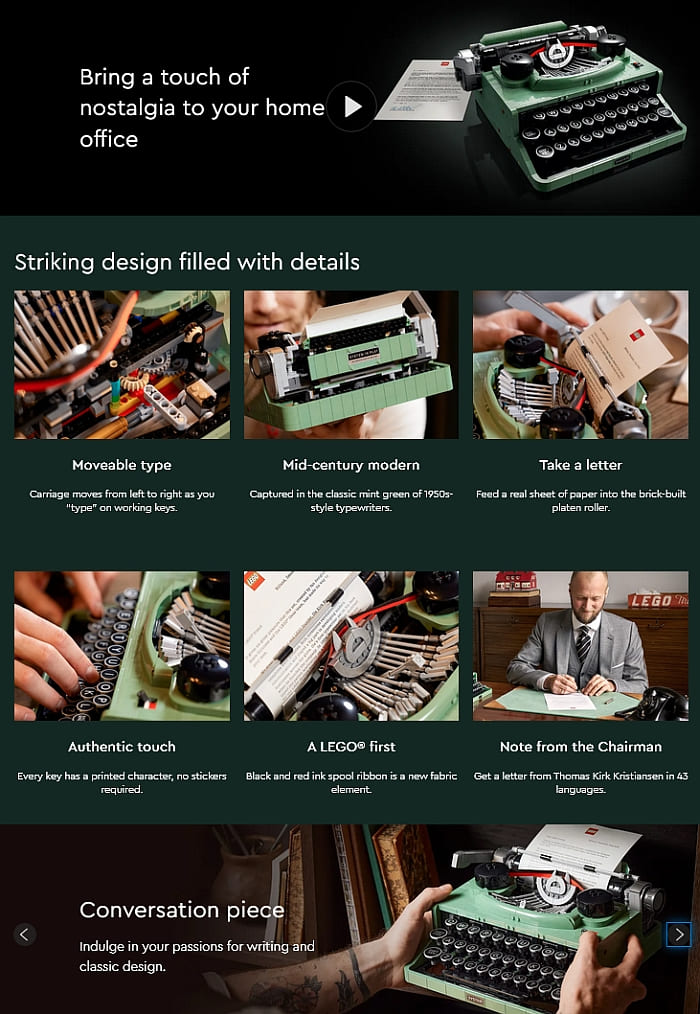
Creating a large roller is pretty simple. Mount round parts on a long axle and then suspend the assembly. The challenges come in choosing the correct angled elements to direct the paper. Thankfully, with an influx of reverse arches and rounded slopes this is possible. The only other issue is how it grabs paper being fed into it. Since tires have a decent grip, they provide another simple solution. It’s the rest of the mechanism that kind of blows my mind.
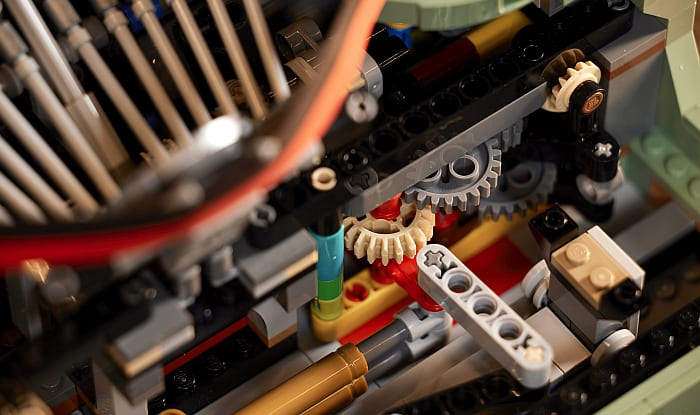
First, the carriage needs to be pushed to one side, but not instantly return. This tells us there is a one-way gear mechanism involved in some way. This is where a gear can freely turn in one direction, but is blocked by some means in the other direction. Turns out LEGO designers used a durable saw blade piece for this purpose. The curved edges of the blade easily slide past the two-pronged catch placed around it. However, the bushes that make up the two prongs catch the blade going the other direction.
It is this two-pronged shape I find extremely interesting. On one end is a ball-joint. This ball-joint gets hit by the small protrusion from the LEGO Technic frame causing the prongs to move. While the top prong releases tension on the saw blade, the bottom prong is preventing too much movement thus allowing just enough tension creating an incremental amount of moment.
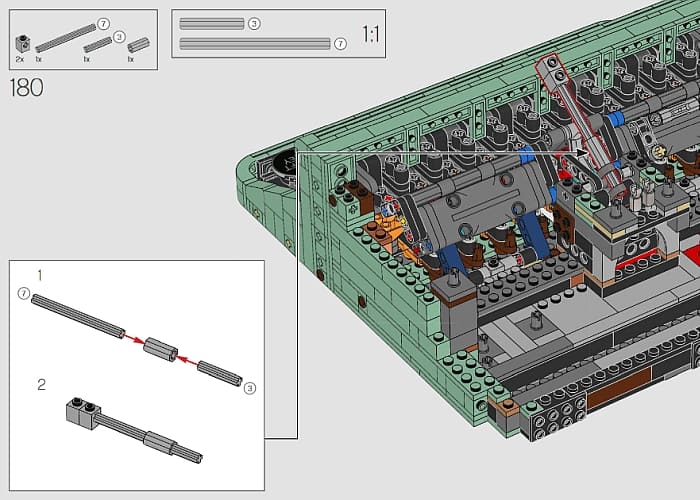
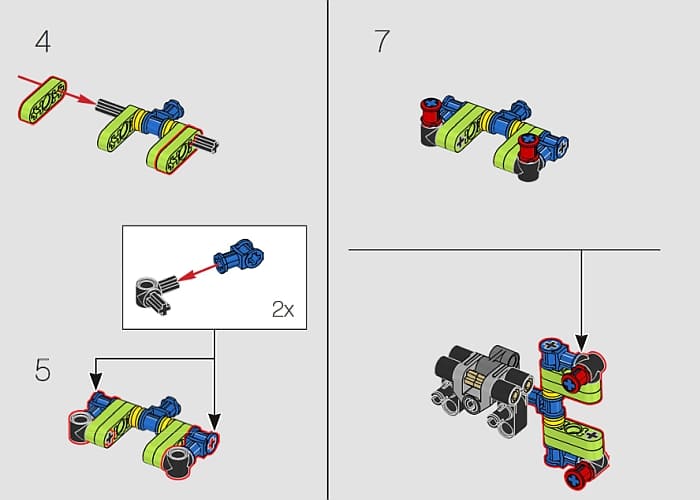
Second, for any of this incremental movement to mean anything, it needs to be under tension. That is where four spring pistons are used in tandem to provide enough force to be able to move the weight of the carriage. These springs are then attached to a relatively small set of joints and lift-arms in order to connect to the saw blade.
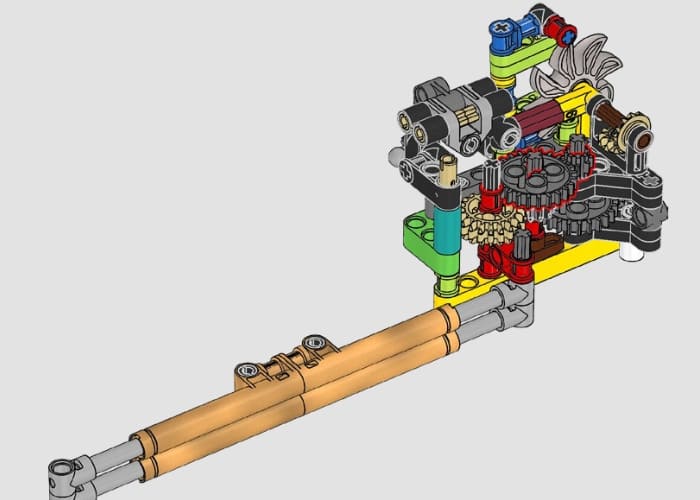
Third, we now have an issue. If the springs were connected directly to the saw blade, we’d get too much movement. In other words, just a few bits of movement would take the carriage all the way from the right to the left. So, the rest of the mechanism consists of gearing down the movement. In other words, any movement from the saw blade would only have a small impact on the springs.
In order to gear down a mechanism, you place smaller gears with the object that has the most movement, in this case the saw blade. Then you have small gears touch large gears – in this case the ones coming from the spring pistons. You can do this multiple times to have a tighter and more precise level of control. In the LEGO Ideas Typewriter, the carriage will now take around 23 key strikes to move all the way from the right to the left. If they weren’t geared down, the whole process would have taken something like three key strikes instead.
APPLYING WHAT YOU LEARN
The LEGO Ideas Typewriter is truly a marvel of engineering. On top of that, LEGO designers managed to make it look pretty in the process. I’m glad to see more and more LEGO Technic elements that are made to flow seamlessly into LEGO System sets. I’m sure the 1×1 LEGO Technic brick with axle hole will prove to be a game changer for many.
When I originally picked up this set, I was expecting to be out of my depth the entire time. However, I felt I really understood what was going on through most of the build. Sure, there were moments where I didn’t fully grasp the impact of an element until later in the build, but by the end I always did understand. In the video below, I will talk a bit more about the set and my experience with it.
This is the set you want for a next-level building experience. It is for those of us who just want to know how stuff works. And it teaches us that if we have a complex problem to deal with, we can always break it down into much more manageable elements.
If it is your goal to do something complicated like this, try making your own design compartmentalized. Separate the goal into multiple stages, then in each stage ask yourself, “What does this stage need to accomplish?” Once you work out the mechanisms, you can then figure out how they can interconnect. Finally, you can redesign the whole thing so it fits into a pretty package or form factor as the engineers say. If you want to check it out, it’s available at the LEGO Ideas section of the Online LEGO Shop.
What do you think? How do you like the LEGO Ideas Typewriter? Do you have it already? And what do you think of the techniques we discussed? Are you planning to use any of them in your own builds? And are there any other interesting techniques you noticed in the set? Feel free to share and discuss in the comment section below!
And you might also like to check out the following related posts:


Such a complex mechanism in there, great to see it explained!
This is one of the most fascinating sets I have ever seen. I knew they were going to make the typewriter, but I had no idea they were going to include so many functions. It’s so satisfying to see it in action!
OMG! They even included the two color ribbon! Such a great attention to detail! Since you reviewed both this and the NES, which one would you recommend to someone who can only get one of them?
Since the play features of both sets are pretty limited, probably the one you’d most rather show off as a conversation starter…
I appreciate your points about breaking complex mechanisms down into smaller sections. Another method I could offer is to study the real item that you’re trying to build from Lego, and see what pieces might be the best choice to replicate the mechanisms. You might luck out and find the exact Lego piece you need.
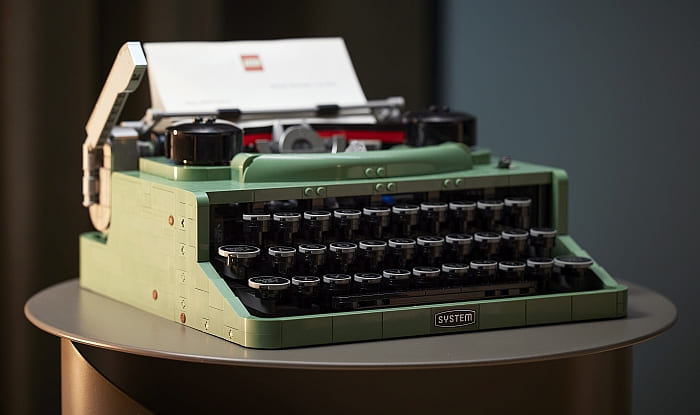
Sand green was the perfect color for this. And it seems that it’s fairly close to the size of the real one. It’s on my Christmas wishlist!