(Written by William)
The recently released #71044 LEGO Disney Train and Station is the second largest set after the very successful #71040 LEGO Disney Castle. We will look at some of the interesting building techniques found in the set, but first I wanted to share some general thoughts. The two sets are similar in price ($330 for the train, $350 for the castle), but their size, their piece-count, and how those pieces are used are quite different. The LEGO Disney Castle is a single structure with 4,080 pieces, measuring over 29” (74cm) high, 18.8” (48cm) wide and 12” (31cm) deep. The LEGO Disney Train and Station features a smaller building and a fully motorized train with tracks with a total of 2,925 pieces.
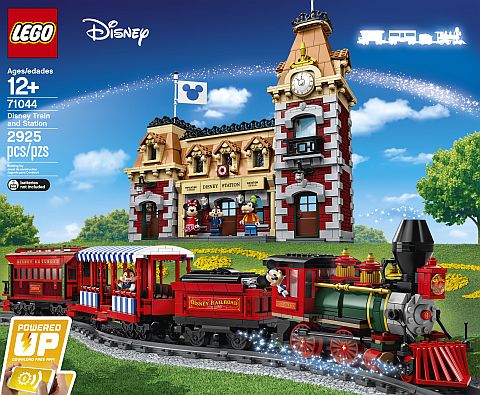
It is also worth noting that while the LEGO Disney Castle is recommended for ages 16+ and includes some fairly advanced building techniques, the LEGO Disney Train and Station is recommended for ages 12+. This means that although the LEGO Disney Train and Station still offers a lot to build, the techniques may not satisfy those who are looking for lots of intricate building techniques. There are some, but not as much as adult-oriented sets in a similar price range.
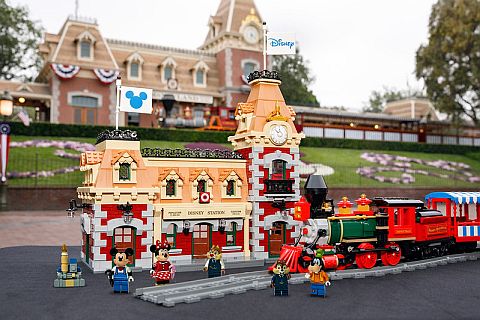
Is the #71044 LEGO Disney Train and Station worth the price tag? If you are a Disney and LEGO fan, I think it is something that can definitely find a place of pride in your collection. It is also a great project for families to build together as even younger and less experienced members can participate. In fact, the instructions are broken down to four booklets, which means that people can build sections of the set simultaneously. And once the set is built, there is a lot to play with. Motorized LEGO trains are always fun!
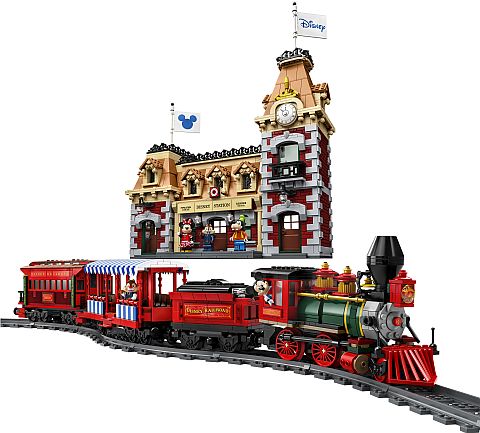
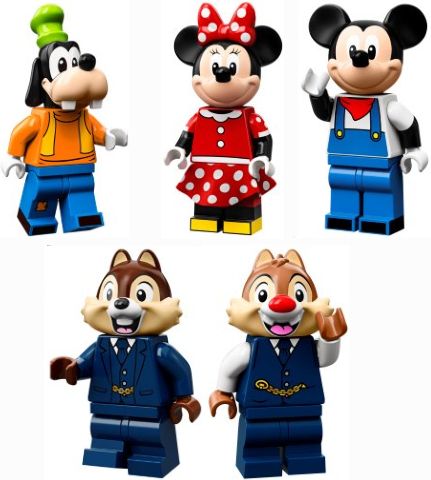
I must admit though that even though I’m a Disney fan, I didn’t purchase this set myself. I was putting it together for a family member who bought it and is a Disney and train fan. This doesn’t mean that the #71044 LEGO Disney Train and Station isn’t a great set. Rather, the price is a little high for someone like me who wants not just a nice display and play set but also an immersive building experience. There are still some interesting building techniques, but they are spread out between long stretches of more basic building sections. And then there are the stickers… lots of stickers… three sheets of them to be exact. As you can tell, I’m not the biggest fan of stickers. Yet they do bring the set to life with some nice decorations and signage throughout. And the minifigures are fantastic too! Some people will probably want this set just for the exclusive Goofy. I can’t lie, I’m one of them.
In the video below, I will share some additional thoughts on the train, the you can continue reading about some of the interesting building techniques found in the set.
BUILDING AN 8-STUD LEGO TRAIN
Official LEGO trains are usually 6-studs wide to easily fit the LEGO train track system and to reduce the number of pieces needed to build a train. This is also usually the scale for custom trains, however, very serious LEGO train builders will increase the width of their trains to 8 studs to be more accurate and to be able to add more details. And this is exactly the reason the LEGO Disney Train is 8 stud wide; it was more accurate to the scale of the source material, and it also allowed LEGO designers to add in more details. Fortunately, 8-stud wide trains can still be run on standard LEGO train tracks.

Before you go upscaling all your trains to this wider format, there are a couple of pitfalls you’ll want to watch out for. First, wider trains can struggle with turns. For this reason, the LEGO Disney Train comes with sets of wheels that can turn independently from the car or engine they are attached to, which goes a long way to absorb to handle the sharper turns. However, this also makes the train more wobbly and harder to place on the tracks (in case it derails, which wider trains tend to do more often).
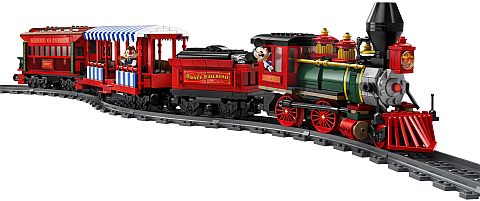
The other major issue is the look of how wider trains turn. Sure, you might have done everything necessary to handle sharp turns, but many railroading fans will cringe when your bigger LEGO train takes a tight corner. The attachment between cars, as well as how those independent wheel assemblies turn doesn’t look exactly right. For these reasons, those who build wider trains usually use wide sweeping curves of track, which of course takes up more space. There are a number of resources if you are interested in building wider trains and appropriate train tracks.
BUILDING A MOVING EFFECT WITH LEGO
I can still recall that one of the first time I used a motor in a LEGO model, I just wanted to create a visual effect. The motor didn’t activate anything, it was just there to create motion to make the model nice with an interesting optical illusion. In the #71044 LEGO Disney Train and Station we find a technique like this in the engine’s driver wheels.
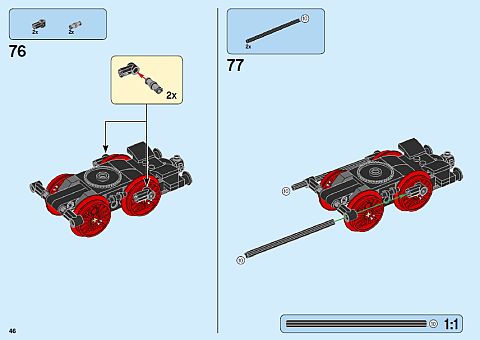
The basic idea of a driver wheel is that it’s connected to the motor and, thanks to its various attachments, it can then drive the other wheels forward. Sadly, in practice, this is a bit hard to build in minifigure scale. Even the 8-stud trains need third-party parts to simulate this effect. However, even if the effect is simulated, it doesn’t mean we can’t have something approximating the mechanism.
In the LEGO Disney Train we get an extremely simple mechanism; just a pin attached to the back wheel, which is than attached to a connector that holds the axle, which is then placed into a different connector to keep the assembly in a relatively stationary position and preventing it from flying off. Mechanically, all of this does absolutely nothing. What the mechanism does achieve though is realistic motion. Seeing the rotation and the shifting position of the axle fools the eye into thinking that there is something majorly complex happening. And that is the goal when you want to build an effect. Don’t try to make it do something specific. Rather, play with a number of moving parts and see what happens when maybe you turn a single wheel. If it looks like a complex machine, then you’ve done your job.
BUILDING MASS WITH LEGO
Big buildings with large walls that are meant to be seen are not really the norm for official LEGO sets. Just look at the sidewalls of any of the LEGO Creator Modular Buildings. They all look plain and even dumpy. Like walls in a back alley, nobody wants to see. This is what can happen when you build something big but are limited to one type of piece and/or color. The Disney Train Station with all those dark-red walls is an excellent example of how to make plain walls look more interesting.
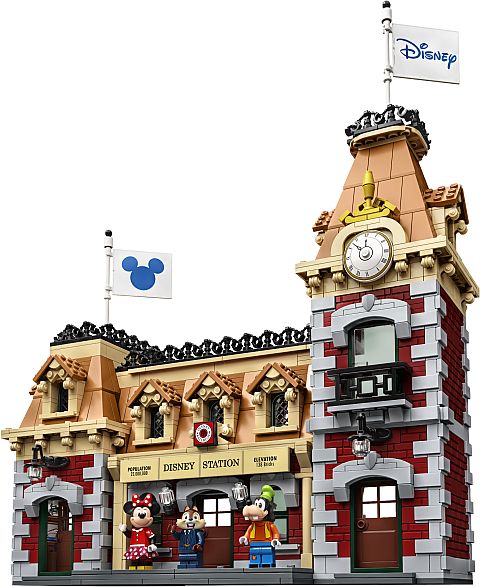
First of all, look at the texture. A great majority of the dark-red walls use masonry profile bricks to have a layered brick façade. However, even this technique could get washed out if overused. The next step is to have interesting ways to frame the wall. Surrounding the left and right of each section of the train station with an interesting light gray pattern goes a long way in breaking up the monotony. Finally, some very interesting doors and windows are added to the structure, which changes the entire focus of the wall. Sure, the walls are still big and still there, but now they work as a pretty backdrop to the more interesting sections rather than being the only thing happening.
Those viewing your creation are always on the lookout for detail or, at the very least, something different. Size alone can be impressive, but you’re going to need just a little more to keep the audience captivated. Otherwise, you could be spending a lot of time and money building something that has very little effect. To get an idea of what I’m talking about look at the outside wall of the station that has no door or window. It’s still a competently built section of the building, but do you get the urge to maybe see a better angle of the model?
BUILDING WROUGHT IRON WORK WITH LEGO
Nothing says fancy like some decorative wrought iron metal work. Used carefully, it can really impress the viewer. This is achieved in part, by just how complicated wrought iron designs look. But truth be told, it’s usually nothing more than an illusion. To mimic the complexity of wrought iron design with LEGO, we’ll need a few things. First, we need a selection of black elements that have interesting shapes to them. Robot arms, whips, barbs, are just some examples of great pieces to use. For this set, LEGO designers used handcuffs and skeleton legs. The next thing you’ll need is a lot of these pieces. This is going to help you experiment with different types of designs. Finally, you’ll need to come up with some sort of pattern.
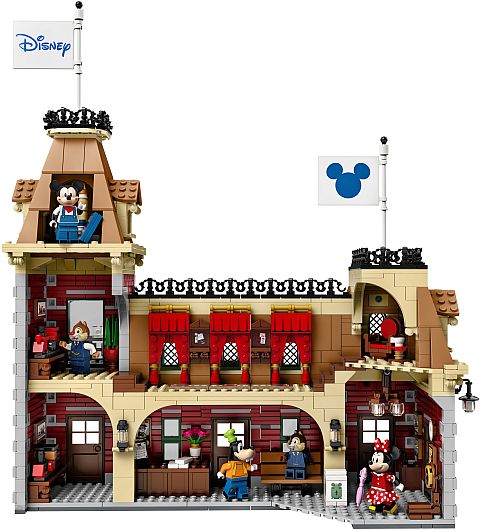
Let’s examine the roof of the Disney Train Station to see what I mean. Each skeleton leg is attached to a jumper-plate to get the spacing right. Then the handcuffs are turned so that they appear woven. All that is really happening is that the left side is a little back and the right side is a little front. The end result is something very special.
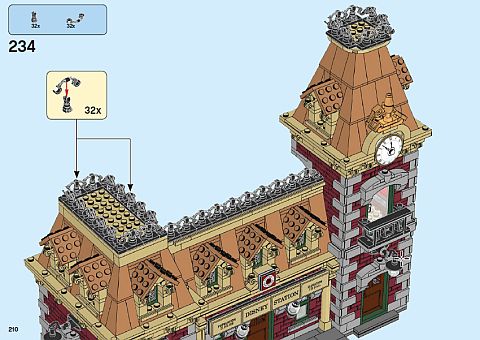
What happens is that there are two things deceiving the viewer’s eye. First, the interesting shape of each piece makes it tough to figure out where one element ends and the next begins. And added to this is the black coloring of the parts. This color is perfect for hiding gaps and shadows, which is what we normally look for when trying to identify specific pieces. And why is the pattern important? Simple, the person looking at the model has to make sense of it somehow. What I mean is that their brain needs to make it form into something that makes sense. By giving them a pattern to focus on, you’re helping their brain tell them that all these parts go together. This optical trick is a very powerful effect when done well.
APPLYING WHAT YOU LEARN
Bigger may not always be better, but you can sure fit in more details when you have more space. Additionally, 8-stud wide trains are actually a bit better scaled for minifigures when it comes to their real-life counterparts. The scale has some downsides as we discussed above, but if trains are your thing, you may want to experiment with the larger size.

As for the remaining three techniques, each of them tackle fundamental concepts I’d recommend a novice builder look at as they are improving their skills. Consider moving parts as a basic effect so you don’t have the pressure of needing to make them actually work. And if you are making something big with a lot of the same part, don’t fall into the mistake of making it too bland. Lastly, if you’re decorating a building, using wrought iron can definitely give a structure a polished look.
What do you think? Do you have the #71044 LEGO Disney Train and Station? Have you built it yet? How did you like the building experience? And what do you think of the building techniques we discussed here? Are there any other techniques in the set that you really liked? Feel free to share your thoughts and discuss in the comment section below!
And you might also like to check out the following related posts:


The wrought ironwork is very beautiful. I hope they use that technique in a future modular set. I’m not convinced about the usefulness of eight stud trains. They are less stable, easily derail, harder to build, and more expensive. The best part of trains is to see them run around the tracks.
8-stud width is often used for very accurately built locomotives. They look amazing. But I agree that for regular play trains and even expert builder trains it’s not worth it.
For this set, they had to go 8-stud wide because of how the real Disney train looks. Plus, it allows a bunch of figs to sit in the cars. It’s weird though how the engine floor is moving.
No arguments here.
It felt like they wanted to please everyone and in doing so had to make compromises. An advanced modeler that wants an ultra realistic experience probably wouldn’t be thrilled. Meanwhile, the audience that would be happy with the set just want a functional train.
I feel sad that it’s like they’re holding the Goofy fig hostage behind a high price wall.
Expensive at half the price!
Yes and no,
You would definitely get your money’s worth in parts at half the price. The problem is at a certain point you expect a certain building experience. And that’s where this set kind of fails to deliver.
The odd thing is, this set feels less geared towards LEGO fans and more to Disney Collectors. I might need to build the Disney Castle soon to see if it also has this weird price disparity.
Another thing about eight stud wide trains is that if you make the train bigger then you have to rescale everything. Cars, houses, streets, etc. It works at shows because you can either have the trains by themselves, or there is enough separation between the trains and other things to hide the scale discrepancies. In other words, you’re opening a can of worms. However, highly detailed eight stud wide trains do look beautiful as displays. It’s like with the larger Creator cars. They look great but you have to keep them separately from your city.
Some old folks like me say that Lego was ruined when minifigs were introduced and almost all sets were locked to minifig scale. I like minifigs, but I agree that they could block the flow of creativity as far as using a scale.
I love the colors of the train station. It reminds me of the Fire Brigade. That’s another technique that could be talked about. Pulling together the right colors is not always easy. Of course, this set is based on a real building so it’s easier, but still.
This was on my sure-buy list for Winter. Then I read reviews on the Lego.com site (US) and a lot of people took of a star or more due to the stickers. Now I read your article and see the same complaint. I hate stickers! I have chosen to avoid sets in the past because of stickers. This one is now a “maybe.” I think any set $200 US or more should by definition be printed-only. Stickers are for little kids on the $20 grocery store sets.
Thanks, I always enjoy your articles and detail on new products and techniques they use.
It’s a great set for what it is. It’s meant for families to build together. Not every expensive set has to be fro afols. Disney fans are very familiar with high prices too! I think this set just makes afols more aware that even with big sets it’s worth paying attention to the recommended age on the box.
I appreciate the section you wrote about the moving effect, and not making the mechanism too complicated. I know I can use that in my own building. When you build minifig scale, it’s hard to fit in all the components of a moving component, but you can always greeble it and make the most visible and essential part of it move. There is a reason Technic sets with real working components are much bigger.