The LEGO Build Your Own Adventure book series by DK Publishing has been very popular with young and old LEGO fans alike. In case you are not familiar with them, they are very high quality LEGO books that include stories, building ideas, and LEGO bricks to build some of the models from the books. There was a similar book series in the past, titled LEGO BrickMaster, which was equally popular. In the old LEGO BrickMaster books, the books themselves had a thick storage compartment for LEGO elements and minifigs, while the new LEGO Build Your Own Adventure books come in a slipcase that contains a normal hardbound book and a separate box for LEGO parts. This way, you can combine reading and building. 🙂
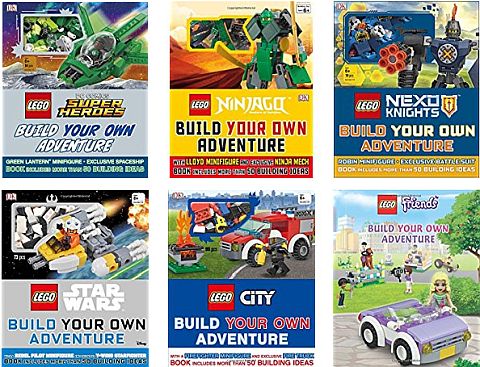
So far, there has been four books in the series; the LEGO Ninjago: Build Your Own Adventure book, the LEGO Friends: Build Your Own Adventure book, the LEGO Star Wars: Build Your Own Adventure, book, and the LEGO City: Build Your Own Adventure book. At the beginning of August, two more books were added to the line; the LEGO DC Comics Super Heroes: Build Your Own Adventure book, and the LEGO Nexo Knights: Build Your Own Adventure book. So, let’s take a look at the two new titles!

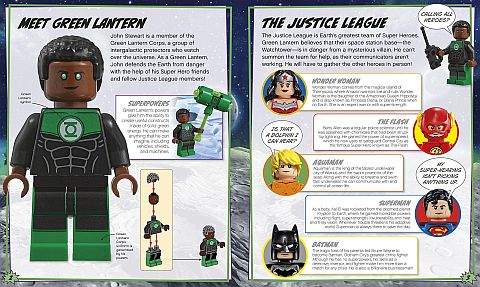
➡ LEGO DC COMICS SUPER HEROES: BUILD YOUR OWN ADVENTURE: LEGO DC Comics Super Heroes: Build Your Own Adventure combines more than 50 ideas for building with enthralling story starters from the world of LEGO DC Comics world. Get inspired to build, then play out Super Heroes adventures of your own using your LEGO collection. Organized into five chapters from Central City to Lex Luthor’s Base, each section features an opener that brings the models together in imaginative scenes and contains a selection of inspirational model ideas. LEGO DC Comics Super Heroes: Build Your Own Adventure will get kids inspired to build and play out adventures of their own, and it comes with bricks and instructions to build an exclusive LEGO model to add to their collection. Hardcover. 80 pages. Regular Price: $24.99, sale price (at the time of publishing this article): $15.49 – BUY ON AMAZON
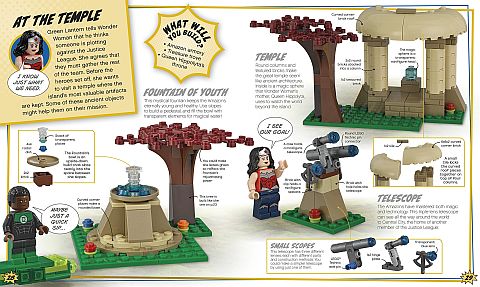

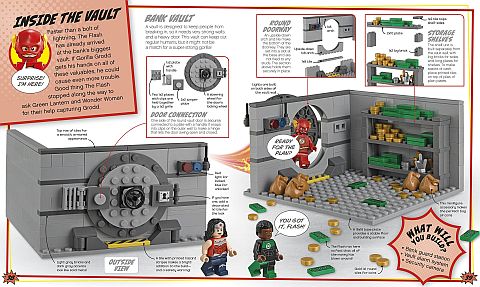
Just like the previous books in the series, the LEGO DC Comics Super Heroes: Build Your Own Adventure book is divided into five chapters; Paradise Island, Central City, Icy Adventure, Search for Superman, and Lex’s Lair. Each chapter features a number of models that you can use for inspiration, along with an enjoyable storyline to tie them all together. Please note that these are not models that you can build with the included pieces, but simply suggestions to put together from your own LEGO collection. However, the models are small enough that most LEGO fans with an average collection should be able to replicate them without much difficulty. The models can also be used as seed-ideas for larger creations.
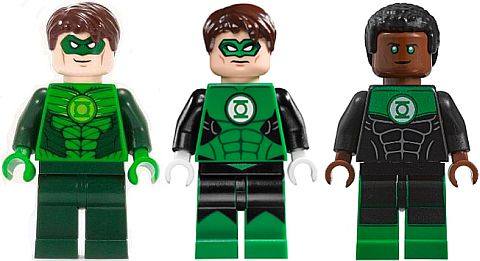
One of the biggest attractions of the book is the main model, and this does come with step-by-step instructions. In this book, we get the Green Lantern Corp Spaceship, which can be built with the included 84 LEGO pieces. It really is a sweet and very swoosh-able little ship, with some unique elements, nice building techniques, two stud-shooters, and of course a green color-scheme. The other biggest attraction of the set is the exclusive Green Lantern minifig. Green Lantern previously only appeared once, in the #76025 LEGO Super Heroes Green Lantern vs. Sinestro set from 2015 (middle minifig above). There is another, extremely rare version from the 2011 San Diego Comic-Con that goes for hundreds of dollars on the secondary market (first minifig above). Both of these are the Hal Jordan variations of the character. The new book version doesn’t just come with brand new torso and leg prints, but it is also the only one that is based on the John Stewart variation. And you can add this awesome minifig to your LEGO Super Heroes collection for just the price of the book!
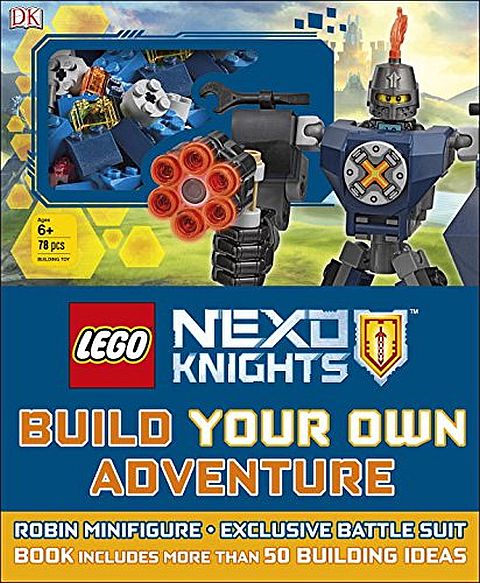
➡ LEGO NEXO KNIGHTS: BUILD YOUR OWN ADVENTURE: LEGO Nexo Knights: Build Your Own Adventure combines more than 50 ideas for building with enthralling story starters from the land of Knighton. Get kids inspired to build, then play out Nexo Knights adventures of their own using their LEGO collection. Organized into five chapters structured around different aspects of the Nexo Knights world, each section features an opener that brings the models together in imaginative scenes and contains a selection of inspirational model ideas. LEGO Nexo Knights: Build Your Own Adventure will get kids inspired to build and play out adventures of their own, and it comes with bricks and instructions to build an exclusive LEGO model to add to their collection. Hardcover. 80 pages. Regular Price: $24.99, sale price (at the time of this article): $17.49 – BUY ON AMAZON
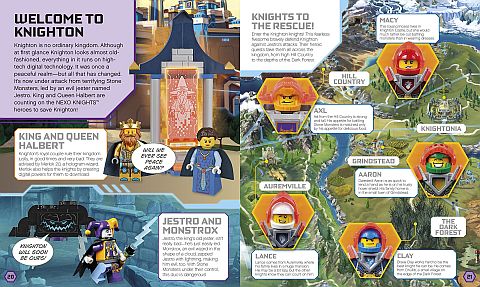
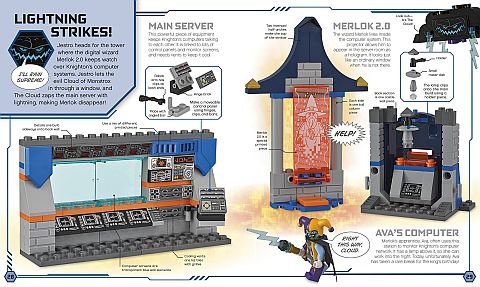
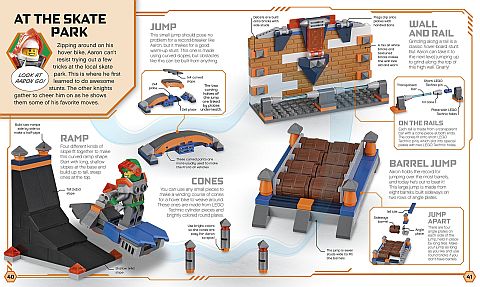
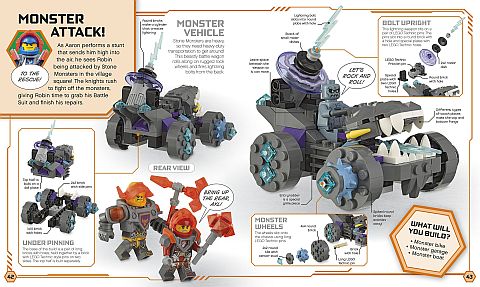
This book is also divided into five chapters to narrate the story; Knighton Castle, Grindstead Village, The Dark Forest, Hill County, and Auremville – all well-known locations from the LEGO Nexo Knights saga. Lots of great models pictured here as well, which you can use as inspirations for your own builds. One thing to point out is that the suggested creations in this book use quite a lot of specialized elements from the LEGO Nexo Knights theme. So, if you don’t already have at least some LEGO Nexo Knights sets, you won’t be able to build the models without some significant modifications.
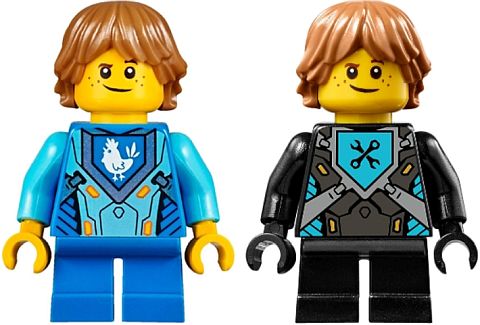
The LEGO Nexo Knights: Build Your Own Adventure book comes with 78 LEGO pieces to build a battle suit similar to what’s available in the LEGO Nexo Knights Battle Suit sets. This particular battle suit it for Robin, who is also included with the book. Robin comes with a unique torso print, as well as black arms and legs, which is quite unusual for the character (he normally wears various shades of blue). Robin and his battle suit can be a very nice addition to the other LEGO Nexo Knights Battle Suit sets.

In the play-list below, I have included video-reviews for both books by JANGBRiCKS, so you can see the content of the books, as well as the included LEGO models and minifigures in more detail.
As I mentioned in my reviews of the previously released books (see links at the end of this post), I really like the LEGO Build Your Own Adventure series. The books offer hours of play for kids, with stories to read, LEGO bricks to build with, and even unique minifigures! I also appreciate the thoughtful design; keeping the book and the LEGO pieces in the same slipcase for easy transportation and storage. While the books are recommended for children 8+, they are also of interest to adult collectors because of the unique minifigures. Plus, it’s fun to see all the really nice inspirational models. Here is a list of all six books in the collection for your reference, with links to their Amazon pages:
- LEGO Ninjago: Build Your Own Adventure
- LEGO Friends: Build Your Own Adventure
- LEGO Star Wars: Build Your Own Adventure
- LEGO City: Build Your Own Adventure
- LEGO DC Comics Super Heroes: Build Your Own Adventure
- LEGO Nexo Knights: Build Your Own Adventure
What do you think? Do you have any of the LEGO Build Your Own Adventure books already? How do you like them? And which one is your favorite? Did you build any of the suggested models found in the books? Feel free to share your thoughts and own review in the comment section below! 😉
And you might also like to check out the LEGO Books section for more book reviews, or select from the following related posts: