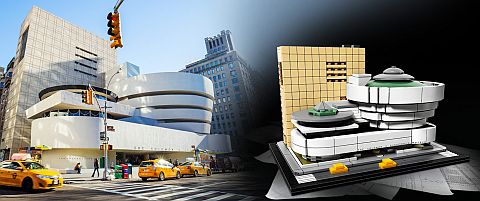
The LEGO Architecture line continues to impress with some really beautiful sets. Smaller models, like the ones in the LEGO Architecture Skyline series, offer some lovely memorabilia of iconic buildings and cities, while the larger LEGO Architecture sets also provide some of the most satisfying LEGO building experience you will ever encounter in an official LEGO set. The latest of these larger LEGO Architecture sets is the #21035 LEGO Architecture Solomon R. Guggenheim Museum, which is what we will be looking at today. 🙂
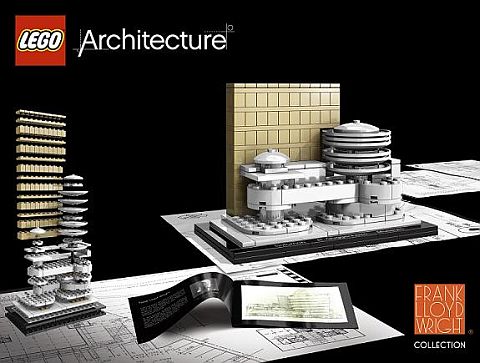
The LEGO Architecture series started out as a collaboration between the LEGO Group and Chicago architect and LEGO Certified Professional Adam Reed Tucker back in 2007. Later, LEGO ran an international competition for architects to participate in the further development of the LEGO Architecture line. Slovenian architect Rok Žgalin Kobe applied for and got the job. He has been working with LEGO since 2011 as a designer and technical assistant, and is presently in charge of research into other buildings and landmarks in terms of their suitability for LEGO design, then develops the selected models to the final stage (source: RTV Slovejina). His works include the #21013 LEGO Architecture Big Ben (London), the #21017 LEGO Architecture Imperial Hotel (Tokyo), the #21018 LEGO Architecture United Nations Headquarters (New York), the #21020 LEGO Architecture Trevi Fountain (Rome), the #21021 LEGO Architecture Marina Bay Sands (Singapore), and now the #21035 LEGO Solomon R. Guggenheim Museum (New York). In the video below, you can watch the designer talk about the set in more detail.
Like all LEGO Architecture sets, the #21035 LEGO Solomon R. Guggenheim Museum is packaged in a sleek and durable black box with a flip-up lid – perfect for long-term storage of the pieces and instructions. The instruction-booklet is also higher quality that standard LEGO instructions, and includes some interesting details about the design, architecture, and history of the real museum. The 744 pieces of the set are packaged in un-numbered bags. I would recommend keeping the content of the bags in separate containers, as with such a large set searching for little parts in a big pile could become a chore.


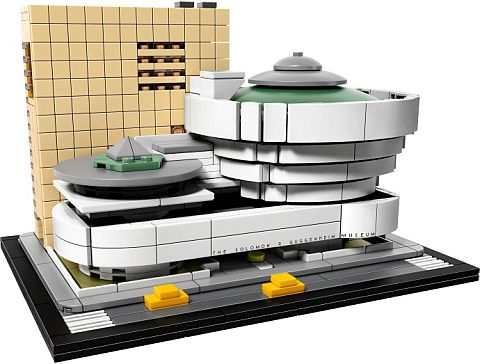
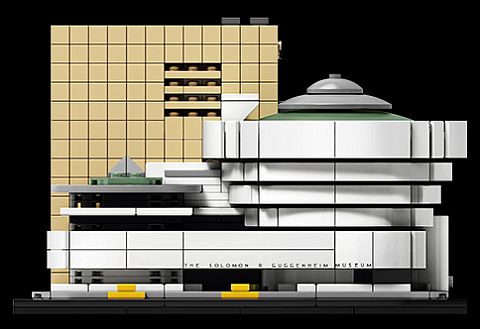
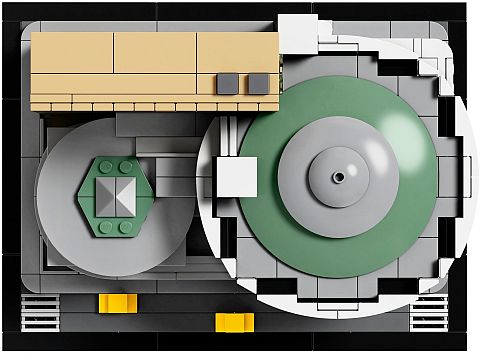
LEGO Architecture sets almost always come with an excellent collection of parts and colors. In the #21035 LEGO Solomon R. Guggenheim Museum we get a beautiful selection of white, tan, olive-green, sand-green, light-gray, dark-gray, translucent-black, and black elements (along with some yellow pieces that mostly hide inside the model). Some of the most notable pieces are the over 100 1×1 tan tiles, and tiles in other assorted sizes and colors, 1×1 translucent-black plates and tiles (used for the windows), curved white slopes, and the large 10×10 sand-green dish (which is unique to this set). The printed name on the side of the building is also unique, as previous LEGO Architecture sets always came with a printed tile at the edge of the base. Even the typeface is similar to the original lettering, which complement the authenticity of the model.
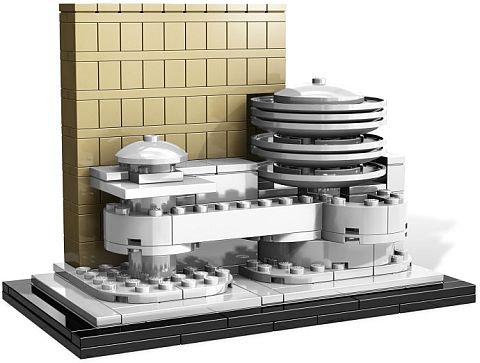
Building larger LEGO Architecture sets is a very different experience from building ordinary LEGO buildings, or even LEGO Creator Expert buildings. The models are much more dense, with the focus being an accuracy rather than the most efficient piece-count. An excellent example is the tan annex building behind the museum with 1×1 tiles covering the entire front side. (To align the tiles properly, you might want to run a thin piece of plastic or a piece of paper in the grooves between the tiles. I use an old laminated ID card that works perfectly.)
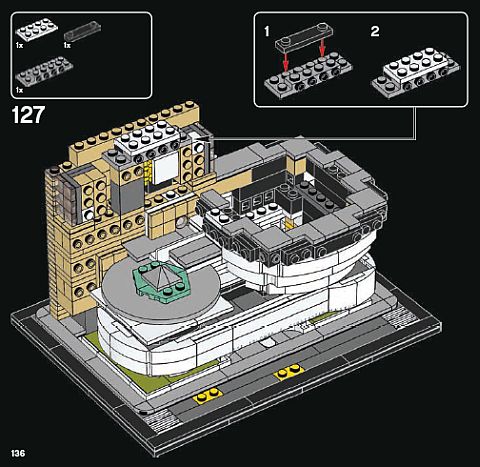
Larger LEGO Architecture sets are full of unique building techniques, and the process of putting them together is never boring. At almost every step, you will find pleasant surprises in the form of interesting solutions for creating shapes and alignments. You can see the most obvious examples of this in the rounded structure at the front, but my favorite building-techniques are actually hiding inside the tan annex building. It may look like an ordinary square structure, however the inside is quite a mash-up of unusual building techniques – especially at the upper floors.
Another section that I really like is the low wall around the base of the building, created with panel pieces. It is a small thing, but it frames the structure so nicely, and is quite accurate too. The two little yellow taxis are a sweet addition as well.
It is interesting to note that the #21035 LEGO Solomon R. Guggenheim Museum is the second version of this historic landmark. The same building was released in 2009, in the much smaller #21004 LEGO Architecture Solomon R. Guggenheim Museum set. While the previous set was pretty much straight up and straightforward building with LEGO pieces that matched the shape of the building the best, the new version really takes advantage of the larger piece-count, new LEGO pieces, and advanced building techniques that makes you build in every direction. These two sets highlight perfectly the difference between smaller and larger LEGO Architecture sets. While both final models are nice, the building experience is so much more satisfactory in the larger set. Also notice the additional colors in the new version, which make the details really stand out.
Here is the official description of the set: Discover the architectural secrets of Frank Lloyd Wright’s Solomon R. Guggenheim Museum. This accurately detailed LEGO model faithfully recreates the curves and distinctive lines that have made this building an architectural icon for the last half-century. The simple, grid-patterned facade of the annex tower complements the main building with its circular rotundas, while buildable exterior elements depict a section of New York City’s 5th Avenue Museum Mile, complete with its signature yellow cabs. The Guggenheim sign, featuring Wright’s architectural lettering, has also been recreated in a similar typeface to heighten the authenticity of the model. This LEGO Architecture model has been designed to deliver a rewarding building experience for all with an interest in architecture, travel, history and design, and is suitable for display in the home and office. Measures over 4” (12cm) high, 7” (19cm) wide and 5” (14cm) deep. 744 pieces. Price: $79.99 – BUY HERE
In summary, I would say that the #21035 LEGO Architecture Solomon R. Guggenheim Museum has a perfect balance between size, looks, piece-count, and building experience. The combination of rounded shapes, nice colors, and accurate details make this set stand out even amongst LEGO Architecture buildings. If you have never built a larger LEGO Architecture set before, this would be perfect model to experience the uniqueness of the collection. You can find it under the LEGO Architecture section of the Online LEGO Shop.

What do you think? How do you like the LEGO Architecture Solomon R. Guggenheim Museum? Do you have either or both versions of the set? Which one do you like better? Feel free to share your thoughts and own review in the comment section below! 😉
And you might also like to check out the following related posts:
- LEGO Architecture Skyline Collection Review
- LEGO Architecture Skyline Collection Wave 2
- Review of the LEGO Architecture Louvre
- LEGO Architecture Trevi Fountain Review
- LEGO Architecture Eiffel Tower Review
- LEGO Architecture Marina Bay Sands Review
- LEGO Architecture UN Headquarters Review
- LEGO Architecture Studio 30-Day Challenge
- LEGO Architecture Studio Hands-On Review
- LEGO Architecture Studio Set Review