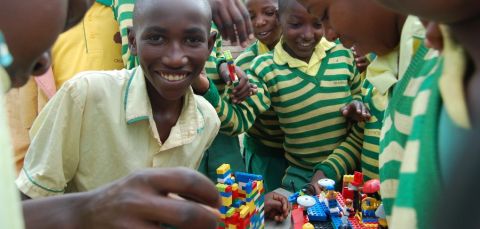
Today I wanted to share with you a wonderful project by a non-profit organization called LEGO Africa. Recently they sent 100 pounds of LEGO bricks to a school in a rural Uganda, to children who rarely see any toys, not to speak of LEGO. The video below captures the joy of these kids being introduced to the LEGO hobby the first time, and their wonderful creations.

LEGO Africa’s shares the following on their website: “LEGO Africa’s mission is to turn clutter in North America and Europe into an educational opportunity in Africa. We began with an initial deployment of LEGO elements to Child Africa‘s school in Kabale, Uganda. This school is near the Rwanda border and helps students from the surrounding hills and rural areas receive a quality education. However, resources are scarce. Books and desks are shared. Many of the students improvise toys by making balls out of plastic bags, for instance. None of the teachers or students had ever seen LEGO before. The arrival of LEGO created a unique opportunity for students to develop important spatial relations skills and creativity. During their first lesson with LEGO, students were very focused and thrilled when they discovered different ways to fit the pieces together. By the end of the day, some students were singing a song about how much they love LEGO. Others were asking when they would have the chance to play with them again. So far, LEGO Africa has enabled more than 200 students to work with LEGO on a regular basis. There are many thousands more who would benefit from the opportunity to do so, and we are eager to reach as many of them as possible.”
Nice video and great project, isn’t it? You might ask though, why LEGO when these kids are lacking so many basic needs? LEGO Africa explains on their website: “LEGO bricks are no ordinary toy. Outlets ranging from International Business Times to Education.com describe the benefits in creativity, problem solving, teamwork, and more that occur in children who play with LEGO. In rural Uganda, most children do not own any toys – many have not ever seen one. Those who are lucky enough to get an education, typically do so in a way that resembles schools in the UK and US more than a century ago. Building and operating these schools is an incredible accomplishment for our partners at Child Africa. We enrich the education they offer through a learning tool they otherwise would not have. Most of the students we provide with LEGO bricks do not have adequate food at home and only regularly at school. There is a chronic shortage of clean water, food, and medicine in Africa. We are often asked why we don’t focus on these basic needs instead of toys. There are many charities doing great work to alleviate these needs, and we encourage you to support them. We believe that fostering creativity and critical thinking skills among the continent’s children directly serves the long term goal of permanent improvements to quality of life in Africa.”
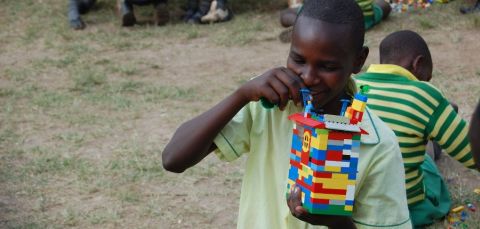
“Donations often come to us from individuals who otherwise would not be involved in charitable giving to Africa. While many of our donors generously contribute funds, some merely want a useful way to get the bin of plastic blocks out of their attic. Financial donors are often intrigued by our unusual approach, or find that our long-term view resonates with them. Many of these individuals would not otherwise be supporting Africa, and some give to us in addition to other African charities. In short, we are confident that the donations we receive do not detract from charities that provide more basic needs, and are simply an additional source of generosity to Africa. Finally, LEGO bricks are a language. Through this toy, African children express themselves in a way that adults and children alike can understand all over the world. We share images African students and their LEGO creations in order to promote understanding and connection between nations and cultures.”
If you feel inspired and would like to participate in this project, LEGO Africa is seeking to expand their program and are requesting help. They accept monetary donations as well as new and used LEGO sets and elements. You can find more information on their website at LEGOAfrica.org. (UPDATE: this website is no longer active.)
As a LEGO fan, there are many ways you can help children who normally don’t have access to LEGO bricks. You can volunteer to run programs at your local library or school, you can donate to LEGO related charities, or just throw an occasional LEGO party. If you have ideas or questions about using LEGO for a good cause, feel free to share in the comment section below! 😉
And you might also like to check out the following related post: