Today I would like to show you the newly released #21301 LEGO Ideas Birds set in a bit more detail. We have discussed the set before (see links at the end of this post), but since then I had the chance to build it in person, so have more experience with it. 🙂
To start out, let me mention that I’m an avid birdwatcher. We have several bird-feeders around our house, one of which is right in front of my window where I work, so I have a chance to watch our little feathered friends closely. Sometimes I even open the window a little bit so I can hear the fluttering of feathers. They also hop on my windowsill to catch seeds that fell out of the feeder, so they are only about 3 feet away from me. We also have a fountain with running water, so the birdies can drink and take a bath. It is a lot of fun to watch them. And in one of our rooms we have a “bird wall”, where we post pictures of all the birds we have seen in our yard. I’m fortunate to live in Florida where there is a very large variety of birds, and because our neighborhood is quiet and very wooded, birds feel safe to hang around.
So far we have identified 38 different birds just in our yard: the Northern Cardinal, American Goldfinch, House Finch, Carolina Chickadee, Tufted Titmouse, Carolina Wren, Northern Mockingbird, Mourning Dove, Common Grackle, American Crow and Blue Jay are regular visitors. The American Redstart, Rose-Breasted Grosbeak, Ruby-Throated Kinglet, Golden-Crowned Kinglet, Northern Parula, American Robin, Gray Catbird, Eastern Starling, Eastern Towhee, Eastern Phoebe, Black & White Warbler, Yellow-Throated Warbler, Baltimore Oriole, Summer Tanager, Cedar Waxwing, Great-Crested Flycatcher, Chuck-Will’s Widow, Wood Thrush, and Brown Thrasher are either seasonal, uncommon in our area, or are more shy to show themselves. We also have several different types of woodpeckers; the Red-Billed Woodpecker, the Pileated Woodpecker, the Red-Headed Woodpecker, and the Downy Woodpecker. Our biggest visitors and residents are the Red-Tailed Hawk, the Barred Owl, and the neighbor’s Black Australorp Chicken named Winston Cratchet (yes, it is a girl, and yes it has a boy name). Our rarest and most treasured sighting was that of a Painted Bunting in the bushes of our back yard.
So why did I tell you all about “my birds”? Well, because the #21301 LEGO Ideas Birds set was designed by a fellow birdwatcher and LEGO fan from England, Thomas Poulsom. You can read more about Thomas, his fascination with birds, life-long interest in LEGO, and how LEGO Birds came about in the previous article: LEGO Ideas Birds Collection Coming Soon!, but the point is that I don’t think anyone can build birds out of LEGO as accurately as a true birdwatcher. These little fathered creatures have so much character, variety and personality, it takes some time to get to know them and accurately portray them.
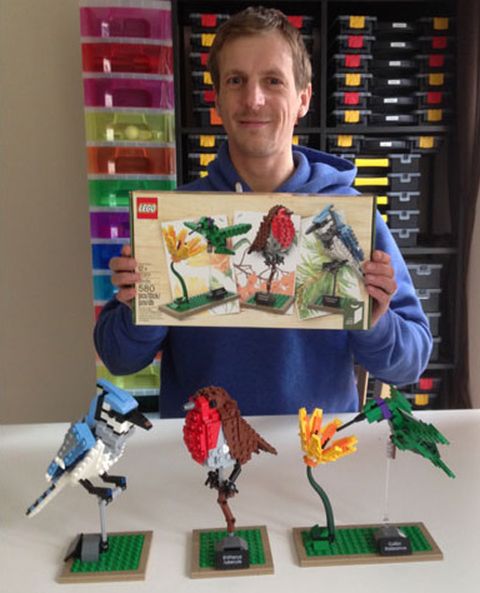
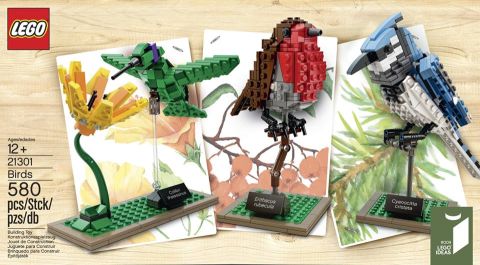
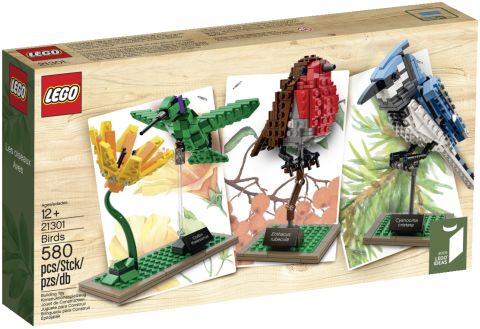
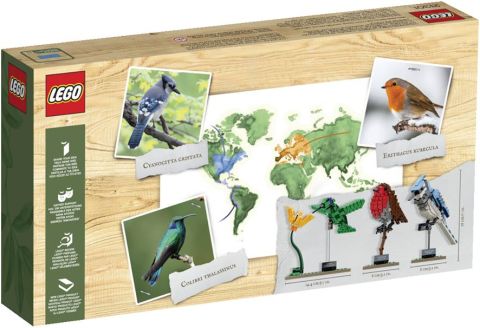
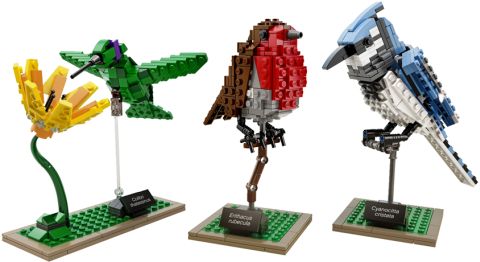
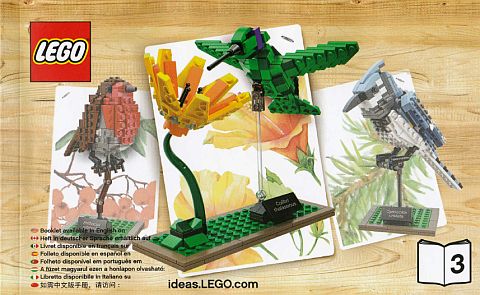
As we have discussed previously, the #21301 LEGO Ideas Birds set includes three of Thomas’ LEGO bird models, the Robin from Europe; the Blue Jay from North America; and the Hummingbird from South America. The set comes in a sturdy box with a flip-top lid, similar to other LEGO Ideas sets, and other high-end exclusive sets like in the LEGO Architecture line. Inside the box there are the pieces for all three of the birds (the Robin and Blue Jay are in two bags each, and the Hummingbird and flower in one), an orange brick-separator, and three booklets; one for each bird. The box and the booklets all have a really lovely design with watercolor backgrounds for the birds. Each booklet comes with an introduction about Thomas and his birds, and a description and some interesting tidbits about each of the featured birds in three different languages; English, French and Spanish.

➡ LEGO IDEAS BIRDS – ROBIN: The Robin is the first bird you build – well, at least if you go in order of the numbered instruction-books. It has a lovely brown, light-gray and red color-scheme with just a touch of white. The finished bird is actually quite large; almost 5 inches long from beak to tip of the tail, and about 4 inches tall. It sits on top of a little perch. The perch is easily removable (maybe too easily) from the stand, and also the bird can be removed from the perch. Although the bird is quite heavy being built up of mostly plates, the whole model has a good balance. The printed name-plate at the front with the Latin name of the bird is a nice touch.
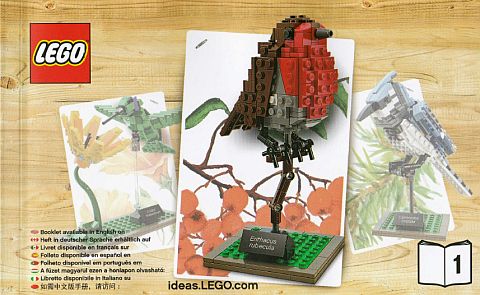
The building process is an interesting experience. There is basically a cube inside the bird with studs on all sides (the cube is built up of plates, jumper-plates, plates and bricks with studs on the sides, so it is very solid), and then you build facades to attach to this cube on all six sides. From the three models this is the building-technique I liked the most. It would be very easy to build other birds based on this model. All you would have to do is change the coloring of the facades to make other birds of similar shape and size. Good candidates would be the Gold Finch, House Finch, Chickadee, Titmouse, Wren, even a puffed up Northern Cardinal – basically any stocky and roundish bird.
The model doesn’t really have any play-features. The tail moves a little bit, but that’s about it. As I said, the bird can be removed from the perch, and displayed differently if you wish. The only thing I didn’t like about this model is that the T-bar in the feet-assembly are light-gray. This T-bar is now available in black, and LEGO should have really used those. This is an easy fix though. Also, while I like the plain black eyes, the new printed tiles with eye patterns also work well. Below is a picture of how the original Robin looked like in Thomas’ submission. As you may notice, the final design is quite similar, which is nice.

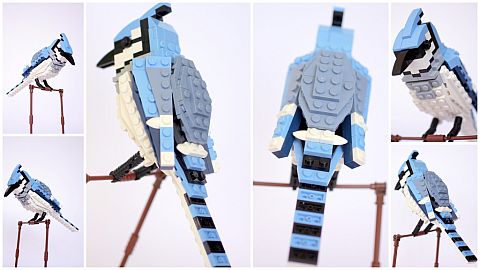
➡ LEGO IDEAS BIRDS – BLUE JAY: This is the bird in the second booklet, and it is another interesting build. The building techniques used are quite different than in the Robin, resulting in some unique angles. To achieve this LEGO used ball-joints for the wings, and hinges for the head, which allows the wings to move a little bit. This is a harder and more complex build than the Robin, but it allows you to learn some techniques for building birds with more streamlined bodies. The shaping of the head is also impressive, and looks very much like a real Blue Jay. I could see the same techniques being used for Kingfishers, Grackles, Waxwings, Flycatcher… this is just a bit harder model to work with due to the angles and more complex design.
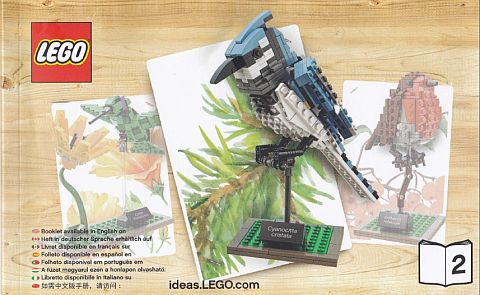
One thing I don’t like about this model is that the Blue Jay cannot be removed from the perch. The perch could be removed from the base, but then you end up with a bird on a Technic axle. I wish the connection would have been done in a similar way as the Robin’s so the bird can be fully removed. I see the issue though designers ran into; the belly of the Blue Jay is not parallel with the base like in the case of the Robin, and because the bird is so large and heavy, it would have definitely needed the extra support of a Technic rod going inside the body. Since that was not possible with the current design, they opted for the bird being solidly attached to the perch.

Talking about size and weight, the Blue Jay is another solid build, and even heavier than the Robin. It is also larger than the Robin; over 7 inches long from beak to tip of the tail and 4 and a 1/2 inches tall. Just like the Robin, it comes with a printed name plate on a 2×4 black tile. The base is pretty solid, although a bit more wobbly than the Robin due to the larger size of the bird. On both models mentioned so far I would have liked a better connection between the base and the Technic axle, maybe even a fixed connection. Right now the axle simply sits inside a regular round hole, which means that the axle can slip out very easily, giving both models a somewhat shaky feel – not when they are standing on display, but when you touch them or try to pick them up. I will work on trying to fix this when I have some time for tinkering. Below is a picture of how the original Blue Jay looked like in Thomas’ submission. Here also, a lot of the original design has been kept.
➡ LEGO IDEAS BIRDS – HUMMINGBIRD: The last model in the series is the Hummingbird. Here the base is larger to accommodate both the bird and the flower. The final model is quite lovely, especially because of the striking difference between the color of the bird and the flower. I would have liked if the Hummingbird is on the same size base as the other two birds for the sake of uniformity, and in fact I have already played with this and it is quite possible to accomplish to fit both the bird and the flower on the smaller base with just a bit of modification.
I really like the design of the flower. The colors are so vibrant and the shaping is just perfect. Couldn’t have asked for anything better. I’m not as convinced about the Hummingbird though, and it is my least favorite of the three models. However I appreciate the fact that here we get yet another way to make birds, this time with wings outstretched. Neither the wings, nor the tail can move, which is a bummer. One of the most striking feature of Hummingbirds is the insanely fast flapping of their wings. It would have been nice if they could move at least a little bit. The only movable part is the head with a 90 degree range of motion, but it moves in two parts, which is kind of strange and unnatural.

To mimic the Hummingbird hovering over the flower, a trans-clear rod is used. This is a very precarious design, and every time I move the model I’m worried that the rod will snap. And I wouldn’t be surprised if at some point it breaks. The connection of the rod to the base however is better and more secure than the other two models, with the rod securely sitting in a half-Technic pin, which is then inserted in the same hole than the perch of the other two birds. So the rod can still be removed, but the connection is more solid. You can pick up the whole model without the bird falling off of its stand (it swings around crazily though because of the weak trans-clear rod I mentioned above). Also, another nice feature is that the Hummingbird can easily be removed from the stand as it is attached only with one clip. However when you remove the bird, you notice how flimsy of the attachment of the back feels. It is actually sturdily connected with a Technic pin, however because only one pin is used, the back wobbles as you fly your Hummingbird around – as I said, it is secure, but it’s just a weird feeling.

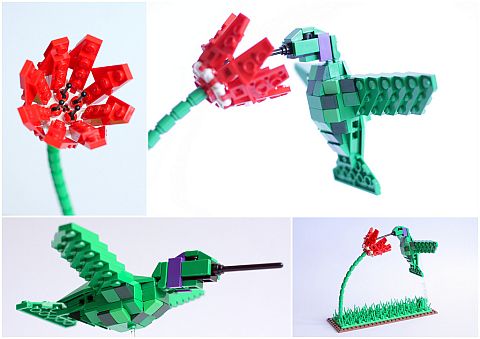
As far as the shaping of the Hummingbird’s body, it looks good. It is also interesting that the wings and the tail are studs down, but it is very effective here and works out nicely. I would just have wished for a better design for the head, and maybe some mobility to the wings and/or tail. Just like the other two birds, the Hummingbird comes with a printed name-plate. Below is a picture of how the original Hummingbird looked like in Thomas’ submission. As you can see, the flower has been updated both in color and the design of the stem, but the Hummingbird is very similar to the original submission.
All in all, I would say that LEGO Ideas Birds is a lovely set. The packaging is really sweet, the booklets are nice, and there are some very interesting building techniques used that those who would like to make their own birds could learn from. The models are sturdy enough to move around – except for the connection to the bases, that could be fixed easily. I wouldn’t recommend this set for young kids though. The suggested age on the box is 12+ and that seems just about right. For younger kids who like to build animals and birds the LEGO Creator sets are a better choice; less pieces, easier construction and more flexible models with some nice play-features. For kids I particularly recommend the #31031 LEGO Creator Rainforest Animals. However for adult collectors and birdwatchers, the more detailed and realistic look of the LEGO Ideas Birds set would be more ideal as a display piece. So far everyone I have shown the set to (both LEGO fans and those who haven’t touched LEGO since they were kids) loved it and are planning to get one. You can find the set at official LEGO stores and the LEGO Ideas section of the Online LEGO Shop.

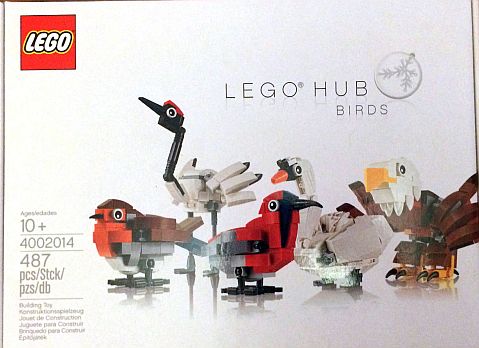
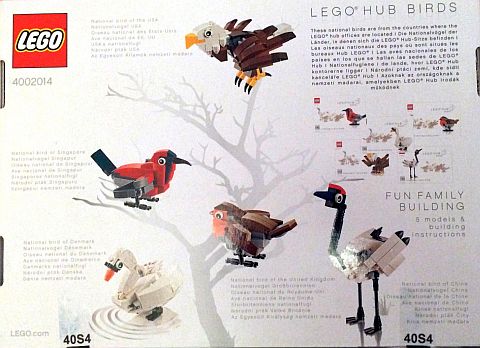
Interestingly, LEGO also released another birds set this year, called the #4002014 LEGO Hub Birds. This has been a gift to LEGO employees for Christmas and includes five birds, one for each national bird from countries where the LEGO hub offices are located. The birds included are a Robin for Britain, a Red-Crowned Crane for China, a Crimson Sunbird for Singapore, a Swan for Denmark, and a Bald Eagle for the USA. They are more brick-built, like the LEGO Creator sets, rather than plate-built like the LEGO Ideas set, giving them a cute, chunky look. This set is not available to the public, but you can find copies on eBay, if you are interested. Here are the listings: #4002014 LEGO HUB Birds on eBay
I hope this review helped you to decide if LEGO Ideas Birds is for you. Also, even if you are personally not interested, keep in mind that this is an excellent gift-item not just for LEGO fans but birdwatchers. Like some of the other LEGO Ideas sets, if you are considering it, it is probably a good idea to get it as soon as possible before it completely sells out. LEGO Ideas sets are produced in limited quantities and are very popular with LEGO fans. Again, you can get it at the LEGO Ideas section of the Online LEGO Shop.

So what do you think? How do you like this set? Which one is your favorite bird from the three models included? Do you have the LEGO Ideas Birds set already? If you do, feel free to share your own thoughts and review in the comment section below! 😉
And you might also like to check out the following related posts:


