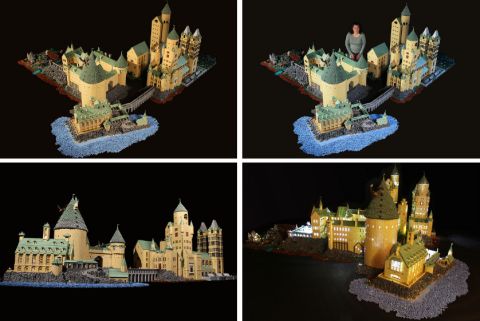
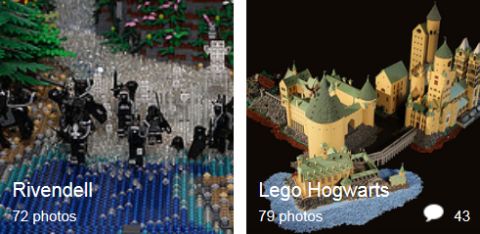
Alice Finch has taken the LEGO fan world by storm. A huge storm in fact, and not just once, but twice! Just a bit over a year ago she first unveiled one of the largest LEGO models ever built by a single person; a minifigure-scale LEGO Hogwarts School of Witchcraft & Wizardry based on J.K. Rowling’s Harry Potter books and the corresponding movies. The LEGO Hogwarts School was first revealed at BrickCon 2012, and was also displayed at other LEGO conventions for the public to admire. 🙂
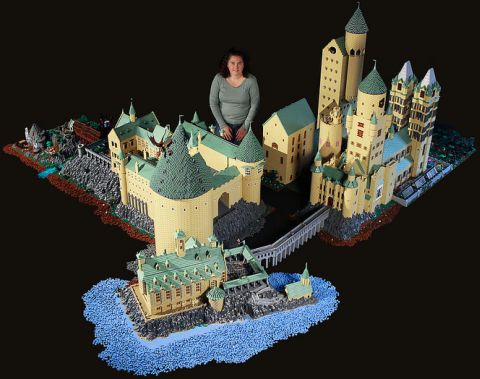
The LEGO Hogwarts School of Witchcraft and Wizardry contains around 400,000 LEGO elements and took about a year to build. Alice meticulously researched the details to make the iconic School of Witchcraft as accurate as possible. At the same time she also kept the model play-friendly so her children can enjoy it. And to be able to transport such a huge LEGO model it is built in sections for easy assembly. The LEGO Hogwarts School of Witchcraft and Wizardry was blogged, tweeted, shared and featured on pretty much all news channels. It was just too awesome! 😀
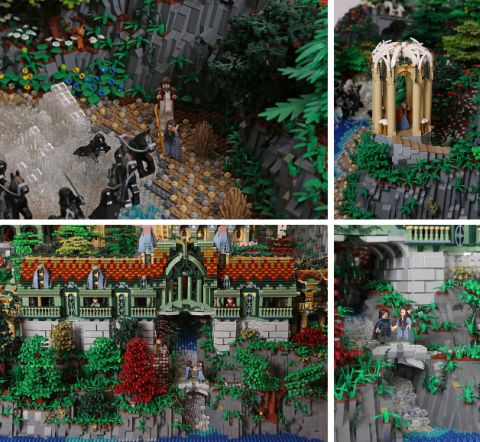
Now a year later, Alice has done it again. At BrickCon 2013 Alice and fellow builder David Frank revealed a 10×5 foot LEGO Lord of the Rings Rivendell based on J.R.R. Tolkien’s The Hobbit and The Lord of the Rings books and the corresponding movies. This model also took about a year to build, and around 200,000 LEGO elements.
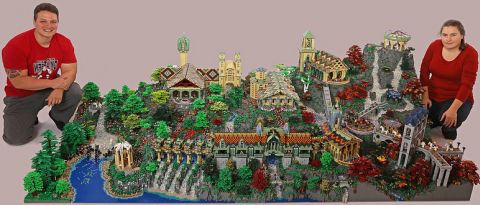
Both Alice and David lives in the Seattle, WA area, and they are both members of their local LEGO Users Group called SeaLUG. After lots of discussions about LEGO castles and elven architecture they decided to build a detailed replica of Rivendell. Each of them independently built certain section and they got together from time to time to make sure everything matched up and aligned. Even their sons helped out in the building (both Alice and David has two sons), and Alice’s husband took the great pictures.
It is very interesting and inspiring to read the stories, and to learn from, such accomplished LEGO builders. How did they start out in LEGO? What inspired them to take up such huge projects? (Both Alice and David are actually fairly new to the LEGO hobby.) Where did they get all the parts needed? How much it all costs? – So much to ask and discuss! Here I just wanted to bring to your attention these amazing LEGO projects in case you haven’t seen them yet, and you can read more at the following exclusive interviews done by the BrothersBrick: Interview with Alice About LEGO Hogwarts and Interview with Alice & David about LEGO Rivendell. You can also see more photos at Alice’s flickr gallery: LEGO Hogwarts Pictures and LEGO Rivendell Pictures.
Alice was also recently interviewed by Joshua Hanlon from BeyondTheBrick, where she talks about both of the projects, the benefits of being a LEGO Users Group member, as well as her recent involvement with BrickLink.com as their new Chief Communication Officer. The interview is over an hour long, but I highly recommend it. If you ever considered getting into large LEGO projects you will get a glimpse of what it takes to make them happen. Also the discussion about BrickLink’s future and development in the second half of the video is very interesting.
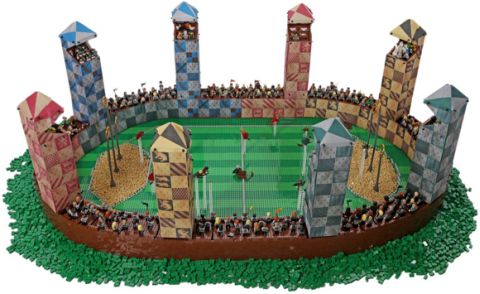
On BrickLink Alice recently introduced herself and her latest LEGO project, the Quidditch Pitch for Hogwarts: “…Like many of you, I played with LEGOs as a child and I had a long Dark Age. One brilliant spot in in that darkness was the first Christmas gift my then boyfriend (now husband) gave to me: set #6034 LEGO Castle Black Monarch ghost. I still have it (and the box). Who knew this would be the beginning of a hobby and passion that now takes over rooms in our house! I’ve always tended to design and build things – from St. Basil’s Cathedral out of gingerbread to the house that I live in, but it wasn’t until my elder son was starting to really build that I began to dabble in LEGO again. What started innocently as building a few of the LEGO Harry Potter sets soon turned into a full minifig-scale model of the Great Hall. A year and a half and many BrickLink orders later, it is 400,000 bricks big. I still can’t believe it’s had 7 million views on Flickr! Even when I’m not putting bricks together, I have LEGO on my mind. I’m a full time mother to two young sons who build (and pilfer from my stash) and I’m an active AFOL in Seattle. I have close relationships with many of the amazing builders in my area, my local LEGO Store employees, and the hundreds of kids I know at my son’s school where I run the art program…”
So what do you think? How do you like the LEGO Hogwarts and LEGO Rivendell projects? Have you had a chance to see either of them in person? And did you learn something interesting from the video-interview? And on more question; if you would have all the LEGO bricks in the world what large-scale LEGO project would you consider building? Feel free to share and discuss in the comment section below! 😉