

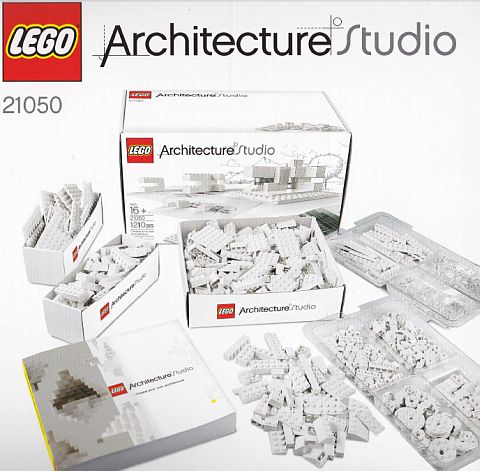
Today I would like to show you a very interesting LEGO project involving the #21050 LEGO Architecture Studio set. We have talked about this set before and reviewed it in detail (see links at the end of this post). LEGO fan Tom Alphin got so inspired by this set that he decided to undertake an ambitious project; The LEGO Architecture Studio 30-Day Challenge – building 30 LEGO models in 30 days using pieces from the LEGO Architecture Studio set. He believes that this will inspire and guide others, who would like more ideas and projects to build, to take full advantage of the LEGO Architecture Studio set. You may even decide to take up a challenge similar to Tom’s! So let’s see what the 30-day challenge is all about. 🙂
Tom says on his blog about the project: “I decided to create my own 30-day challenge inspired by the LEGO Architecture Studio. The set includes a great selection of LEGO bricks and a ‘Create your own architecture’ guidebook which describes seven hands-on explorations covering ‘Abstraction’, ‘Scale’, ‘Space & Section’, ‘Modules & Repetition’, ‘Surface’, ‘Mass & Density’, and ‘Symmetry’. That’s a good start, but I will definitely need to come up with more projects to fill up the month! My main goal in taking on this project is to inspire others to include creative free-form LEGO play in their life. Take the challenge, and share the LEGO challenges you create! My personal goal is to build better models through practice and research into advanced building techniques. I hope to learn the strengths and weaknesses of the choice of bricks included in this set, and will create a list of ‘missing’ bricks that would enhance this set for advanced model builders.”

A challenge is not a real challenge without some guidelines, so Tom also came up with a set of rules that he intends to follow. He says: “If I’m going to take on this personal challenge, I should establish some simple ground rules to keep myself honest. I want to make sure I define the challenge clearly before I build it. This is important to helping others try the 30-day challenge. I will try to build each challenge using only the bricks included in this set, plus a couple baseplates. That said, I might recruit a few colored bricks for certain projects. I want to make sure the project stays fun and I’m fairly busy, so my personal deadline is to complete 30 challenges before Thanksgiving. It is important that I capture and share the results of each challenge on my blog. I hope that others will try these challenges as well! That said, since this is my project, I reserve the right to adapt the rules as I go.” 😀
To start out Tom gathered some ideas of what he could do. He shares: “I haven’t defined all of the challenges in advance because I hope that the first couple challenges will give me ideas for more interesting challenges to complete later. I also hope that people following my progress will suggest additional ideas for me to try. The following are some of my initial ideas.”
- Build a microscale model of exterior of your home from memory.
- Build a simple repeating structure using only simple blocks. Build a more complex architectural model inspired by that simple structure.
- Bring your LEGO to a building with interesting architecture or interiors. Recreate elements of the environment using your LEGO bricks.
- Browse books or the Internet to find a building you like. Build a model of that building.
- Select a style of architecture. Make a new building inspired by the shapes and patterns common of that style.
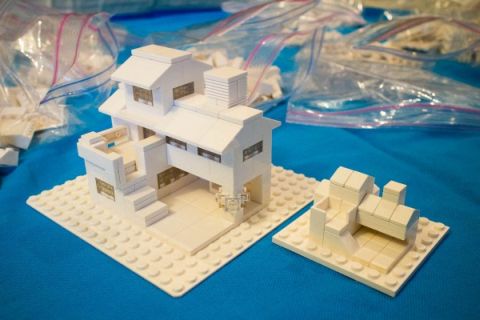
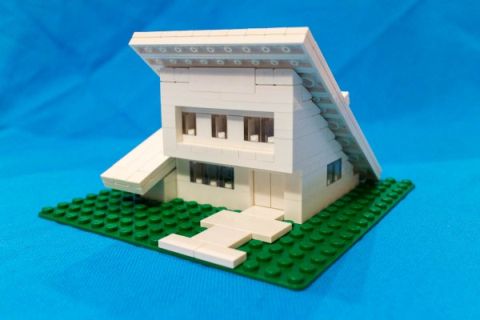
- Build a small micro-scale home (base of around 4×4). Create a larger model of the same home and incorporate subtle new details which weren’t possible in a smaller model.
- Build a micro-scale home with a group of people where you take turns adding a few pieces to the model.
- Build a simple model from scratch and recreate it on your PC using LEGO CAD software.
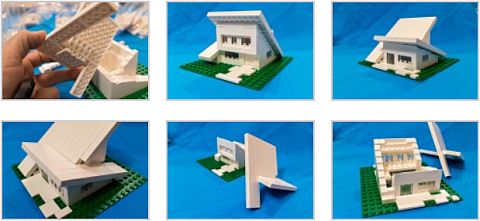
Tom is already well into the 30-day challenge and have built 10 models so far. With each challenge Tom shares in detail his thinking process, the resources he uses for each of the project, the challenges he faces, as well as lots of pictures of the building techniques used. Here are the links to Tom’s blog with the already accomplished projects:
- Challenge #1: Build a simple repeating structure, then reinterpret it with more detail
- Challenge #2: Build a microscale home, then a bigger model with more details
- Challenge #3: Make a model of a famous building (Fallingwater)
- Challenge #4: Build a LEGO sphere
- Challenge #5: Build a model in a specific architectural style (Shed style)
- Challenge #6: Make a 3D model of a LEGO project
- Challenge #7: Build a model based on Art Deco style
- Challenge #8: Build a model of a piece of furniture
- Challenge #9: Build a model of a fire lookout tower
- Challenge #10: Build a Prairie Style home
If you would like to follow along with Tom through the LEGO Architecture Studio 30-Day Challenge, make sure you subscribe to his blog, and also leave him comments. He is open for ideas for other challenges that he can incorporate in the 30 days period.
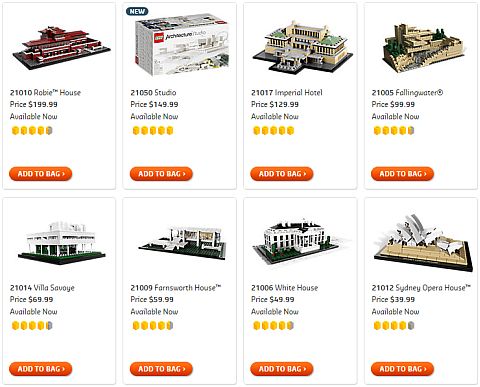
The LEGO Architecture Studio set is a recently released LEGO exclusive, available online at LEGO brand stores and at the Online LEGO Shop. It is specifically meant to learn free-building with LEGO and also to use it as a medium by architects and designers to develop their projects. You can check it out here: LEGO Architecture Studio Set at the Online LEGO Shop
So what do you think? How do you like Tom’s idea for a 30-day challenge? Which one of his models do you like the most? Are you planning to participate in the challenge yourself? Or have you tried similar challenges with LEGO? Feel free to share your thoughts and discuss in the comment section below! 😉
And you might also like to check out the following related posts:


