Celebrations are happening across the galaxy! But how do they look? The LEGO Ideas team is asking fans in a new contest to create brickfilms in the Star Wars universe, based around some of the best ‘Earth’ holidays! Read the details of this fun contest are below.

For this contest, your brickfilm should relate to one of the following four themes: May the 4th (Star Wars Day), Father’s Day, summer holidays/back to school, or the year-end holiday season (Christmas, New Year etc.).
Your brickfilm should be between 15 and 30 seconds and either feature royalty-free music/sounds, using the provided sound effects from Lucasfilm, or be silent. The LEGO Ideas team is making a library of sound effects from Lucasfilm available to contestants who wish to use the official sound effects. Please note that these assets must only be used for this contest. For full information, see the fine print section of the contest page.

Also note that for the first time, there will be a double fan vote! There will be one fan vote to decide one winner of each category (based on the categories above). These four winners will then go into a second vote with the potential of winning the ultimate prize on top of the first prize! Here is the breakdown of how the contest will go:
- Submission Phase – Create and submit your entry before January 13th, 2022 at 6:00 a.m. EST. Submissions may be in either physical bricks or by using a digital building tool such as LEGO Digital Designer. You’re welcome to use image/video editing tools, such as Photoshop, to create your videos.
- Judging Phase – LEGO Ideas judges review the entries and choose 5 entries in each category to be part of the first fan vote by January 27th, 2022.
- Fan Vote 1 – This fan vote made up of 20 entries (5 from each category) will run from January 27th, 2022 to February 3rd, 2022.
- First Winner Announcement – The results of the first fan vote are shared on February 10th, 2022.
- Fan Vote 2 – The 4 winners of the first fan vote move into a second fan vote that will run from February 10th, 2022 to February 17th, 2022 to decide the final winner of the ultimate prize.
- Final Winner Announcement – The results of the second fan vote are shared on LEGO Ideas no later than February 24th, 2022.

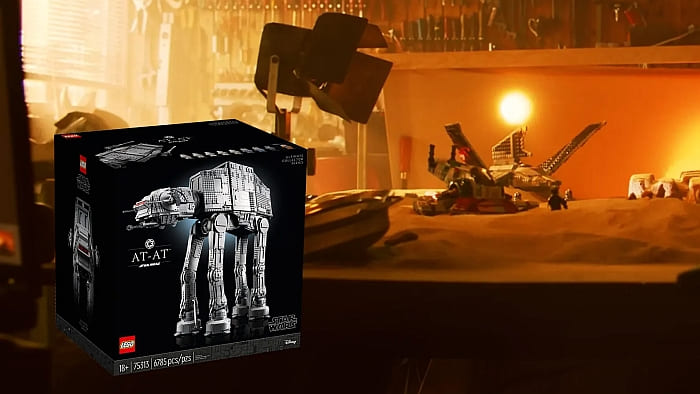
Each of the four winners of the first fan vote will win the following: #75309 LEGO Star Wars Republic Gunship, #75288 LEGO Star Wars AT-AT, and LEGO Ideas tote bag. If you’re the epic winner of the second fan vote, you’ll win the following: #75313 LEGO Star Wars Ultimate Collector Series AT-AT set. For more details, head on over to the contest page to read the contest rules and get started.
What do you think? Are you inspired to enter this contest? Feel free to share and discuss in the comment section below!
And you might also like to check out the following related posts: