(Written by William)
When I initially heard that the Home Alone house was going to be a LEGO Ideas set, I was a bit surprised. From previous models that had made it through the LEGO Ideas process, this felt like one that would be rejected. Don’t get me wrong, I was happy it got selected, it just seemed to be an unexpected choice.
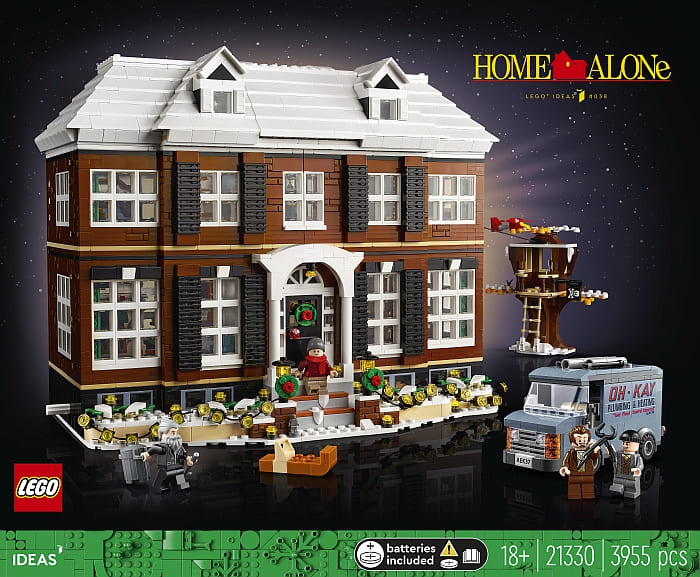
I do recall watching the first movie in the Home Alone franchise quite a lot in my youth. But the #21330 LEGO Ideas Home Alone set just didn’t hit my nostalgia meter like other licensed models have. Couple this with the price tag, and I was prepared to pass on the set. However, my father-in-law fell in love with the pictures of the set and encouraged me to check it out.
Turns out, this set has a fair amount of play-features I wasn’t expecting. With large and expensive models like this, play-features are usually a turn-off for me because they are often not integrated well and are too visible. But again, to my shock and great relief, the way LEGO designers went about creating the action elements to serve an older fan base felt just right. Additionally, they didn’t skimp on the display potential of the building. And if that wasn’t enough, I learned new details about the film that I hadn’t picked up on when I initially watched it.
The set is currently shown as temporarily out of stock at the Online LEGO Shop due to high demand, but don’t worry, it will be back sooner or later. In the meantime, let’s take a closer look at why I think this is a fantastic set and awesome building experience.
LEGO HOME ALONE SET – ACCESSIBILITY
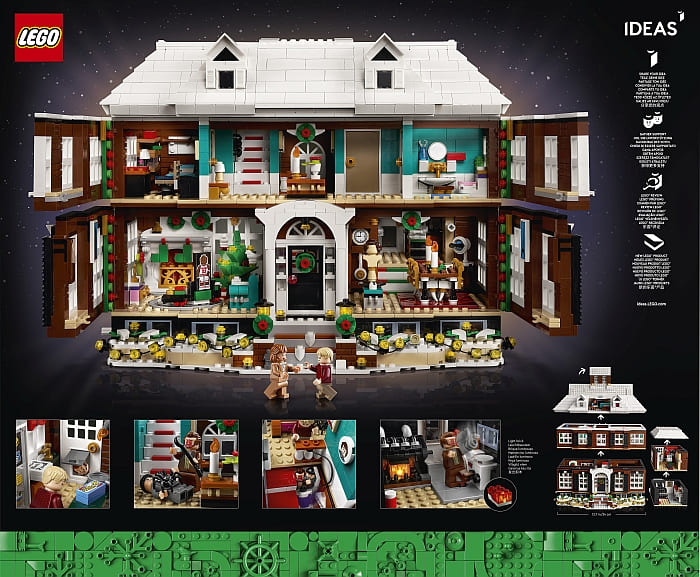
When we think about adding access to a LEGO building’s interior, we often envision a single method. Perhaps one wall would hinge open or maybe a roof would come off. Official LEGO sets often use one method as well. However, in recent years, we have gotten several examples of official LEGO sets when various accessibility techniques are combined.
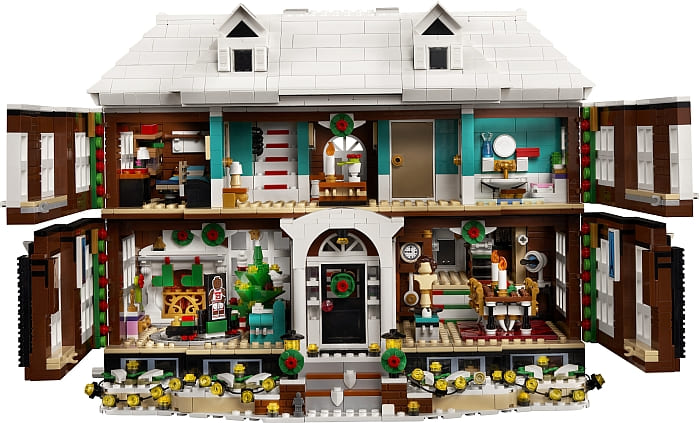
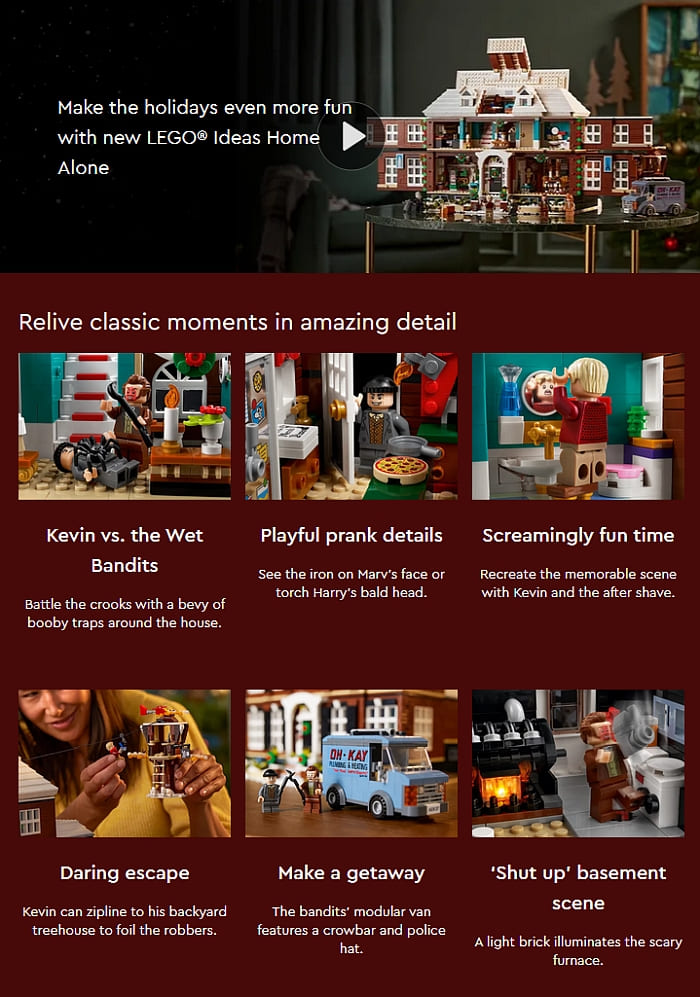
Good examples include the #21310 LEGO Ideas Old Fishing Store and the #76178 LEGO Spider-Man Daily Bugle. The fishing store allows you to remove the roof of the main building and has a hinged wall, and The Bugle lets you remove front walls as well as floors in order to get inside the building. And I think the LEGO Ideas Home Alone set uses every standard technique we have seen in other sets and throws in its own twists to boot. The result is a remarkably robust model that has open access to every major moment you could think of.
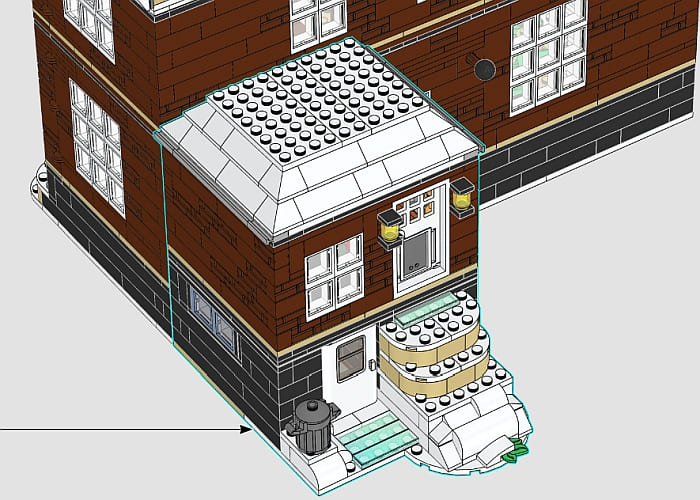
For starters, there is the basic modular floor design. You can remove the attic to get to the second floor, which in turn can be removed to get to the first floor. Likewise, the back kitchen and basement sections have their own roof, and the kitchen area can be removed to get to the basement. The building also features hinged elements for quick partial access.
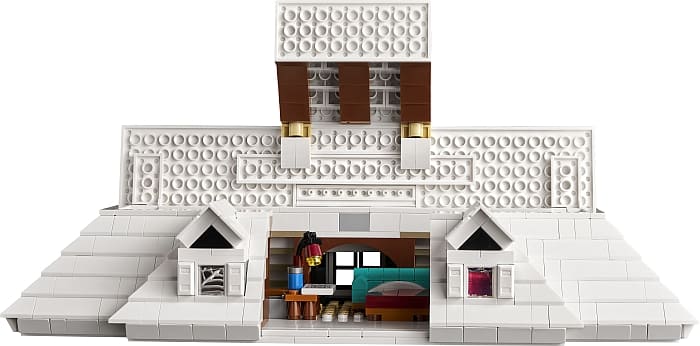
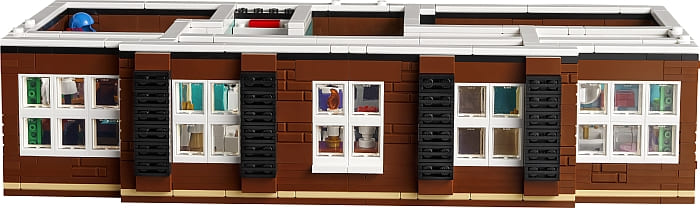
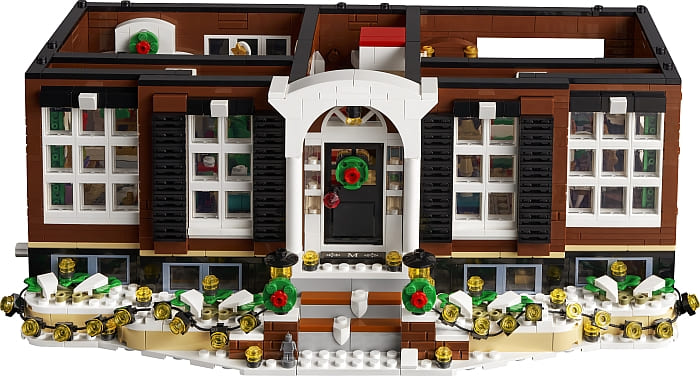
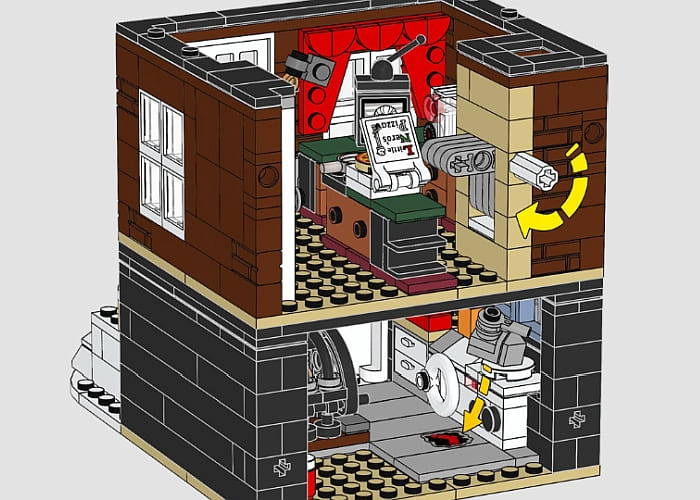
The first and second floors have left and right walls that can swing open independently. I particularly like the fact that the hinges for these walls sit slightly back. This means that when the wall is fully closed, the hinge is at its full extension and does not turn that wall section into a weak point by allowing additional movement. The other hinge that I never expected is at the roof. It opens up just like the lid of a treasure chest and, just like a treasure chest, it has its own forgotten trinkets to indulge in when opened.
Now we move to the horizontal detachment. The back kitchen and basement are secured by two axles near their base and two pins near the top. So, if you find reaching in from above to be too much of a chore, you can take an additional step and remove the whole back section of the house. In fact, you may have to do this in order to operate the laundry chute that drops the iron. This leads me to an interesting twist…
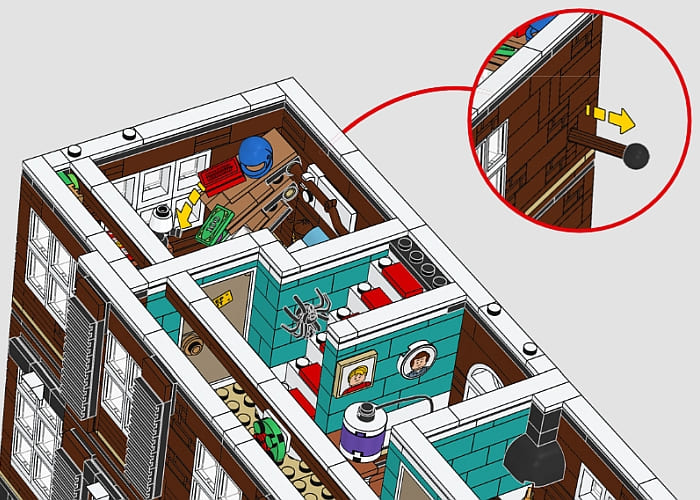
Many times, we reach into a scene in order to recreate some sort of action. Well, by planning which moments LEGO designers felt were the most dynamic, they added little knobs around the model in order to move interior elements and bring them to life. In other words, they provided additional access to the interior by removing our hands from being in the way.
Ultimately, the designers looked at each and every section and didn’t try to fit it in a single building style. Rather, they thought about what would make the given section of the model the best access for enjoying it. All of which makes for a very fun and refreshing build experience.
LEGO HOME ALONE – NARRATIVE ACTION ELEMENTS
Nine times out of ten, when you add an action element, the action comes first and then you make up your own story for what is going on. A boulder falls, a missile fires, something gets pushed, etc. This is great when the goal is to help unleash someone’s imagination. But here there is an example of a different type of action element and I think it’s awesome.
Sometimes, like with this set, the story comes first. What you then end up with are action elements that try to recreate a given moment. What I wasn’t expecting was how that simple approach made for some very engaging action elements. Given their specific nature, it would be hard to point to any one of these and say, “That’s a great building technique”. But the approach to building these elements gave each scene ten times the personality.
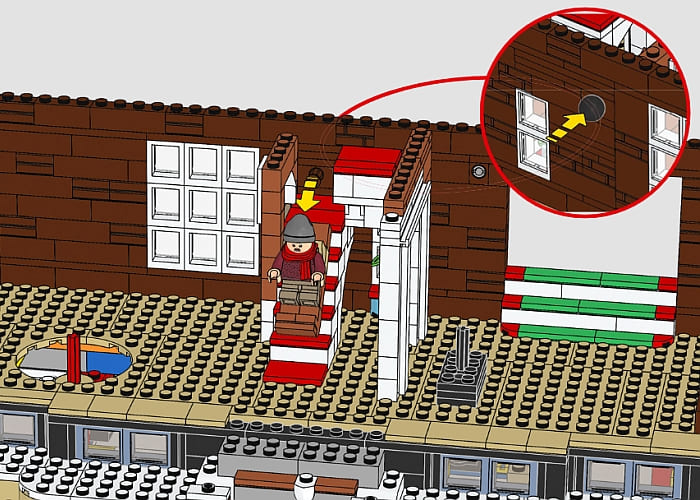
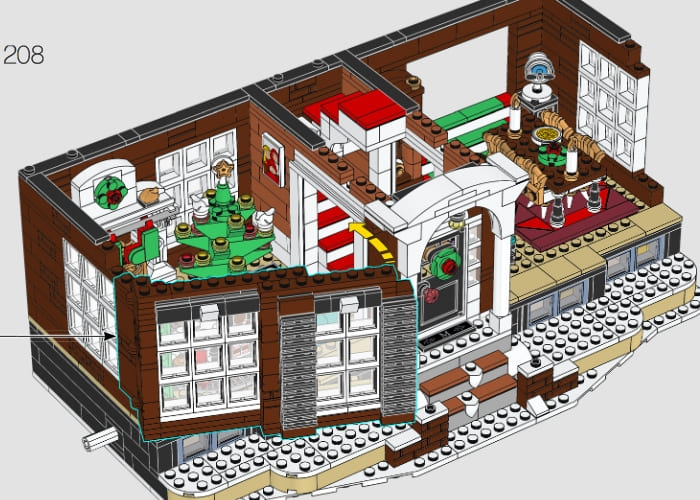
A train rotating around a track, a record revolving on a turntable, shelves collapsing, an iron falling, sledding down the stairs, even the boiler opening up and lighting up, are all relatively simple elements mechanically speaking, but thanks to the movie they are based on, each feels larger and more important.

The collapsing shelves especially made me pause. From a generic action element stance, I’d never thought to sequence three shelves to work together purely based on their own geometry. But put them together and they recreate an iconic moment you relive from the film.
As I mentioned earlier, most of the time I feel like action elements take away from large display sets. But this is one of those times when they add a lot to it. So, my advice is that if you are working on a creation that involves a particular intellectual property, try coming at an action element story first. It might lead you to some pretty interesting mechanisms.
LEGO HOME ALONE SET – APPLYING WHAT YOU LEARN
When LEGO models get large, accessibility becomes a crucial part of the design. Having a big creation is cool, but if people can’t see or reach any of the details it becomes less awesome. Additionally, it is not necessary for every access point to operate the same way. Freeing yourself from this way of thinking can allow you to utilize space better. The basic rule of thumb is to ask yourself, what is the most important part that people need to see or get to. If you know that, you can custom-build a way to access that section.

As for action elements, I never really thought too much of them. Generally, I divided models into two major categories: playsets and display models. If a creation had an action element, it tended to go into the play category. But actions that stem from a story first definitely feel more like a display model, which adult LEGO fans gravitate towards. This also made me realize why I liked the #10262 LEGO James Bond Aston Martin set so much; all the gadgets came from the film first.
As for the types of questions you need to ask yourself when designing in this manner, two come to mind. Either, what was the most memorable element that moved in the story? Or, what fundamentally changed the scene? These are two simple questions to get to the root of what will make the best impact and where your efforts will show the best. Of course, you can probably come up with more detailed and appropriate questions based on the intellectual property you’re working with, but these should put you on the right track.
What do you think? How do you like the LEGO Ideas Home Alone set? Do you have it already? Did you have a chance to build it? How do you like the accessibility options and action features? Did you notice any other interesting building techniques? Feel free to share your thoughts and discuss in the comment section below!
And you might also like to check out the following related posts: