Last weekend, while many of us were busy with holiday shopping, LEGO quietly added the 2022 LEGO Monkie Kid sets to the Online LEGO Shop. While Monkie Kid usually appeals to kids, it is also popular with LEGO Ninjago fans as the themes are so similar. And it is also of interest to those who like unique elements and colors. So, let’s take a look at what’s coming!
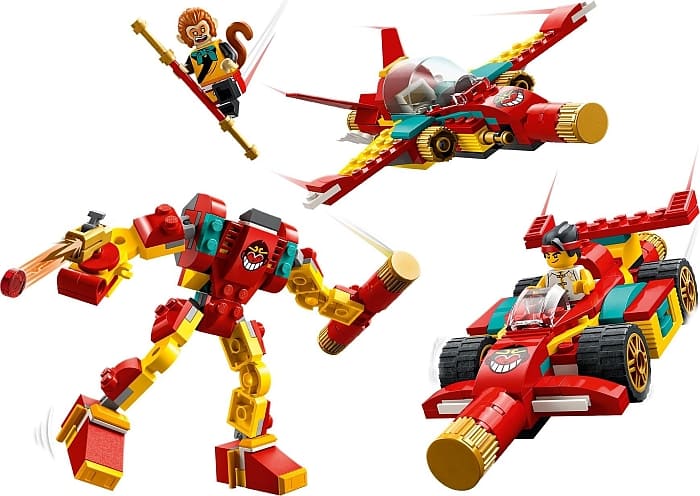
#80030 LEGO MONKIE KID’S STAFF CREATIONS –This set reminds me so much of some of the previously released LEGO Ninjago vehicles! It features a buildable mech, racecar, and airplane, each with easy-to-attach parts so you can mix the models together to make your own unique creations. The set also comes with a new-for-January-2022 Monkie Kid minifigure in a training outfit and the Monkey King with The Golden Staff. 309 pieces, price: $34.99.
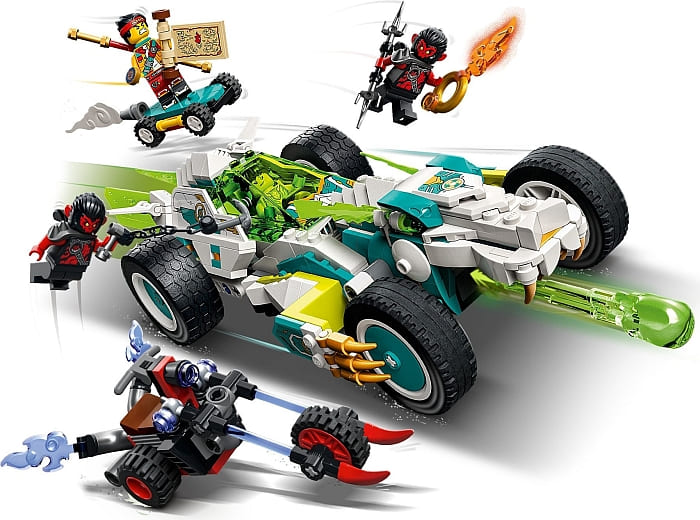
#80031 LEGO MONKIE KID MEI’S DRAGON CAR – Mei’s awesome vehicle has a spring-loaded shooter, an opening minifigure cockpit, and new-for-January-2022 neon-yellow LEGO elements. Included are Mei, Monkie Kid, and 2 Shadow Monkey minifigures with cool weapons and accessories, plus Monkie Kid’s buildable Cloud Board and the Shadow Monkeys’ trike. 456 pieces, price: $49.99.
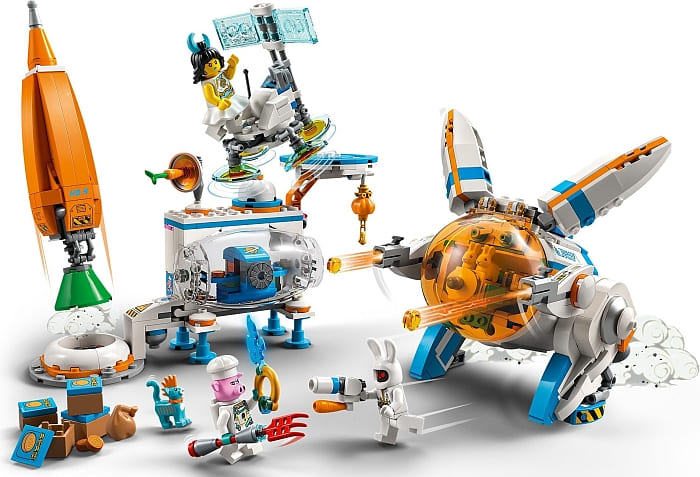
#80032 LEGO MONKIE KID CHANG’E MOON CAKE FACTORY – This set is a trip! We get Chang’e’s brick-built moonbase, with her live-streaming platform, moon cake factory production line, carrot-shaped rocket to export the cakes, and a stud-shooting bunny mech. There are also 3 new-for-January-2022 minifigures, Mo the cat and 2 bunny figures, plus weapons and accessories, including the blue Fire Ring. 609 pieces, price: $69.99.
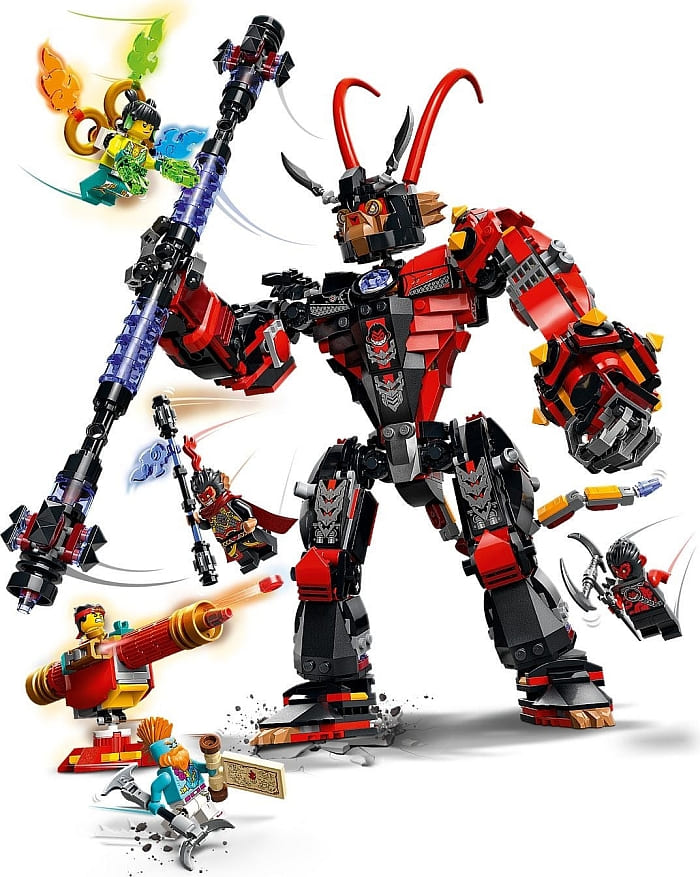
#80033 LEGO MONKIE KID EVIL MACAQUE’S MECH – The LEGO Monkie Kid line is known for its giant and highly detailed mechs. This fully posable mech has new-for-January-2022 joints for extra stability, and a big staff that the mech can hold or have clipped onto its back. There are also 5 minifigures – Mei, Monkie Kid, Sandy, Evil Macaque, and Rumble – with cool weapons and accessory elements, including Monkie Kid’s stud-shooting Golden Staff Cannon, map. and compass. 893 pieces, price: $79.99.
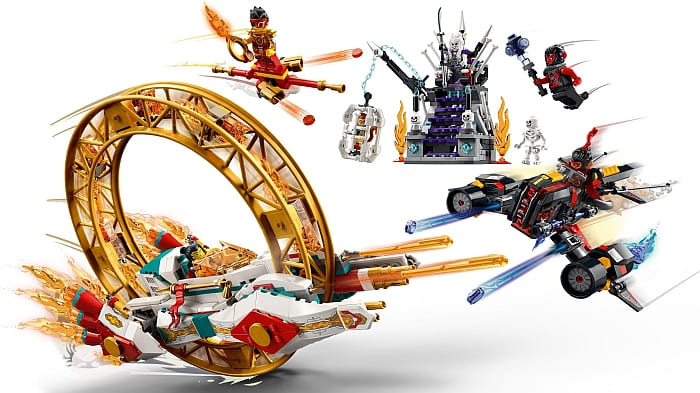
#80034 LEGO MONKIE KID NEZHA’S FIRE RING – This is a very interesting set, featuring Nezha’s Fire Ring monowheel vehicle with 2 flame-energy spring-loaded shooters, the Evil Macaque’s stud-shooting jet flyer, Monkie Kid’s Golden Staff Flyer, and the White Bone Demon’s throne with a hanging bone cage and prison cell. There are 6 minifigures in the set, including Monkie Kid with new-for-January-2022 battle armor decoration, plus weapons and accessory elements such as Nezha’s iconic spear and attachable Fire Rings. 929 pieces, price: $99.99.
#80035 LEGO MONKIE KID’S GALACTIC EXPLORER – We talked about this set previously, but to recap, it features Monkie Kid’s Galactic Explorer spaceship and launchpad. The spaceship has 2 spring-loaded shooters, a minifigure cockpit, a cabin for the crew, and storage for the green Fire Ring, jetpack, and moon rover. The buildable launchpad also has lots of features, and there are 6 minifigures with assorted weapons and accessory elements, plus a Robot Mo figure.1,356 pieces, price: $129.99.

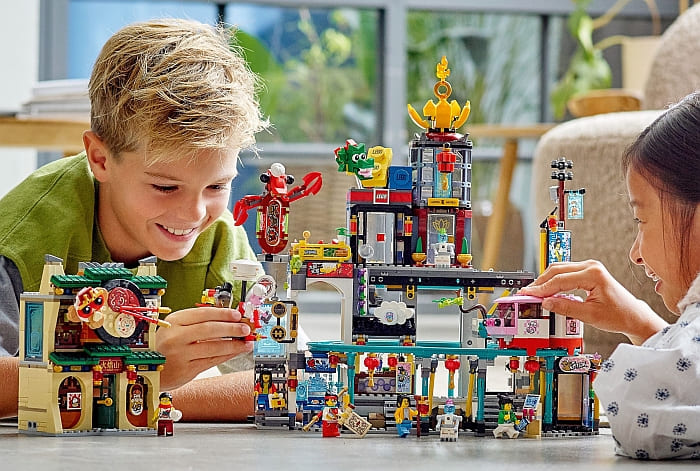
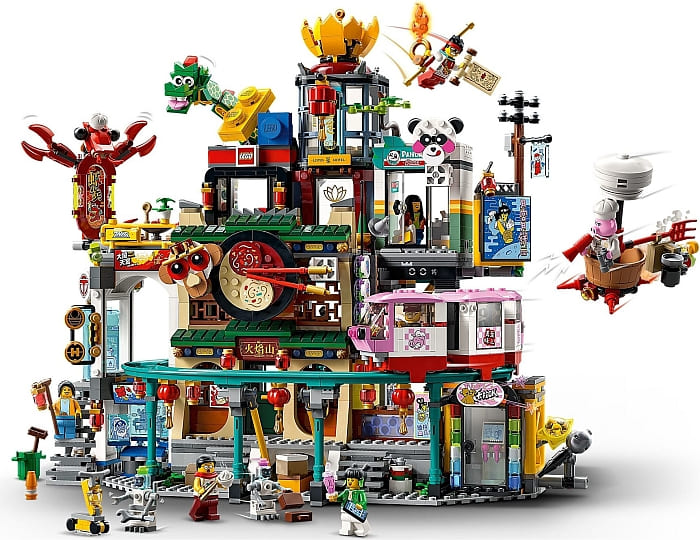
#80036 LEGO MONKIE KID THE CITY OF LANTERNS – This is the set most adult fans and LEGO Ninjago fans are most excited about, as it appears quite similar to the large and highly detailed LEGO Ninjago City sets. It features a LEGO store, hotel, Speedy Panda store, 2 restaurants, karaoke booth, bubble tea café, and a rapid transit train and track that weaves its way around the city. The buildings are easy to detach and can be combined in multiple ways to create a unique city. I’m sure many people will use this set to enhance their LEGO city and/or LEGO Ninjago dioramas. 2,187 pieces, price: $149.99.
LEGO Monkie Kid is similar to LEGO Ninjago in many ways, but it also has its own imaginative details and color-scheme. My personal favorites are the previously released little shops and dwellings, the new City of Lanterns, but there are also sets for those who love mechs, vehicles, and unique minifigs. If you would like to check out the currently available and upcoming selection, visit the LEGO Monkie Kid section of the Online LEGO Shop.

What do you think? How do you like the LEGO Monkie Kid collection? And what do you think of the sets coming next year? Are you excited about any of them? Feel free to share your thoughts and discuss in the comment section below!
And you might also like to check out the following related posts: