The 2021 LEGO Friends collection includes several truly delightful offerings. Today, we will take a closer look at two of the mid-size sets; the #41444 LEGO Friends Heartlake City Organic Cafe, and the #41447 LEGO Friends Heartlake City Park.
The #41444 LEGO Friends Heartlake City Organic Cafe isn’t just another eatery in Heartlake City. It is actually a well-thought out and presented multi-use environment for growing food, preparing food, delivering food, consuming food, and composting food waste. And all of this is packed into a 10×3 inch footprint and using only 314 pieces.
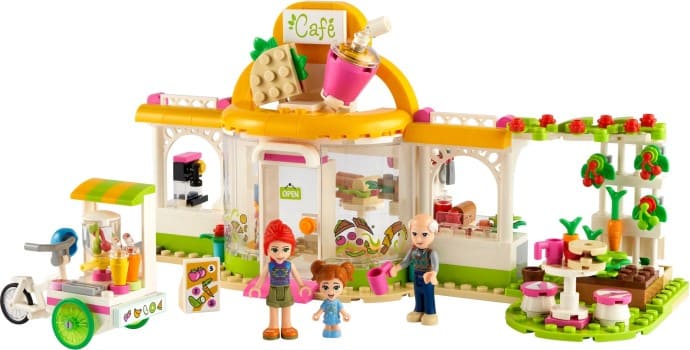
The box includes two instruction books, four numbered bags with all the parts, two separate arch pieces, a sticker-sheet with 13 stickers, two mini-dolls (Mia and Grandpa Marcel), and a cute micro-doll, granddaughter Ava.

The first instruction book is only 16 pages long with building steps to build the juice delivery trike and some outdoor accessories for the cafe from the first numbered bag. The trike is a great little model, with a juicer, fruits, and cups with straws. It would look perfect on any LEGO City street!
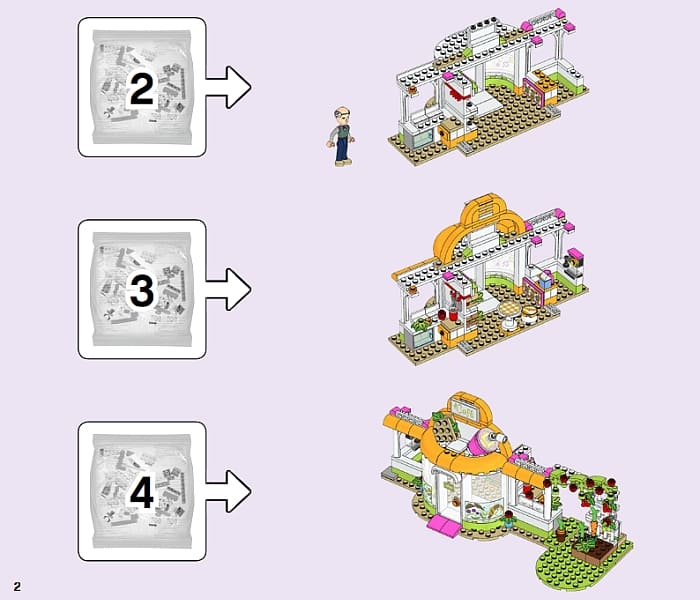
The second instruction book is 86 pages long with building steps for the cafe itself. The second numbered bag establishes the foundation and outer walls of the cafe, the third numbered bag adds some of the interior decor for the kitchen area, and the diner area with all the furniture elements and accessories. The fourth numbered bag is for building the small archway connecting the cafe with the composting/recycling area and vegetable garden, as well as the sign above the entrance featuring an oversized sandwich and cup with straw.

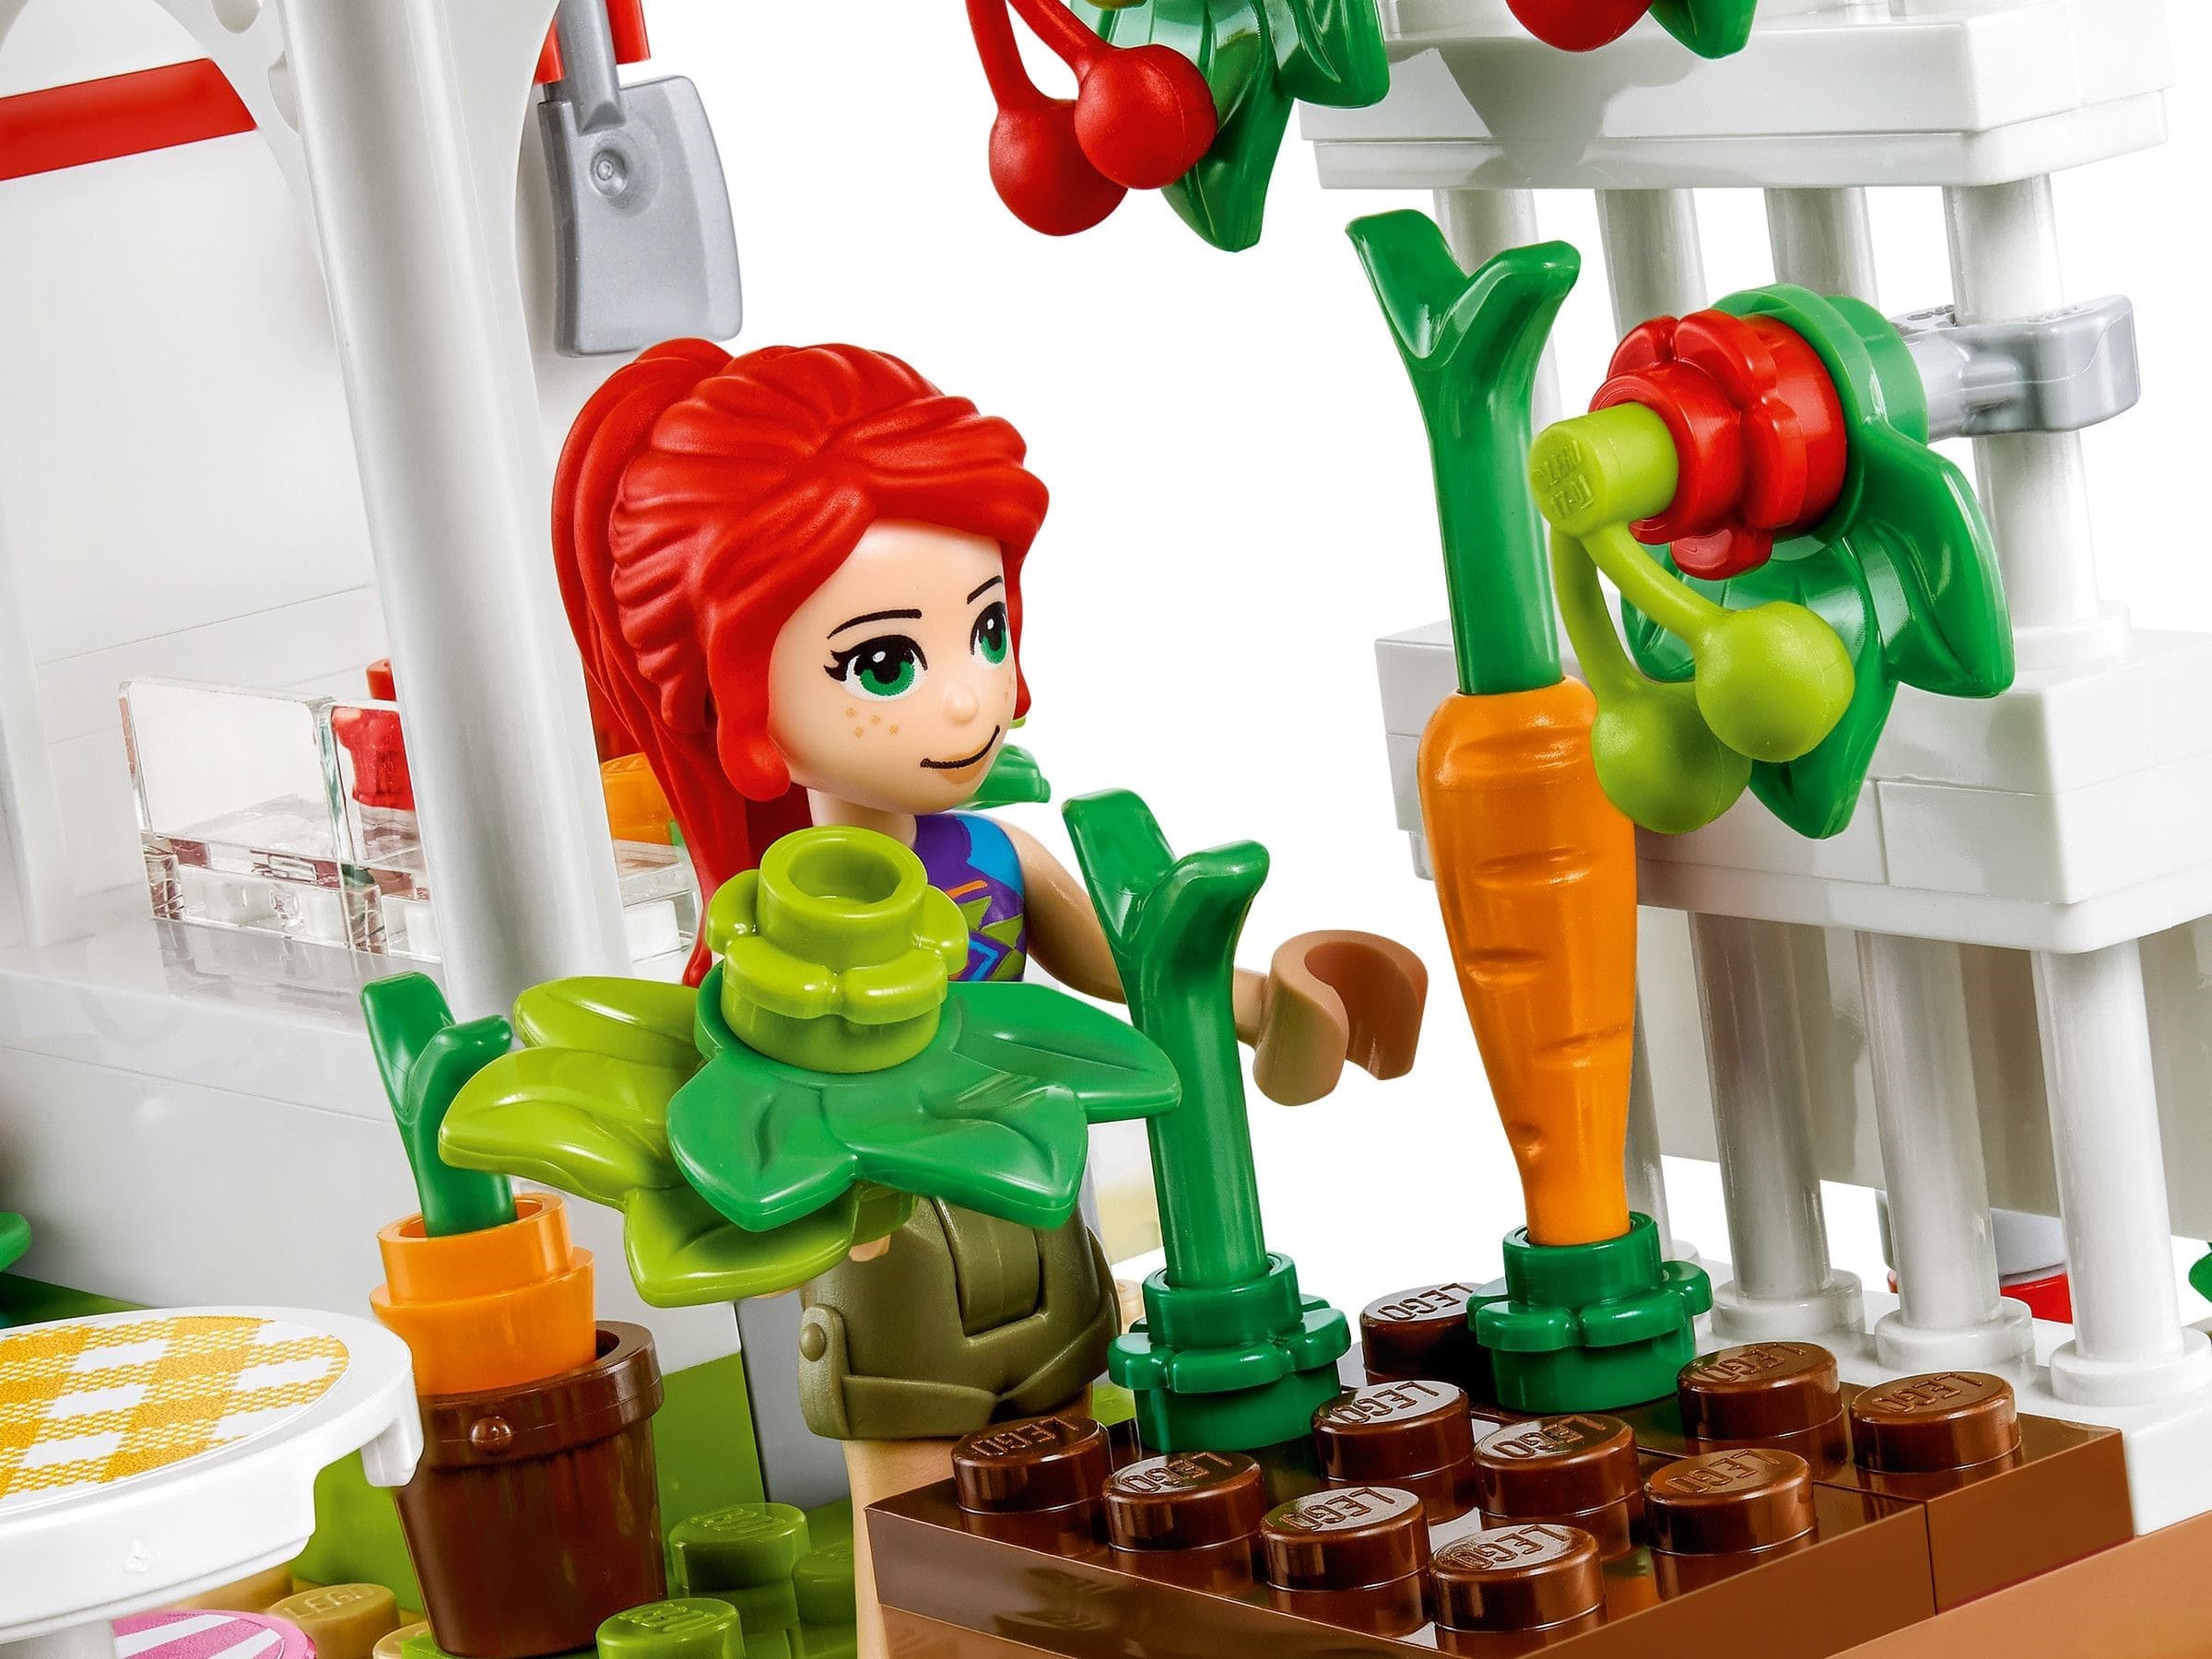
The exterior of the cafe looks cheerful and inviting, and I really like that the vegetable garden is right next door. Patrons can appreciate the growing fruits and veggies while they are munching on delicious sandwiches made with fresh ingredients right out of the garden. And the juice delivery trike can deliver delicious drinks around Heartlake City in an emission-free way.
The interior is also very nicely designed with space for everything. The kitchen on the right is well equipped with an oven for baking bread, and plenty of countertop space and utensils for building sandwiches. Right next to the kitchen is the area for composting organic waste and for recyclables.
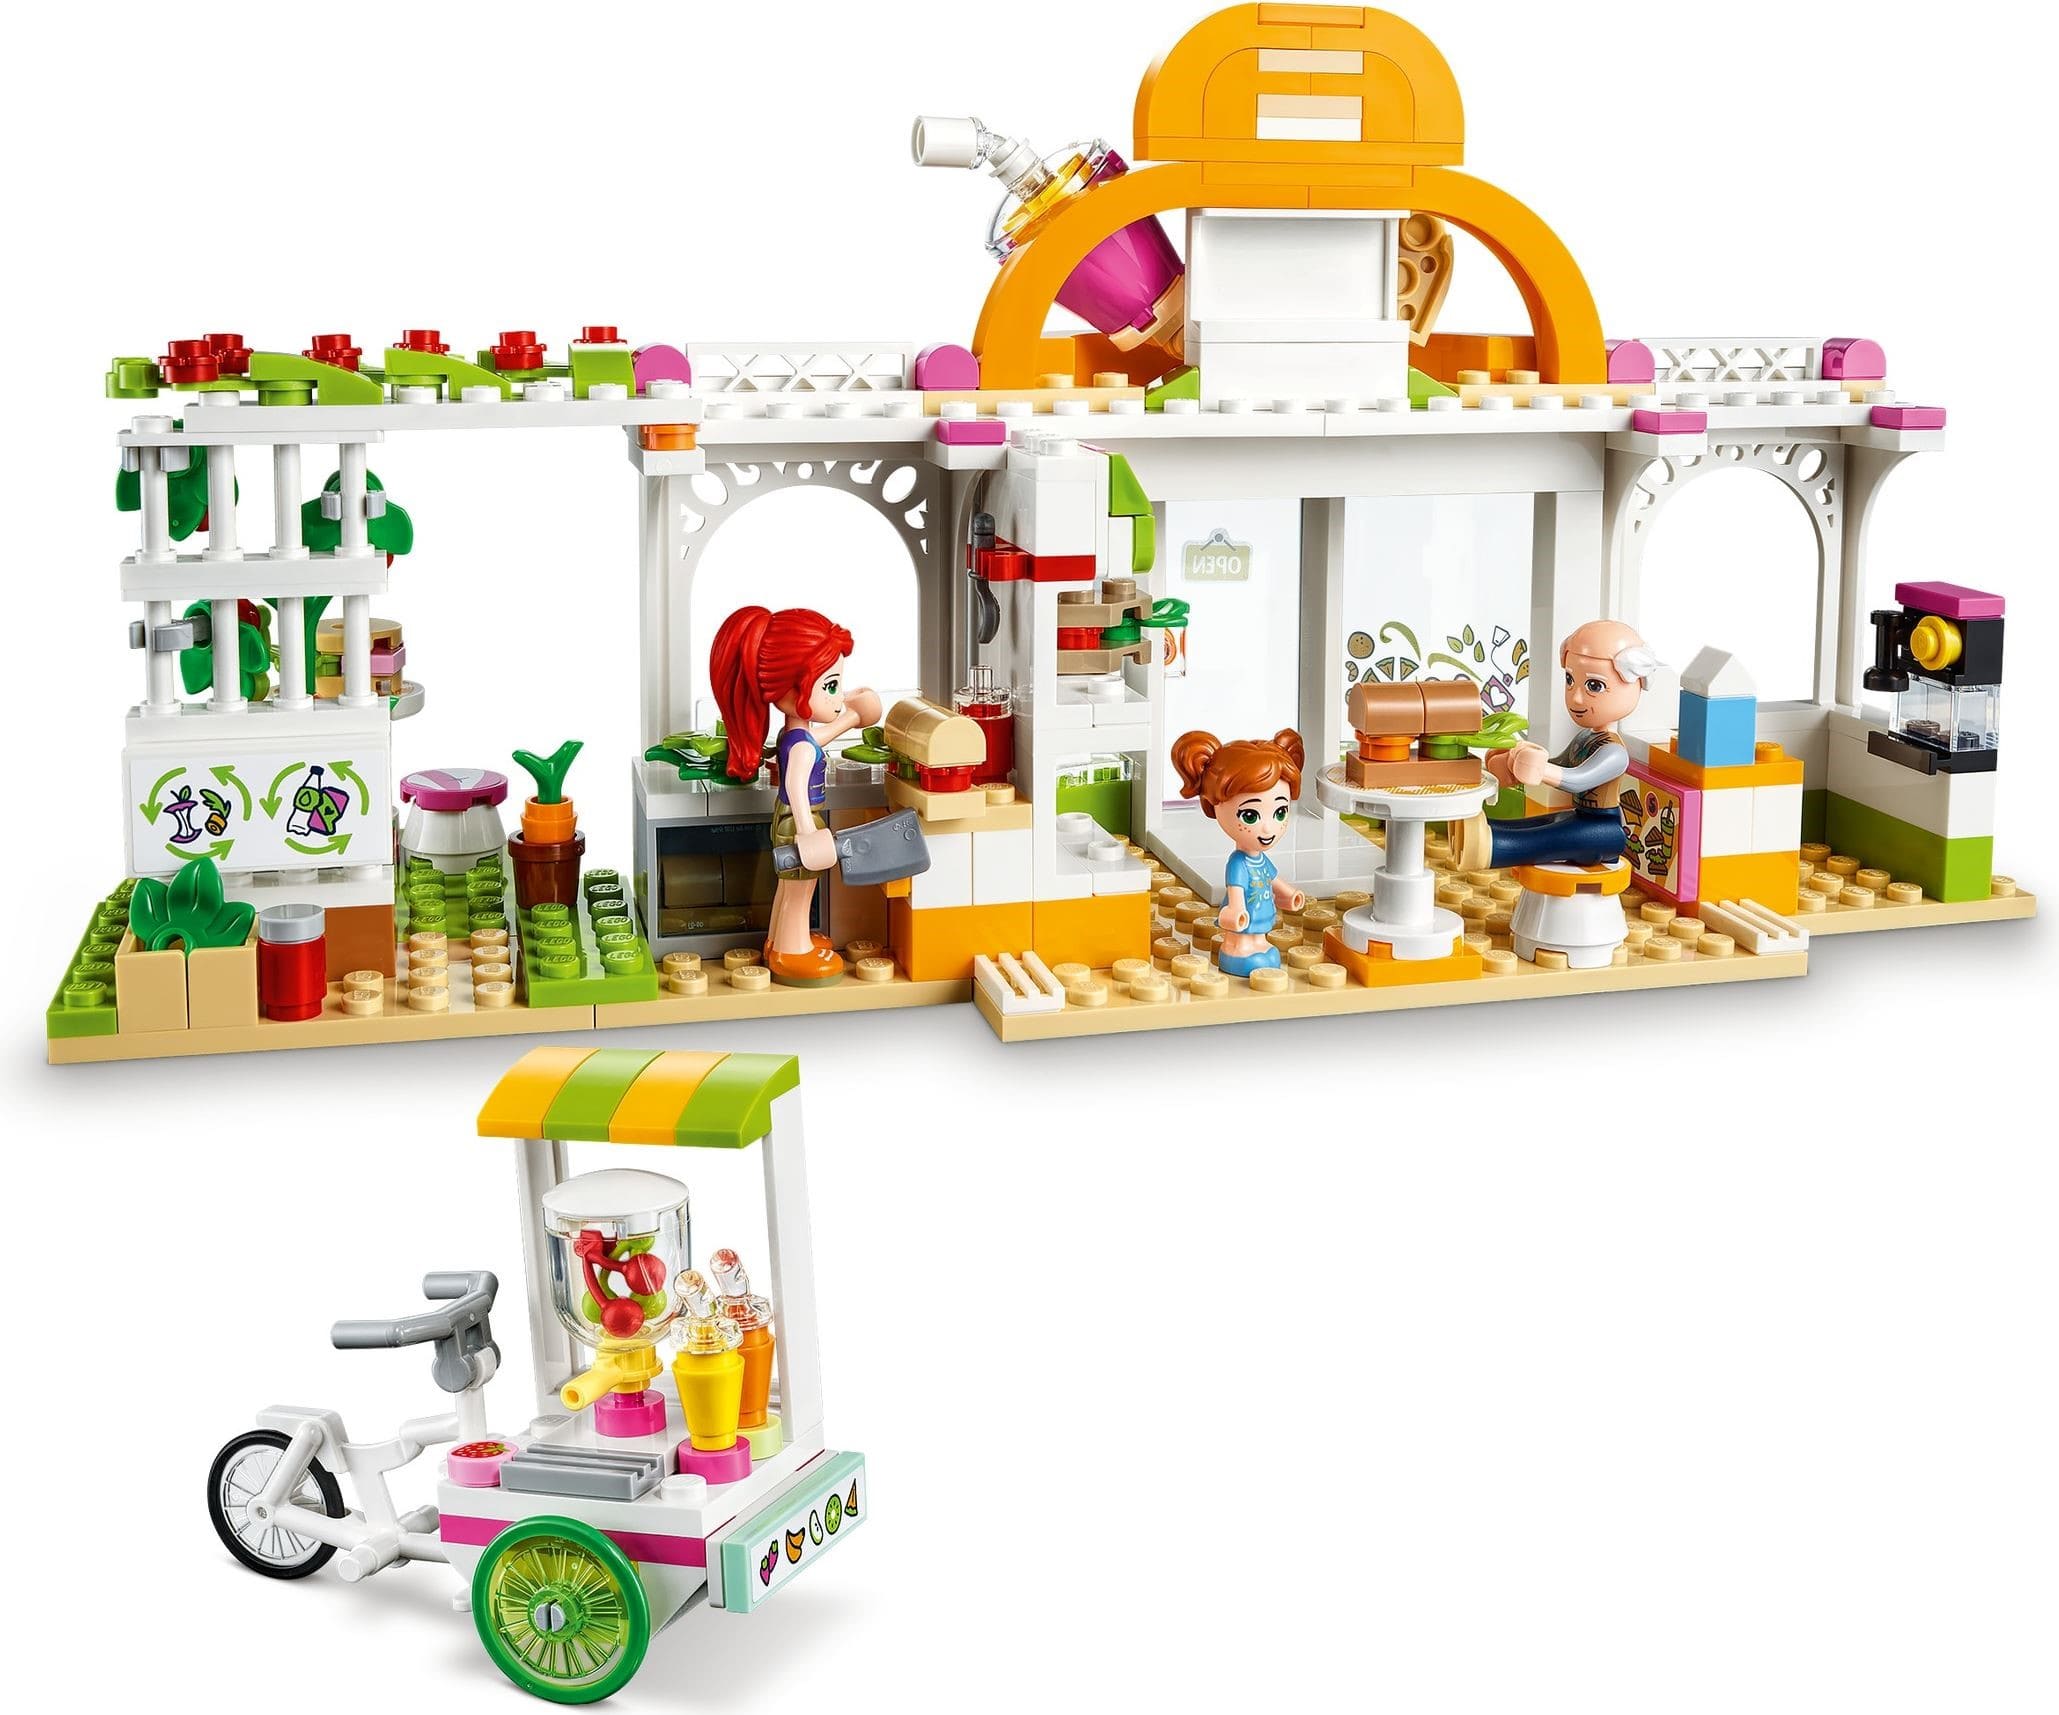
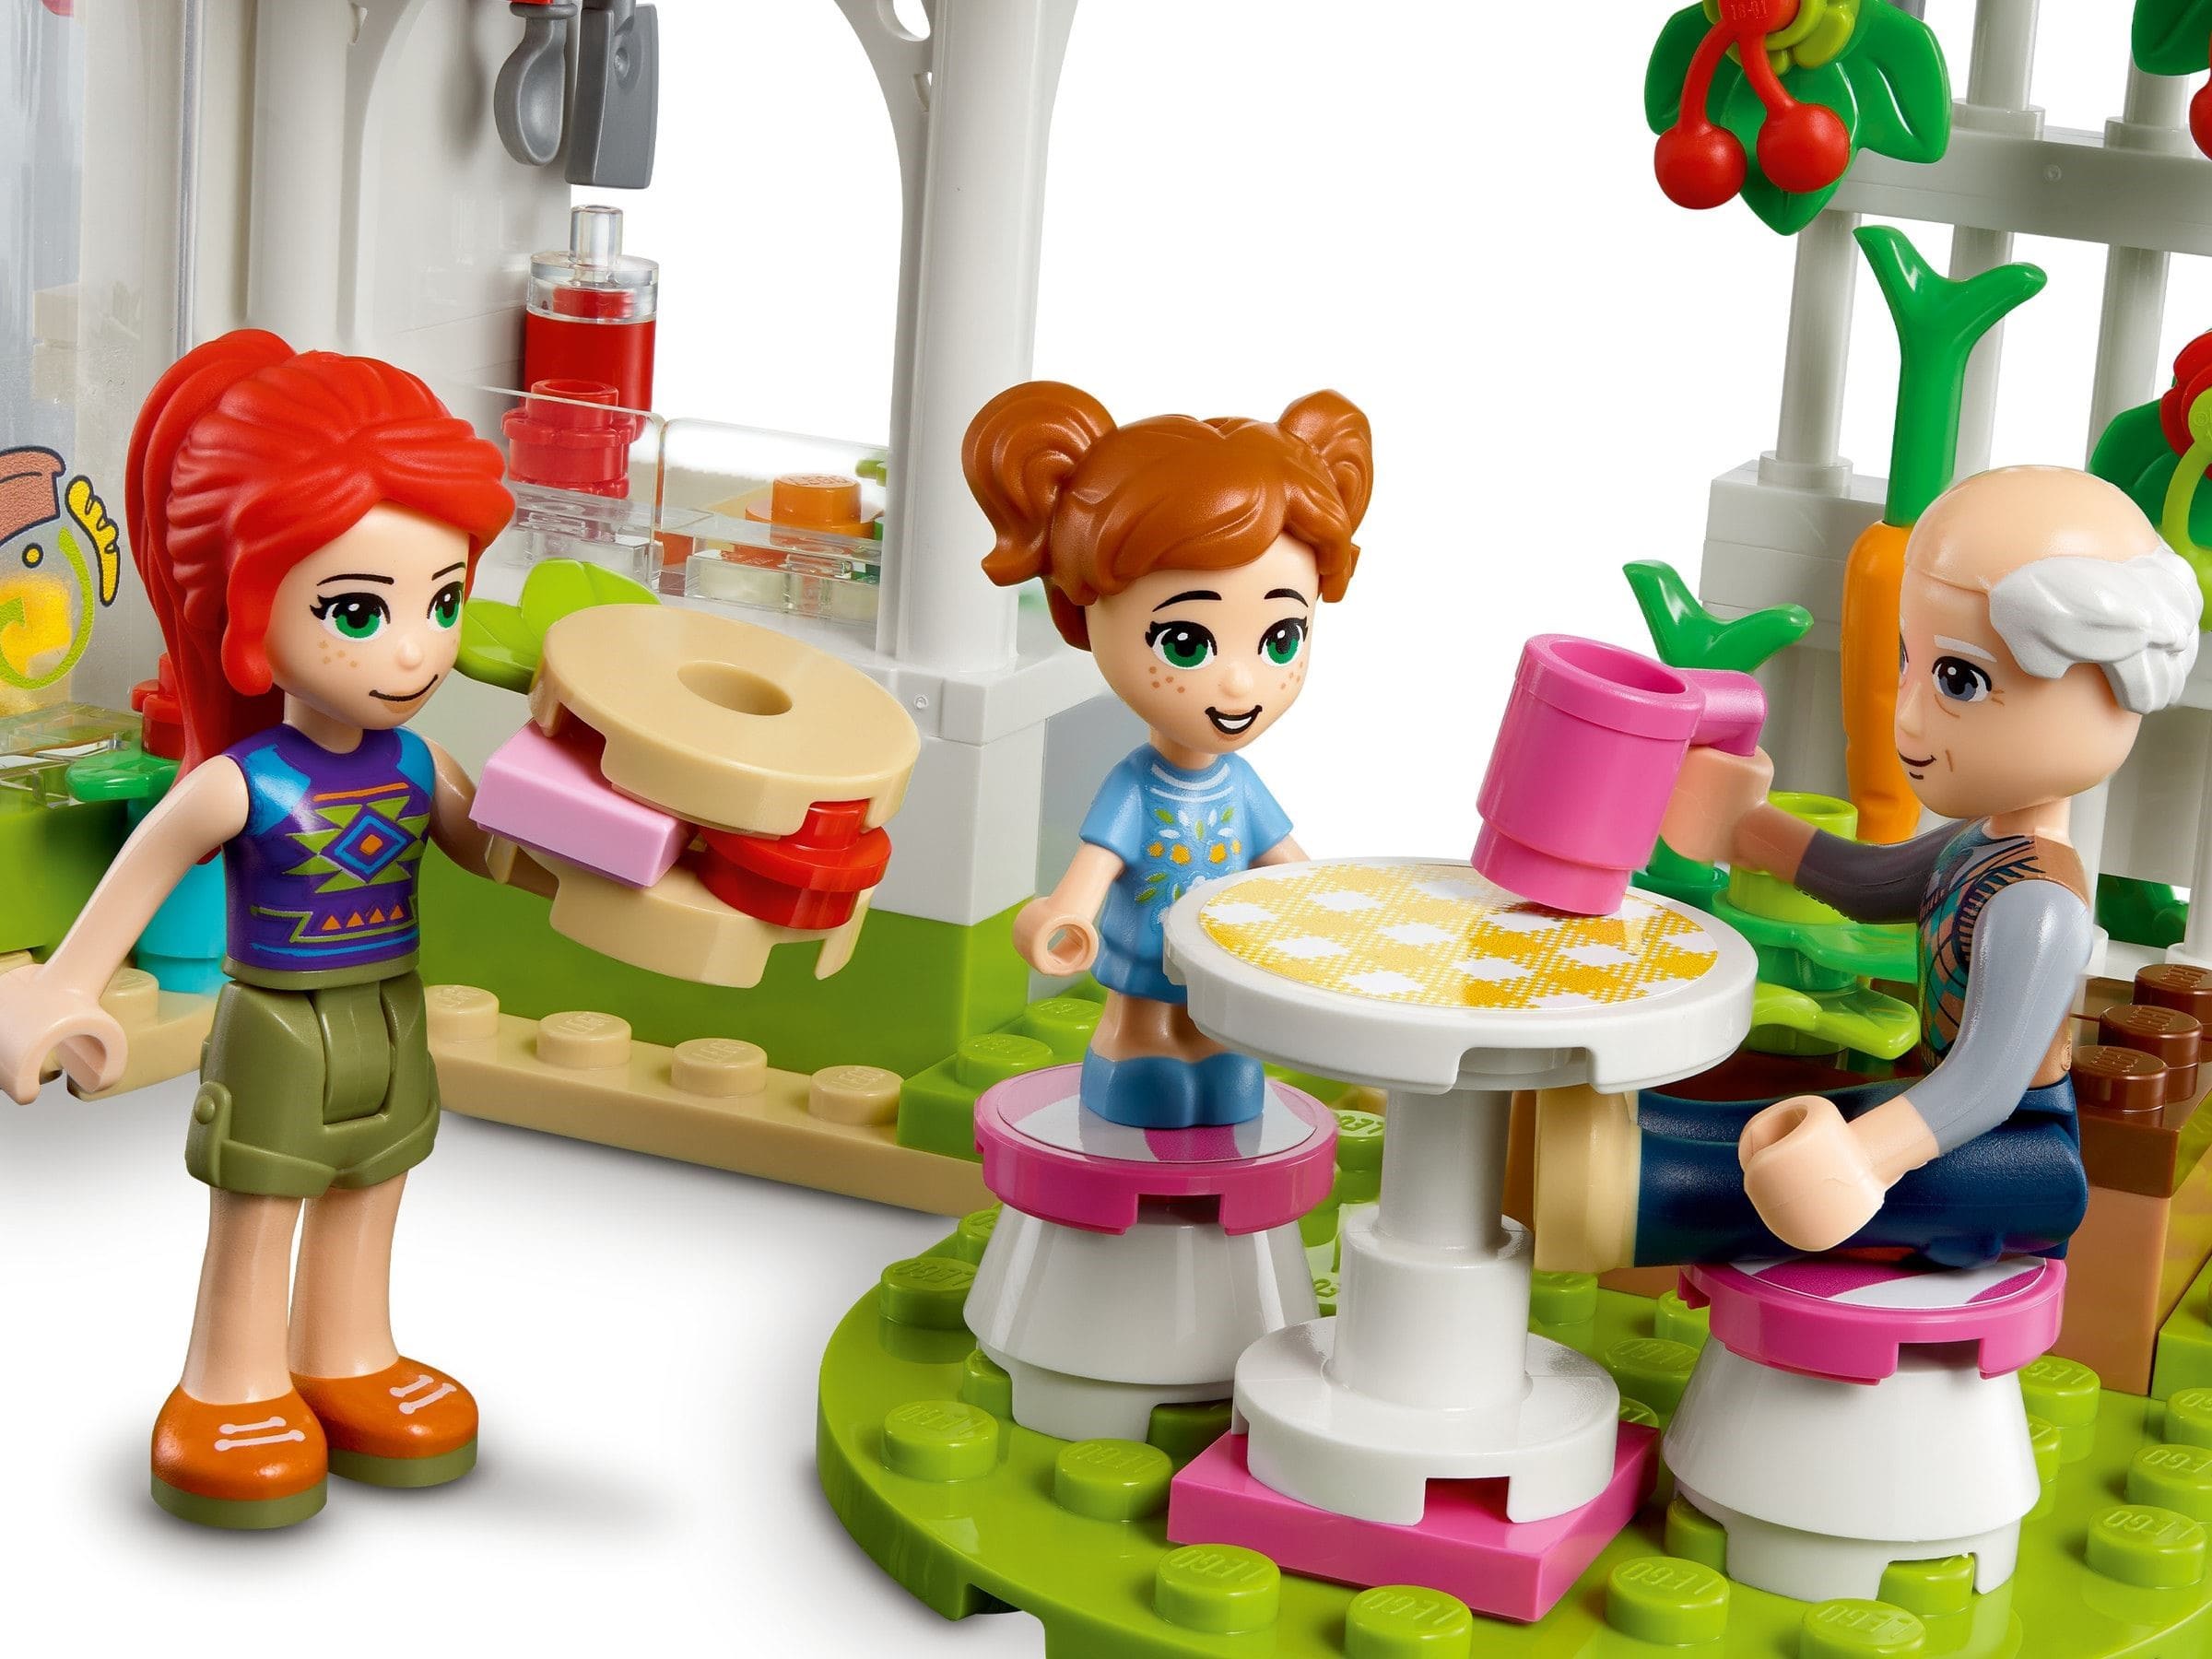
The middle section of the cafe is basically the lobby, where mini-dolls can pick up sandwiches from the display shelf and order coffee. There is also some seating for those who would like to hang out inside. And remember that there is also additional seating outside (which you can move inside, if you want).
The left side of the cafe houses the counter to place orders and a coffee machine. The open arches in front of the kitchen and the customer service area suggest that perhaps food and coffee can be picked up even without entering the building.
As you can see, there is a lot of great things going on in this set. As a frequent visitor of organic cafes, I’m happy to see that it accurately recreates the atmosphere and experience. Building this set is truly a joyful experience. My only complaint is that while Heartlake City Organic Cafe seems like a lovely and progressive establishment, poor Mia has to take care of everything all by herself; take orders, serve customers, run the kitchen, take care of the garden, and run the juice delivery bike. This set would have greatly benefited from having at least one more mini-doll to handle all the tasks. Other than that, I highly recommend this set. The price is only $29.99 and it’s available at the LEGO Friends section of the Online LEGO Shop.

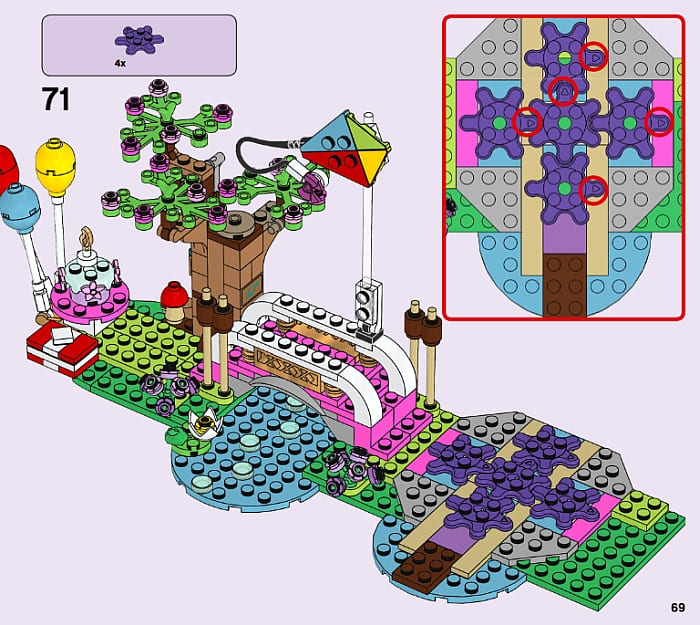
The #41447 LEGO Friends Heartlake City Park is a slightly larger mid-size set with 432 pieces in five numbered bags (plus one separate large plate), one instruction booklet, one small sticker-sheet with 10 stickers, three mini-dolls (Olivia, Emma, and Ethan) and one cute micro-doll, Henry. The story is that it’s Henry’s birthday, and he is celebrating with his friends in a pleasant park.

The set is separated into several sections. From the first and second bags, you build the birthday party section and the small creek with a bridge over it. There are several play features in this section. The tree has an attached piñata that kids can bash to release the candy inside, there is a nice looking kite to fly, three balloons, an attractively decorated birthday cake, and a birthday present.

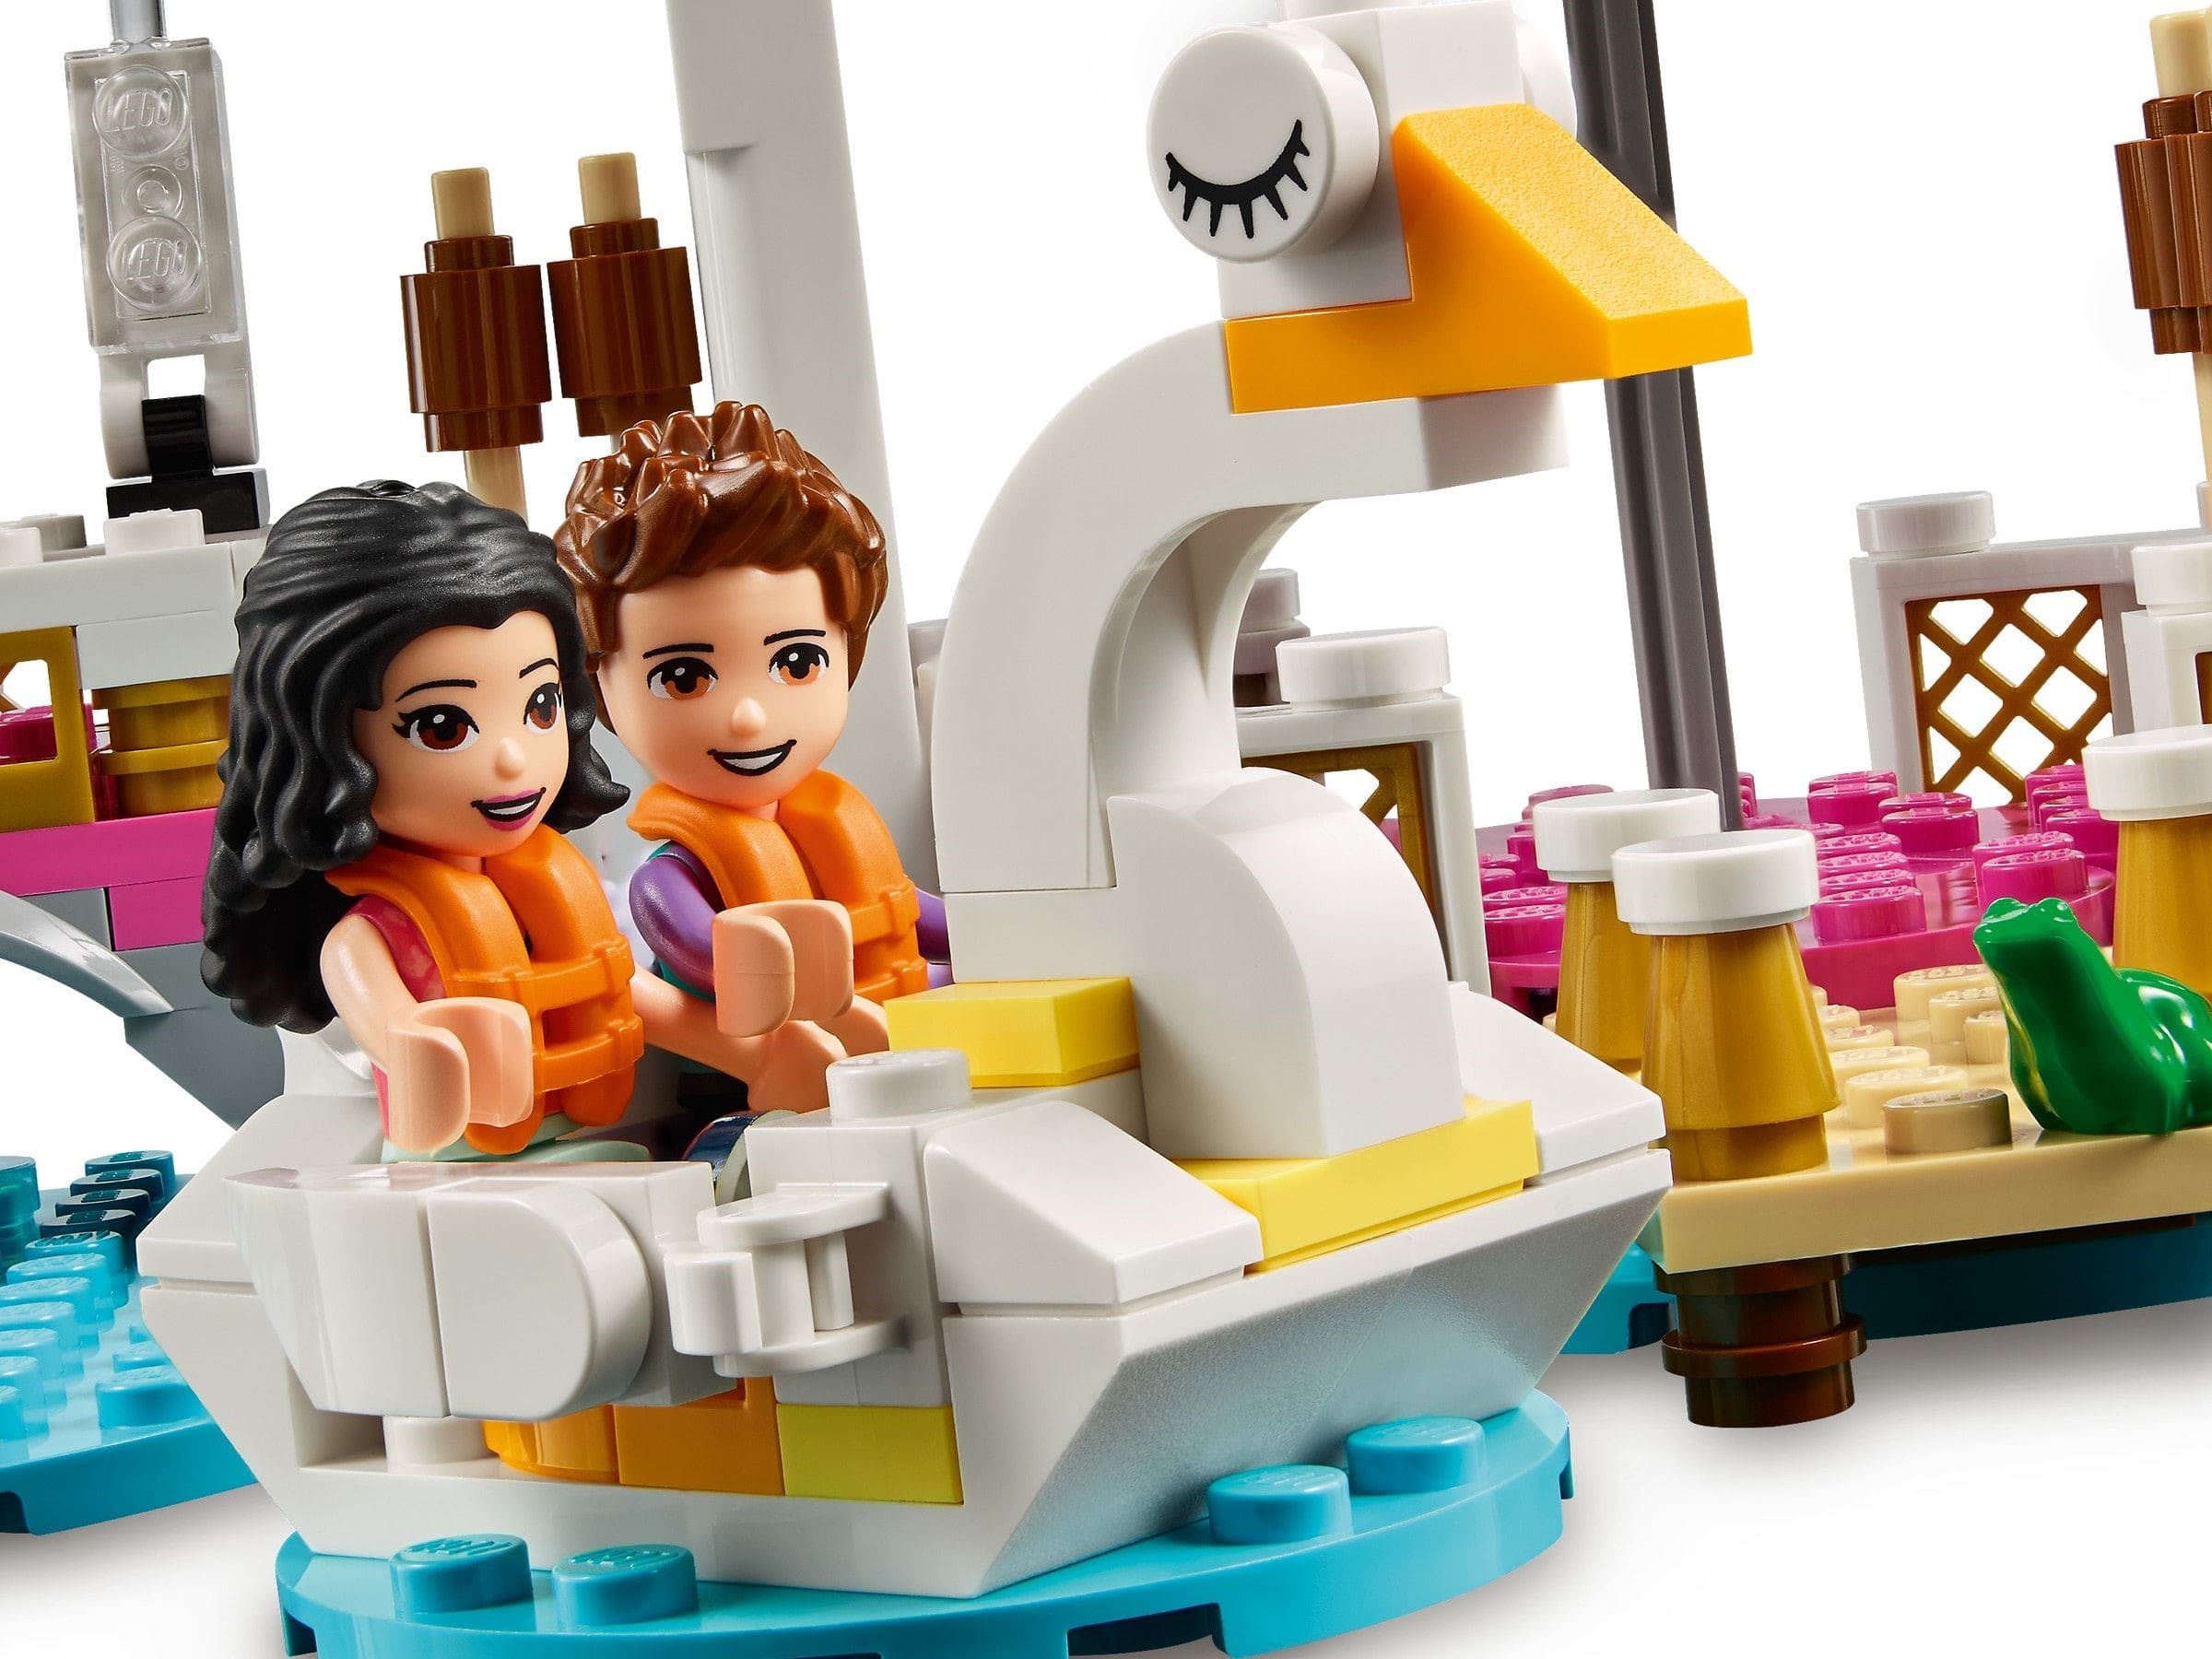
From the third and fourth bags you build the gazebo in the middle of the layout, which features a dance floor, and the elegant swan boat. The dance floor has an interesting spinning function, so the mini-dolls look like they are dancing. This contraption is built by using five large connecting gears covered with round plates, and connected to the gazebo’s roof with a LEGO Technic axle. When you rotate the large cone on top of the gazebo either way, the gears are activated, spinning the round plates. It’s a simple, but very effective function that works well.
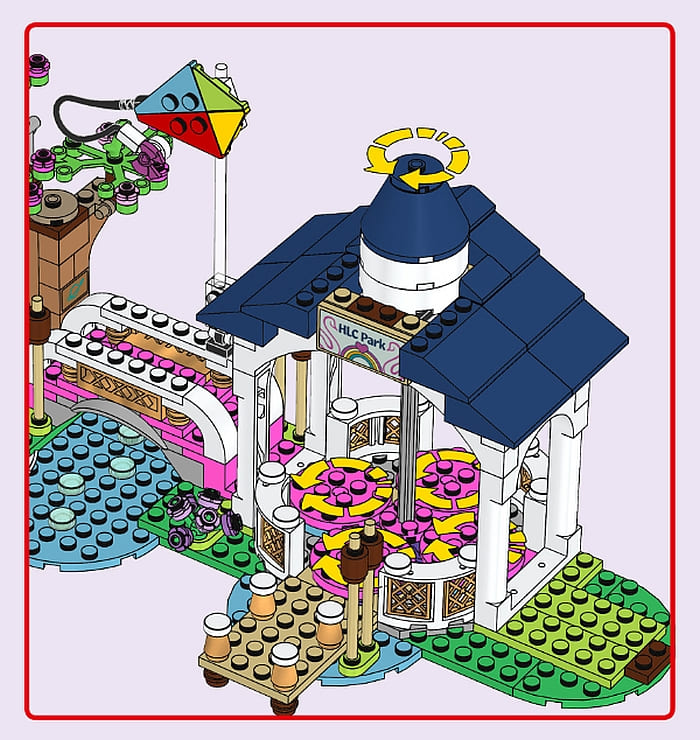
Also notice the new quarter round arch pieces around the gazebo with lattice window panes. They are going to be extremely useful in a lot of different applications. There is a small pier leading from the gazebo to access the swan boat. This is another lovely model with opening wing doors.
The final section of the set is the second tree on the right of the gazebo, which is built from the fifth bag. This tree can serve as an alternate place for setting up the piñata, and it’s also the home of a cute squirrel.
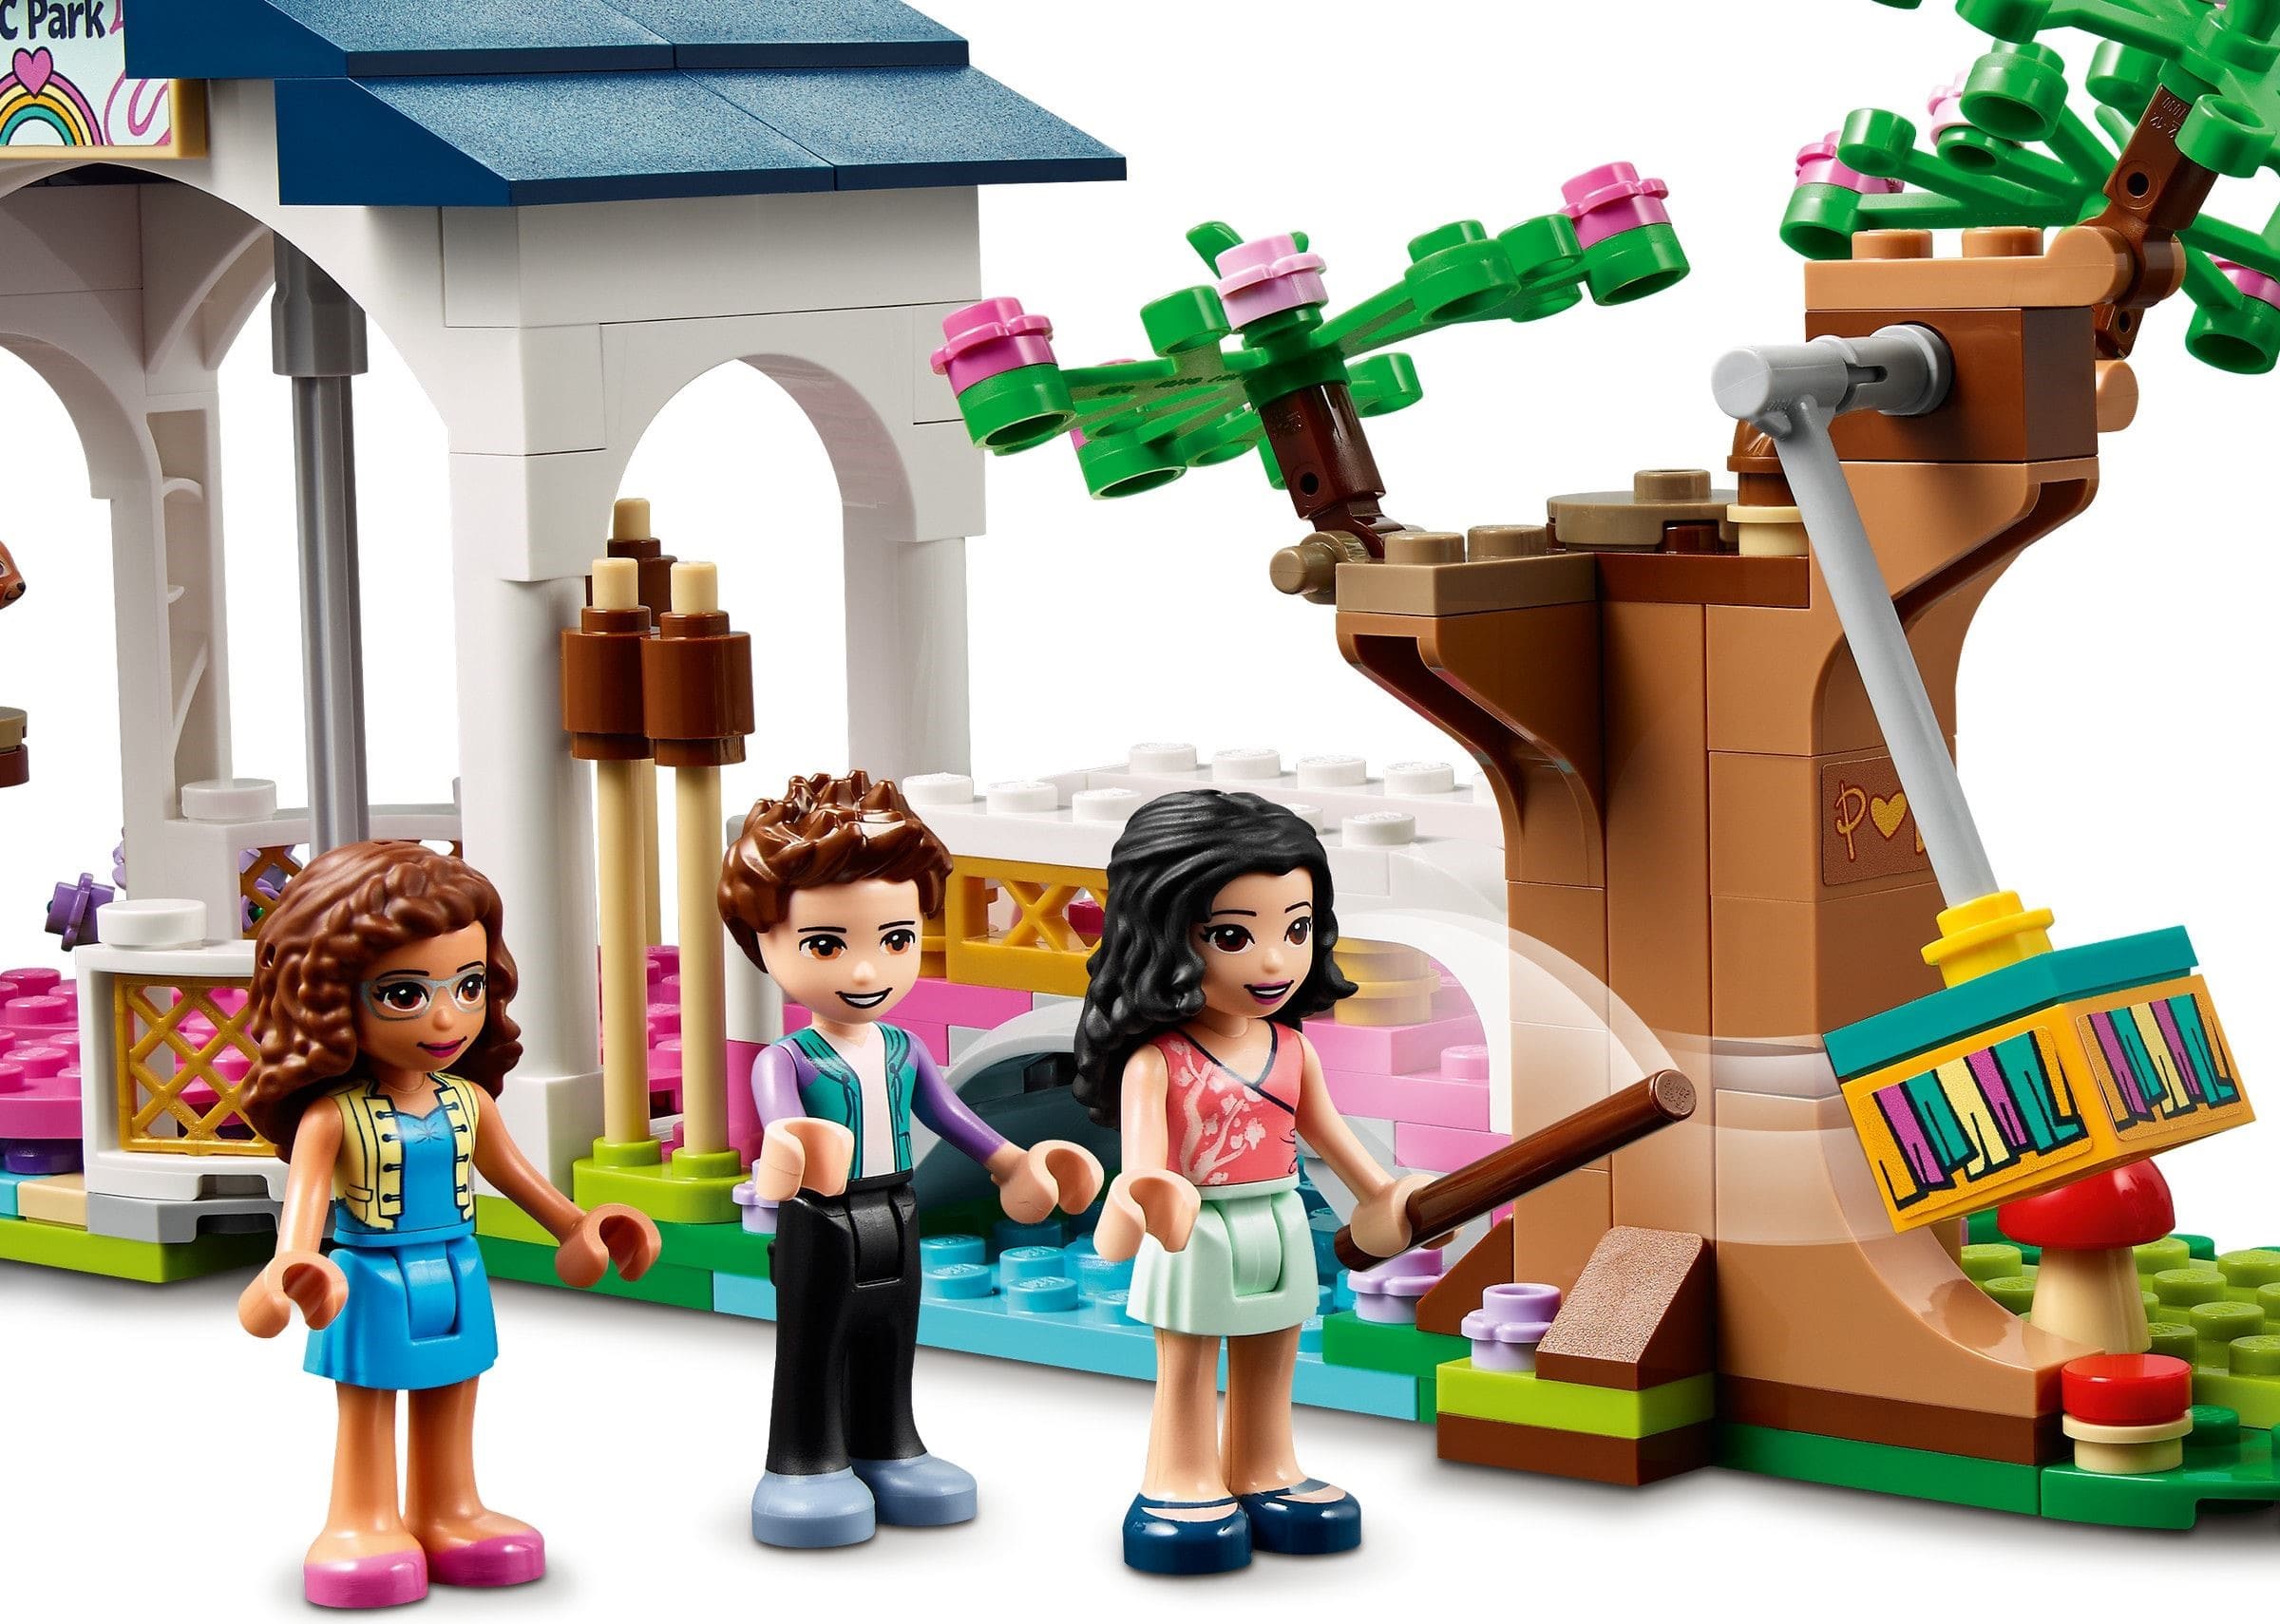
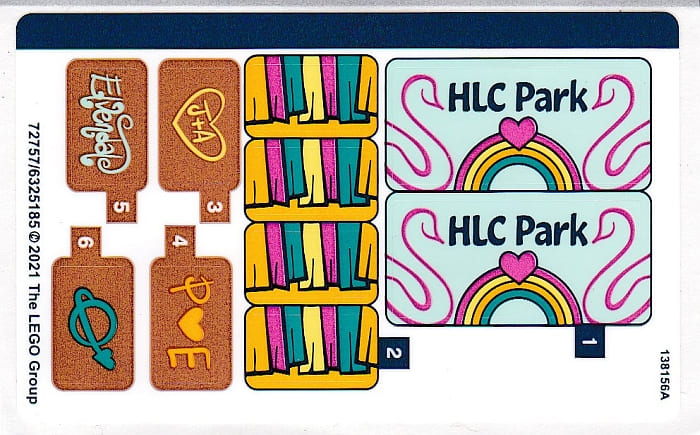
Red mushrooms and lavender flowers decorate the base of both trees. Four of the stickers decorate the trees with carvings, referencing Elvendale, Classic Space, and initials, which probably belong to the set designers.
In summary, this is another nicely designed set that would look good with a Heartlake City layout, a standard LEGO City layout, and would also work as an excellent birthday present/activity. If you would like to check it out, it’s available at the LEGO Friends section of the Online LEGO Shop.
I’m very impressed by the LEGO Friends sets this year. They have some of the most pleasing color-scheme I have seen in LEGO Friends sets, the subject matters are playful, educational, and even progressive, and the micro-dolls are super cute. I’m hoping to get some of the other sets as well, so look out for future reviews, and you can check out the full selection at the LEGO Friends section of the Online LEGO Shop.
What do you think? Do you like any of the 2021 LEGO Friends sets? Do you have any of them already? Feel free to share your thoughts and own reviews in the comment section below!
And you might also like to check out the following related posts: