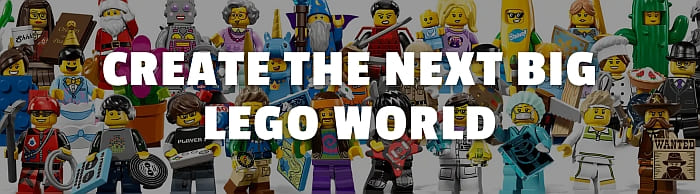
I mentioned last year that I was a beta tester for an exciting new platform that was developed by the LEGO Group in partnership with Tongal, called LEGO World Builder. You can read more about the platform in two previous articles that I linked at the end of this post. To recap, LEGO World Builder is somewhat similar to LEGO Ideas, but instead of submitting ideas for potential future LEGO sets, it’s for submitting ideas for new LEGO entertainment content (i.e. web series, TV series, and maybe even the next LEGO movie).

One unique feature of LEGO World Builder is that the original creator can ask for and accept help from other creative people on the platform to develop various aspects of their original idea. LEGO regularly monitors the platform, and just like on LEGO Ideas, original creators (as well as contributors) with accepted submissions share profits with the LEGO Group. There is lots of great content on the platform already, so if you want to check them out and even participate, visit WorldBuilder.Tongal.com.
The update that I wanted to share with you today is that one of the ideas called ‘Holiday Heroes’ is officially the first fan-made world on LEGO World Builder to be acquired for development by the LEGO Group. Created by Canadian LEGO fan, Eddy Beals, this world is a globetrotting adventure inspired by his passion for exploring different cultures. Just weeks after Holiday Heroes was published, the LEGO Group took note of the idea, and Eddy was invited to pitch his original world directly to LEGO’s development team. They were highly impressed, purchased the idea, and placed it into development.
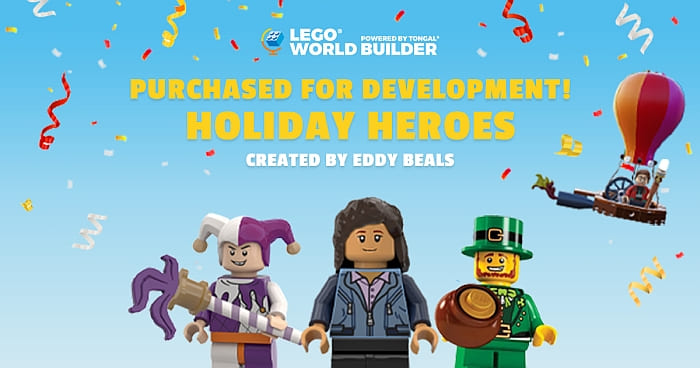
Eddy’s idea was created in response to the LEGO Group’s Holiday Special creative prompt that asked the community to dream up original holiday-themed worlds that could become the next big LEGO Holiday Special. Eddy’s idea of exploring different cultures also inspired other creators, and he received over seventy contributions from around the world, including new characters, storylines, LEGO builds, artwork, and more.
An article was published on the blog section of the LEGO World Builder platform, interviewing Eddy about his experience. It’s an interesting read as it gives us an idea both about Holiday Heroes as well as how the LEGO World Builder platform works. Below, I have copied the questions from the interview for your convenience, and you can also read the original here.
What was your experience creating this world on LEGO World Builder?
“It’s been a pretty wild ride. I had no idea what to expect when first creating Holiday Heroes on LEGO World Builder. It all started with a few notes in a notebook, then became character sketches, then a proposed theme, and then as people started contributing to Holiday Heroes, it became something much bigger than I could have imagined. For anyone with an idea of a world that they want to submit – go for it! You never know what can happen, and just the process of creating and collaborating is terrific in itself. For anyone already in LEGO World Builder, seek out other ideas to collaborate on – engaging with the ideas of others can spark something big!”
What was your inspiration for Holiday Heroes?
“The Holiday Heroes theme was inspired by my passion for learning about different cultures. The world is such a wide, beautiful canvas and filled with all kinds of people. Learning about different cultures is a great way to realize how different our forms of expression are, but also how we can share similar desires and values amongst ourselves no matter where we’re from. On a side note, I’m learning Japanese in my free time, and hope to be able to use that someday on a trip to Japan – maybe to check out Otsukimi for myself!”
What was it like pitching your world directly to the LEGO Group?
“I was pretty nervous going in, but felt great through the pitch meeting and after it. In my job, I get to deliver presentations and meet new people frequently but had never done anything quite like this. A friend and teammate at work gave me some excellent advice on how to deliver pitch presentations, so I’m quite grateful to him and to everyone who was supportive of me along the way. During the presentation, I was really happy to receive questions from the LEGO team that demonstrated that they were engaging with the theme fully and already playing with the possibilities. That left me on a high note once the meeting concluded.”
Can you tell us more about the opportunity LEGO World Builder created for you?
“LEGO World Builder was an amazing opportunity for just being able to create a world and collaborate with others on it. When you have others interacting with an idea you started, it can feel like something much bigger than what you first thought of. There was a period of time where new collaborations from others were pouring in, and it was touching to see so many people wanting to add to the story in amazing ways – whether it was interesting new characters, exciting settings, beautiful mockups, unique items, and much more! Funny enough, I started learning about new holidays across the world such as Samhain and St Martin’s Day through collaborating with others. A huge ‘thank you’ to everyone who contributed to Holiday Heroes. It wouldn’t be what it is without your contributions and enthusiasm.”
Interesting, isn’t it? I’m looking forward seeing how this first idea develops now that LEGO purchased it. In the meantime, if you have an idea on your own, or if you would like to see if you can contribute to the ideas of others, visit WorldBuilder.Tongal.com.
What do you think? Have you been participating at LEGO World Builder? Did you contribute any of your own ideas yet? And how do you like the platform? Feel free to share your thoughts and discuss in the comment section below!
And you might also like to check out the following related posts: