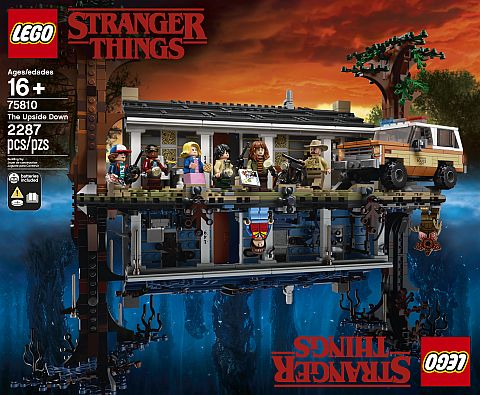
One of the most unusual LEGO sets, the #75810 LEGO Stranger Things: The Upside Down became available earlier this month. In general, it has been well received by LEGO fans and fans of the Netflix show, but there are also some… shall we say… strange things about this model. So, before we talk about the set itself, let’s discuss some of the background of its release.
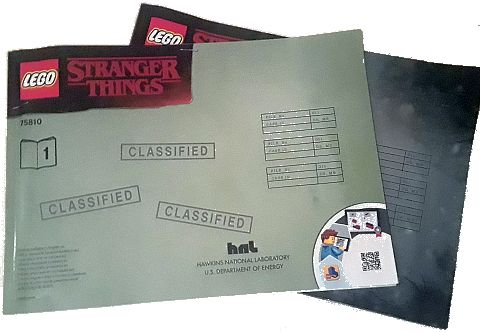
➡ LEGO STRANGER THINGS STORY: First of all, if you are not familiar with the Netflix show, the set’s instruction booklet helpfully includes the following summary: Stranger Things is set in the fictional rural town of Hawkins, Indiana, during the early 1980s. The nearby Hawkins National Laboratory ostensibly performs scientific research for the United States Department of Energy, but secretly does experiments into the paranormal and supernatural, including those that involve human test subjects. Inadvertently, they have created a portal to an alternate dimension called “The Upside Down”. The influence of The Upside Down starts to affect the unknowing residents of Hawkins in calamitous ways. The first season begins in November 1983, when Will Byers is abducted by a creature from the Upside Down. His mother, Joyce, and the town’s police chief, Jim Hopper, search for Will. At the same time, a young psychokinetic girl named Eleven escapes from the laboratory and assists Will’s friends (Mike, Dustin, and Lucas) in their own efforts to find Will.
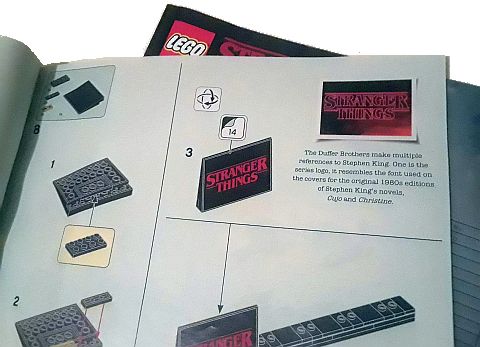
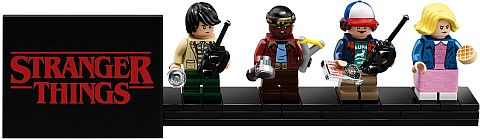
I might as well also mention here that the #75810 LEGO Stranger Things: The Upside Down comes with two instruction booklets for each side of the model, and include screenshots from the film, pictures of all the characters, and a bit of info about the designers who worked on the set; LEGO Designer Justin Ramsden, LEGO Graphic Designer Crystal Fontan, and LEGO Element Designer Jeffery Alan Davis. And, in the building instructions sections, there are little bits of interesting info about the Stranger Things show and characters.

➡ LEGO STRANGER THINGS AT LEGO IDEAS: When the #75810 LEGO Stranger Things: The Upside Down set was first announced, many LEGO fans were surprised by the news. While most of the main characters of the Netflix TV show are children, the episodes contain dark and scary topics that don’t seem to be compatible with LEGO brand policies. In fact, when LEGO fans submitted Stranger Things related projects to LEGO Ideas, they were consistently rejected with the following message: “We reviewed your project submission and unfortunately it refers to a brand or licensed property that doesn’t fit the LEGO Group’s standards for appropriate content or themes. While there might not be anything in your project itself that is against our policy, the brand or licensed property your project refers to contains content or themes that we find inappropriate for a potential LEGO product. We’re afraid that LEGO Ideas cannot accept a project submission based on this brand or licensed property.”
When questions about the seeming inconsistencies in policy standards were raised at the LEGO Ambassador Network, it was explained that the LEGO Ideas team takes the LEGO brand values and does their best to apply them to every IP imaginable. Generally, they err on the side of caution, which means that sometimes another branch of the company makes a different decision on an IP. In fact, the LEGO Ideas team also rejected The Simpsons projects and the car from James Bond, but both IPs were later accepted.
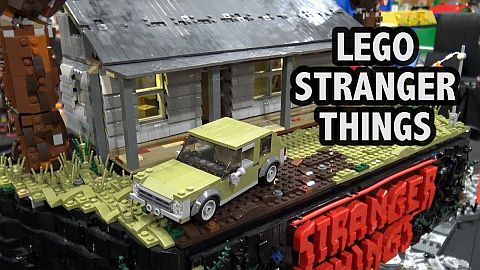
➡ LEGO STRANGER THINGS CUSTOM PROJECTS: While LEGO may have not accepted projects based on Stranger Things at LEGO Ideas, this did not stop LEGO fans for building their own Stranger Things models. In fact, one of the models by a young LEGO fan who goes by the name Mr.MOCsProductions, is eerily similar to the official LEGO set, including the flipped and mirrored setup. Joshua Hanlon from Beyond the Brick interviewed the designer at BrickWorld Chicago in 2018 where the model was displayed. You can watch the interview on YouTube.
➡ LEGO STRANGER THINGS REVIEWS: Even though the background of the #75810 LEGO Stranger Things: The Upside Down is somewhat controversial, already published reviews are mostly positive. The set appeals not just to seasoned LEGO fans, but also to those who may not be as familiar with LEGO, but would like to have an interactive model from their favorite Netflix show. LEGO sets that are linked to a particular IP always have the potential to attract people who are fans of that IP. And, if they like the LEGO building experience, they may venture into building other LEGO sets as well.
I actually had the privilege to witness this first hand. When I received the #75810 LEGO Stranger Things set, my brother and his wife were just visiting from the UK. It turns out that they are both huge Stranger Things fans, and they know much more about the story than I do. So, I offered them the opportunity to build the set and let me know what they think. They worked on the set for several days whenever we weren’t busy with other activities. My brother played with LEGO as a child, but that was over 20 years ago, and his wife never built a LEGO set before. My review below is based on their thoughts on both the building experience and the finished product.
For the sake of completeness, I’m also including reviews from the perspective of seasoned AFOLs (Adult-Fans-of-LEGO). In the video-review below, JANGBRiCKS will show you all the details of the set and the minifigures. If you prefer written reviews, I recommend the one published at Brickset, which you can read in two parts here and here.
➡ LEGO STRANGER THINGS OPENING THE BOX: The #75810 LEGO Stranger Things: The Upside Down is a big set with 2,287 pieces. Inside the box there is a plain white inner box which contains about half of the sealed bags. (I believe LEGO does this so the bags are more evenly distributed within the outer box.) There are 11 sets of numbered bags, plus some loose large plates, and two sticker sheets. Bags #1 contain parts for the car and the Stranger Things minifig stand. Bags #2-#5 contain parts for the normal version of the Byers’ house. Bags #6-#9 contain parts for the Upside Down version of the house, and parts from Bags #10-#11 builds the trees and connects the two versions of the house.
The set comes with two instructions booklets. The first booklet covers the car and the normal house, and the second booklet covers the Upside Down House, the trees, and connecting the two houses. This allows two persons to separately work on the two halves. My brother and his wife really liked this feature. They could chat while building, compare the two versions of the house, and even compete on who could build a section faster. My brother opted to build from the first booklet, while his wife built the Upside Down (they quickly realized that my brother had great advantage, as the regular version of the house is a simpler build with less details.)
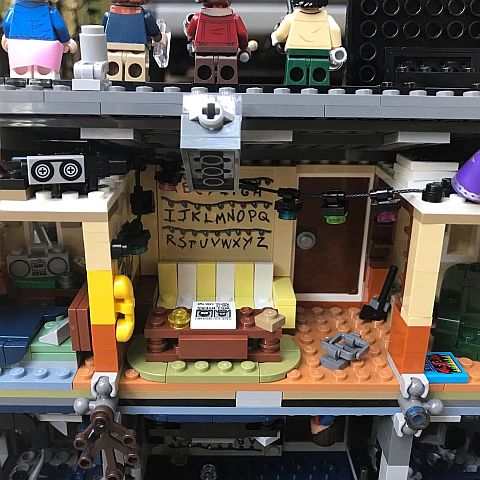
➡ LEGO STRANGER THINGS BUILDING EXPERIENCE: Building the #75810 LEGO Stranger Things: The Upside Down set is an absorbing experience. There are tons of details crammed into every little nook and corner with the help of lots of little pieces. In fact, most of the set is built using plates, tiles, and small accessory pieces.
My brother and his wife worked diligently on the set and didn’t need my assistance. However, they did point out several times that although they appreciated the accuracy of the set compared to the Netflix show, they felt the building experience is unnecessarily complex. Sections that could be built with fewer pieces were pieced together from tiny elements. Because of this, certain sections remained very fragile until they were locked in place at a later stage. And, even when locked in, some sections continued to fall apart when additional decorative elements were added. This was especially pronounced on the Upside Down version of the house, which has a lot more detail. The roof of both houses remained problematic even in the finished model. Building the Upside Down version of the house had the added challenge of working with many similar dark colors, which were hard to distinguish in the instructions.

This made me think that advanced sets like the #75810 LEGO Stranger Things: The Upside Down are usually appreciated by seasoned LEGO fans because of the unique use of pieces, and pieces in new colors. This part of the building experience is not accessible to adult builders who are not as experienced. LEGO fans excitedly exclaiming NPU! (Nice-Part-Usage) when seeing a clever use of parts, or being all giddy over black sausages goes right over the head of someone who is a fan of an IP first and LEGO second. They don’t know when parts or colors are new, or when they run into a unique building technique. They just follow the building steps, pick up the parts, and assemble them according to the instructions. This in itself is an enjoyable experience, but when overdone with too many small parts and complex techniques, which result in fragile and not easily understandable assemblies, it can result in fatigue and frustration.
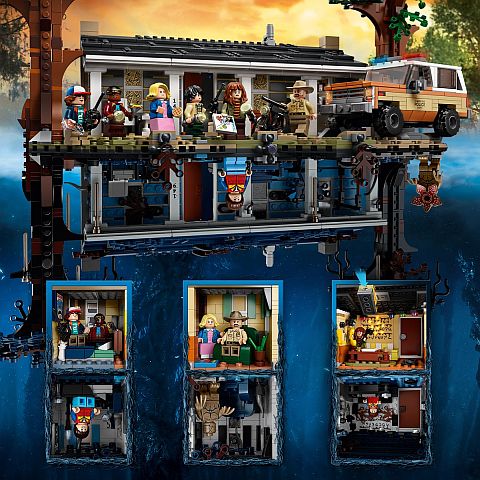
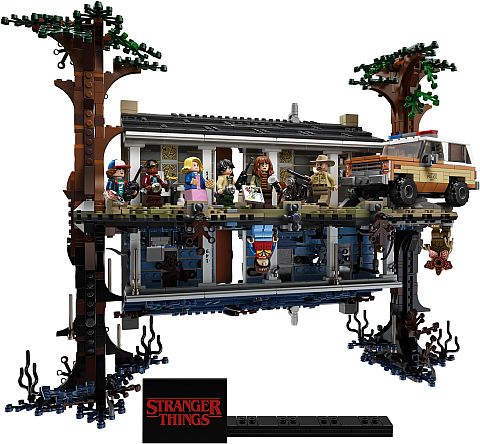
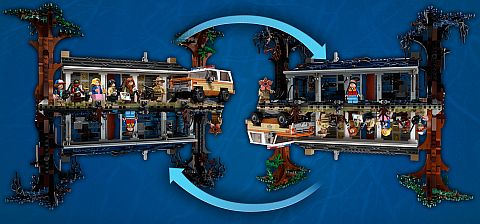
➡ LEGO STRANGER THINGS THE ASSEMBLED SET: My brother and his wife both agree that the #75810 LEGO Stranger Things: The Upside Down set is an excellent representation of the setting from the film. They loved the mirrored assembly, and were marveling how stable the structure stands on the treetops. Chief Jim Hopper’s police truck is also a favorite, so were the stickers with all their authentic details. Interestingly, they had no issues with applying the stickers (and they did a good job!), nor did they complain about them. They considered all the minifigures very accurate. (My sister-in-law sneaked the set outside and took a couple of pictures.)

On the negative side, they felt that the set is too complex and crowded, the buildings are too fragile, and there is very little playability. Looking through the set myself after they finished building it, I have to agree. The entire set looks more like a very good custom build rather than an official LEGO set. Also, while the mirrored setup is very clever, it reduces playability even further as you can’t easily extend the layout. And, separating the two buildings once they are put together is very difficult without damaging sections of the set (JANGBRiCKS talked about separating the two halves in his review, but I wouldn’t recommend doing it. If you do intend to keep the houses separate, it’s best not to put them together in the first place. They are sturdily locked in with lots of ball-joints that are not really meant to be pulled apart.)
Comparing this set to the LEGO Modular Buildings, it is clear why the Modulars are superior. The LEGO Modular Buildings are also adult oriented structures with complex building techniques, but there is a good balance between easily understandable techniques and the occasional more complex assemblies. This makes the Modulars much friendlier for customization even for the novice builder. Also, while the LEGO Modular Buildings have some interior assemblies like furniture, appliances, etc., they aren’t overdone. There is still plenty of space left for custom additions or for moving things around. The spaces in the #75810 LEGO Stranger Things: The Upside Down are so tiny and so crowded, it’s practically impossible to reach inside them without knocking a bunch of things over. And, that brings us to playability. Even with adult size hands, it’s easy to remove the floors and reach inside the LEGO Modular Buildings to play out various scenarios, put the minifigs in different poses, etc. And, there is plenty of room on the outside of the buildings for more play and adding extensions. The only play-features of the #75810 LEGO Stranger Things: The Upside Down set is that it can be flipped around, and that the light can be turned on. There is a little bit of space to pose minifigs in front of the houses, but that’s about it. Jamie Berard, the LEGO designer who worked on most of the LEGO Modular Buildings, stated in an interview that he considers official LEGO sets as starters or seeds to inspire LEGO fans to further build and customize. When a set is too perfect, there is no room for this, and once built, it will simply collect dust on a shelf.
Considering all of this, I would say that the #75810 LEGO Stranger Things: The Upside Down has plusses and minuses for both experienced LEGO fans, and those who are fans of the Netflix show. For LEGO fans the building techniques, colors, and piece-selection should be a great source of appreciation and joy. The trees that double as supports for the entire set are especially worth to study. You will also learn the subtle art of color selection to convey mood, and get an incredible amount of leaves, plates, and tiles in beautiful shades. And the minifigs are generic looking enough to blend into any LEGO city style setting (except for the Demogorgon). And those who are primarily fans of the Stranger Things show, the set offers an authentic replica of the Byers’ house, the Upside Down, and the main characters. If you feel the building experience a bit overwhelming, just spread it out to several smaller sessions. And remember, you can build this set with someone else, which makes the experience more fun. For both LEGO fans and Stranger Things fans, the value of the set after it is built is questionable. It has few play-features, and it’s not the most impressive set on display, although being able to flip it around is pretty cool.
For additional information, here is the official description: The ultimate LEGO Stranger Things model to build and collect! Fans of the global hit Netflix original series will appreciate the authentic details of this highly collectible LEGO Stranger Things toy. The sturdy, brick-built model can flip between the real world and The Upside Down. The design of the model’s building instructions makes it a great, shared building experience with friends and family. The Byers’ house features Will’s bedroom, the living room, and the dining room. The Upside Down version of the house, from an alternate dimension, features all the rooms from the real-world model but with a dark, vine-covered, dilapidated look that fans will instantly recognize from the series. With eight Stranger Things figures, each with its own accessories, this playset makes a great gift for Stranger Things fans who will love to build and display this model to show their passion for the series. Measures over 12” (32cm) tall, 17” (44cm) wide and 8” (21cm) deep. Includes 8 minifigures: Eleven, Mike Wheeler, Lucas Sinclair, Dustin Henderson, Will Byers, Joyce Byers, Chief Jim Hopper and the Demogorgon. 2,287 pieces. Price: $199.99 – BUY HERE

What do you think? How do you like the LEGO Stranger Things: The Upside-Down set? Have you been watching the show on Netflix? Are you planning to get the LEGO set? Or do you have it already? Feel free to share your thoughts and own reviews in the comment section below!
And you might also like to check out the following related posts: