(Written by Mark H. Avery)
In this series, I have been sharing my own personal story in the LEGO hobby, including slowly building up a collection of sets from the 1970s to the 1990s, and constructing a LEGO city. If you like, you can read Part 1, Part 2, Part 3, Part 4, Part 5 and Part 6 by clicking on the links. For today’s chapter, I will discuss my experiences with model railroading and the connection to LEGO trains and cities…
➡ REAL TRAINS, TROLLIEYS, AND MODEL TRAINS…
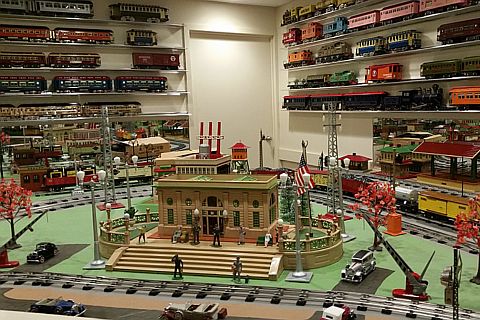
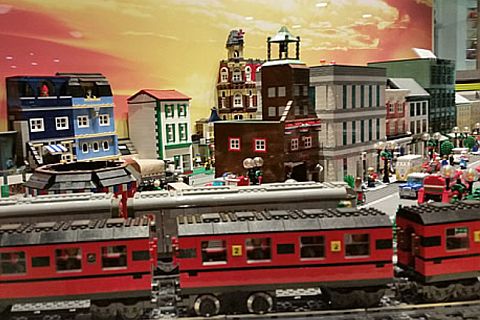
In my last article, I discussed my LEGO train collection and the trains in my layout. However, neither LEGO towns nor trains operate in a vacuum. At least to me, much of the concept of a LEGO train setup comes directly from model trains and model train layouts. And this will be the subject of this article (image below from Toy Collectors’ Museum).
Fifteen or so years ago, I became interested or re-interested in model trains. No, not as a new hobby – I certainly had no space or money for a new hobby – but as an adjunct to LEGO. After all, there have been LEGO trains in my city for at least thirty years!

I was always fascinated by old railroad trains and trolleys, and by model train layouts. I’ve been to many trolley museums, some on multiple occasions. They include those in East Haven and Windsor, CT, Kennebunkport, MA, Washington, PA, and Kingston, NY. Train museums I’ve visited include places like Elgin, IL, Scranton and Strasburg, PA, and North Conway, NH – among others. I’ve also visited the Baltimore and Ohio Railroad Museum on several occasions, most recently when the Washington LEGO Users Group had an exhibit there. I think that was the first LEGO exhibit I ever visited.
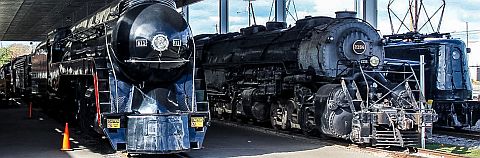
I’ve also wandered through the Virginia Museum of Transportation in Roanoke (see picture above), the Nevada State Railroad Museum in Carson City, the Railroad Museum of Pennsylvania in Strasberg, the National Railroad Museum in Green Bay, WI, and the California Railroad Museum in Sacramento. The latter, if I recall, has a nice model train exhibit. An interesting example of a small, off the beaten path museum is the C&O Railway Heritage Center in Clifton Forge, VA, about fifty miles from nowhere (see picture below). It is located along a (still) main line through the Appalachian Mountains. It includes several old railroad buildings, displays of various old trains, and a huge building with a large, lightly scaled down model railroad in the center, and old train artifacts along the walls.

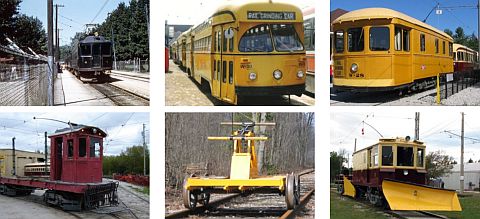
More recently, I’ve visited some nice train museums in Danbury, CT (which has a LEGO train display for Christmas), another museum in San Antonio, TX, and the great Halton County Radial Railway Museum in Milton, Ontario (see picture below). In many cases, the quality of the visit is a function of your guide. I must say that in all three of these museums, I had wonderful guides, and almost private tours. A good guide is typically a volunteer worker and often a former trainman who is willing to take you behind the scenes.
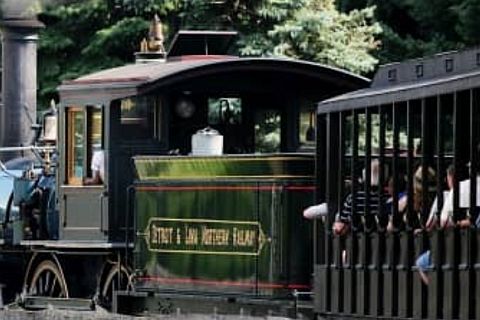
Then there are the tourist railroads that just offer rides, and little more. The train at Stone Mountain, GA is an example. The train circles the mountain, and the day we visited, it was sunny on the boarding side of the train, and pouring rain by the time we reached the back of the mountain. The Huckleberry Railroad in Flint, MI is another example. The train at The Henry Ford in Dearborn, MI circles the museum village and is another pleasant ride (see picture below). One of the stations there goes back about a hundred years. Nearby is a small three-stall roundhouse open to the public. There’s also a hand-operated turntable that I helped to push. (I’d like to build a small turntable for my LEGO trains, perhaps by cheating and starting with a Rubbermaid Lazy Susan.) Then there is the Strasburg Railroad that goes from its own yard (with workshops) to a spot alongside the ‘real trains’ where the engine then circles around and hooks on to the other end of the passenger consist. That’s the real world justification for my LEGO layout having both old steam trains and modern diesel trains in the same place.
Separate and connected to railroad museums are old trackside buildings, mainly old passenger stations, often with interesting designs. A few are still used by railroads, but a lot more serve as tourist information centers, restaurants, professional offices, stores, and even homes. Many are great buildings to model in LEGO.
➡ MODEL RAILROAD DISPLAYS…
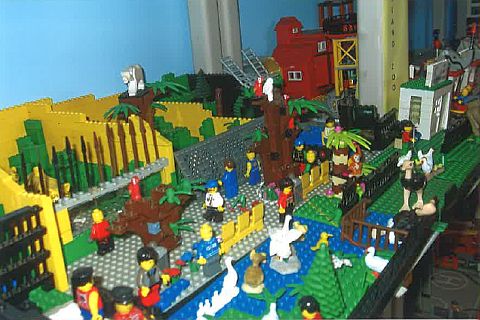
In terms of model layouts, The Choo Choo Barn in Strasburg, and Roadside America in Shartlesville (both in Pennsylvania) come to mind from back when I was growing up. (If you are a LEGO townie and in the area, I highly recommend them.) I could stand for hours watching those exhibits. Smaller ones at the Toy Collectors’ Museum in Strasburg (which has a LEGO exhibit – see picture below), and in Jim Thorpe and Bethlehem, NH (since closed) were also places for me to visit. Northlandz in Flemington, NJ bills itself as “the world’s largest model railroad”. The only thing I’ll say that it’s different, and you should wear good walking shoes.
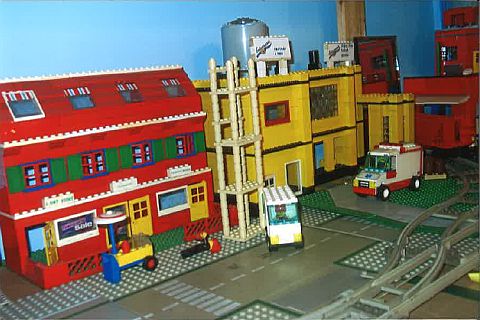
More recently, I visited the old main train station in Kansas City, which has a large model railroad exhibit. Right next to it, is a city built entirely out of LEGO pieces. (I consider their office building with scaffolding around it to be a real masterpiece.) The National New York Central Railroad Museum in Elkhart, Indiana has a large collection of old trains alongside the current freight tracks – some in better condition than others. In one of the rooms inside the depot, there is huge model train layout. Unfortunately, it only operates on weekends. There are many other model train exhibits we’ve visited across the country, and many others that we’ve missed – typically because of time constraints. I’m pretty convinced that every model train exhibit has something to offer LEGO City builders; ideas for layouts, building designs, scenery, scenes, and more.
➡ MODEL TRAIN MAGAZINES…
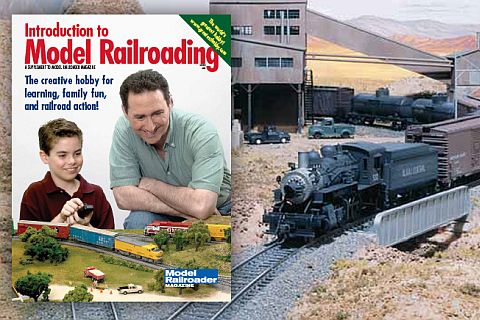
I started buying occasional model train magazines. Then I subscribed to the Model Railroader Magazine in 2006. I picked up inexpensive back issues as well. I think I have a complete collection since 2002, and have most issues going back to the mid-90s. Much more recently, I also subscribed to Classic Toy Trains, and began searching for free or inexpensive back issues of that magazine. (I picked up about a dozen of them free least summer.) Then there are the occasional issues of Model Railroad Craftsman, O-Gauge Modeler, Scale Rails, and various annual and one-time issues. I have seven bookshelves devoted to model railroading magazines.
All the magazines have stories and pictures that I could try to translate to LEGO. The how-to stories aren’t that useful for a LEGO fan, neither are the layout plans. But, the layouts themselves, along with photographs of specific buildings and scenes, are great inspirations. Model railroad structures, like LEGO, can be built from a kit or from scratch. Many – maybe even most – model structures are kit-bashed. Meaning, official kits are modified, expanded, shrunk, flipped around, etc. That’s how many of my own LEGO buildings are modified as well.

From what I can tell, today’s model railroading comes in at least three varieties: a.) realistic scale model railroads prototype or freelance, typically HO or N scale, b.) toy trains in O scale often with outsized equipment and little or no scenery, and c.) what has come to be called Hi-Rail, which is someplace in the middle. Hi-Rail can most simply be thought of as O-scale toy trains run on realistic layouts with scenery and structures that can compete with the best of scale model layouts. I would think that most LEGO modelers aim to fit into the Hi-Rail category.
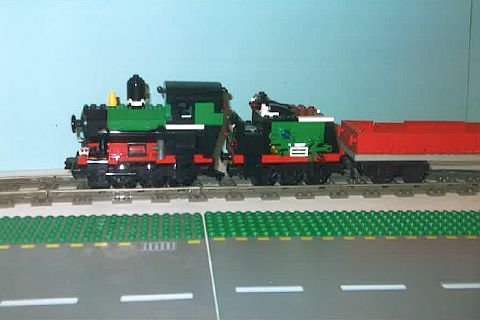
LEGO trains are not quite to scale. The tracks come in very limited varieties and radiuses. Minifigures are disproportionately wider than scale (minifigs can’t sit in cars two abreast). The insides of buildings, number of rooms, and so forth, are never as big as in a real building. Also, historically, LEGO town buildings come without backs. Yet, there are many beautiful realistic buildings, and various attempts at scenery and greenery. I’ve learned many things from model railroading. On the other hand, I have absolutely no interest in weathering my LEGO trains or buildings – a very big deal in that other hobby.
➡ MODEL TRAIN SHOWS…
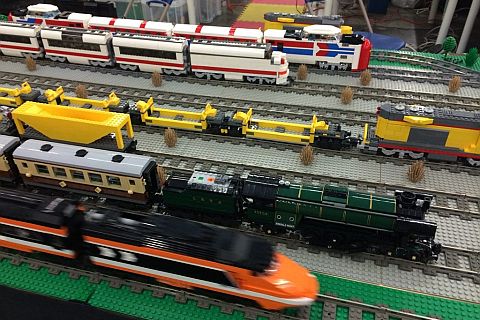
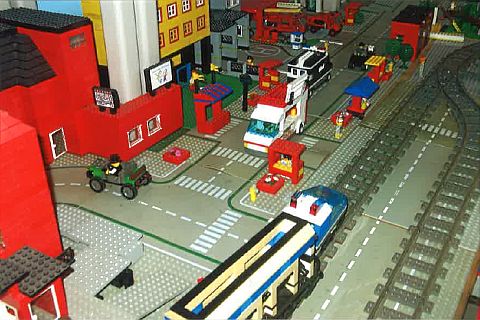
At some point, I started attending occasional Greenberg Train Shows, some of which have LEGO train exhibits (see picture below) in addition to O, HO, and N scale modular layouts. Most shows even have a seller or two offering LEGO sets, random bags, and especially minifigures. Vacation trips often include visits to model railroads and shows. When the National Train Show was in Philadelphia, and a few years later in Hartford, I went to visit. Both had LEGO town and train exhibits beside the O, HO, and N train exhibits. We have visited several state and county fairs that have had either model train or LEGO exhibits – sometimes even both. I try to take lots of pictures so I can reference them when working on my own LEGO town.
I even decided to cheat a little with my LEGO layout. I bought several packages of (used) O-scale train set water pipes. Lined up outside a LEGO construction site, I think they add some realism. I also purchased logs (wood dowels) to put on flatbed cars. (Getting enough brown 2×2 round bricks to do the job seems too hard and expensive.) Somewhere in a drawer are a set of used train billboards, traffic signs, bridge tresses, and a package of brown squirrels.
When I wanted a small farm, I likewise opted to start buying O-scale (used) cows rather than using expensive LEGO ones, or making my own out of LEGO bricks. The ducks and chickens on the farm, and the zebra, gorilla, and hippo in my zoo are not LEGO either, although the dogs, pigs, horses, bears, monkeys, camel, and ostriches are all genuine LEGO. I also have three LEGO elephants and maybe a dozen alligators, as well as several dinosaurs. Then there are the LEGO sharks, swordfish, and other creatures. Anyway, going to train shows is something I started doing 3-4 times a year. They involve lots of walking, but so far I enjoy them.
With all the talk about trains, my daughter keeps reminding me that I have a huge city diorama that just happens to have a train running through it. Not a train layout (LEGO or otherwise) that has scenery and structures to add context.
I hope you enjoyed this story. Shopping for LEGO and, more specifically, dealing with the LEGO Company on various levels has been an ongoing activity. That will be the subject of my next article. Your comments, questions, and feedback are welcome. Thanks for reading!
Mark H. Avery is a LEGO Town/City builder and collector for over 30 years. This is the first of a series that will trace his personal LEGO experiences and offer his personal insights on LEGO related issues. All opinions are his own.
And you might also like to check out the following related posts: