(Written by Geneva – gid617)
One of the perennial LEGO themes is LEGO City, a theme that has given us countless fire stations and police cars. However, especially in recent years, LEGO has gone the extra mile introducing fun subthemes into the LEGO City lineup. This year, LEGO civilization reached farther than ever… all the way to the Arctic! 🙂
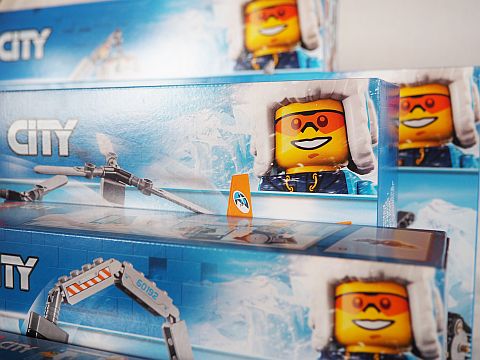
This isn’t the first time citizens of LEGO City have visited the poles; in 2014 there was a previous wave of LEGO City Arctic sets, also featuring orange as a primary color (you can check out the sets in the Brickset database). This year, bright-blue and dark-blue have been added to the color scheme – a vast improvement, in my opinion! Not only that, but we get a wooly mammoth and a couple of saber tooth tigers, in addition to the polar bear and huskies that were released in 2014. We have already taken a look at these sets previously (see: LEGO City Arctic Sets Video-Reviews & More and 2018 LEGO Arctic Collection Review & Thoughts), but they merit another look before we move on to an overview of the whole theme.

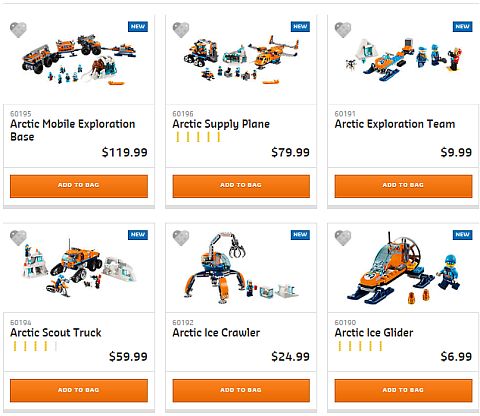
The #60190 LEGO City Arctic Ice Glider (50 pieces, price: $7.99) is a nice introductory vehicle, fun to build and whoosh around. I like the concept of a glorified sled powered by a rear propeller, and it also includes a generous amount of minifigure accessories for the explorer!

The #60191 LEGO City Arctic Exploration Team (70 pieces, price: $9.99) is just a tad larger than the previous set, and is a great addition to any of the larger sets with the included three minifigures, a husky, a vehicle plus sled, and a little snow mound. As a stand-alone set, it would be a little lackluster, especially since the builds are all simple. However, it does include a fascinating new piece; a transparent light blue round brick with a mosquito printed on it.
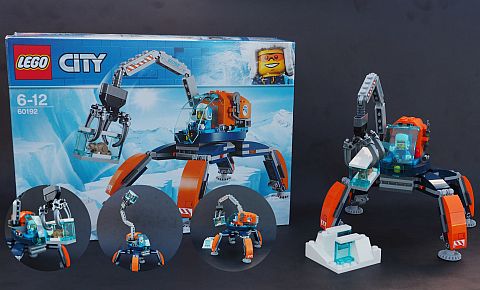
The #60192 LEGO City Arctic Ice Crawler (200 pieces, price: $24.99) is my favorite of the new LEGO City Arctic sets. For one thing, the crawler has a great unique design (although I expect it is rather a pain to drive, especially considering that one lever is all the poor operator has for four legs and a claw hook!). This set is fun to build, and includes the poster minifigure for the line. And, who could say no to a cute frozen mouse?
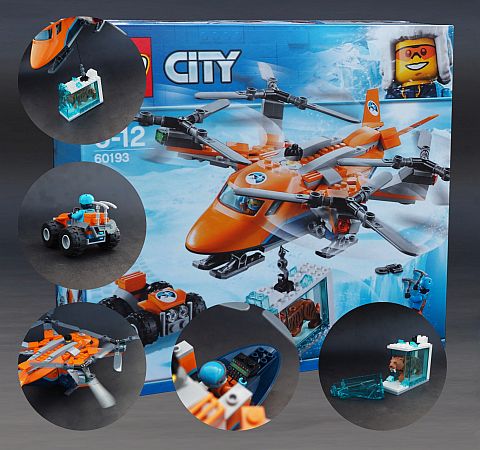

The #60193 LEGO City Arctic Air Transport (277 pieces, price: $39.99) features a really fun quadrocopter, equipped with a winch for transporting ice-encumbered mammals. The winch is easy to operate, since the twisting gear sticks out the top. On the other hand, it is a little tough to get all four sets of blades spinning at the same time. Come on, isn’t that the first thing everyone tries to do?
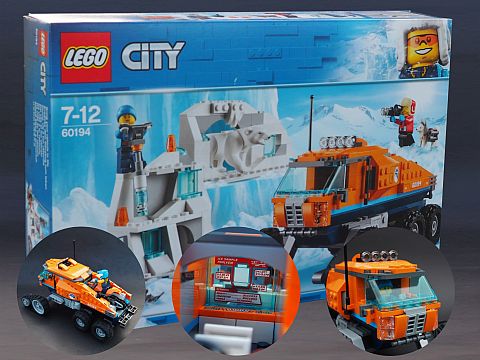
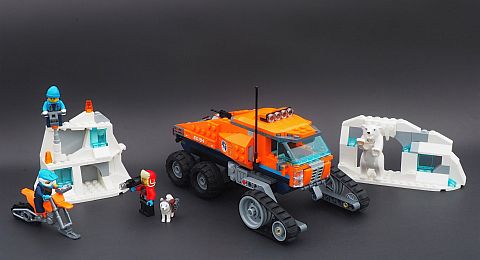
The #60194 LEGO City Arctic Scout Truck (322 pieces, price: $59.99) comes with three minifigures, a polar bear, and a husky. Something about the jutting front treads of the truck seems a little unsightly to me, but I really like both little snow builds, and the interior of the truck has great play-value. Also, this set is designed to combine with LEGO BOOST to make a working forklift – a nice plus!
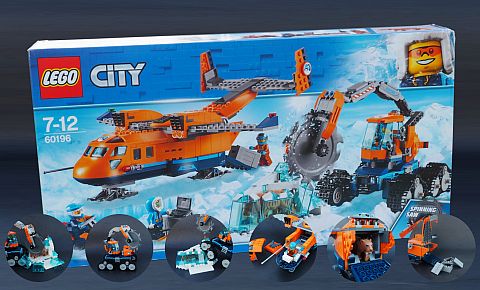
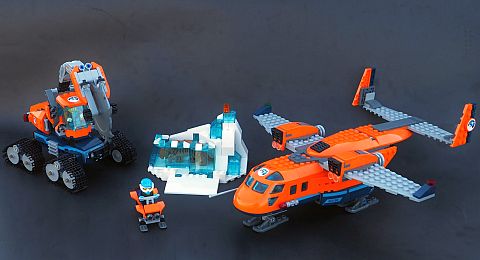
The #60196 LEGO City Arctic Supply Plane (707 pieces, price: $79.99) is a three-vehicle set that will bring your minifigures a long way on their quest to uncover the mysteries of the Arctic! I found the plane a little ordinary, but it does have a lot of cargo space (something the quadrocopter is lacking), and in any case, the ice cutter makes up for it! Although the #60192 LEGO City Arctic Ice Crawler is my favorite set, the ice cutter is definitely my favorite of the vehicles. The cab has 360-degree rotation, the treads move independently allowing for great maneuverability over large chunks of ice, and the saw can be raised and lowered into all kinds of different positions.
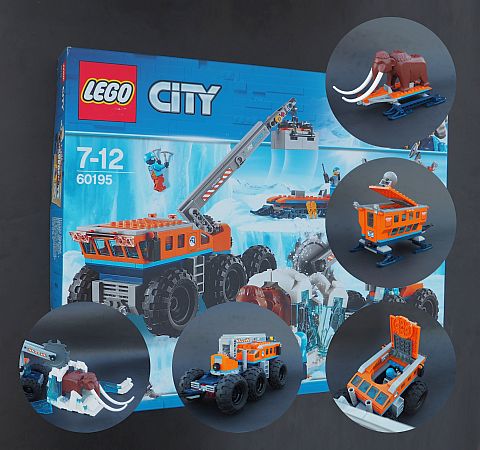
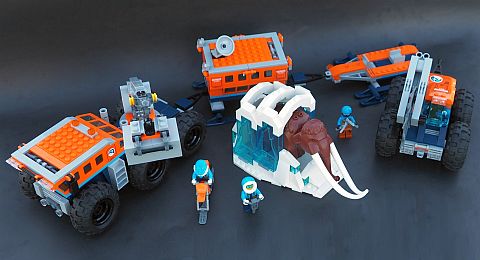
The #60195 LEGO City Arctic Mobile Exploration Base (786 pieces, price: $119.99) is the largest of the new LEGO City Arctic sets, with four connecting vehicles making for a long train to haul supplies and equipment over vast stretches of snowy wasteland. The cab/crane has a neat look with the front slanting windows, though (much to my surprise) several people have mistaken the other end for the front, despite the obvious incongruity of having a crane right in the middle of your windshield. Personally, that would never have occurred to me, but I do find that the crane has a tendency to fall off at the rotating base. After the excellent ice saw in the #60196 LEGO City Arctic Supply Plane, the one in this set is very basic, but the mammoth cave atones for all. This is an animal that has me very excited about potential uses in my own LEGO creations!
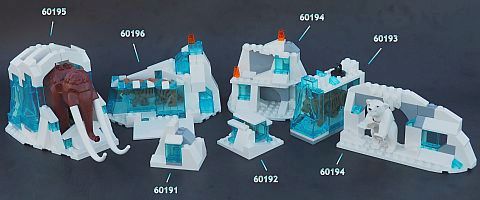
Speaking of animals, we haven’t talked much about any of the animal ice habitats/cages in these sets. They’re all built out of a mix of white, transparent-light-blue, and light-grey, and the ones that have animals trapped inside also have easy ways to remove the animals.
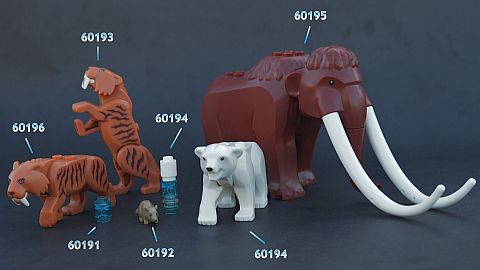
The saber tooth tigers and polar bear all have poseable rear legs and heads. Although only the mammoth’s head is poseable, it can turn completely around as well as up and down. And let’s not forget the mouse and mosquitoes! LEGO City has been giving us some great animal designs lately, and these LEGO City Arctic sets are no exception.

Between the seven sets, there are 20 minifigures and 2 huskies in the LEGO City Arctic theme, though several of the minifigures seem to be twins. On the whole, LEGO graphic designers did a very nice job making the figures similar and cohesive, but still with unique designs and colors. For instance, notice the white hands on some, azure on others, and dark-blue on a few. Arctic huskies have to be some of my favorite LEGO dogs. although the real reason I’m listing them with the minifigures instead of the animals has more to do with my forgetfulness than with my partiality for huskies.
The Arctic subtheme is a worthy addition to LEGO City, and it remains to be seen in the next part of this review what happens when all seven sets come together! What do you think about the subtheme? Do you have any of the sets? Which one is your favorite? And how do you like the minifigures and the new animals? Don’t hesitate to share your comments and questions below! 😉
And you might also like to check out the following related posts: