There is quite a bit of exciting news for fans of the LEGO Ninjago TV series! So let’s talk about them. First of all, LEGO uploaded a mini series on their YouTube channel, titled LEGO Ninjago Decoded, which previously was only available on Cartoon Network. The series consist of ten episodes; each about eleven minutes long. It is basically a recap of the events of the LEGO Ninjago TV show up to Season 8. While watching the mini series is enjoyable for all Ninjago fans, it is especially useful for those who are new to the Ninjago story (i.e. they got introduced via The LEGO Ninjago Movie), or those who have been following the saga on and off through the years. 🙂

The ten LEGO Ninjago Decoded episodes are titled as follows, and you can watch them in the video-player below: 1.) Legacy 2.) Vehicles and Mechs 3.) Legendary Places 4.) Ninjago’s Most Wanted 5.) The Digiverse and Beyond 6.) The Elemental Masters 7.) Beast and Dragons 8.) Rise of Garmadon 9.) Prophecy of the Green Ninja 10.) Greatest Battles. The episodes will automatically play one after another in the playlist below, or you can use the drop-down menu in the upper left corner of the player to select the episode you would like to watch. Enjoy!
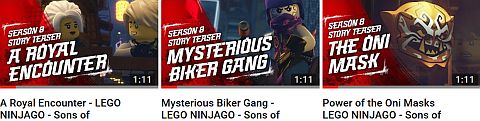
Also, yesterday LEGO uploaded to their YouTube channel three story teasers for LEGO Ninjago Season 8! Each of the are just a couple of minutes long, but very exciting! In the first teaser-trailer titled Power of the Oni Mask you will find out the origin and power of the Oni Masks, including where did these powerful masks come from, why are they feared, and what will happen if the evil Sons of Garmadon get their hands on them? In the second trailer titled Mysterious Biker Gang, you will get a closer look at the mysterious new criminal syndicate called the Sons of Garmadon rampaging through Ninjago City. Who are the Sons of Garmadon, what can they do, and just who is their leader, The Quiet One? And, can the ninja team hope to stop these outlaws before it’s too late? The third trailer is titled A Royal Encounter, where the ninja meets Princess Harumi, the beautiful and dutiful daughter of the Emperor. When Lloyd and the princess meet, sparks fly, but will their new friendship lead to triumph? That will be the story of the full episodes, but at least we are getting a glimpse! You can watch all three teaser-trailers in the video-player below.
I really appreciate LEGO Ninjago Decoded, as it is a good way to catch up on the story, characters, and places without having to watch or re-watch all the seasons (I highly recommend them though, if you have the time to watch them). The series is also the last time we will hear Jillian Michaels voicing Lloyd. From now on, Sam Vincent is going to voice the character. We have talked about Season 8 of the LEGO Ninjago TV show previously (see links at the end of this post), and I have to say I’m liking it more and more. Also, don’t forget that the LEGO Ninjago sets related to the season are already available. You can read/see reviews of them at 2018 LEGO Ninjago Sets Review & New Trailer!, and purchase the sets at various LEGO retailers and directly at the LEGO Ninjago section of the Online LEGO Shop.
What do you think? How do you like the summary mini series for the previous episodes and the teaser-trailers for the new episode? Did you notice any interesting details or clues about the story? Feel free to share and discuss in the comment section below! 😉
And you might also like to check out the following related posts: