

(Written by William)
In this Brick Breakdown series I review official LEGO sets, from the perspective of looking at interesting building techniques we can all learn from. Today we will be looking at the #10245 LEGO Creator Santa’s Workshop. You can also check out the previously discussed LEGO techniques found in official LEGO sets at the end of this article. 🙂
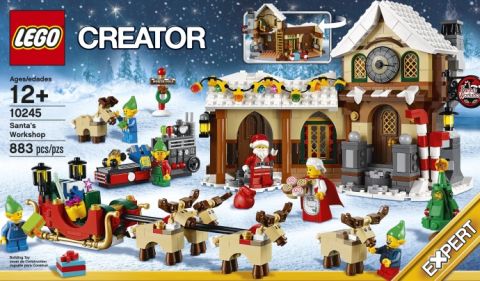
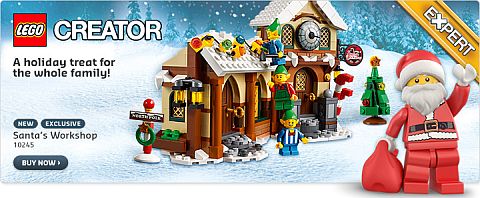
The #10245 LEGO Creator Santa’s Workshop set is the latest in the LEGO Winter Village series and is currently available at the Online LEGO Shop. Technically it is not titled Winter Village like the sets in previous years, but the style and theme seems suitable for it to be classified as a LEGO Winter Village set. The omission in the title is most likely due to the fact that there are elves, reindeer and Santa and his wife in the set – which may be hard to explain in the otherwise realistic LEGO Winter Village world.

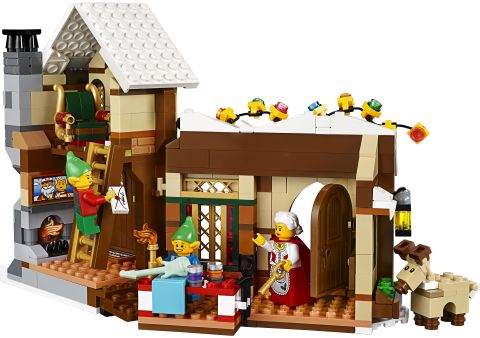
Frankly, you could pretend that the elves are kids in costumes and the reindeer are artificial winter decorations, thus there is no reason why you couldn’t add the set to your LEGO Winter Village display. (Although this set doesn’t have a lamp-post, which all of the previous LEGO Winter Village sets had.) However no matter how you view this set in the LEGO Winter Village world and in your own collection, it doesn’t disappoint. All previous LEGO Christmas-themed sets have been really sweet, and this set is no exception. From the picture over the fireplace showing the Clauses on vacation, to the door mat that says “Welcome Ho Ho Home”, this set is filled with charming details. So let’s take a look at some of the building techniques used here.

➡ LEGO SANTA’S WORKSHOP – THE SLEIGH
Normally, I would talk about a specific technique and then use the set as an example. However, in this case, the object that is being replicated is just as important as the techniques used. Santa’s sleigh has a very unique look, with curves that make it iconic. And because these swooping curves are not square by nature – thus not easily replicated with basic LEGO elements – it sort of forces you to work with the few LEGO elements that has curves.
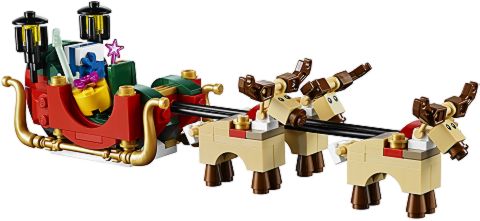
Take for instance the sides of the sleigh; they have that U-shaped curve to them. This means that if you want to recreate this classic design, you have to look at LEGO pieces with an arch. Through that process you may try the large inverted LEGO arch pieces, but find them too big. Then you may think about how nice a normal LEGO arch would work if it was just upside down – and that’s when you realize that is in fact the answer. You could come to the same conclusion with the runners and figure out something similarly decorative – like what LEGO designers ended up doing in this set. Just keep in mind that every time you make these decisions they may cost stability.
And this brings us to another feature of the sleigh. If you look at the bottom, you’ll find it is built on a solid plate. This means it’s not as functional as a real sleigh, but you have more options for decorative elements. This concept is explained further in the Brick Breakdown of the LEGO Exo Suit under the Triangle of Design section.

So now that we talked about the fact that an iconic object will direct you toward certain pieces, and that you’ll need to compensate if it focuses too much the decorative side of things, we need to look at one additional element, and that is the scale of the model. Before you rush off and find the right elements, you need to know what scale you should use for recreating something from real life. To do this, you must determine the functionality of your model. In this case, LEGO designers wanted a sleigh that Santa could sit in, and could also be stuffed with a moderate amount of presents. This functional need for space gives us the framework to build around, which in turn guides us to the pieces we need to use, and also how to reinforce them for a model that doesn’t fall apart.
And this is what makes building recognizable real-world objects so attractive to LEGO builders. Approached the correct way, you almost have a step-by-step manual on how to build your model. This is of course an over-simplification of the process, and you can in fact run into some pretty difficult issues. But every time you do, you can walk through this process of focusing on the shape, scale and functional need first, then the LEGO elements that could make them happen, and finally on how to keep them all together. Remember that there could be more than one solution to the same problem, so keep an open mind as you work on a solution.
➡ JOINT – YET DIFFERENT – LEGO BUILDINGS
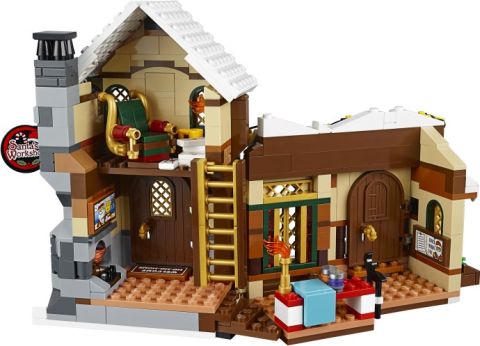
Many LEGO sets only contain one building instead of multiple connected structures. Technically, the LEGO Santa’s Workshop also has only one building, but it is very clear that one side is the workshop while the other is a bit more like a home. Therefore, we can extract this technique from the set even though that might not be its intention.
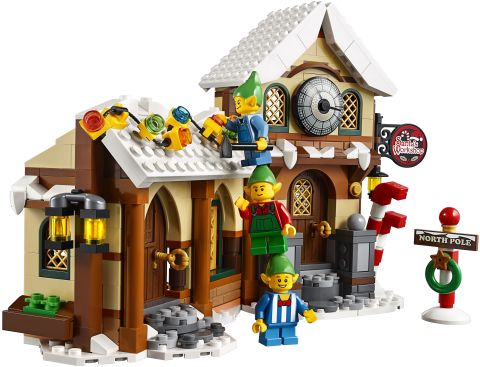
First of all, keep in mind that buildings have a purpose. Despite how decorated they may be, people use buildings to do specific things, and this is often reflected on how a building is decorated. The right side of this Santa’s Workshop has a clock, and a sign, along with decorations (like the candy canes and stone-work) on either side of the door.
On the left building there is a bit of decoration like the Christmas-lights on the roof and the double lanterns on the side, but overall it is plainer. This initial glance tells us that the right side is less industrious than the left. Another tip in making joined buildings stand out is to have clear entrances. In the case of Santa’s Workshop, it has two doors. Look closely and you’ll see that the windows in each door are different to, again, indicate that they lead to different places.

Finally, you can further distinguish two buildings using subtle architectural clues. Check out the doorway on the right. It is completely rounded, while the door and large window on the left come to a slight point in the center. You may also note that the left side uses log bricks in the wall to help give it more accents. Don’t forget to look at the roofs. Each one is built in a different style to put that final suggestion that these are very different places.
The point I’m trying to make here is that this is something that happens in real life. We tend to build things to fit a purpose, and this is reflected in the building’s design. Sometimes these differences are small and subtle, but they are there. So if you ever end up working on a LEGO model with several joint buildings that serve different purposes, keep these points in mind. They can make a big difference in making your buildings realistic and believable.
➡ APPLYING WHAT YOU LEARN
Having a real-life object to copy and make into a LEGO creation is a wonderful thing. It not only gives you a challenge, but also provides a guide in how to create something. It also provides a concrete example of the triangle of design we talked about in the LEGO Exo Suit Breakdown – which is always handy if you are trying to make the best LEGO creation possible.
Buildings that are joined often use similar color schemes and patterns. This might make it hard to figure out how to make them stand apart. The trick is recognizing the subtle signals we all pick up on without thinking about it. For an example, go to a downtown area and chances are you’ll think “business”. Then go to a residential neighborhood, and you will think “people live here”. And the factory district will have an industrial feel. You don’t need to know anything about these places because the buildings tell you what they are. Knowing how to create these subtle differences will allow you to experiment with some very advanced LEGO building techniques and architectural styles. If you are interested in the #10245 LEGO Creator Santa’s Workshop, it is available at the Online LEGO Shop.
So what do you think? How do you like the LEGO Santa’s Workshop set? Have you had a chance to build it? Did you learn from the interesting building techniques? How do you like the sleigh, the building and the reindeer? Feel free to share your own experiences, tips or ask questions in the comment section below! 😉
And you might also like to check out the other reviews in this series:
- Brick Breakdown: LEGO Ideas Exo Suit
- Brick Breakdown: LEGO Ideas Research Institute
- Brick Breakdown: Emmet’s Contruct-O-Mech
- Brick Breakdown: LEGO Forest Animals
- Brick Breakdown: LEGO King’s Castle
- Brick Breakdown: LEGO Cinderella’s Castle
- Brick Breakdown: LEGO MetalBeard’s Sea Cow
- Brick Breakdown: LEGO MetalBeard’s Duel
- Brick Breakdown: LEGO Minecraft Sets
- Brick Breakdown: LEGO Disney Princess Sets
- Brick Breakdown: LEGO Back to the Future DeLorean
- Brick Breakdown: The LEGO Movie Ice Cream Truck
- Brick Breakdown: LEGO Parisian Restaurant
- Brick Breakdown: The LEGO Movie Flying Flusher
- Brick Breakdown: LEGO The Hobbit Dol Guldur Battle
- Brick Breakdown: LEGO Winter Village Cottage
- Brick Breakdown: LEGO Winter Village Market
- Brick Breakdown: LEGO Lord of the Rings Council of Elrond
- Brick Breakdown: LEGO Castle Dragon Mountain
- Brick Breakdown: LEGO Lord of the Rings Pirate Ship Ambush
- Brick Breakdown: LEGO Ninjago Golden Dragon
- Brick Breakdown: LEGO Superman Black Zero Escape
- Brick Breakdown: LEGO Tower of Orthanc
- Brick Breakdown: LEGO City Dump Truck
- Brick Breakdown: LEGO Monster Fighters Ghost Train
- Brick Breakdown: LEGO Lone Ranger Silver Mine Shootout
- Brick Breakdown: LEGO Lone Ranger Constitution Train Chase
- Brick Breakdown: Ninjago Temple of Light
- Brick Breakdown: LEGO Lone Ranger Colby City Showdown
- Brick Breakdown: LEGO Lone Ranger Comanche Camp
- Brick Breakdown: LEGO Lone Ranger Stagecoach
- Brick Breakdown: LEGO Star Wars AT-RT
- Brick Breakdown: LEGO Arkham Asylum Part 1
- Brick Breakdown: LEGO Arkham Asylum Part 2
- Brick Breakdown: Legends of Chima Polybags


Hm…I never really thought about it that way. I’m not a building-person, I like making mechs and ships more. But I would rather work making a real-life object than working with my imagination. I like the sled, especially the gold elephant trunks on the bottom, they give it a kind of “elegance.” What I don’t get is how the set is 833 pieces and $70, but still so sparsely decorated on the interior. I would have liked a bit more. 😐 Also, can anyone tell me what holds the reindeer onto the flex-hoses on the sled? It’s been bugging me a lot. Or is there nothing even there? 😕
There is one normal clip underneath the arches holding them on.
I’m not sure how the reindeers are connected as I don’t have this set, but I emailed William to answer your question.
Thanks, admin. 🙂 I also just checked Brickinstructions to see the clips William mentioned, and it seems the site has been updated significantly, which I suppose is nice. The Myinstructions part is still not finished, though, it’s been that way for a year now. 😕
Hm… I haven’t used those sites for a long time. I usually just use LEGO’s own website and download the instructions. But it is good to know that they are keeping the site updated.
Very interesting always love the brick break downs! And BPLproductions a post of the new Mixels I made should be up next week.
Each of the four reindeer that are connected to the sled have a modified 1×2 modified plate with a horizontal clip on the end.
These are disguised by the fact it looks like a colored harness built into the reindeer.
As for cost: the average is $0.10 a piece. So if you apply that directly to this set you get a cost around $83. The fact that it is lower than that price means that manhy of the pieces are small and the reduction of plastic allows them to cut corners in the price.
As for the sparce interior…yeah, it won’t impress you by a long shot. Building this set you will realize that most of the effort went into making the sleigh. The buildings really feel like an after thought. However, they did manage to make a rather pretty exterior.
Ooooohhh… I see. I built the reindeer on LDD some time ago, and I though those were merely 1×2 red plates. Cool! Thanks for the help! 🙂 Also, the true number of pieces is 883, so at $.10 a piece it should be $88, but, yes, it was nice that they cut the price. However, I wouldn’t have minded if they raised the price by $10 and added some more interior detail. It wouldn’t have been too big a problem.
Sorry, didn’t look close enough at the piece count. Transposed the 8 and the 3.
Yeah, the interior has much to be desired. I suppose the conveyer belt and machine are techniquely inside the work shop.
The problem is they didn’t have enough room for the interior. Add one thing and the place gets cluttered.
Part of the issue is that it’s hard to say where this set is catagorized as. On one hand it is clearly a “Winter Village” set, but it is not labeled as such. Now if it is a Winter Village set the sparce workshop makes some sense. This building is merely a decoration so is more or less a shell. However, if it is its own thing, then they probably under designed the set.
It might have just come down to LEGO looking for a certain price point and this is what fit the bill.. I’m actually hoping they go back to the more village aspects. There is still lots of ground to cover, pet shop, hardware store, bank, grocery store, train station, clothing shop, ski shop, heck even a police and fire station would look neat in this style. But that’s just hopeful wishing on my part.
I’m inclined to agree that they designed this with the price point in mind and ended up with a building that is distinctly compromised and disappoints. I agree as well that the exterior is far more interesting than the interior.
I am contemplating buying a second or third set and trying to expand the interior space by making the two-story half deeper and adding a second deeper story to the other half. My hope is that the conveyor belt could be moved inside and Santa’s throne could move down to the first story below the new workshop. I’d like to make Mrs. Santa a kitchen as well. Probably in the deeper room beyond the fireplace.
I’d like to find a way to incorporate a light brick too. Are they even available as parts?
The thing is, I’m not a MOC builder. If anyone has suggestions I’d deeply appreciate the info I’ll need to come up to speed as a builder. But, mostly, our Winter Village is a really nice part of our Christmas and if this is supposed to be Santa’s Workshop I’d sure like it to be worthy of the concept.
Rainey, there is indeed an official LEGO light-brick. It is available in yellow and red: http://www.bricklink.com/catalogItem.asp?P=54930c02. There are also third party manufacturers who make light-bricks (like you can see in the right-hand side-bar. And you can also make your own by using LED lights. As far as customizing the set, it might be a good idea to get a second one so you have parts to work with, or you could just get some extra loose parts that you feel would be helpful to expand on it; like the wall and roof pieces, etc. It is always a good idea to have extras of some of the basic elements, even if you are not a regular MOC-er. They can be very handy for projects like this. 🙂
My kids are putting this together but I got called in because the roof on the taller building just didn’t want to stay on. I checked their work against the instructions carefully and it all looked correct but the 2×2 hinge pieces under the two two large flat roof pieces just won’t snap into the other half of the hinge. Is the roof just supposed to rest loosely on top?
Tim, I forwarded your question to William to make sure he sees it. He should be answering here soon.
Hey Tim,
The roof is supposed to connect fully to those hinges. They aren’t necessecarily the most secure though. You might want to try this.
Take the hinge connector off the walls of the building and try connecting it to the roof then placing it back on the walls. This might be harder to connect to the walls, but sometimes approaching it at a different anle can help.
You may also have a very slight alignment issue. The under side of this roof like many of the winter village buildings is sometimes deceptively hard to make out since it is not straight forward like tuds. The problem arrises when you move a plate slightly off. This is possible because you can off center parts if a plate is large enough. Then the problem comes up when you go to connect a stud and there is a plastic line where ther should be space.
Another thing to try is looking at everything the roof rests on. It is possible to have an angle turned wrong or a piece that is slightly crooked. This can prevent a piece from laying flat.
Additionally, you may just need to go around all the walls and press the pieces tighter together. It is very common for building to have alignment issues when some of the bricks aren’t fully connected.
Sets like the Winter Village are more precise in nature so it doesn’t take much for something not to fit right. As far as I know the only set that currently has a roof that just rests on top is the Simpson’s House. Every other set I know does have roofs that are attached.
Oh, almost forgot. You may also be experiencing a perspective issue. This set especially has some very strange angles. You may just want to try putting the roof where it looks like it goes and slowly move it around until you feel it connect. It has happened to me on a couple of occasions where it looks like it should go a certain way but it was just an issue because the instructions are representing a 3D concept in 2D.
Hope that helps!
Will