

(Written by Geneva – gid617)
The largest set in the LEGO Ninjago line, and one of the most gorgeous LEGO sets in its own right, the #70751 LEGO Ninjago Temple of Airjitzu dominates the Ninjago landscape with style! Despite its eye-catching color-scheme it has a peaceful look, and seems to be a great place for the ninja to make/ their headquarters between missions. You can check out the full review of the set from when it was first released here: LEGO Ninjago Temple of Airjitzu Review, and today we’re going to explore the great potential for modification that this set offers. 🙂
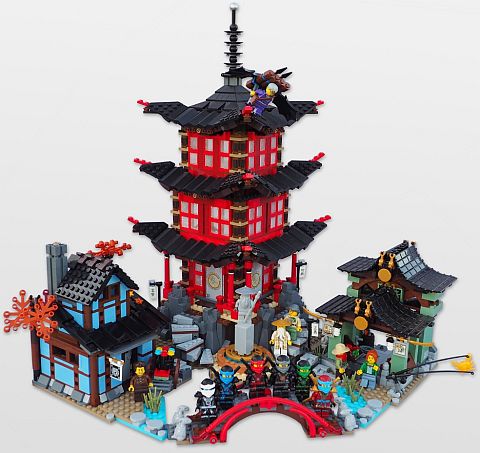
While the LEGO Ninjago Temple of Airjitzu looks great as it is, there were a few things about it that I wanted to see changed while conserving (if possible) the shadow around back – one of the highlights and main play features of this set. The blacksmith’s shop and little marketplace off to the sides – although neat in themselves – were just not working in the context for me, and they are not very accurate to the TV show. Plus, I wanted to have all those useful pieces available for other builds anyway.
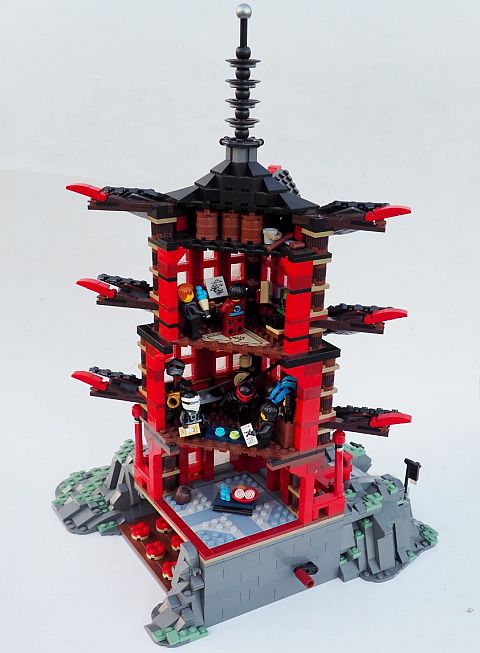
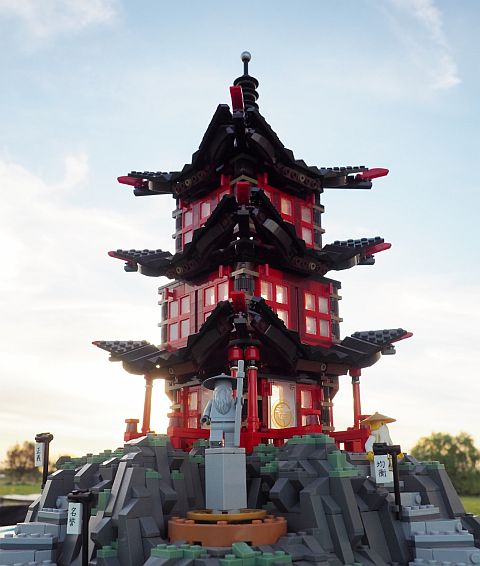
Besides that – at least to my eyes – the rockwork at the base of the temple was less than stellar. This is to be expected in an official LEGO set, as building rocks can be very parts consuming. However since I had plenty of parts and time, I decided to give it a go and make some changes. Below is the result of the modifications I have made…
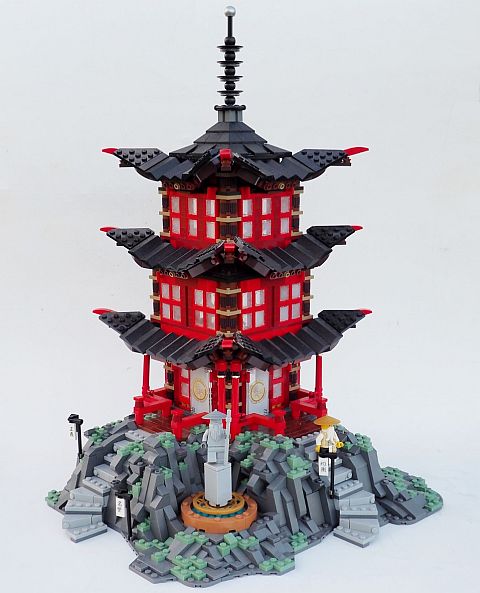
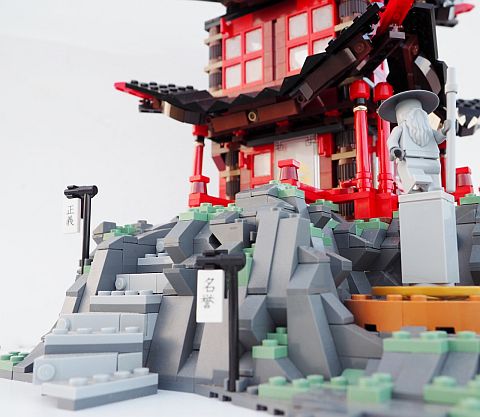
As you can see, the flanking buildings have vanished, replaced by fairly extensive sprawling rockwork. I went pretty much all out, pushing the Temple back farther and up slightly higher. A similar result could be achieved with less rockwork, if you choose to do so. And using a different shade of green to complement the gray would set a very different tone as well.
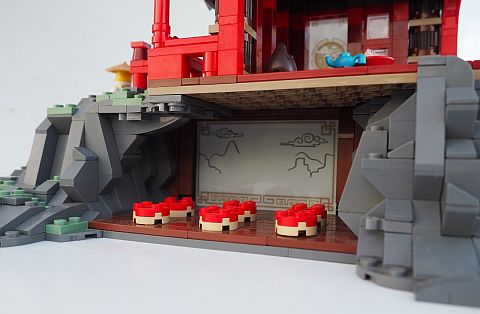
You’ll notice that the stairs were moved much further back. Previously, the stairs seemed to just run off into the little pond, which I found absurd. But I definitely wanted to keep the awesome curve of the steps. So I found a way to build the first couple of steps straight, and the next couple curved.
Adding so much rockwork out front meant that I had a much larger footprint to play around with. I really wanted to give the shadow a decent seating arrangement, so the ninja could watch the show without sitting on my hard desk. Not that a minifigure would really care, I suppose…
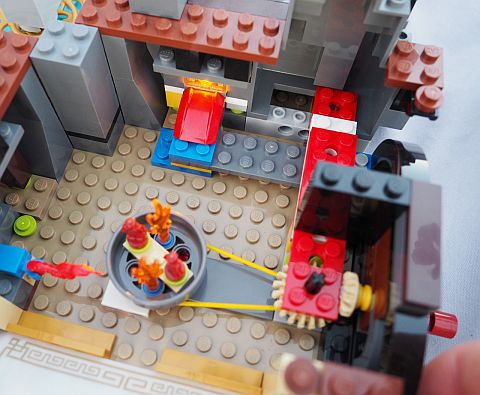
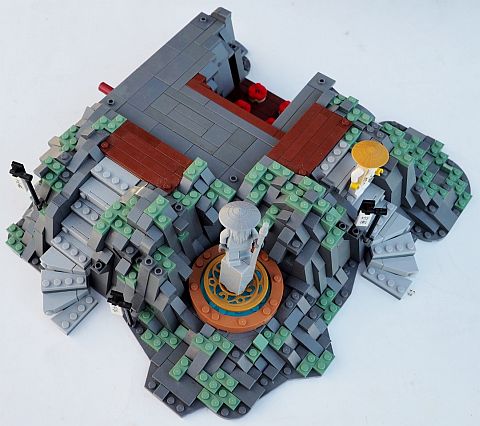
I was surprised to find that I didn’t need to change the basic mechanism for the shadow , just extend it a little further. In case you are wondering what the mechanism for the shadow looks like, below are some pictures of the original version. The LEGO nanofigures, snake, and flames cast shadows and appear to be moving, as the gears allow them to rotate while you turn an outside lever.
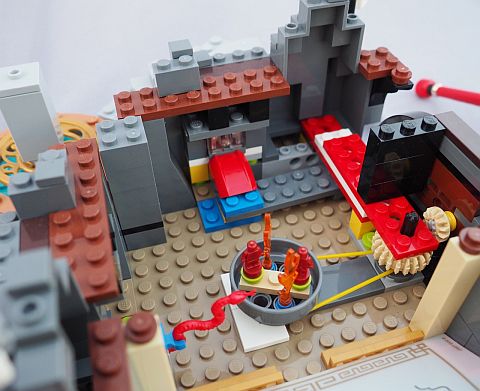
How it all works is that you slightly push on the wall (which is constructed on top of swivel-plates, so it can stick out ever so slightly) which turns the light brick on, while at the same time – by turning the dark-red lever – you can rotate the nanofigures and flames, creating a shadow effect on the outside. It is really a very clever mechanism!
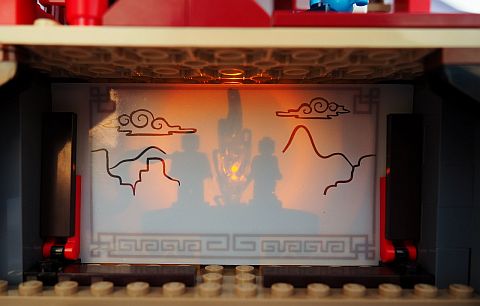
Notice in the last picture how close the screen is to the edge of the building. This was one of the other features I wanted to change, and allow some seating for the ninja. By building the mechanism under the rocks instead of under the Temple, I was able to succeed fairly well.
First of all, I had to make sure that the changes I made did not affect performance. Fortunately, it was easy to conceal the swiveling wall, so in my version, all you have to do is push the lever in almost imperceptibly as you rotate it. It works perfectly smoothly, and was much easier to adjust than I had imagined – the LEGO designers did most of my work for me!

As you have probably noticed, I added two rows of seats for comfortable theatre viewing, and also built the theatre walls out of rock – a bit of needless flare.
The interior of the Temple underwent much fewer changes. The designers did a pretty good job of using space efficiently. I just added a bit of recreational material for the ninja to relax after their hard work.
For no particular reason, I decided to build the Temple in such a way that the Temple structure would be easy to remove from the rock base. At first, I was going to leave it so that the shadow mechanism would be easily accessible, but then I tiled the top, and that was that.
One thing that I was not able to achieve with this modification was to expand the bottom story to a more proportionate size. If you look closely, you can see that the bottom story behind the porch is smaller than the story above it (notice how the columns sit more in). This is quite out of line with the tapering pagoda-style building, but it seems to be the only way to leave enough room for the porch without significantly expanding the roof structure – which I did not have the parts for. However, this minor fault is only noticeable from certain angles, and even then it is easy to overlook.
On the whole, I am very pleased with the LEGO Ninjago Temple of Airjitzu (available at the Online LEGO Shop – see below), and have no qualms about displaying it prominently for all our guests to see. Not only that, but my modified version shows off to advantage, besides my brother’s bare-bones original standing just a few feet away. 😀

So what do you think? How do you like the LEGO Ninjago Temple of Airjitzu? Do you have it already? How do you like it? Have you done any modifications yourself, or are you inspired to do some after seeing my version? Feel free to share in the comment section below! And if you have any questions about the changes I made, feel free to ask those as well! 😉
And you might also like to check out the following related posts:


Well done! I especially like the inside theater. It bothered me that the ninja had to sit outside to watch a show!
Thank you! Yes, fixing that was one of my priorities when I went to change the set up!
I love the green on the rocks! (though I would add some olive green) Stays awesome!
Thanks! Now that you mention it, I don’t think I’ve ever actually tried mixing sand green and olive green, but somehow I’ve never really thought they would work well together. I may have to try it now though – I know that I was surprised to find that olive and lime go together well!
So, ya gonna reboot the other 3/4ths of the set now?
Hehe… probably not. 😉 Though my brother and I are planning on building a larger Ninjago diorama that would incorporate the Temple, so maybe some version of the other buildings will make its way in there as well!
Great modifications! I think I will have to buy that set now…
It’s definitely a great set – I don’t think you’d regret it!