

I must admit, when the #17101 LEGO BOOST Creative Toolbox was released last year, it went completely under my radar. It was out for months before I even knew it existed. However, once I found out about it, I couldn’t help but drool over the idea of playing with it. Up to this point, I’ve used the LEGO Power Functions system and even had an opportunity to look at the LEGO Education WeDo system. LEGO Mindstorms is still out of my price range and, if I’m honest, intimidates me a bit. So, having a lighter robotics system that doesn’t break the bank seemed highly attractive. 🙂
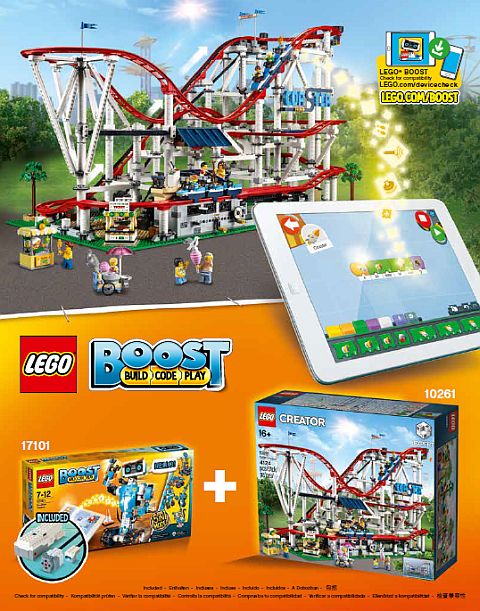
Eventually, I was fortunate enough to trade my way into getting a copy of the LEGO BOOST set, so I can play with it, and write up my personal opinion based on my experience. The LEGO BOOST set has several alternate models and lots of options which would mean an incredibly long review, so, instead, I choose to build two of the models, and also combined LEGO BOOST with the #10261 LEGO Creator Roller Coaster. My review will be based on these experiences. Keep in mind though, that this is just scratching the surface of what can be done with LEGO BOOST.
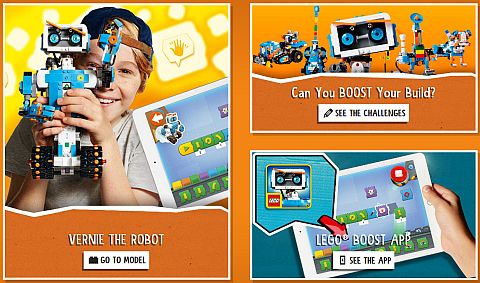
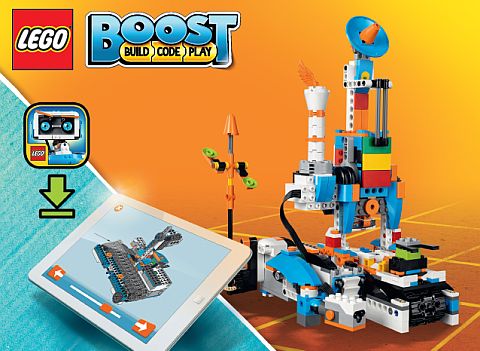
There is a reason why LEGO refers to this set as a toolbox. LEGO BOOST is a whole new system of blending physical and virtual play. Using the LEGO BOOST app, the models are meant to teach you just how robust your virtual control really is. And, this is what we will focus on in today’s review; looking at all the techniques I learned while enjoying the LEGO BOOST set.
➡ PLUG AND PLAY WITH LEGO BOOSTS
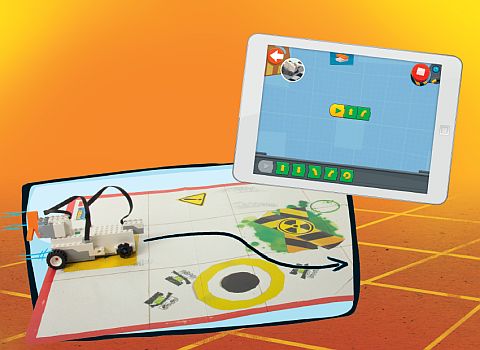
I wanted to start out easy since I have virtually nothing when it comes to coding experience. So, I grabbed my #10261 LEGO Creator Roller Coaster, as I knew it was compatible with LEGO BOOST. Inside the LEGO Creator Roller Coaster’s instruction manual, you can find diagrams on how to connect it to LEGO BOOST. The roller coaster only uses the battery-pack/control module, the plug-in servo-motor, and the sensor. Once those components were in place, all I had to do is open the LEGO BOOST app and turn on the battery pack. The app connected with LEGO BOOST via Bluetooth, I selected the roller coaster set, turned it on, and I was done!
While the app played background sounds, I could operate the coaster and shove it along manually. Once the sensor detected the coaster, the app had an automatic program that moved the chain, made sounds, and generally made the whole operation a hands free experience. At this point, I still wasn’t learning any coding nor was I forced to. This made me much more relaxed with the system and willing to push myself a bit farther.
➡ LEGO BOOST INITIAL BUILD
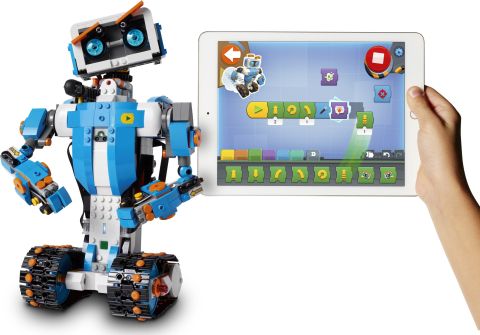
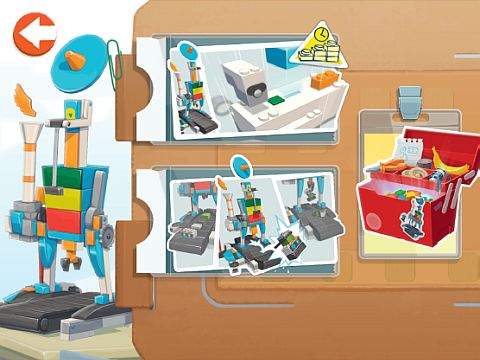
Moving on to the actual set, the LEGO BOOST app instructed me to open bags labeled #1. From there, I was guided to build a strange little car with two very basic robots. Only the car used the LEGO BOOST system. This took less than five minutes. No sooner was I finished building a section of the car than the app had me coding. Essentially, once you add some wheels, you are making it go forward, back, turning, making one hundred and eighty degree turns. Then you give the model a sensor and propeller, and you’re back to coding. By the time I was done, I became roughly familiar with the servo-motor, the sensor, and the other two motors on the main power unit.
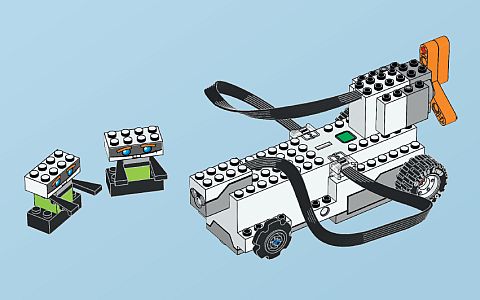
You also get a grid playmat in the box. This is used with your basic car, so you learn about how far the car moves and how far the sensor can detect things. You even get to see how the sensor can be used to tell the vehicle to stop, avoid the robots used as obstacles, turn on the propeller, and make sound-effects. Overall, this was everything I was expecting out of LEGO BOOST and at this point, I hadn’t even made anything of note.
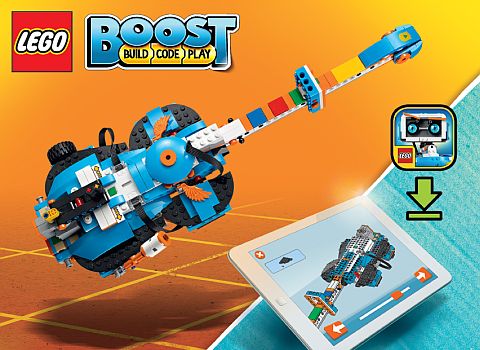
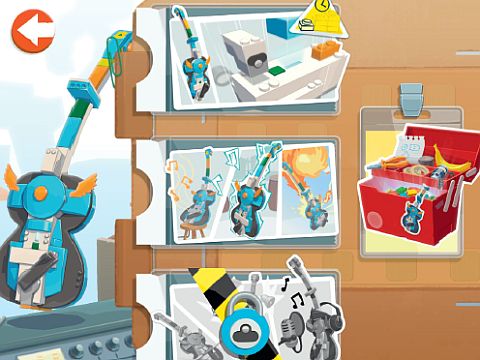
This is when I felt ready to try a couple of the main models. I wanted to build different types of models as well as different difficulties. So, I looked at the app and found they rated each model from one to three. Ones are the simplest to build and learn, while the threes are the most difficult. So I chose the guitar (rated one) and the robot-building machine (rated three). And I wasn’t expecting what came next…
➡ BUILDING THE LEGO BOOST GUITAR
The early part of this build doesn’t really have any shocking techniques. The oddest thing you build is a little mechanism that can slide up and down the guitar’s neck. And, just like with the initial car model, once something can be programmed, you go to the app and start coding. At which point you really play with the sensor’s depth perception.
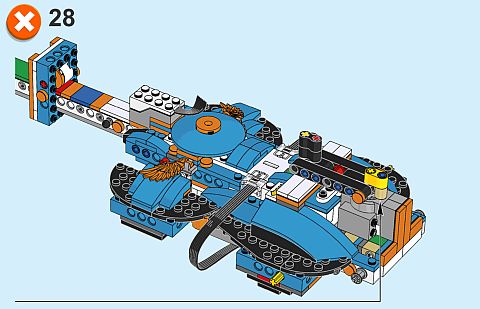
The neck of the guitar is color coordinated with red, green, blue, yellow, and white, but that’s just for the builder to see distance increments. The sensor is really looking to see how far away the sliding mechanism is from it and acts accordingly. So, you learn what increments the sensor uses, and you can assign different effects to those increments. In fact, it shows you a number of different sound files that can be attached to the different ranges.

Next, you build an odd little handle to the motor at the back. This surprised me since you use this lever as if you were strumming the guitar. So not only does the servo-motor work to move things, but it can also act as a receiver. You play with this for a while and discover an even bigger sound library in the process. Then, you build a knob and lever for the other two motors. These are also motors that can receive information, and at this point, the guitar can show off all of its sensory capabilities.
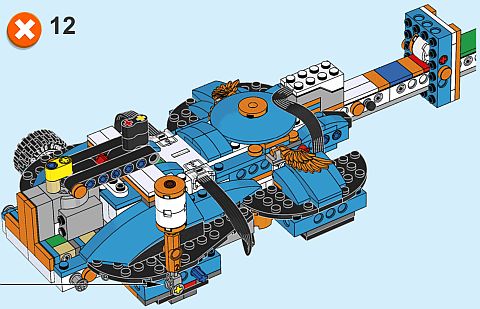
There is the visual sensor for the neck of the guitar, and you there are the control abilities of the three motors. One motor is used to play the sound, the lever is to change the pitch, and the knob is to add distortion. Then, you are instructed to clap. It turns out that the sensor can also hear loud sounds and is set to clap along with you. Then you are told to tilt the guitar, and an audience cheering sound plays. So, the model also has a gyroscopic sensor to detect when it moves.
From here, you are instructed to dismantle the rubber grip for the strumming portion and build a bow. The bow is to simulate a fiddle or violin and things get even more complex with sounds. You can have layered tracks, and in case there is nothing you like from the selection, you can record your own sounds.
By the time I was done doing all of this, I wasn’t looking at the guitar as a funky little toy. I honestly saw it as a legitimate build-it-yourself instrument. It may not be the most complex instrument out there, but you could definitely tailor it to do a wide range of things. And believe it or not, there is even a whole section of fart sounds… in key, of course.
➡ LEGO BOOST ROBOT BUILDING MACHINE
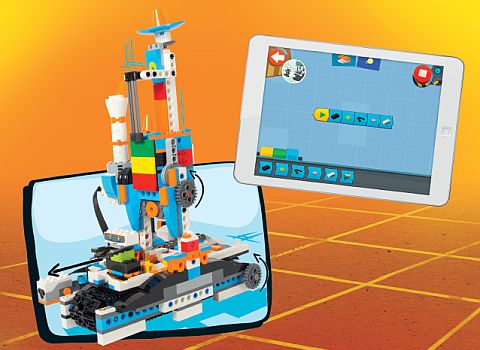
It was kind of hard to imagine how the robot building machine was going to show off different controls after being blown away by the guitar. Unlike the guitar, the robot builder is an odd contraption. There is no symmetry to its design, which leaves you constantly guessing how something like this can possibly build a robot.
As soon as the treads were in place, I was back to coding. This is where I first saw the amount of precision available to builders. Just by changing a number, I could precisely control how far or short, not to mention the direction, in which the treads would move. And since they were suspended, I guess it would be more accurate to call it a belt.

Soon you are back to building and using a gear-rack set up. A gear-rack is essentially a modified tile that has gear teeth on top instead of being smooth. This feature allows for horizontal or vertical movement when controlled by a normal gear, especially when you build a specific channel for it to move through. Once done, you can play with a basic arm that can move up and down over the belt. Not only does it use specific increments but you can also control the speed at which it moves. Again, precision is the key word here.
Now comes the fun part. You build the rest of the overhang as well as a tray that snuggly fits onto the treads. Then you throw on a little whirly thing in the back and fill the tray with loose parts. Each part has a specific space designated for it on the tray. The reason why I said this was fun has to do with how temperamental the model is. The tray was getting stuck in places for no reason. I could manually move it, but the motor didn’t want to move. After messing with it for a while, I’d get it responding, only for it to get caught in a completely different space. Eventually, I managed to work out all the sticking points. I can’t even tell you how I fixed it. I guess something was not pressed down or connected fully? At any rate, the machine could actually run and you get to see the precision in action.
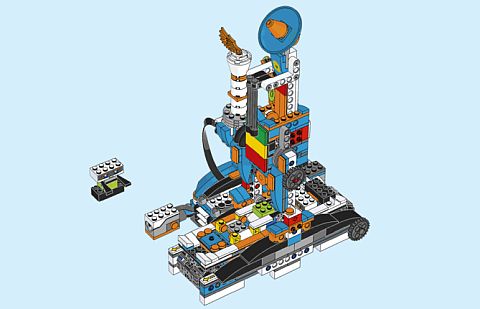
The tray would move to specific spaces so that the arm could grab the parts and then build a robot on a different part of the tray. When it was done, the little whirly thing in the back spun to help celebrate. I can’t say the whole thing was very reliable. I managed to make it work twice and got one of the tries on camera, (which you can see in the video-player below). At this point, the rest of the model dealt with coding. You could see how to build different robots by putting the parts in different orders. You could also get full control over the machine where you control the smallest movements. Then came something very interesting; a game.
Instead of building a robot, you put a completed robot on one space of the tray. Then you had a countdown timer and were supposed to use the sensor as a controller. Put your hand close to the sensor and the tray moves forward. Take your hand away and the tray goes all the way the other direction. Put your hand somewhere in the middle and the tray will stay in place. The goal of the game is to position the robot right under the arm. Then, when time is up, the arm picks up the robot, places it on the building space, and the whirly thing celebrates. The machine could also detect when the tray was not in the right space and failed to pick up the robot. As a result, you get a failed sound effect.
Unpacking this model coding-wise gives us a couple of interesting tools. First, there is a timer mechanism. This helps in determining specific actions that may be a bit longer than incremental adjustments. Second, we get our first look at “if…then” type controls. In this case, we have two options; if successful, turn on the whirly device, if fail, make the fail sound effect.
After building and playing with the robot builder, I could truly see the depth of LEGO BOOST. It was no longer a simple device that could bring movement to a model. This is really what you need to start the basics of coding and how it can relate to real-world applications.
➡ FINAL THOUGHT S ABOUT LEGO BOOST
Normally, I recap things we talked about in the review, but this set has so much more to offer. The amount of control this device gives you is staggering, and the models do a fairly good job teaching you in small practical steps. Of course, this set is not without its downsides.

Since so much of LEGO BOOST depends on the smart device you use, you can have varying experiences. Smaller screens might be too small for building a model, while a large screen might be awkward for controlling it. Additionally, there is not much in the way of text within the app. This is a language-independent design that relies heavily on images to get the message across. Sometimes it became tricky just trying to figure out what they wanted you to do. Plus, there is no one saying why this step or that step is important, which means you’ll have a lot of trial and error ahead of you.
As far as hands-on learning, I have to say it’s one of the best implementations I can think of for teaching basic coding skills. Add in the fact there are several other models in the #17101 LEGO BOOST Creative Toolbox I haven’t even touched upon, as well as the possibilities with other LEGO sets that the toolbox is compatible with, and you have something that’s well worth the price tag in my opinion. If you want to take a look yourself, it’s available at the LEGO BOOST section of the Online LEGO Shop.

What do you think? Do you have the LEGO BOOST Creative Toolbox? Have you played with the different models? What was your experience? Feel free to share your and discuss in the comment section below! 😉
And you might also like to check out the following related posts:


Thank you, Will, for taking the time to write this review. I had no idea Boost was so complex. I look at the models and they look crude, but that’s not the real benefit here. I wonder why Lego don’t put more effort into marketing and explaining this set the way you did.
This makes me rethink Boost. It got a lot of negative feedback at the beginning because it was compatible with so few devices. It seems that they are doing a lot better now with more devices compatible. I haven’t seen a lot of talk about this set by AFOLs, so it’s good to hear about the set from an AFOL perspective. Sounds like you had fun with it.
I also have a question. How do you envision using Boost in your own MOCs? Can you do anything with it that is not tied to official sets?
I have this question as well. I know Will goes to some Lego conventions. Have you seen any afols using boost in their builts?
Honestly, it may be a while before I can work this in regularly to any MOC I build. With that said, the BOOST is a tool you can totally put into any MOC with two provisions.
First, you understand the coding. That is essentially why they run you through the models to teach you how everything can come together.
The second condition is figuring out how to build the power unit into the model. It’s rather substantial but not impossible.
I’d say the system itself is perfect for a crazy contraption module, but of course many of those builders already have Mindstorms. So this still may be a better transition set for AFOLs.
Ideally though it can be a fantastic tool for prototyping a contraption or spicing up a model with something unextpected.
If it does show up in an AFOL MOC it might more seamlessly work in a large display piece. For example a sea monster with moving parts and can roar when something gets close.
I do agree the rush to get it in stores and the very bright color pallet puts the set in a weird limbo for advertising.
In fact, I personally was going to ignore it until one of the LUG members brought it to a meeting and I saw the cat build. Immediately I was interested. Not only could it react to certain actions but the builder could initiate controls to make it behave in a certain way.
LEGO’s remedy to making it look better is to offer compatible sets which actually look good, but that kind of requires you to already be invested with the BOOST.
Shoot! I think I even forgot that the BOOSt has some sort of gyroscopic sensor! In the guitar build there was code for crowd reactions when you tilted the guitar around.
So at this point I’m still a bit in awe of what this thing is capable of and the way you learn still feels a bit free form which makes it a little tough coming up with ideas to work on a design. I would probably suggest retro-fitting an old MOC first to see what life you can breathe into it before starting a completely new creation.
I think it’s the bright colors and crude designs that make people not take Boost too seriously. And the early issues with compatibility made a lot of parents return the set. It was a big deal as all of this happened right before Christmas last year. Once something gets a bad reputation like that it’s hard to recover. I hope Boost does well, so they will keep improving it.