

(Written by William)
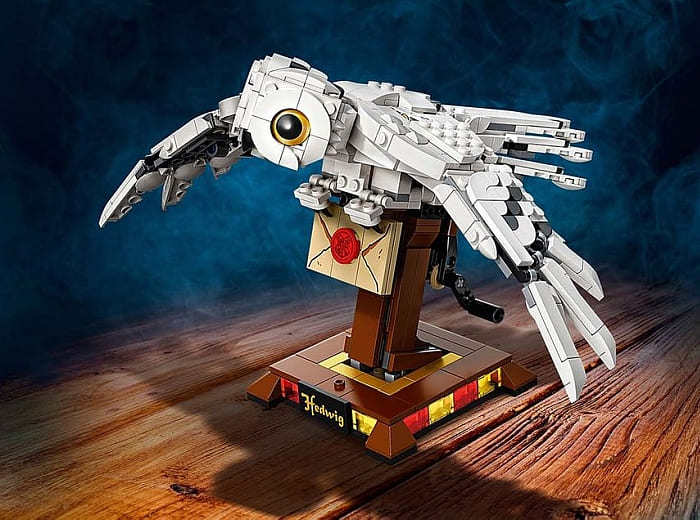
When I first heard about the #75979 LEGO Harry Potter Hedwig set, I thought that it might be an interesting sculpture – nothing I needed, but nice. Then I learned that the wings flapped. I was intrigued, but still not fully sold. I figured it was a simple mechanism where you hit a single lever and the wings would move up and down. Fortunately, my wife insisted on getting it, and oh, boy, I’m glad she did!
What I failed to notice was that Hedwig is actually a kinetic sculpture. As of late, I have become entranced with kinetic sculptures. This is why I had to build Jason Allemann’s LEGO Sisyphus model, and why I was so in love with the #81000 LEGO FORMA Koi set. Heck, I even made a LEGO Ideas project based around the concepts of kinetic sculptures. (See links at the end of this post.)
If you are uncertain what a kinetic sculpture entails, in short, it’s a model that features a moving mechanism that simulates life-like movements. This was to be the hallmark of the LEGO FORMA line, but sadly LEGO chose not to go beyond the initial set of the Koi. This made me a bit sad, but I have recently realized something; LEGO is starting to incorporate this style of building into their mainstream sets. For instance, the recently released Spider-Man and Venom crawlers feature some rather fantastic kinetic elements, and Hedwig is completely a kinetic sculpture.
When it comes to interesting building techniques, I think we need to really look at some fine points of this kinetic creation. I don’t expect that this will be an easy article to follow since it tackles a very demanding subject. Most kinetic sculptures straddle between being a LEGO Systems model and a LEGO Technic set. Technic creations do have movement, but they are usually designed to achieve a specific purpose, like knocking something over or picking something up. Meanwhile, LEGO Systems really excels in making a model look great. So, when you have a sculpture whose moving parts are made to look great, you end up with a category that is still relatively new in terms of finding out what is possible.
In the video above, I have included my overall thoughts on the set, and below that, we will talk about the building techniques. In order to make this article a little easier to digest, I’ll talk about two concepts. The first will be rather broad and less technical in nature so everyone can get something out of it. The second part will involve deconstructing the wing section and seeing what exactly is involved in making a truly defined motion. So, strap in, cause we’re about to take flight!
LEGO KINETIC SCULPTURES – DISTANCE IN MECHANISM
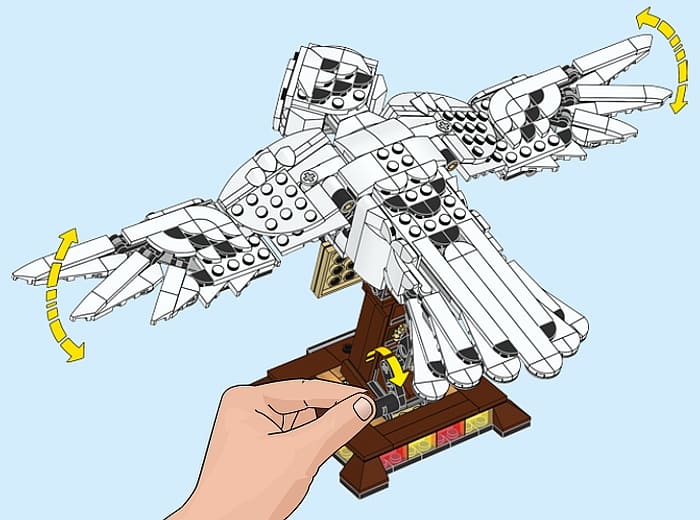
Generally, a kinetic sculpture has a key feature you interact with and a resulting motion from that interaction. In the case of Hedwig, you turn a crank and then the wings flap. Granted, there are a lot of things that happen in between the turn of the crank and the flap of the wings, but let’s take a broad look at this feature and figure out partly why this is so impressive.
When it comes to making a LEGO creation like this, you can either go the direct method or add degrees of distance between the two elements. To give an example, the direct method involves using a switch or knob that directly connects to the section you want moved. Think of a nutcracker; lift up the back lever and the mouth opens, push down the lever and the mouth closes. This is a direct method on making things work.
As far as methods go, this is practical and uncomplicated. Usually the motion you interact with is the same as the result you are trying to perform. I do recommend to those starting out with kinetic sculptures to use this approach first. It’ll let you define what you’re trying to accomplish, while also getting you in the mindset of how to make room for mechanisms as well as creating triggers. Sadly, even though the effects are novel, they tend not to impress too much.
Now when you add a bit of distance, both literally and figuratively, people are much more astounded by what you create. When it comes to the literal distance, I’m referring to how far away the resulting motion is from whatever you use to activate it. This distance gives the viewer a clear line of sight on the motion without the operator in the way. What you end up with is what’s called the “suspension of disbelief”. This is a theater term that roughly means the audience, or person viewing, can allow themselves to think something impossible is happening. In our case, seeing a LEGO creation come to life is impossible, yet extremely captivating.
As for the figurative distance, I’m referring to how different the action you perform is to the resulting motion. So, for example, if you turn a crank and the resulting action is something that also turns, then there is very little in the way of figurative distance. Now if that same crank turned and instead a hammer raised and lowered, then the mind thinks of the two actions as being different. In this model, having a turning crank result in wings flapping is a very figuratively distant expression. When this occurs, you definitely get a much stronger notion of being impressed.
Ultimately, this is what I’d encourage builders to work towards when creating a moving model. First, figure out how it should move and then put as much distance between the end result and the activation control that puts the whole thing into motion. Doing this is harder done than said, but it is a roadmap for how you can get the most out of your design.
LEGO KINETIC SCULPTURES – DEFINING WING MOTION
The most challenging part of a kinetic sculpture is figuring out how to create a precise motion that looks right. Generally, most models use circular motion to power their devices. This is in part thanks to circular motion being the easiest way to express continual motion. If you instead used a button or lever, the action would end as soon as the button is pressed or the lever is pulled. But with circular motion, you just keep turning the knob or crank to power the machine.
Therefore, figuring out how to turn circular motion into a form you want is the first challenge. The Hedwig set uses a series of beams which are used like levers that tilt in clearly defined ways. It’s the limitations of the levers that force the motion to look like a flapping wing. Let’s break down each part of the wing to see how it structures the effect.
The mechanism is made up of five distinct pieces. There are two beams that are straight and make up the part of the wing that connects the wingtip to the owl’s body. Each of these beams acts slightly differently, so to treat them as two distinct parts, we’ll call them the upper and lower beams. At the end of these, away from the body, is the wingtip, which is built on an “L” shaped beam. Fourth, we have the turning mechanism. This is a small beam with a pin that provides the source of the motion. And finally, we have a small assembly that forms a right angle. This little built section connects to the body as well as the lower beam and sits behind the upper and lower beams. Now that we’ve identified the key parts let’s see how they interact.
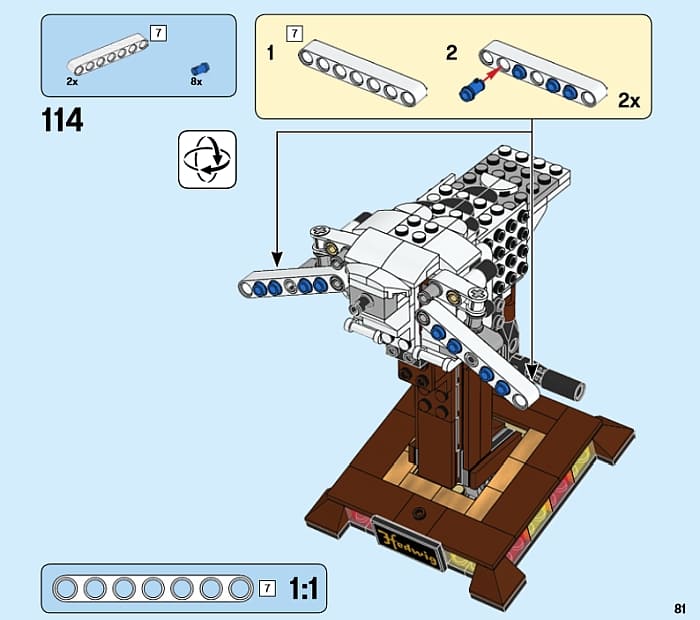
Starting with the top beam, it is connected to the body and the wingtip. This simple connection ensures that, no matter what else we do, the main part of the wing will only be able to move up and down.
Next up is the turning mechanism that powers the wing. As you can tell, it is rather small. Often, it is unnecessary to have large circular motions since, if you want to exaggerate a moving element, it’s often easier to just use longer beams. In short, the turning mechanism itself is unremarkable. And this is actually the challenge we are presented with as it is this circular action we need to change.
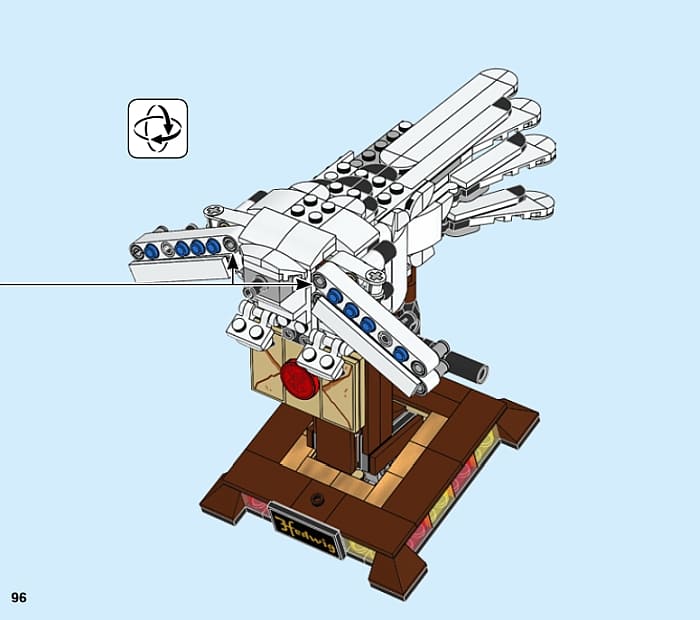
Following this, we’ll go to that right-angled support we built to help connect the lower beam to everything. Essentially, this small build has three jobs. The point at which it connects into the body of the owl is there to direct the overall motion (kind of like how the upper beam works). Its other connection point is to be used as a fulcrum for the lower beam (think of it as the center section of a teeter totter, so when the lower beam is pushed down on one end, it will go up on the opposite end). Finally, this contraption’s third job is to contain the excess movement from the turning mechanism. (By being built in a ninety-degree fashion, it can more easily work with the constant turning motion rather than stuttering and spasmodically twitching when the circle of motion reaches its farthest points.)

Bringing all of this together is the lower beam. It attaches to the turning mechanism, the right-angled contraption, and the wingtip. Now, when it receives motion from the turning beam, it will act in two distinct ways. When the moving circle is up or down, the lower beam will go in the opposite direction thanks to the right-angled contraption. And, when the turning mechanism is left or right, this will either push out or pull in the beam. Again, the right-angled contraption helps the beam move along with this motion. The up and down motion explains the main reason why the wings flap, but if you notice, something interesting is happening with the wingtip.
As mentioned before, the wing tip is built on an “L” shaped beam. The foot of this beam is rather small, being only two pinholes long. It’s these holes that the upper and lower beams are connected to. Being so close together means that it takes very little change for the other end of the wingtip to move dramatically. Therefore, since the upper beam is a solid connection point, the wingtip will tilt whenever the lower beam is pushed out or pulled back in. Of course, we know this is happening thanks to the circular motion. The end result is a secondary joint that has a very realistic motion, when it is merely reacting to the forces placed upon it.
APPLYING WHAT YOU LEARN
Creating any type of moving element that has a high aesthetic appeal is fairly rare in official LEGO sets. However, we are seeing more and more of these type of models making it into production. This is why, up until recently, we had to look to fan designers to see such marvelous creations. However, now that LEGO is also making such creations, we can start dissecting some of these mechanisms and figure out what a good approach is to recreating them or using them in our own models.
Just knowing the types of features that make a kinetic sculpture look good – like adding distance in various ways – can go a long way in planning a design. Though, as I stated earlier, starting with the most basic functionality of a model is the best starting place before you challenge yourself with something more complex.
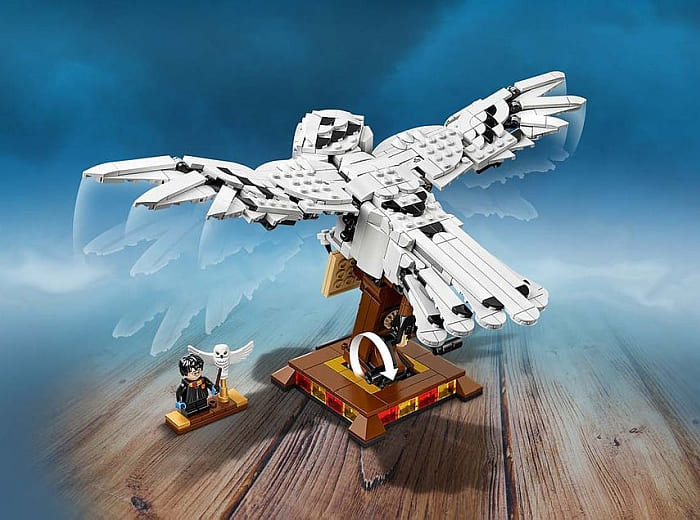
Of course, an advanced builder has an example to work off of with the wings of Hedwig. Understanding the basics of a lever’s movement is simple. It’s the layered interactions that is harder to understand and harder to recreate. In my own experimentation with the techniques, I first tried to work out all the moving elements in a stripped-down barebones scaffolding. Only after this was figured out did I even bother building the more decorative elements to my model. LEGO Technic builders will have a big advantage in this area since they are more familiar with the elements that can achieve these types of actions. So, if you need more examples beyond Hedwig and the Super Hero crawlers, I do suggest picking up a few inexpensive LEGO Technic sets to move your building skill to another level. If you want to get Hedwig, it’s only a $40 set, and is available at the LEGO Harry Potter section of the Online LEGO Shop.

What do you think? How do you like the LEGO Harry Potter Hedwig set? Do you have it already? Or are you planning to get it? And what do you think of the building techniques we discussed here? Have you experimented with building kinetic sculptures? Feel free to share and discuss in the comment section below!
And you might also like to check out the following related posts:


Wow. I had no idea the wings moved like that! That’s a really cool mechanism.
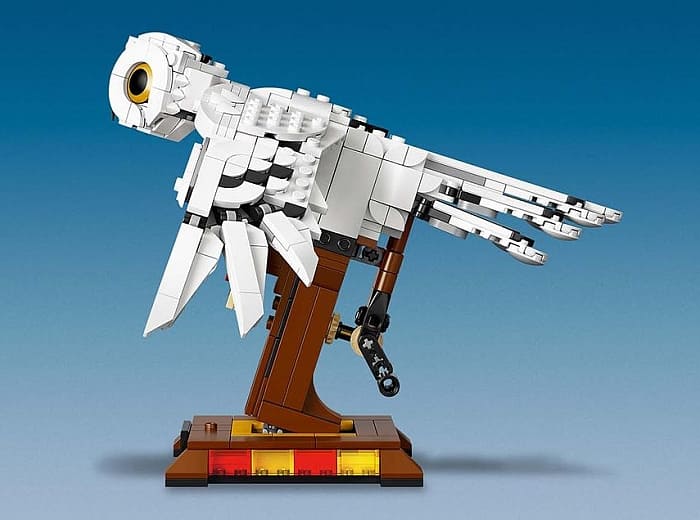
What’s I’m most impressed about is that they managed to hide all that mechanism in a relatively small build.
I love how they did the feathers. It turned out to be a nice looking bird even without the mechanism.
This is a much better way of using kinetic features than in the koi set. The foil pieces were too far from normal Lego. I hope to see more sets like this.
Could you use the underlying mechanism easily for something else? In otherwords? Can you keep the mechamism and dress it as something else than an owl? Maybe type of bird?
I didn’tpay any attention to this set. I thought it was just a sculpture. Now I’m interested! Thanks for talking about it!
I have made hedwig instruction by instruction and all the way till the end the wings moved when you turned the lever then all of a sudden it won’t work??? Help!
Lisa, I reached out to William so he can take a look for you. Hang in there. 🙂
My guess is that you have some gears that seperated.
There is one gear in particular that is thin and a bit large. the teeth on it are very shallow so that’s where I guess the connection has come undone.
The problem is that set of gears is buried inside the owl.
If you look at the back underside of the model you can see a few gears. If all three of these are moving then it is the gear that is touching the top most one you can see/feel. Hopefully though it is the bottom most two gears since those you can just press together.
If it is the big gear I’m thinking about, then you will need to dismantle the back of Hedwig just to get access to it.
Now, if the wings are completely jammed then what is likely to be the case is the wings are attached wrong. In that case, you’ll want to take apart the wings and try rebuilding them paying close attention to which holes they connect to.
Another way you might figure out that it is indeed the gears is if you hear clicking. That means the gears are trying to connect but they don’t have enough purchase.
And if all else fails, tearing it down and doing a complete rebuild is always an option. Fortunately, this set isn’t as big as others.
If you do rebuild, one thing I always do is to move the Technic pieces to see them in motion once I attach them. When you build with axles they can slip and jam if you’re not careful This can also show you any problem areas ahead of time. However, since you did say it worked before, chances are you built it right and gears just seperated.
Over time pieces will have natural seperation with temperature change. Normally this doesn’t effect a model, but when moving parts are involved that can cause working issues.
Hopefully that gives you a couple of things to check and get your bird flying again!
We have lost a small beige cog in the Hedwig pack, does anyone know where we can source another?