

(Written by William)
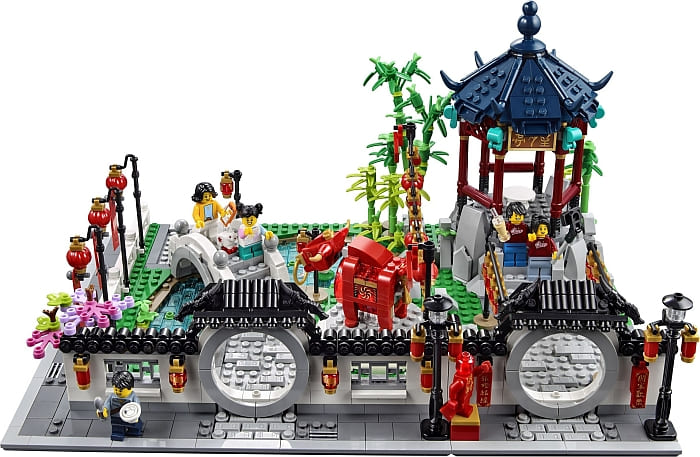
LEGO released two large Chinese New Year sets this year; the #80106 LEGO Chinese New Year Story of Nian, which we already talked about (Brick Breakdown: LEGO Story of Nian), and the #80107 LEGO Chinese New Year Spring Lantern Festival.
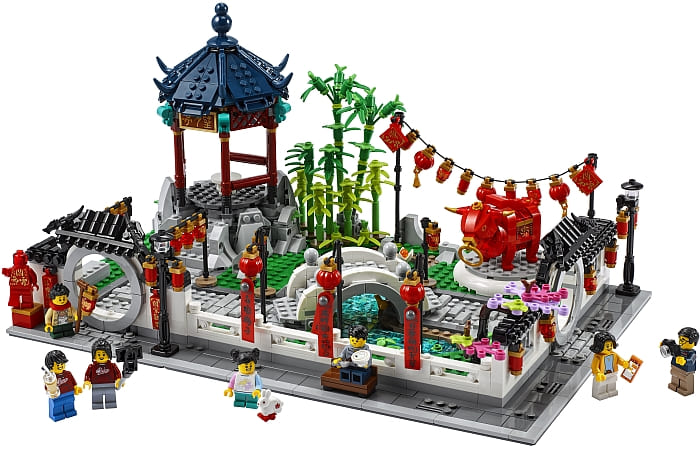
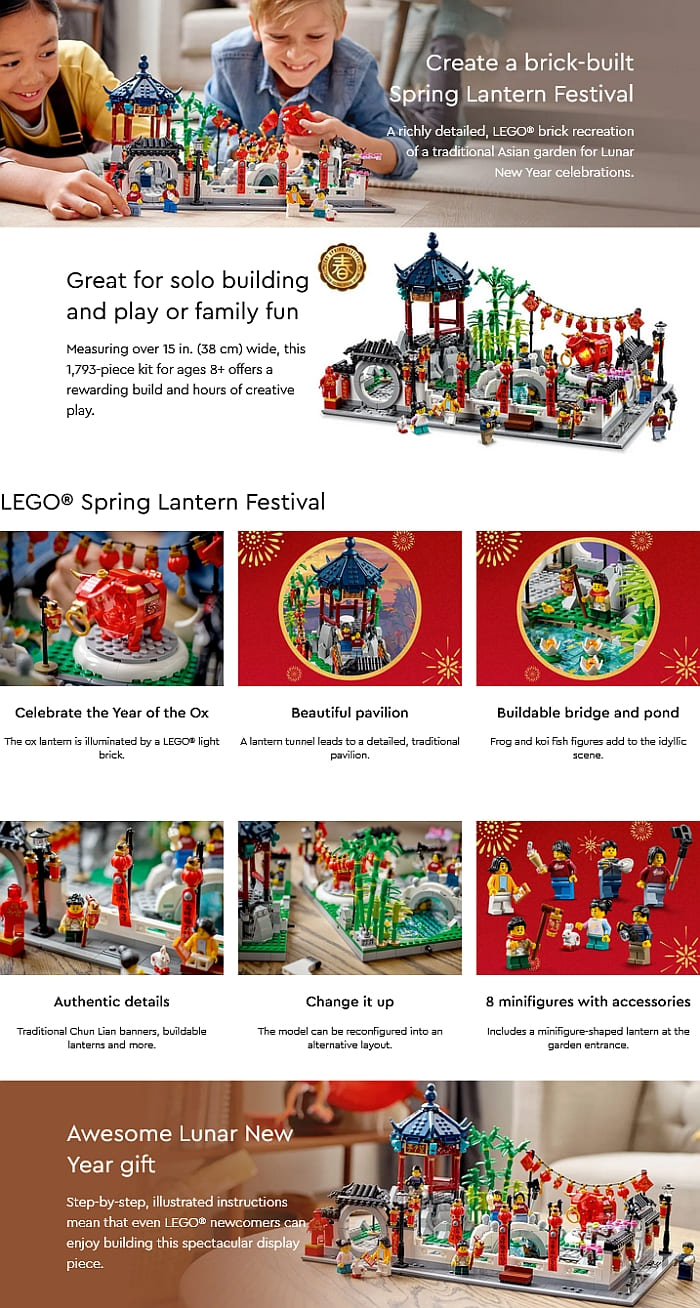
Before we discuss some of the interesting building techniques in the set, I thought to share some of my general impressions. The level of detail in this set – including new printed elements and interesting building techniques – really grabbed my attention. I found myself thoroughly entertained during the building process.
And if this set couldn’t get any cooler, it is compatible with the large LEGO Creator Expert Modular Buildings. It features the right type of sidewalk as well as the pinholes in the correct spots to make attachment easy. So, even if you aren’t that interested in a holiday set, but you like the Modulars, this is – for all intents and purposes – a modular park set!
It’s also worth noting that there are no stickers in this set. Everything is printed including a number of transparent pieces. Fish, lanterns, and banners, all have exquisite detailing, and not to mention the minifigures. Throw in some interestingly colored elements like bananas in dark-blue, a 32×32 baseplate in dark-gray, and this set is not that bad as a source for useful parts either. I especially enjoyed the colors of the candle elements that are present on the roof and in the construction of the bamboo. Plus, the light-brick hidden in the ox is a nice touch as well. After all, considering this is a lantern festival, something should light up! But what really stole the show for me was how much effort was placed on creating the landscape. So, let’s talk about that.
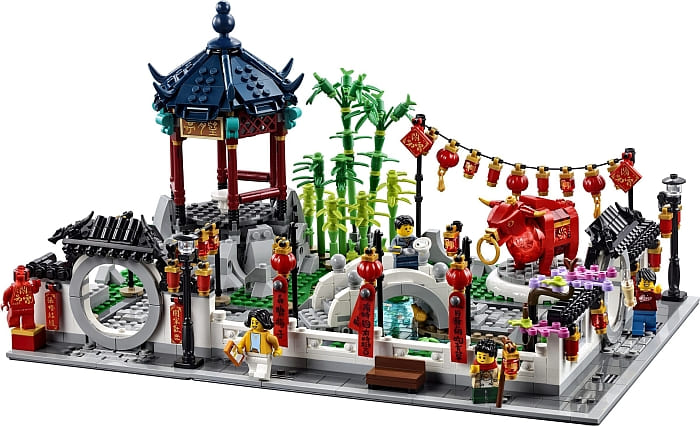
LEGO Spring Lantern Festival – Landscape Sculpting
Having a festival set in a park means it is going to have some landscaping. And since this is an expert level set, it means that the landscaping techniques are quite advanced. I must admit, this set really made me rethink how I approach creating nature, even if I’m doing it just for filler in a display.

First of all, this set demonstrates that variety is king. Whether you are mixing grass and rocks, dirt and paths, water and hills, nature comes alive when you vary things up. Just by having a bit of contrast, it makes each element more distinct and thus more special. Even plants can easily be varied by choosing different leaf and flower types to model different plants. A tree doesn’t look anything like bamboo, so using both lets each of them shine in their own way.
The next tip to nature building is to play with color, shape, and texture. At a glance, the park looks fairly flat, yet it is striking. This is because LEGO designers packed four plates of carefully crafted design just to make the water for the pond. Each layer treats color, shape and texture in its own way to help create something amazing.
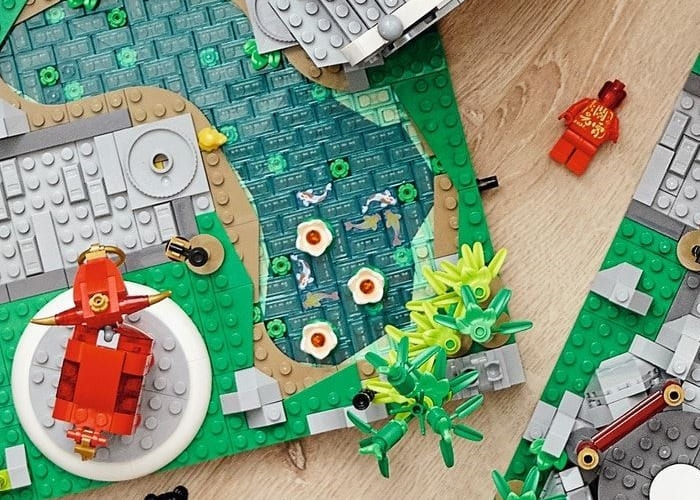
The base layer of the pond features mostly tan and dark-green plates, which adds a sense of depth. At the same time, all the angles begin framing something that looks carved out naturally. The next layer mostly involves transparent tiles. This smoothes out the surface of the water making it feel like its own thing. The tint of blue also mixes with the colors underneath creating a whole new color-scheme. This layer also features some printed fish to further draw the eye. Both the first and second layer contain small round flowers in green to bring an added level of diversity.
The third layer focuses on the shoreline. Wedges of all shapes help hide and reveal certain sections to further accentuate the natural erosion caused by the water. The fourth layer continues to shape the banks while adding flora to the scene. Leaves on the banks, lily pads in the water – they all highlight life in the scene.
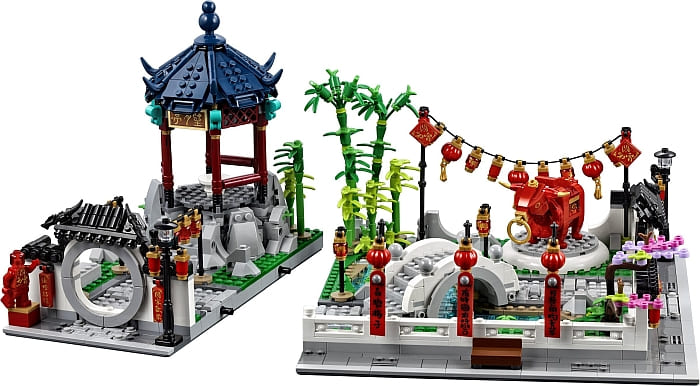
There is also another excellent example of landscaping, which incorporates landscape elements into a structure. On one end of the park, a standing structure sits on a shelf of stone. Much of this stone looks unworked and raw. Presenting nature in this way can convey a number of different things depending on what you are going for. For example, in a post-apocalyptic setting, you may want to show that nature is unbound and can’t be contained. However, in this set, I think the idea is that the culture is in harmony with nature. Two totally different impressions. And the techniques used aren’t that hard.
What you’ll want to focus on is finding a variety of shapes (slopes are great for this), and practice sideways building techniques. It’s not necessary to build sideways, but it presents a lot of great opportunities and tends to be easier for creating natural shapes.
LEGO Spring Lantern Festival – Building a Rounding Frame
I admit that I am terrible at making things round out of LEGO bricks. When I try making something round, let’s just say I don’t trust the stability of those creations. It’s hard to make round forms with mostly square parts. So then how can we make something round? Or at the very least, how do we make something appear round? Well, one technique demonstrated in this set is based on how you create your base frame.
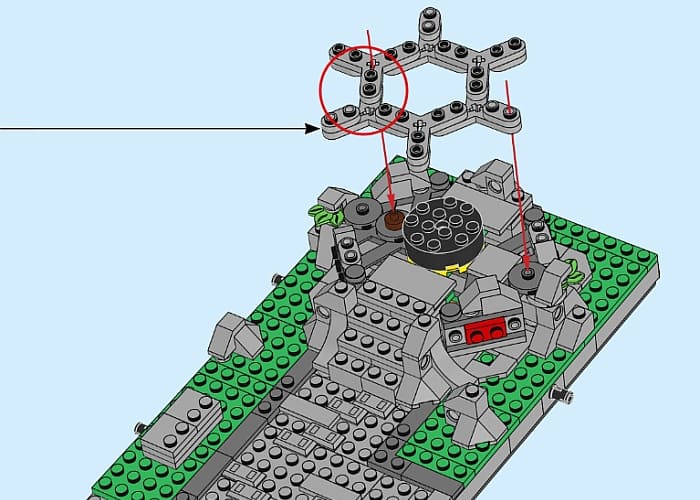
As I mentioned before, stability can be an issue when building something round. LEGO bricks and elements are often better suited for flat rectangular shaping. Therefore, when creating a more exotic shape, it’s best to start with a good frame. In this case, LEGO chose to create a hexagonal, six-sided, frame for the pavilion. This allows the builder to focus on much smaller sections at a time. Then, when each side is put together, you get a natural curve.
The rule of thumb is that the more sides you add to your frame, the more seamless the curve will be. However, more sides to your frame may pose an issue, since it may be a bit more delicate working with too many sides. Fortunately, there are ways to disguise your seams.

Let’s look at the roof of the pavilion. The six sides provide room to create some triangular shapes. They even have prongs that stick out beyond the corners of the hexagon for mounting decorative elements as well as to cover more distance. When the roof is complete, clips, candles, and bananas, are laid down and rest in the seams of the triangular wedges.
The end result is something that may not be the most stable, but it looks incredibly fancy, and that’s all what’s needed. When adding elements over seams, its often not important to make them the most durable of connections. They are serving in a highly decorative purpose, so aim for elements that grab the eye. Interesting shapes and colors are the hallmark for choosing these parts.

To recap, the goal of a good rounding frame is to break down the challenging shape into much more manageable sections. Then later you can use more fragile decorative elements to cover up any gaps. As an added touch, you can even place a smaller element that is curved or round at the top or somewhere prominent to reinforce that what people are looking at is round. If well done, viewers won’t even notice that the round shape is just a really dressed-up polygon frame.
Applying What You Learn
When creating highly detailed landscapes, one of the best techniques is to work in layers. This can be actual literal layers of brick and/or plates, or it can be a variety of items. Ideally, varying your terrain types can provide very interesting contrasting elements to your scene. Using too much of the same thing can be impressive in the sheer mass of LEGO elements involved, but you can do so much more with a more focused approach.
As for creating a rounding frame, this is just a good habit to get into. For a truly complex shape that is still fairly uniform, like a roof, do what you can to break up the shape into smaller sides. It is these smaller sections that the rounding frame will accommodate and support. So, in case you are uncertain as to how to start, you can always work backwards by figuring out what type of small sections will look the best. Everything else is simply window dressing to make the structure look seamless.
What do you think? How do you like the LEGO Chinese New Year Spring Lantern Festival set? Do you have it already? And what do you think of the techniques we discussed here? Are there any other interesting techniques you noticed in the set? Feel free to share and discuss in the comment section below!
And you might also like to check out the following related posts:


I love this set. It’s really beautiful. I hope they will continue with the Chinese New Year sets for many years to come
I’m trying to evaluate my rounding techniques… I think I do, almost always, start with the outside and build the frame afterwards. At least for a roof, where there is the added variable of the angle. Maybe not for a wall, where I can imagine the outside, almost subconsciously, without having to lay pieces out on my desk and then work on a frame for them.
The pavilion roof here is brilliantly well done.
THis is such a beautiful set. I’m most impressed by the techniques they used for the vegetation.
dark blue bananas! 😀 by the way, the tree house has a similar roof technique and it also uses dark blue.
I love this set! It was out of stock for a long time, so I was worried I won’t be able to get it, but it’s back in stock now. I received it a couple of days ago, but I haven’t built it yet. It’s so beautiful t! Your article made me want to build it even more!
I hope I can get this set one day. It’s so pretty and tranquil, but I don’t know what I would do with it right now, so it’s not on top of my list.