

(Written by William)
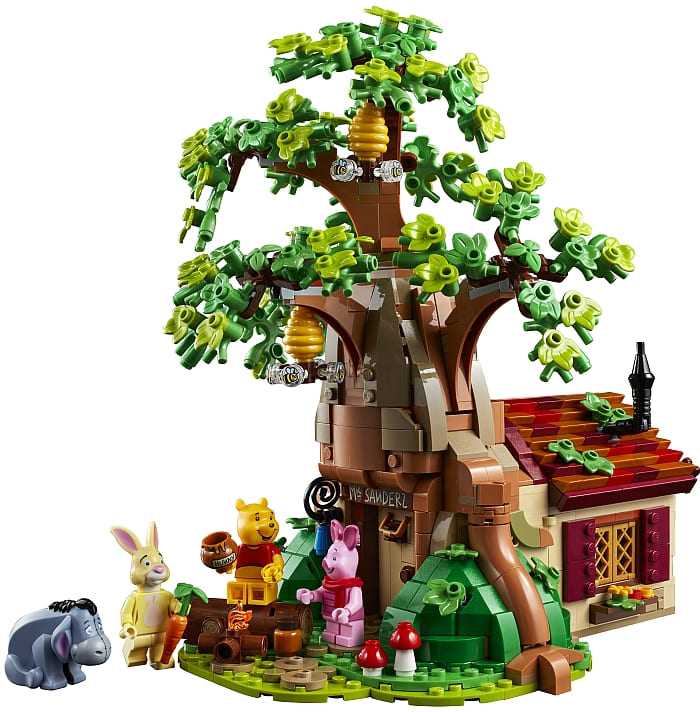
I was so excited when the Winnie the Pooh project was selected on LEGO Ideas to become an official LEGO set. I grew up with Winnie the Pooh and friends, so this set was a must for my collection. I stayed up late to place my order as soon as the set became available. And I’m glad I did.
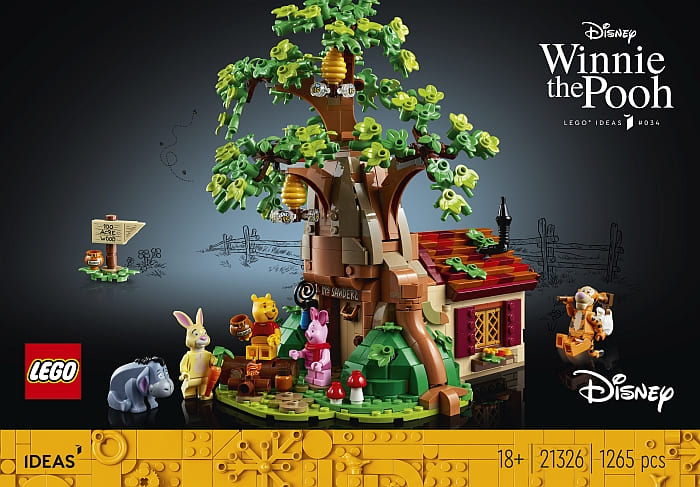
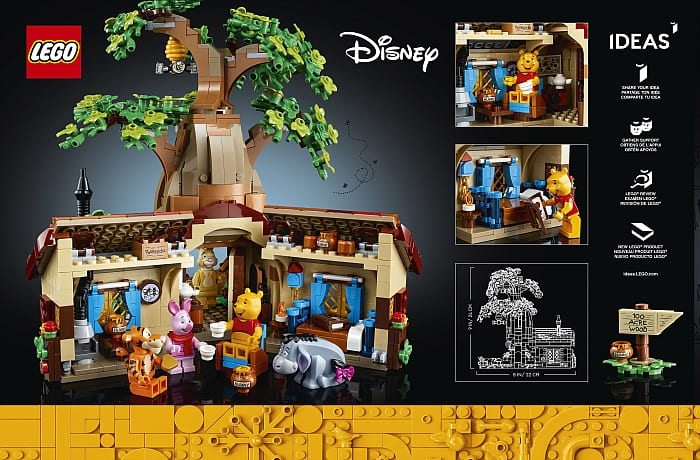
Pooh’s house is crammed to the rafters with authentic details and meaningful items. I especially love how every nook and cranny has a honey pot. Or, to be more precise, a Hunny Pot, since Pooh is questionable when it comes to spelling.
I was also thrilled to see the sculpts for the minifigures. For the longest time, LEGO refused to create new molds for their LEGO Ideas projects. That changed with the minifigs in the #21324 LEGO Ideas 123 Sesame Street set, and I’m glad to see it done with the figures in the LEGO Ideas Winnie the Pooh set as well. I think the only missed opportunity was to have the Eeyore character poseable in some way. As it is, he is a solid piece. Perhaps that’s why he’s so glum?
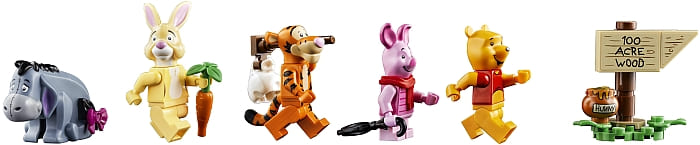
The #21326 LEGO Ideas Winnie the Pooh set does have some stickers, which I know detract for some fans. But there are also some nice printed elements. The cut log that Pooh sits on are printed. The “Hunny” label on the pots are also printed. And, of course, we get the printing on the figures themselves. And honestly, the included stickers are so specialized that it would have been hard to justify having them as printed elements.
In the video below, I will share some more of my general thoughts on the set, then we will discuss some interesting building techniques.
What really keeps me in awe of this set is how it handles natural elements. The techniques employed here make me re-examine how I’ve been approaching recreating nature. It’s so involved that I need to split the approach up into two distinct techniques. After all, the 100 Acre Woods deserves no less.
SHOWCASING NATURE ELEMENTS WITH LEGO
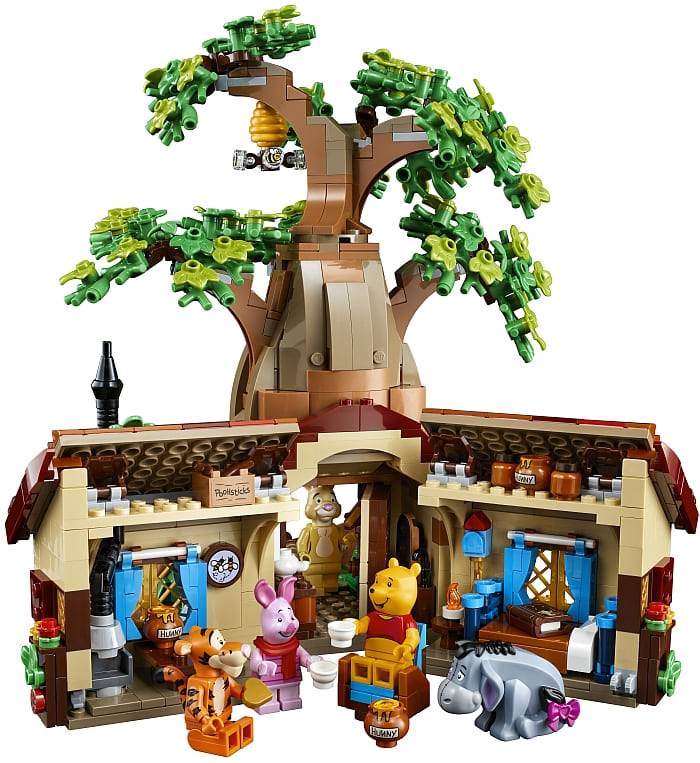
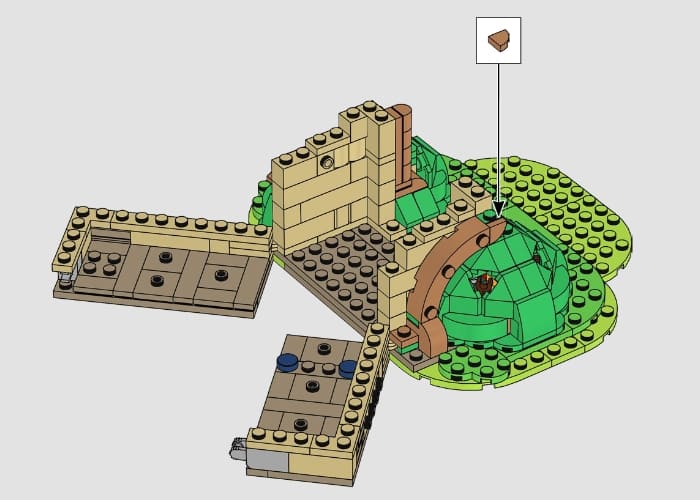
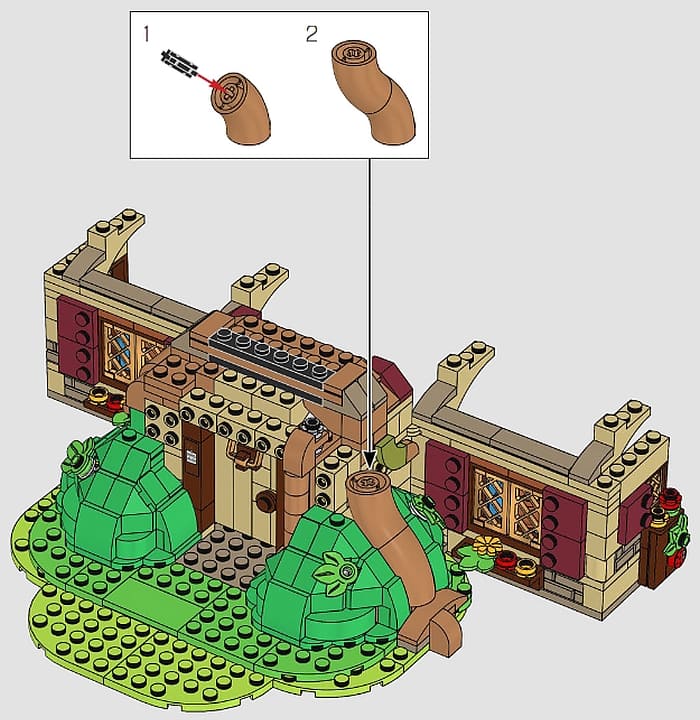
Looking at the tree, the flowing curves are striking. At the right side there is that massive rounded tubular root. On the opposite side, where the tree transitions into the house, there is a large macaroni brick turned sideways to form another irregular bit of curving. And even the branches that stick left and right are canted upwards at a jaunty angle. The end result is something that looks extremely organic.
These examples – save for the branches – aren’t integral in holding up any sort of structure. Even the branches only hold up some token leaves, though they could handle significantly more weight. The primary purpose is that all these elements have interesting shapes. And these shapes become even more interesting when they are angled in unexpected ways – outside of the expected geometry you usually see with LEGO. Even the large root on the right has a notch cut out for it on the side of the tree just so it can rest there.
Showcasing in this way is all about finding the best, most original shapes and figuring out how to place them into your model so it looks connected. Think of this as a way to greeble on a large scale. (For those unfamiliar with greebling, it is a technique often seen in spacecraft, where lots of small elements are used to texture a surface, giving it a complex look.) Showcasing is a bit broader though. Instead of texturing a surface, it does more to sculpt the larger bulk of the model.
Using this technique is fairly simple, but can require a bit of forethought. First, select a part or parts you wish to showcase. Determine what angle they would work best in your creation. Figure out what type of connection it will need for that angle. Then, when building that section, make sure you have the room and connections you decided on. Remember, most of the time, a showcased element does not need to be structurally sound. Although, you may want to avoid showcasing elements on sections that move around a lot, like a door or hatch. For starters, I suggest examining parts that feature rounded curves since they will often offer the most unusual abstract shapes.
VARIETY OF LEGO CONNECTIONS FOR NATURE
Previously, my standard approach to creating a natural scene was to randomly lay out parts. Then, from that awkward base, begin melding them all into a cohesive whole. This bit of irregular beginning seemed to naturally lean towards an organic feel. But this set showed me how to go one step further.

Why stop at just the random placement of parts? Why not vary the ways sections get connected as well? Honestly, it wasn’t anything I had considered before, but the proof is in this set that it works. A good portion of the set does have normal building techniques along with the expected studs-not-on-top sections to add extra slopes and curves.

Then there are some extra touches like covering up gaps with leaves. These are attached using clip and bar connections. What’s more is that the bars used are the clear curved pieces that were used in the LEGO DC Super Heroes Collectible Minifigures, so elements could be posed in more action-oriented positions. Then there is the clip and bars for the root on the right. Of course, one bar is secured into the axle hole of one of the tubular angled elements. Then the showcased branches that stick out the left and right are angled using LEGO Technic pins to fix them in a sloped angle. Then the leaves themselves are anchored in by small ball-joints.
Each connection point brings with it a different feature it excels at. This variety works the same way as me placing random pieces around, but in a more subtle way. This wide-ranging approach gives the model a fluidity that you want in your nature scenes.
There is a downside to this technique though that you should be aware of. By introducing more and more connection types, you can lose structural integrity if you aren’t careful. Thankfully, nature models aren’t often played with too roughly. So, if you keep the variety of connections to being more decorative in nature, you shouldn’t have too many problems.
Sadly, I’ve built many nature models that do have a tendency to be a bit brittle structurally. Most of the time this isn’t because so many connections are used, but rather the very last connection is not very secured and is tenuous. This is because they want to retain the beauty of nature and minimize any visible connections.
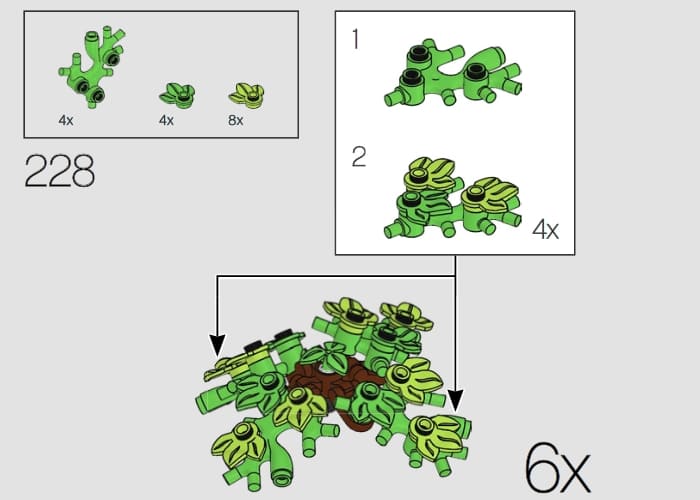
And I hate to say it, but I did find this to be the case with the leaves in this model. LEGO designers went through all the trouble finding great connections for all the other elements and the final leaves are only attached by a single stud.
That’s why I’d recommend trying out this technique on the leaves of the tree. Try using different methods to connect the leaves and see if any of them improve the stability. Perhaps a plate with a clip on top is more secure to grab the seaweed pieces. Or perhaps a plate with bar can stick through the hollow stud of the seaweed making it more secure? Or just examine how moving around a few leaves changes the overall composition of the model.
In the end, using variable connections to form nature is a bit more like free-form expression rather than a codified technique. There’s no wrong way to do it. Just make sure your model doesn’t fall apart and you like how the end result looks. I guess the only real advice is to go out of your way to make using different connections possible.
APPLYING WHAT YOU LEARN
Both techniques in this set stress the importance of variety when it comes to nature. Having the ability to be unpredictable with unusual transitions really heightens the visual appeal. Additionally, the ability to showcase a piece will have you looking twice at some of the elements in your collection. Many of which you may think are too specialized. However, if they are used and placed in very unconventional ways, you might find more use out of them.
As for varying your connections, this is the obvious step beyond what I was doing for my own nature scenes. Randomly placed elements can start you off, but, if you want a truly dynamic nature scene, play with all the connection types at your disposal. This way you might find the full extent of what you can get out of clips, bars, axles, pins, ball-joints, locking hinges, swivel and tilt hinges, and so much more.
The only thing to watch out for is to still have a strong support structure. Too much in the way of odd detail work may leave your parts stressed beyond their capacity. Though, if you do play with LEGO Technic connections, you might be okay since they tend to be a bit more secure than your average LEGO System based connections. Axles that run through other elements are ideal for this very reason. So, stay strong and add some variety to your outdoors! And if you would like to pick up the #21326 LEGO Ideas Winnie the Pooh set, visit the LEGO Ideas section of the Online LEGO Shop.

What do you think? How do you like the LEGO Winnie the Pooh set? And what do you think of the building techniques we discussed here? Are there any other techniques in the set that you really like? Feel free to share your thoughts and discuss in the comment section below!
And you might also like to check out the following related posts:


Wow. I completely forgot that this set is now out. Thanks for the reminder. And I agree the techniques for the tree are wonderful.
I have the Winnie the Pooh set it was so fun to build and own And i have it on display. In fact it’s right next to the Sesame Street set. On the Winnie the Pooh set I did have trouble getting the leaves right in the bushes but I managed somehow. This was a childhood fond memory that came back to life in Lego form.
This tree is too chaotic for me. I don’t like the mix of the two colors and all those weird shapes. I guess I’m old school and only appreciate blocky and studded trees. 😀
I love the minifigs, and I like most of the set too. However, I feel that using dark brown and reddish brown would have been a better choice. Like they did with the bonsai. The lighter colors don’t blend together that well and thus the tree is kind of awkward.
I’m fascinated by all the different ways of making Lego trees. I tend to prefer simpler trees, but I appreciate designers giving us so many different examples. Tree house, bonsai, Winnie the Pooh’s tree, the trees in the modulars, the tree in Ninjago city gardens, etc. They don’t stay with just one method. They keep innovating.
One of my favorite new sets. You can use it to play out scenes right from the book. It’s lovely!
There’s a few key characters missing, though, including Christopher Robin, Kanga, Roo and Owl. Maybe you could do some customs…
I like the little house at the back, the interior and the minifigs. I also appreciate the tree, but like others said, I think darker colors would work better. As far as my favorite tree techniques, I like the bonsai the best. I think this tree would look better with a larger canopy. I remember a larger tree from the book.
I think the tree’s rather bright in Disney’s source material, though. The model at Disney World seemed to be closest to Tan.