(Written by Geneva – gid617)
Last week I showed you the large underwater and above water landscape I built from the recent waves of LEGO Ninjago sets (see: LEGO Ninjago The Island & Seabound Sets Combo), and I promised that we would take a closer look at the techniques I used to create it!
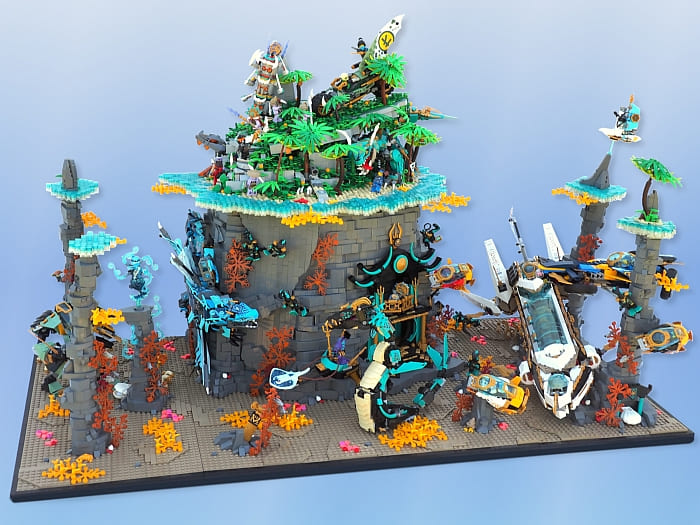
We’ll start with the biggest part of this creation: the massive rock wall. Sideways rock is my go-to technique for tall cliffs because you’ll often see horizontal lines in natural rock formations. You can also get a lot of mileage out of ordinary dark-grey bricks with this kind of technique, instead of having to rely on slopes. Besides bricks and slopes, I used a bunch of large dark grey rock panels turned sideways.
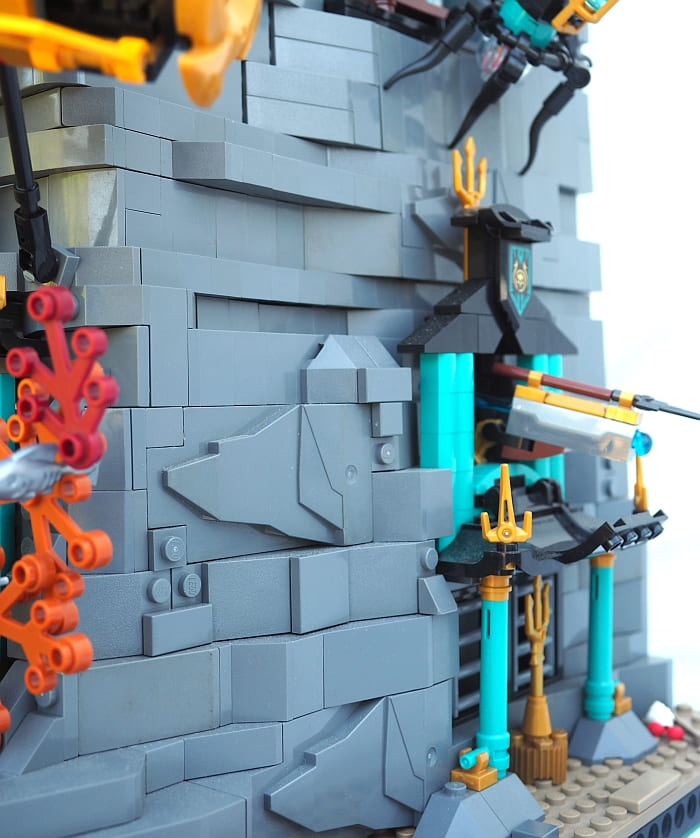
Lately, I’ve been using a “slinky rock” technique originally developed by Eli Wilsea. My version uses LEGO Technic axles running through bricks with LEGO Technic pin holes in them. I alternate between layers of various thicknesses. This technique can be very sturdy, but I didn’t want to waste dark-grey bricks, so most of my layers aren’t attached by more than a couple studs. (If you’d like to know why they’re called “slinky rocks”—you’ll see in the video below!)
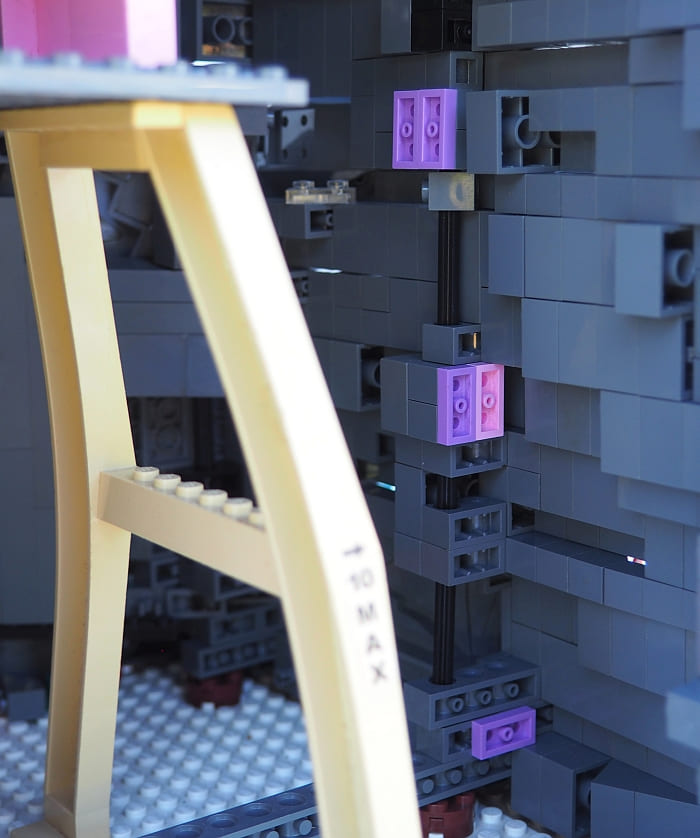
You can get a closer look at the way these rocks are built here inside the pillars. I used some 1×2 bricks with two holes and some with only one hole in the center, allowing for half-stud offsets between layers. Also, most of the layers rotate freely.
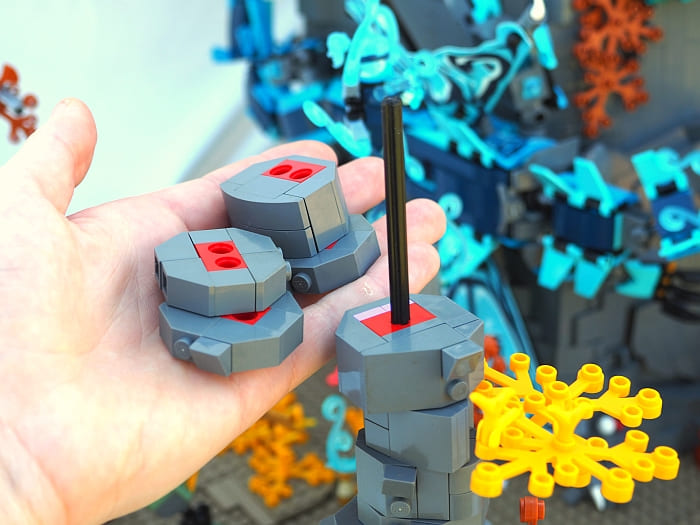
The top layer is extra thick, so I can end with a completely dark-grey top that covers over my axle nicely.
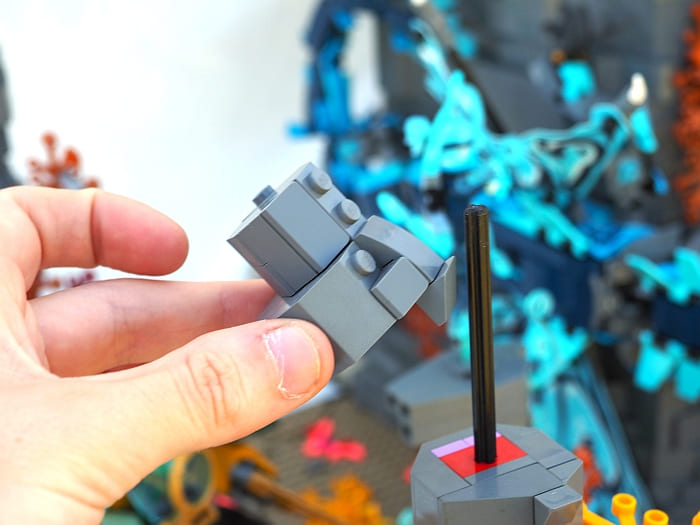
Although I relied on this technique for most of the rockwork in this build, I do have one long slab of bricks around the corner. I did this mostly to get more out of my longest dark-grey pieces!
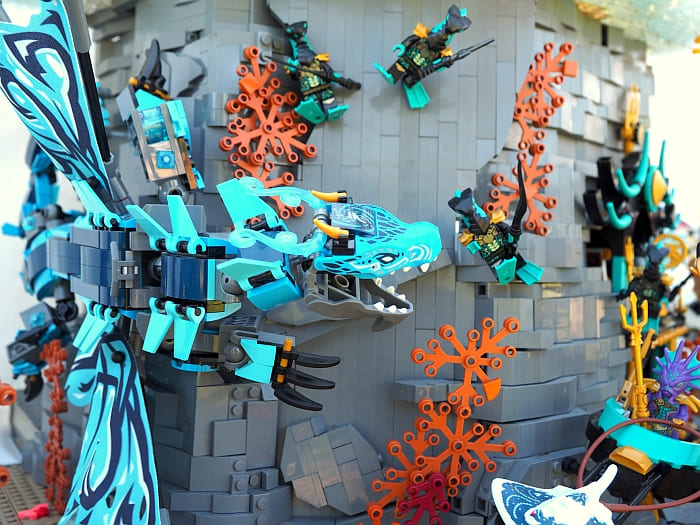
Now that we’ve seen how the rocks were built, let’s see how I used them to support the dragon and submarines. The #71754 LEGO Ninjago Water Dragon is attached to the cliff face by four studs. I didn’t think this would be enough but turns out the dragon really isn’t that heavy. So since there was no need for me to tear it halfway apart in order to embed a LEGO Technic axle inside it, I didn’t bother. Four studs did the trick instead.
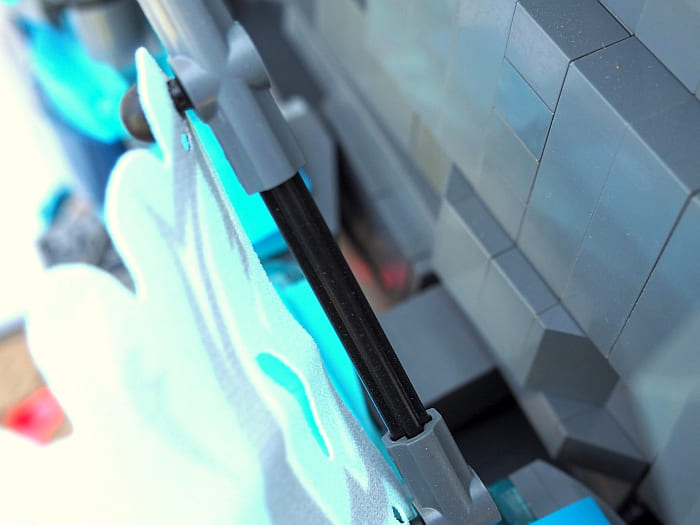
The support system for #71752 LEGO Ninjago Ninja Sub Speeder is more elaborate. I attached light-grey axles between two pillars of rocks in order to give it a resting spot. The submarine puts plenty of pressure on the axles, but they handle it well and bend without breaking.
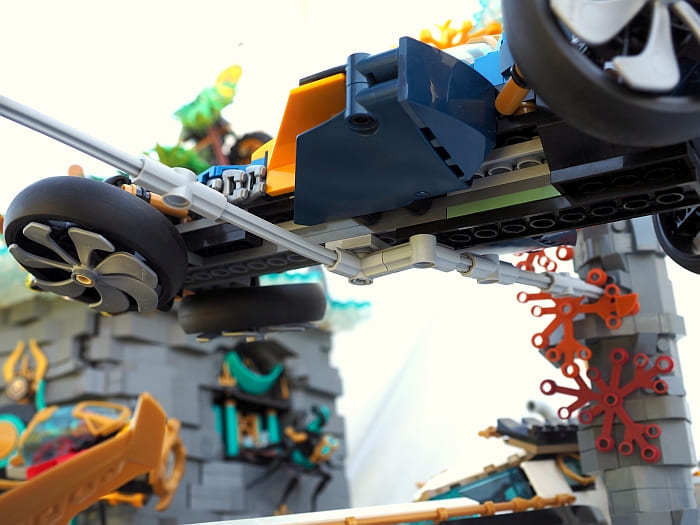
The #71756 LEGO Ninjago Hydro Bounty is right underneath Jay’s submarine. For the most part, it just rests on the ground, but I did attach a few bricks to its base and left a hole in the rock for them to fit into. It’s not attached, but this arrangement keeps the Bounty from sliding out of position.
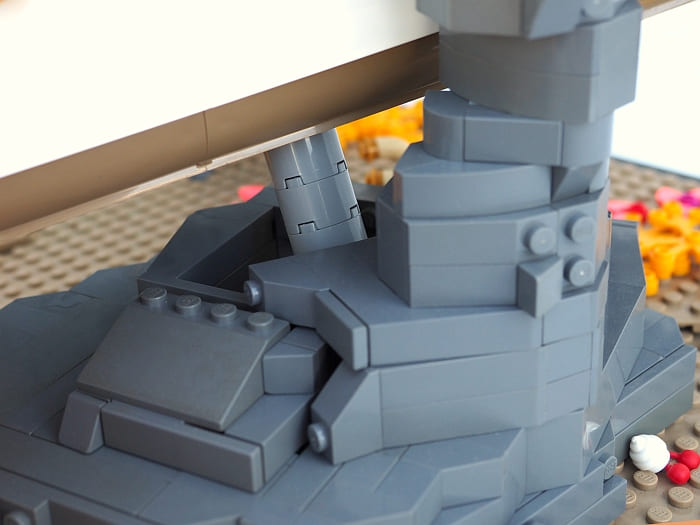
The smaller submarines are attached to the rock using a few bar and clip connections.

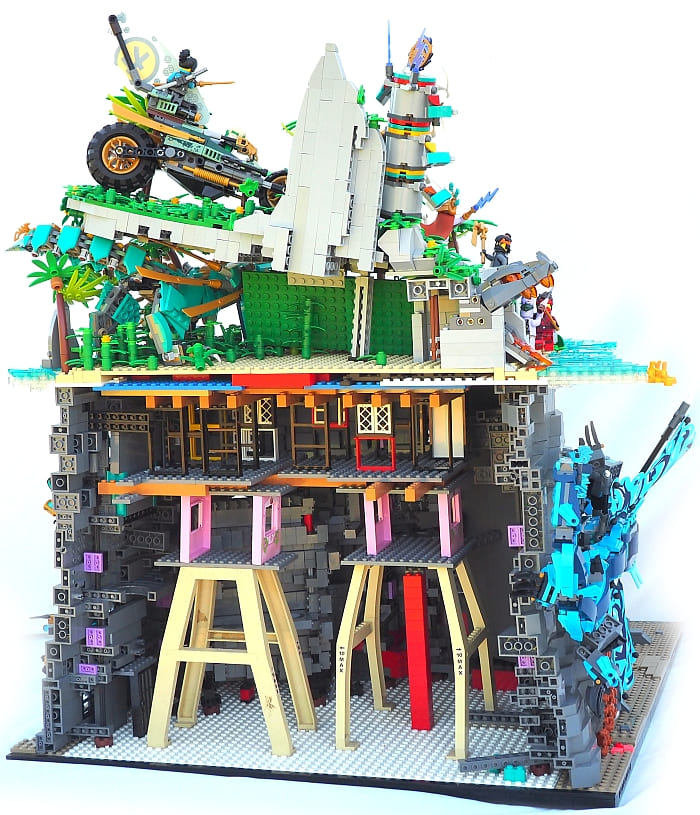
We’ve already caught a glimpse of what the inside of my giant rock looks like, but here’s a complete view where you can see just how hollow it really is. In fact, for the size of this creation, it’s unusually light. I trusted the rock walls themselves to provide most of the support for the island layer and only built the bare minimum for internal support.
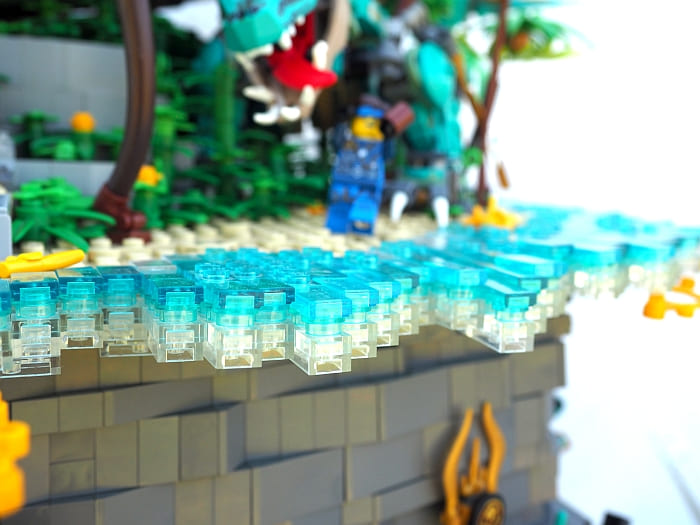
The next technique to talk about is the water. There are four layers in my water—two layers of trans-clear 1×2 plates, a layer of 1×1 round trans-light-blue dots, and finally a layer of trans-light-blue 1×2 tiles. I definitely ran out of pieces building this water; I had hoped my collection would hold out for a couple more inches of water all the way around the island, but there was no way!
Lastly, there are two things to point out about the coral and seaweed. First of all, I got some great advice from another builder, who suggested I try warm red and yellow colors, in order to make sure my seaweed wouldn’t camouflage the sets. That worked great and helped keep the above and underwater visually distinct too.
Secondly, a good tip when you’re building coral or really any kind of plant; find a few pieces you have a lot of and see if you can combine them in a plant-like way. In this case, I used flowers and quarter tiles, elephant tusks and gold round plates, and twigs and minifigure hands. But I’m hardly exaggerating at all when I say that a few dozen of any LEGO piece makes good coral. It’s especially good if you can combine two or more similar pieces for an assembly and then repeat that many times.

If you’d like to see some of these techniques in more depth, I put together a short video to explain more!
Building a habitat for these Ninjago sets was a lot of fun and I was able to flesh out some techniques that I’d only dabbled in before, like the slinky rocks and the seaweed! But I think the best part was planning the colors in order to make the whole creation as eye-catching as possible.
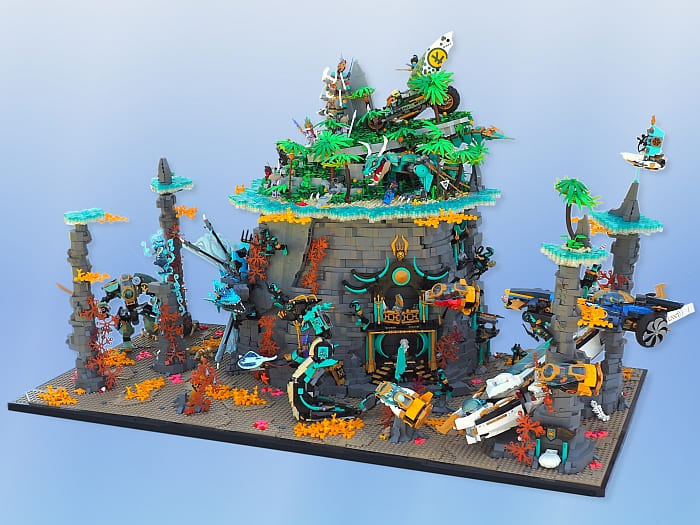
The sets I used in this build are #71750 LEGO Ninjago Lloyd’s Hydro Mech, #71754 LEGO Ninjago Water Dragon, #71747 LEGO Ninjago The Keepers’ Village, #71745 LEGO Ninjago Lloyd’s Jungle Chopper Bike, #71746 LEGO Ninjago Jungle Dragon, #71756 LEGO Ninjago Hydro Bounty, #71752 LEGO Ninjago Ninja Sub Speeder, and #71755 LEGO Ninjago Temple of the Endless Sea. You can find these sets in the LEGO Ninjago section of the Online LEGO Shop.
What do you think? Are any of my techniques here new to you? What would you have done differently if you’d been building a habitat for these sets? Is there any technique you wanted to know about that I didn’t explain? Feel free to share your thoughts or ask questions in the comment section below!
And you might also like to check out the following related posts:
- LEGO Ninjago The Island & Seabound Sets Combo
- LEGO Ninjago The Island Sets Review
- LEGO Ninjago Seabound Sets Review
- Awesome LEGO City & LEGO Ninjago Pop-Up Books
- LEGO World Builder – Original Ninjago Short Film
- Ninjago Season 14 Clip: Ninjas Meet Twitchy Tim
- Trailer for LEGO Ninjago Season 14: The Island
- LEGO Ninjago City Gardens Review & Thoughts


At least the internal structure seems to be purist, using only Lego parts.
(I heard rather many people used Duplo bricks for such structures, since they were cheaper by the mass, and they facilitated building up rough, big structures in a quick time…)
Well, Duplo is produced by the LEGO group, so… 😉
I would consider investing in some Duplo if I were doing a long-term large display, since I wouldn’t want that many normal bricks to be tied up. But I usually recycle my creations pretty quickly so I’ve stuck with normal LEGO for filler so far!
The rock work is amazing. I especially like those stacked rocks. Haven’t seen that technique before.
Thanks! It’s a really fun technique to work with! Well, it did get old eventually with there being so much of it on this MOC… 😉
This is fantastic. I love all the little details. How do you get so many of the same parts though?
Most of my really large quantities of a certain part come from either the Pick a Brick wall in the LEGO stores, or from Bricklink! https://www.bricklink.com/v2/main.page
But there are some sets that come with lots of repetitive parts. Almost all the yellow and orange leaves seen here came from the Ideas Treehouse!
You can also order bulks of certain parts online through Lego by Pick-A-Brick and Bricks-And-Pieces. (The Bricks-And-Pieces assortment is bigger, Pick-A-Brick is more generic.)
Yep, I have used both of those too! But not often. Bricks and Pieces is a great way to get newish parts, but the shopping layout is extremely not buyer-friendly.
There are more user-friendly ways to use Bricks And Pieces and see the assortment than purely through Lego’s own site, I have learned…
Really?? You must teach… 😀
Well, since you’re asking so nicely. Through Brickset and Rebrickable you can find part lists, either by set or by chronological releases by year.
Through the German browser app BrickHunter you can search the current BAP assortment. (Instructions are in German, but if you don’t know any of it, you could probably get the gist through web translation.)
https://www.stonewars.de/anleitungen/brickhunter-browser-erweiterung/
Boy, that looks super handy! Thanks 😀
What are those big support column looking pieces? I have never seen those before.
Crane stands that were used in various City- and Harbor-related sets between the 90’s and 00’s. (Noughties, as the Brits would call them…)
https://www.bricklink.com/v2/search.page?q=Crane%20Stand%20Double#T=A
Bingo!
I got them from the slightly more recent City farm sets though (2009). I think that was their last appearance.
Seems like the very last appearance was 7939 Cargo Train in 2010 (in green).