

 Have you ever wanted to make your own custom LEGO armor? Here is a step-by-step tutorial from an increadibly talented and artistic young LEGO fan, Lamanda.
Lamanda has been creating various custom accessories for LEGO minifigures. You can find many of them in her Bricklink store; Bricks & Customs. Her custom capes and flags are especially beautiful.
She also creates hand-painted custom LEGO goblin-heads that she makes available in her store from time to time. If you are inspired to support the work of a young artist, please visit her store. You really have to see her work personally to appreciate the quality! She has many happy customers! 😀
You can also check out Lamanda’s LEGO customs and other artwork at her flickr Gallery.
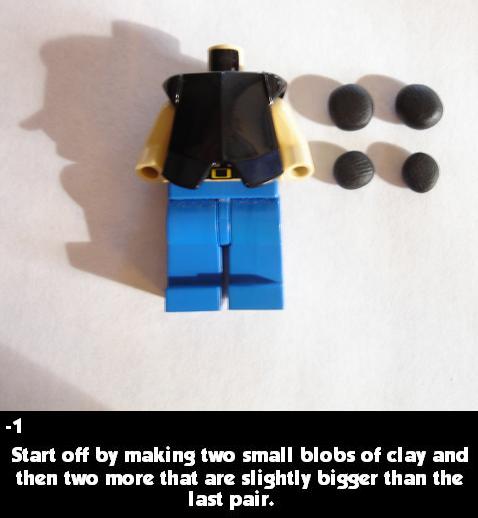
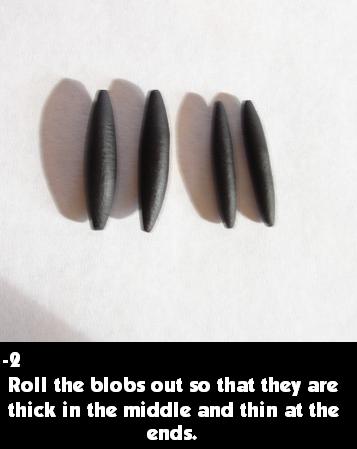
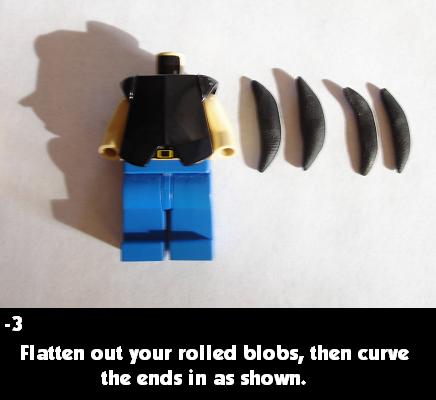
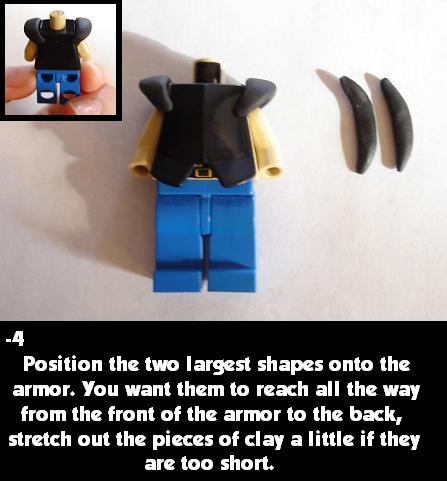
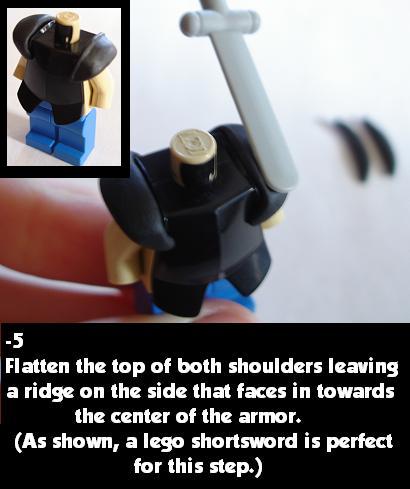
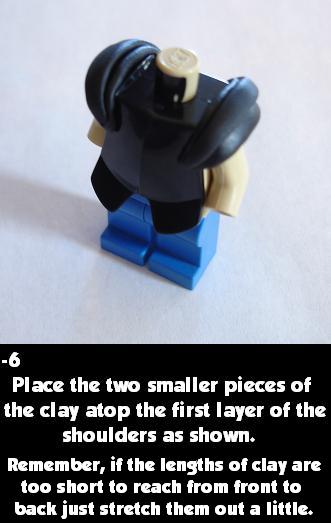
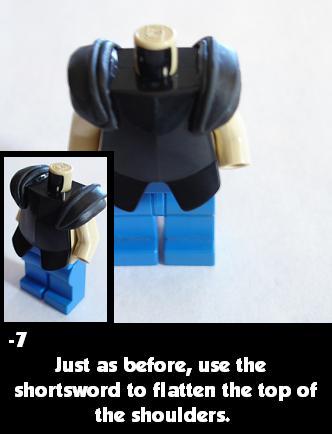
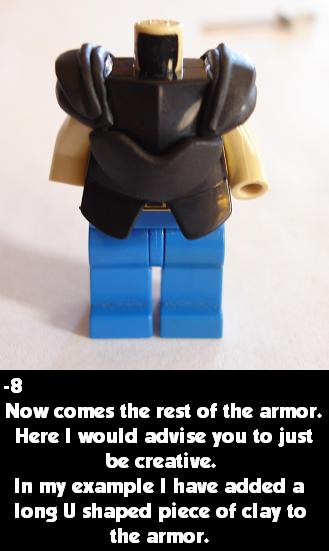
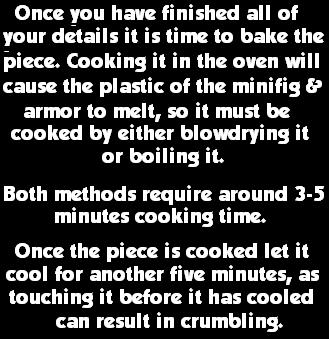
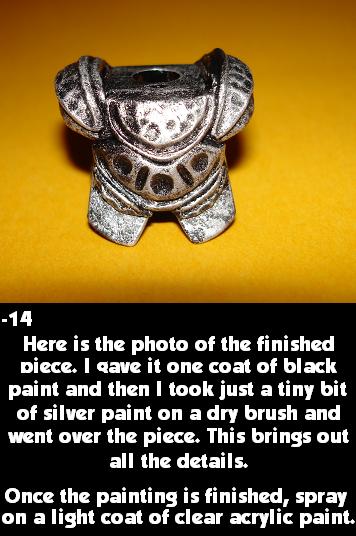
And here is Lamanda’s tutorial for making a custom armor for your LEGO knights or fantasy warriors. You can click on any of the thumbnails below to see a larger view of each step:


Likey, likey, likey! Great tutorial!
Do you know what kind of clay is she using? Is that just regular modeling clay?
I’m not sure, Waverider. I assume it is just modeling clay. You can probably ask her through her flickr page. 😉
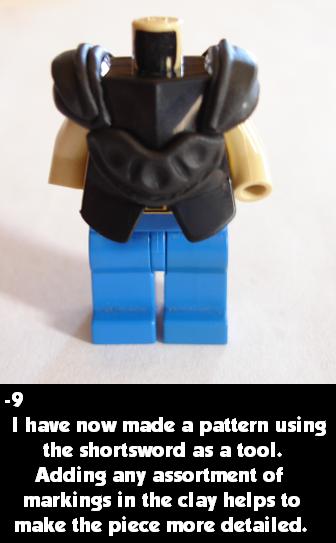
i really like the effect of the metallic paint! great job!
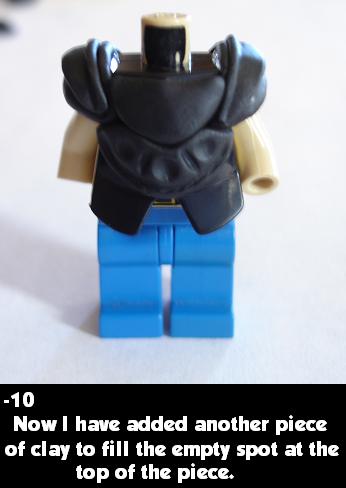
Fantastic article! Lots of nice info. Just one suggestion that once you discover it will make your life a thousand times easier. It sounds like you are using a bakeable clay like Skulpey II (sp?) This is great, but as you note in your article, it needs to be baked to harden. Which is problematic when working with plastic.
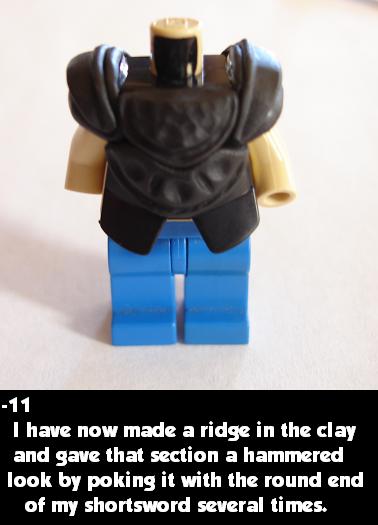
Instead look for a product called “Aves Apoxy Sculpt” it is a two part epoxy clay. (a cruder form of this type of stuff can be seen advertised by Billy Mays on TV under the heading “Mighty Putty”). Aves is the good artist stuff. Very fine grain. Extremely easy to work. It remains workable for hours, takes a day or so to cure, and once cured, it is essentially resin plastic. Once it hardens you can then use it as a master, cast a silicon mold around it, and then duplicate your custom part in resin to your hearts content.
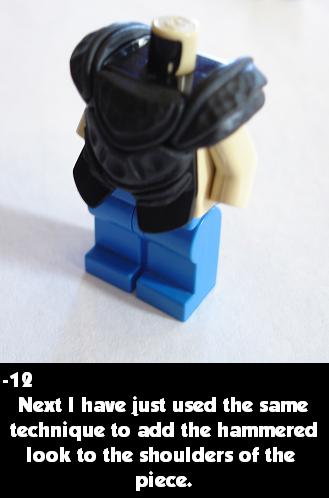
Most good artists supply stores will carry Aves as will some higher end model focused hobby stores. https://avesstudio.com/ Trust me, combine this with your figure mod skills and you will be able to do anything with no mess fuss or blow dryer.
Faelon, thanks for the great info! Really appreciate it! 🙂
wow! to think i could make some awesome armor that easy! 8)
oops! some thing went wrong with that smiley could you fix it admin?
Fixed for ya! 😉
thanks 😀
how would you make a lego armor mold and where would you have the separating line between the two pieces of the mold.
You can use pretty much any material that is solid, or will dry solid, then use silicon-mold for casting. You might be able to cast the armor as one piece, or if you are planning to do it in two parts, you can do the separation the same place LEGO does it, across the top, where the neck-hole is. 😉
also were would you put the hole for the resin to poor through
If you look at the new Lex Luthor polybag fig or the Galaxy Patrol CMF you can see how Lego themselves worked that out. In the case of that chect/shoulder piece the mold seam runs vertically up the sides of the minifig and straigh up and across the shoulders. (a straight up front/back split). In that case it also looks like the pour point and escape gate points would be either the center of the back and chest, or on the case of a medieval armor, and depending on your casting skills, the bottom edge of the front and back. (personally I would do a pour point in the center of the back and a overflow/escape gate at the bottom of the front edge. That would probably be the easiest clean up after casting.)
Oh, thanks Andy! I appreciate your expert imput! 🙂
Thanks, actually looking on it more, you are probably right. With a piece that has smaller shoulders, and does not rise much above the neck hole it probably would be easiest to simply cast it as one piece, with the top plate/neck being the actual pour point. You may even be able to get away without overflow channels below, although air bubbles will be an issue and need clean up.
Andy, great points! Which reminds me that I should really get into moulding. It is a great and very rewarding hobby. 🙂
You can find out all about custom LEGO moulding and casting at the K.A.M Forums: http://fineclonier.com/
thanks for the tip
1
\/
____
1 >| || |< 1
/\
2
this is a side view of the armor mold 1 is the first part of the mold two is the second witch goes in between both sides of the first so where the body would be thats were the second part of the mold goes is that right
never mind my computer messed up the picture i made sorry
If you would like to send me the picture so I can insert it in your comment just let me know. 😉
so the mold line is on the side of the armor so the first half of the lego armor mold is on the front back and ontop of the shoulders. the second half would go where you would fit the legoman body
am i correct?
I think it would be helpful if we could all refer to the same armor style/design. Is there a LEGO armor design that is similar to what you have in mind?
im looking at a lego b10 vest and backpack on
i would like to make more copys of it so i can add to my lego squad
but i dont feel like buying more because of there price and i dont want to mess up on the molding the first time
would you now how to mold it
The safest way to mould that piece would be to cut it in half at the neck, so you would cast the front and the back separately before joining them together. It is a fairly simple piece, except for the great detailing at the front, that’s why I would suggest to use a two-part process.
I don’t want to stiffle your creativity and learning a new skill, but since you mentioned that the only reason you want to cast them is to save money, you can pick them up pretty cheap here: https://store.bricklink.com/Minifig.Cat?p=Minifig.Cat
I’m very familiar with this store and ordered from them many times. They only sell Sidan Toys products compatible with LEGO minifigs. And their selection and prices are great! 😉
well im not doing it only to save money ive always wanted to make a mold of something but i just couldnt find the product untill now.
thanks for the web site
also do you mean cut the armor inhalf at the neck or the mold.
In that case Caminoan’s Forum should help you significantly. There is actually a whole tread there about casting with excellent pictures and detailed instructions. Just follow the directions there to get your first mold/cast/product done. Keep us posted how it goes. I love this part of the LEGO hobby! 🙂
ok thanks
oh one other thing it might be a wile because i still have to buy it
and it’ll be a wile to ship it all
once im done i might post it on youtube and then ill put a link to them and you can see them.
Sounds good! 😉
now what i think three part mold would be better than two
Sure, you can do it that way too. It takes a bit of trial and error to get it right. 😉
ill also be doing a lego military helmet ive already figured out how to mold it
Actually, helmets are much harder to mold than armor because the fit must be exact. With armor you have quite a bit of wiggle-room so it is more forgiving. But with helmets there must be precision. They can’t be too loose because they will fall off the head, or too tight, because they won’t fit. But if you are up to it, go ahead! A lot of customizers will start with a regular LEGO helmet and customize that for the mold rather then starting from scratch. 😉
im buying the helmet heres the
link
https://www.firestartoys.com/Shop/Minifigure-Headgear/Brickarms-Headgear/7839-Brickarms-~-Modern-Combat-Helmet-~-Gunmetal.html
That would work. BrickArms products are excellent, and they fit perfectly. I have that helmet myself. 😉
ok thats good
by the way what kind of clay is used in the tutorial at the top
Just regular hobby-clay that dries solid. Or can be baked. Available at pretty much any hobby or art & craft store.
thas is a truely remarkable and beautiful peice of lego custom artwork!!! i’m going to use this armor style for my custom minifigs! (i’m a lego customizer)