(Written by Quad)
If you would like to enhance your LEGO photography skills you will need a photo light-box. Here is a little tutorial on how to make a simple light-box for great quality LEGO photos.
Instead of shelling out $20+ for a professional photo light-box you can make your own from things around the house with almost the same outcome. Here are the steps (you can click on any of the pictures for a larger view):
➡ First off you will need at least two large, thin, books (a little larger than a normal sheet of paper). These Science Library books will do nicely:

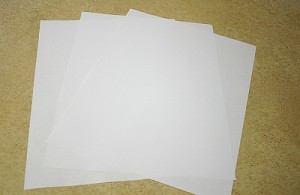
➡ Next, you will need at least three sheets of paper without any marks on them (like the paper you use for printing):
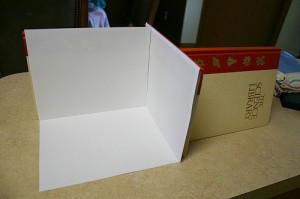
➡ Now set up the books something like this (the third book is actually not needed – you just need something to hold up the other book):

➡ Set one of the sheets of paper down to act as a “floor”:

➡ Then set up the other sheets up like you see below. You might need to stick some double-sided tape on the backside of the paper, so it won’t fall down during your photo-shoot. You can also put another piece of paper to cover the gap between the sheets, so you don’t have that crack in the middle of your LEGO photo. (Thanks Admin!)
➡ Probably the most important thing you’ll need is a nice, bright, white light – not like a flashlight but more like a desk-lamp. Some lights give off a sort of yellowish light. That is not the light you want. You need a lamp with a light that looks pretty much pure white. Some LED lamps and florescent lights are great for this. I’ve also heard that some people wait till its bright enough outside to take their LEGO photography. But you cannot take those pictures at all times, and I know for a fact that white bricks can get discolored if they’re out in the sun for too long.
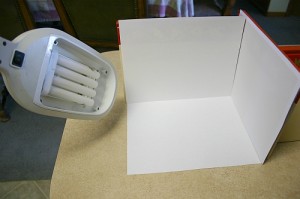
See how nice it looks? 😀
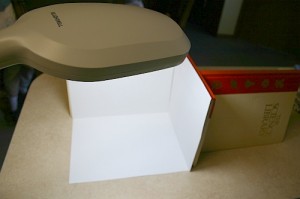 Just showing how nice LEGO photography can look with a nice, professional white background.
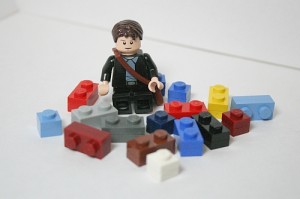
If you have any other ideas and tips on how you make LEGO photography look better just add them in the comment section below. Thanks! 🙂
And if you would like to invest in a professional photo light-box, below are some nice and fairly inexpensive options:


The minifig galleries at Brickset use this method to take pictures.
https://www.flickr.com/photos/hmillington/5355493252/
Slightly more elaborate, but use it for the consistent look across all of the minifigs.
True but I did notice that they had a lightbox around all of it. This tutorial is to show how to do it with stuff around your house. 🙂
Very nice tutorial! Even though I have a photo light-box, I use a very similar technique as you when I just want to take a quick picture. 🙂
Brickset’s photos are some of the best! Their photos are used even by LEGO book publishers. The equipment you see in their set-up costs about $3,000 though. So yeah, not everyone can afford that! 😉
The only suggestion I would offer would be to place a sheet of paper on top of the existing ones that creates a curve between the background and the floor. This can eliminate the appearance of a corner/gap if desired.
It’s nice, but I hate those lines in background. I preffer using single, but very big sheet of paper.
Great ideas for making a simple light box out of stuff you own. I was using a white book shelf for the longest time, but lately, we’ve been making bigger MOCs. So here’s what I bought for making a larger light box.
-at JoAnn’s Frabrics, went to the remnant section and bought a big piece of white fabric for a backdrop. Not too shiny. Nice thing, it was half off so only cost me $5.
-at the Dollar Store, bought 3 pieces of large white thin cardstock and 2 thick foam board. I taped two of the white cardstock to the two foam board as sides and the third white cardstock was for laying down on the table.
A light source had been a problem, but I bought a new bulb for the living room lamp that imitates sunlight – it’s blue bulb which actually creates clean white light. I pull that near my set-up and it works pretty well. But one day, I’ll invest in desk lamp that I can direct at the light box.
Here’s a recent picture I took with the set-up:
Here’s a smaller set-up: https://www.flickr.com/photos/both-sides-of-the-brick/6370723937/
Not perfect, but it works for me and works much better than an open table.
If you have Adobe Photoshop or the free GIMP program, you could also highlight the white paper in the background and remove it. Then replace with a flat, digital white background so you don’t see the cracks/shadows of the paper.
Very nice! My sons love your tutorial! They just asked me to help them build your setup! Thanks!
Here’s a light box made out of a shipping box and some Bristol board. https://digital-photography-school.com/how-to-make-a-inexpensive-light-tent/
Chris, thanks for the link! I remember reading this one long time ago, then I lost the link. Thanks again! 🙂
nice and cheap!!
I use a large white cardboard piece as my background and it looks pretty good.
Yes, that works well too! 😉
Neat. Admin, could I do a stop motion tutorial sometime? I might not, just wondering.
Sure, you could. 😉
Nice, should have seen this before doing theses videos 🙂
but will try for sure hihihi
http://www.youtube.com/watch?v=T451dNRVbVA&list=UUum5RLF2qlOEJJoPkLotghg&index=5
Nicely done stop-motion! I like your background! 🙂
I just take a big poster board and bend it. It has the same affect, but without the cracks.
Jackson, yeah, that’s a great idea. Your method can also create a nice subtle fading in the background. I use this technique myself. 😉