The #21108 LEGO Ghostbusters Ecto-1 is really one of the best sets that came out of the LEGO Ideas (formerly LEGO CUUSOO) platform. The Ecto-1 was designed by Brent Waller, an Australian LEGO fan and life-long enthusiast of the Ghostbusters. We have talked about the set before (see: LEGO Ghostbusters Set Video-Review & More), however today I would like to discuss the phenomena the LEGO Ghostbusters set started; LEGO fans tinkering with and modifying the official set to bring it to perfection, as well as creating extras for it to expand on the LEGO Ghostbusters theme. 🙂

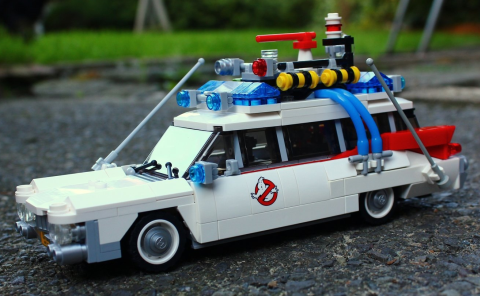
If you participate in LEGO forums you probably know already how popular the #21108 LEGO Ghostbusters Ecto-1 is with LEGO fans of all ages. It is a great set right out of the box and a joy to build. Having said that, with LEGO there is always room for adjustments and improvements – that’s a big part of the fun! For example I have been in touch with a LEGO/Ghostbusters fan on Reddit who goes by the username segamegadrive, and we have been going back and forth on giving each other suggestions on how to make our Ecto-1 better. Below is a picture of the PerfEcto-1 (clever naming!) with all the bells and whistles. See more pictures in segamegadrive’s gallery.

Some of the changes made to the Ecto-1 are: adding 1×1 white tiles at the sides where there used to be exposed studs, adding an antenna at the back, adding a rare-view mirror on the left, raising and modifying the police-lights on top, smoothing down the roof with tiles, using official LEGO rubber bands to keep the hoses together, replacing the brown bar on top with a red one (that was really an eye-sore), and a few more little things here and there. I actually have done almost the same modifications on mine – unfortunately I don’t have the red bar yet (need to order it from BrickLink), so I haven’t taken pictures as of yet. But as you can see a little modification can make the Ecto-1 even more awesome.
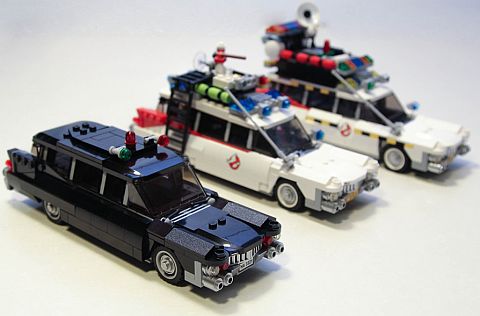
Brent Waller himself has been working on other LEGO Ghostbusters creations for the 30th anniversary of the film. In the video above he shows you the Temple of Gozer, Ghostbusters logo mosaic, Stay Puft Marshmallow Man, Firehouse Headquarters, and several version of the Ecto-1 including; the original 1959 Cadillac which later got turned into the Ecto-1, the Ghostbusters II version, and one with flashing lights.

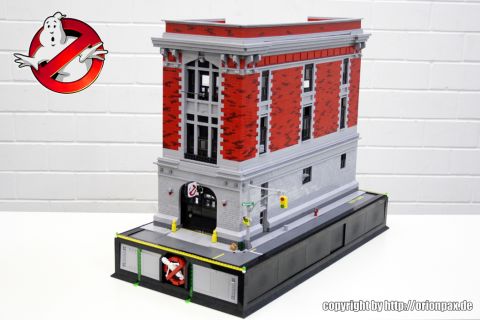
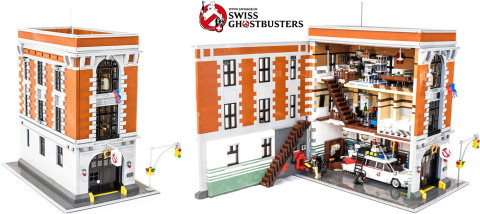
As far as the Ghostbusters headquarters Brent provides step-by-step instructions for building your own. You can download the instructions from this thread at Eurobricks. Brent also mentions two other versions of the Firehouse, one created by OrionPax and posted on LEGO Ideas, and the other by Sergio512 also on LEGO Ideas – both with full interiors. You can support these projects by voting for them on their LEGO Ideas pages (just follow the links), and you can download the instructions for Sergio512’s version from his website.


As you can see, the LEGO Ghostbusters Ecto-1 is a fun set not just for displaying but for modifying and expanding. There are many-many modified versions of the Ecto-1 that you can search for at LEGO forums and picture-sharing sites. If you don’t have the set yet, I highly recommend that you check it out at the Online LEGO Shop.

Also, I should mention that Sony Pictures Entertainment will commemorate the 30th anniversary of Ghostbusters with special events and home entertainment releases including; a theatrical re-release of the restored and re-mastered version of the original 1984 film beginning August 29th in both the USA and Canada, and on September 16 the Ghostbusters 30th anniversary edition as well as the Ghostbusters II 25th anniversary edition will be available on Blu-ray. The Blu-ray versions of both films will include conversations with director Ivan Reitman and Dan Aykroyd, as well as never-before-seen deleted scenes from Ghostbusters II.
So what do you think? Have you gotten the LEGO Ghostbusters Ecto-1 yet? Did you modify it? If you did, what did you change? Or did you add to it to create a whole LEGO Ghostbusters scene? Feel free to share in the comment section below! 😉
And you might also like to check out the following related posts:


I like how you and your friend changed it 🙂 sadly, I don’t own any LEGO Cussoo/Ideas sets. Also, I’m first!
You might consider getting a CUUSOO/Ideas set when you find one that you really like. They are not expensive, great fun, the booklet is very high quality and even the box is much better than other LEGO sets. Also, you are supporting fellow LEGO fans who designed them. 🙂
I’d really like the build that HQ. Have you looked at the instructions? I know there isn’t an interior but could it be modified to have one very easily?
Kim, no, I haven’t looked at the instruction in detail, however I do know that both designers added detailed interiors – at least on their own models. If you check their flickr galleries you should be able to get some inspiration and ideas for the interior. I’m pretty sure it wouldn’t be that hard, expecially since the vehicle fits right in. I’m considering building only a facade as I’m displaying my Ghostbusters set in one of those cube shelf systems. I think it would look nice as a background, but I haven’t decided yet.
Oh I feel dumb now. I didn’t notice the line that said Sergio’s with the interior’s instructions can be downloaded. Whoops.
Kim, it’s all right. I skim articles all the time too. That’s why we have the comment section, so we can talk things over. 😉
This is way off topic, but I have recently been looking at your Roman soldiers, Admin. For their shields, do you use restickered Knight’s Kingdom II shields?
Yes, that is correct. BTW, since then I replace the shields with the official LEGO Roman shields that were released later, although I still like the stickered ones as they are larger. LEGO’s Roman shields are too small. Also, BrickWarriors makes some really nice Roman shields if you are interested, and BrickForge also has some – theirs are printed. 😉
Mine is in the mail!
I should arrive this week-end. I hope.
Sweet! I think you will really enjoy it! 😛
Hey just wondering if you have a part list for the ecto upgrades you did? Would love to make mine look that awesome!
Thanks,jake
Jake, they are really simple upgrades, as explained in the article. If you have a few small bits and pieces you can easily do it yourself just by looking at the pictures. 🙂
Oh ok thanks for the help! Just love what you guys did to the kit de made it look a lot better!
Jake, if you have any specific questions – like you can’t figure out how something was done – feel free to ask. But the modifications are pretty simple. 🙂