

(Written by Henry Alekna)
In this guide, (which will be published in two parts), I hope to answer some of the most common questions in regards to photographing LEGO. We will cover choice of camera, how to get the most out of the camera you have, the different variables that affect the quality of a photo, and finally basic color correction and background removal in Photoshop. So let’s begin. 🙂

➡ CHOOSING A CAMERA FOR LEGO PHOTOGRAPHY: In general, most modern cameras are perfectly capable of taking good quality photos of your LEGO models. However the older the camera is, the less it can cope with high noise in high ISO photos (ISO is explained further down). The main feature to look out for is manual control. If you have a smartphone for taking photos, I believe there are apps which allow you to control the camera settings, but I don’t know how well these work. The types of cameras you may consider are as follows:
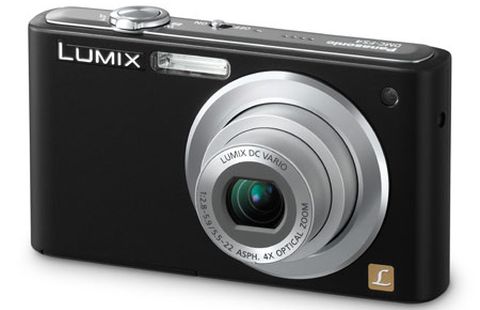
- SMARTPHONES & BASIC COMPACTS – Ideal for someone wanting a small camera that’s easy to use. Most compacts will be fine for LEGO photography, as long as they have manual control. Don’t get one that is too old though, because the quality of these small cameras has been improving drastically, as there are more accurate ways to produce small lenses and electronics. For specific models, the iPhone 4S or later are fine, while on the Android side, models such as the Samsung S4 should do the job reasonably well. Unless you already own one, you can save a lot of money getting a basic compact camera rather than buying the latest smartphone, as the images you can get out of most cheap compact cameras are far better than most smartphones. As far as compact cameras, the Canon Powershot ELPH 180, (sometimes know as IXUS 180 in some countries), and the Nikon COOLPIX A100 are good examples. They cost around $150 or less.
- BRIDGE COMPACTS – These have a larger, DSLR-style body, and a long zoom that folds part of the way back into the body. The quality you get out of them will vary, as they use tiny sensors to accommodate such a large zoom. There are some with larger sensors, however they are not cheap, and not a great value for the quality photos you can get out of them – especially when compared to similarly priced DSLR or mirrorless cameras. For LEGO photography, a large sensor compact would be a better choice. The Nikon COOLPIX P900 and the Canon PowerShot SX720 HS are two examples. These cameras cost between $350 and $750.

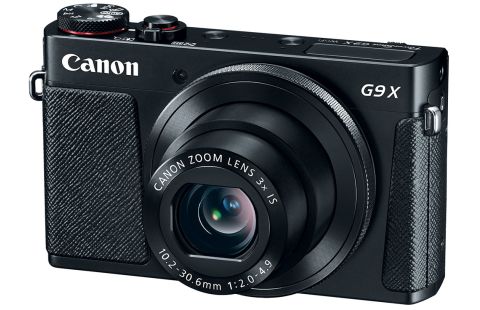
- LARGE SENSOR COMPACTS – Large sensor compacts are a good choice, as they have decent image quality and much better performance than small compacts with tiny sensors. They offer good image quality in a small pocketable form and – if you are willing to buy used – you can get some good deals for only a little more than the price of a basic compact. Most advanced compacts offer larger sensors which means that there will be much less noise (grain) showing in the images. They tend to offer shorter zoom lenses, as the lenses are more focused on quality over quantity. A few currently available examples are the Canon G9X, the Fujifilm XQ2, and the Sony Cyber-Shot DSC-RX100 IV. The cameras in this category cost $350 to $1,000.
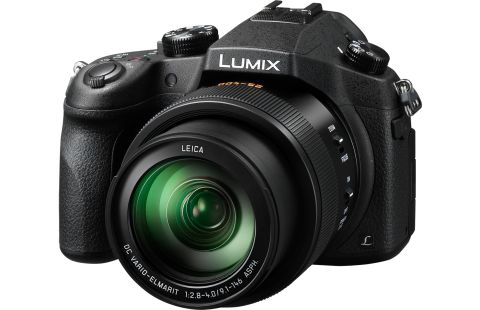
- ADVANCED BRIDGE – These cameras offer good image quality over a wide range of focal lengths, so are very convenient in this regard. However because of the high price, it is better to just go with something with less zoom. Some examples are the Panasonic LUMIX FZ1000, the Panasonic Lumix DMC-ZS100/TZ100, and the Sony Cyber-Shot RX10 III. Prices range between $700 and $1,600.
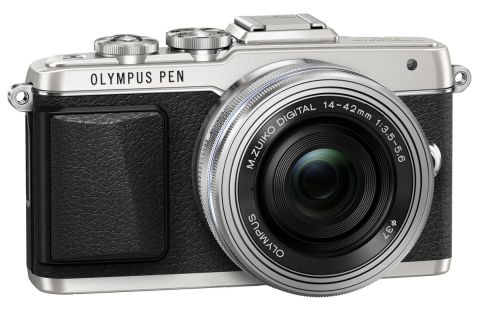
- MIRRORLESS ILC – A mirrorless camera is a camera which – instead of using a mirror to reflect the image up from the lens into the viewfinder – uses an electronic viewfinder (rather like a more advanced version of some compact cameras). Basic mirrorless cameras tend to offer the best value for money, and indeed are much less expensive than many advanced superzoom cameras, while offering better quality, as well as the flexibility to change lenses. Some models to look into are the Olympus PEN EPL7, and the Fujifilm XA2. They cost less than $500.
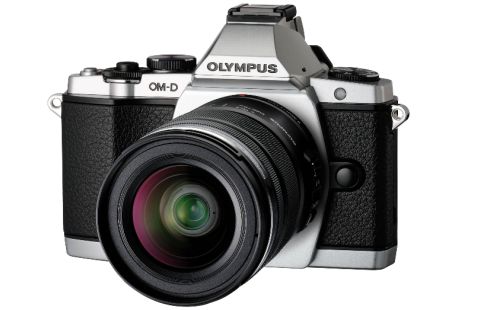
- ENTHUSIAST MIRRORLESS – Enthusiast mirrorless cameras such as the Olympus OM-D EM10 II, are some of the best cameras you can get in their price and size range. The Fujifilm XT-10 – an analog styled digital camera that performs well in most situations – is an excellent choice for LEGO photography. These cameras cost between $500 and $800. Also, you can look into some older models that can still be found at places like eBay for good prices. The Olympus OM-D EM5 is an excellent camera, and so is the Olympus OM-D EM10.
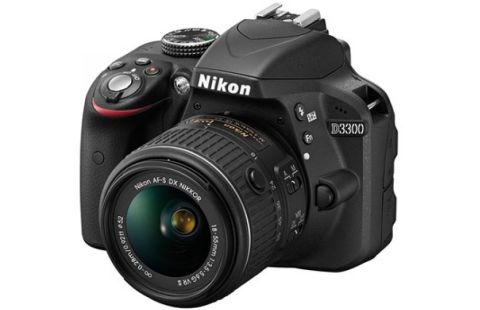
- ENTRY LEVEL DSLR – These cameras are a popular choice as the photo quality is good, they are inexpensive, and there is a larger range of lenses available for them. The photo quality matches the mirrorless camera, though in most cases it doesn’t surpass it. It really depends whether you would prefer an electronic viewfinder (as found on some mirrorless cameras), or an optical one (as found on all DSLRs). A couple of examples are the Nikon D3400, and the Nikon D5500. They cost between $500 and $1,000.
- ENTHUSIAST DSLR & MIRRORLESS – High-performance cameras without the professional price tag. They offer the best performance for photography without paying for professional cameras. In most cases, they aren’t really necessary for LEGO photography, though the photo quality will be among the best. Some example models include the Fujifilm XT-2, Canon 80D, Nikon D7200, and Olympus OM-D EM-1 MKII, among others. They cost $1,000+.

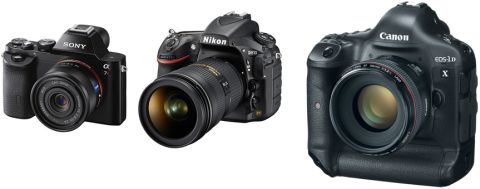
- ENTHUSIAST FULL FRAME DSLR & MIRRORLESS – The large sensor size of full frame cameras allows for the best high ISO performance. They aren’t cheap though. For LEGO photography they are mostly an overkill, and can even make things unnecessarily complex. Because of the large sensor, the depth of field (focus) can be a lot smaller with fast (wide) lenses. This can be useful at times and annoying at others. Some examples are the Sony A7R II, the Canon 1DX II, the Canon 5D IV, and the Nikon D810. They cost between $4,500 and $10,000.
In summary, most cameras – no matter how old (within reason) – can produce perfectly acceptable LEGO photos, as long as they have complete manual control. I would suggest learning to use what you have first, before buying a new camera. The second most important thing is to use a tripod, which will be needed to implement just about all of the photography tips that are in this guide.
➡ IMAGE STABILIZATION & OTHER CAMERA FEATURES: Some modern cameras and lenses have a technology called “image stabilization” (or IS for short). This can help to compensate for movement of the camera while you are taking a photo handheld, and allowing you to use slower shorter speeds without a tripod. Another feature you might want to look out for is weather sealing. Some cameras and lenses are weather sealed, splash proof, or water resistant. This is only really useful if you are doing landscape photography in the rain, or are in a really damp environment – neither of which are particularly relevant for LEGO photography. Note that even with weather and dust sealing, cameras can be damaged by dust and saltwater.
➡ CARING FOR YOUR CAMERA: Cameras aren’t hard to care for, but there are some basic rules you should follow. First, don’t get saltwater on them, not even on the weather resistant ones. Be particularly careful with the lens in this regard. A completely waterproof “tough” camera will be fine with salt water, as long as you rinse it with clean water immediately after exposure to salt water. Sea-spray is nearly as bad.
Secondly, a UV filter is an inexpensive solution for protecting the front of a DSLR or mirrorless lens. Third, store your camera and lenses away from damp, very hot and very cold environments. If you live in a damp climate, put a silicon moisture absorber in your camera-bag. And finally, if there are dust spots appearing on your photos, try cleaning the lens and filter. If that doesn’t work, you may need to clean your camera’s sensor. There are air blowers designed specifically for this issue, available from all good camera stores. Do not use compressed air – it contains moisture that will damage the sensor.
➡ BACKDROPS FOR LEGO PHOTOGRAPHY: There are already a number of good articles offering advice on backgrounds, which can be made of anything from a piece of paper propped up on a book with a desk lamp for lighting (works well for smaller models) to a fullblown lightbox (which will give you the best quality when combined with a couple of desk lamps for lighting). A lightbox that can fit a medium sized LEGO model is pretty inexpensive from places like eBay. Always remember to check the size first, and get one that has a good margin of space around the model, as the light will be more diffused this way. For large models you can use a sheet or tablecloth propped up with a chair (careful not to let it fall on your creation), with desk lamps for lighting. The best option for large models is to rely on Photoshop, as otherwise it’s difficult to get the background perfectly smooth.
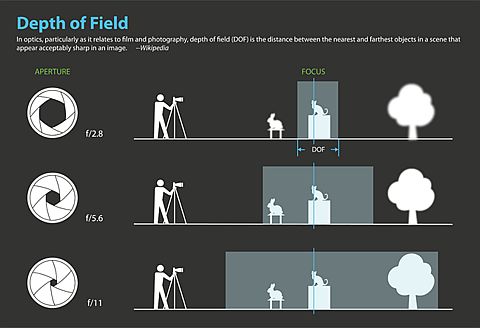
➡ ISO & HOW ISO SENSITIVITY DIFFERS IN CAMERAS: ISO is the sensitivity of the cameras sensor too light. The higher the ISO number, the less light is needed for the camera to take a bright photograph. The tradeoff is that the higher the setting, the more noise (pixelation) there is (see fourth row down in the diagram bellow). How much noise the camera picks up at high ISO numbers depends entirely on the camera, and will vary greatly from a cheap compact camera to higher end models.
For small compact cameras and smartphones, an ISO between 50 and 100 should work best. Experiment with different ISOs to find out which is the best setting for your camera. For compact cameras with larger sensors, mirrorless cameras, and DSLRs, an ISO of between 100 and 400 should work best. Again, experiment and find the ISO setting that gives the best results from your camera. Note that the lower the ISO, the slower the shutter speed will have to be, as to compensate for the lower light-sensitivity of the sensor. This will result in blurred images if you don’t have the camera stable. Again, a tripod is essential.

➡ APERTURE & HOW IT INFLUENCES DEPTH OF FOCUS: The aperture of your camera’s lens is controlled by a number of blades that rotate inwards to adjust the amount of light getting through the lens and onto the sensor. The diagram below – and the first two lines of the diagram above – demonstrate the aperture sizes and depth of focus.
The faster (wider) the aperture, the more light gets through to the lens, allowing a lower ISO if you are using your camera handheld. The tradeoff is that the faster (wider) the aperture the amount of a scene in focus will be dramatically reduced (see diagram below). On the other hand, the slower (smaller) the aperture, the less light gets through to the lens, and a larger part of the image will be in focus (again, see diagram below). The only way to avoid either blurry or noisy shots when using a slower (smaller) aperture is to use a tripod.
Most lenses have their sharpest point at around f/8.0, so for smaller models and close-ups that is a good place to start. The larger the model, the smaller the aperture will need to be to have the whole model in focus. Try these apertures for larger models, f/16.0, f/20.0/ f/22.0 and smaller – if your camera/ lens allows it. Note that some compact cameras may not be able to close as far down as f/22.0. This shouldn’t be much of a problem, however. Simply set the aperture as small as it will go, and there should be no issues.
➡ CAMERA SHUTTER SPEED: Shutter speed is how quickly the shutter of the camera fires to capture an image; the faster it fires the less light will be captured by the lens. For moving subjects and handheld photography, a speed of between 1/500 of a second and 1/1000 of a second is usually sufficient. If your camera has image stabilization, you may be able to use a slower shutter speed. To let the most light into the lens and the camera (allowing you to use the optimum aperture and ISO) a long exposure (a really slow shutter speed) is one of the only ways to let enough light into the camera for a well-lit photo.
To perform a long exposure, set your camera to “A” (Av on Canon cameras), aperture priority mode, then set your desired aperture and ISO. The camera will automatically set a shutter speed. Then take a test shot of your LEGO model. If the picture comes out too light or too dark, there should be something on your camera’s monitor that looks like this: -3.0_-2.5_-2.0_-1.5_-1.0_-0.5_0.0_+0.5_+1.0_+1.5_+2.0_+2.5_+3.0. This is the camera light meter. 0.0 is where the camera thinks is the correct exposure for the image it sees. There should be either a dial or a button that lets you set a place on the slider for the brightness. Experiment to find which setting produces the correct brightness. You will have to use a tripod for long exposures, and most LEGO photography in general. It is the only way to be able to have all the camera settings perfectly adjusted for the best quality.
➡ USING AVAILABLE LIGHT AND WHITE BALANCE: In tricky lighting situation where the light is very saturated towards one color, there is a setting in your camera called “white balance”. In the white balance settings, there is a list of different options such as; sunlight, cloudy, tungsten and a variety of others – including an option to set a custom one to match the lighting in which you are photographing your LEGO creation. In normal situations, automatic white balance generally does a pretty good job.
And that concludes the first part of our introduction to LEGO photography. I hope you have found this guide useful so far, stay tuned for part two soon! I’m a TFOL (Teen-Fan-of-LEGO) from Australia, and this is my first article at theBrickBlogger. My two main hobbies are LEGO and photography. You can check out my LEGO creations here, and my other photography here. If you have any questions, comments, suggestions, feel free to share them below! 😉


This is great, I love learning about LEGO photography. Very much looking forward to part 2!
Sarah, glad the article helped. If you have any comments or questions feel free to include them. It will help Henry to write the next part. 🙂
Glad you found the article helpful! By all means, feel free to send me any questions you have, or suggestions for adjustments, either through the comment here or via Flickr or Eurobricks.
There really is a lot to taking a good picture… haha. And this is only part 1?! 😉
I usually don’t pay a whole lot of attention to the ISO, aperture, and shutter speed for normal photographs. Sometimes I try to fiddle around, but the problem is I can’t ever remember which setting went with which picture, so I don’t have a clue as to which ended up better. 😛
You’re spot on about it being hard to keep large backdrops perfectly smooth when using a sheet or something cloth like that. And there are few things that are more unmotivating (for me) than having to cut out a big MOC in GIMP, so getting good pictures of larger builds is generally more-or-less of a nightmare.
It really is impressive how much a little extra effort and research can improve photography – definitely well worth it for any LEGO fan who routinely photographs his/her builds.
Yeah, Henry is into this deep. I’m also looking forward to part two. There is so much to learn! 😀
Yep, only part 1! Part two is going to cover (among a few other things), basic Photoshop background removal.
With pretty much all cameras, (including your Olympus), the camera includes data inside the image which shows the aperture, ISO etc settings which the image was taken with. Most programs can read them, however Flickr also shows the settings, EG, this photo (https://www.flickr.com/photos/robert4168/29658520274/in/pool-2925503@N23/ ) was taken at ƒ/7.1 , 21.0 mm at 1/200 of a second set to ISO 200. I double checked your photos, but the Flickr setting to show EXIF seems to be disabled.
Its definitely the most tedious part of Photographing a MOC, though the end result are well worth it!
This kind of article is also useful for people wanting to get into stop motion animation, the same principles apply 🙂
That is very true. After all stop-motion is just a series of pictures. 😀