

(Written by William)
Having built a number of LEGO BrickHeadz characters and having a chance to put together the large #75187 LEGO Star Wars BB-8 set, I’ve been interested in the concept of sculpting with LEGO elements. When the LEGO Star Wars Helmet series popped up, I almost bought the sets, but then I heard there was going to be an Iron Man helmet in the near future. As I’m a bigger Super Heroes fan than Star Wars fan, I waited until the #76165 LEGO Iron Man Helmet became available.
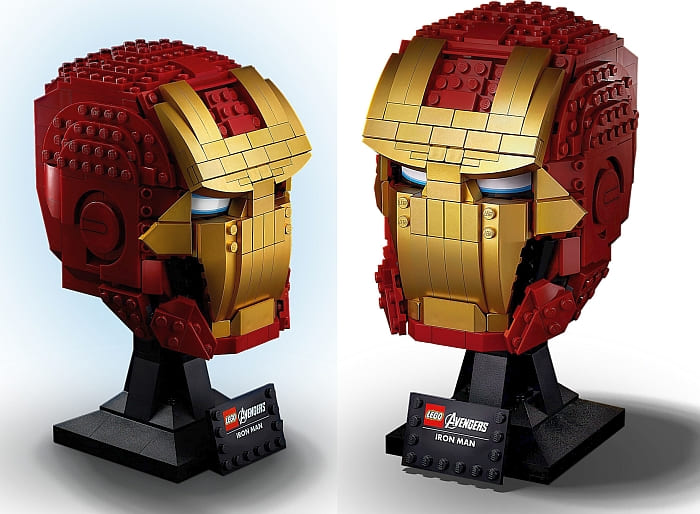
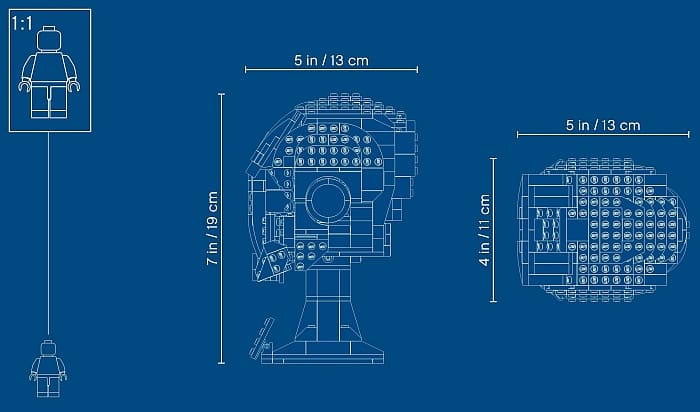
I knew a few things going into this purchase. First, the #76165 LEGO Iron Man Helmet is entirely a display piece. It wasn’t anything I could take off a stand and put on a large doll or stuffed animal. Second, the difficulty of building might be surprisingly low given that the set is in the 18+ line. (This series is aimed at adults who may or may not be experienced fans of LEGO products.) And third, this model was going to be designed like a human head rather than a minifigure exaggeration of a human head. This last point is why I was eager to check it out.
It’s safe to say, LEGO BrickHeadz are the simplest form of sculptured art. Don’t get me wrong, there is a lot of work that goes into getting the most out of those little pieces. But, at the end of the day, they are blocky characters built with limits. The #75187 LEGO Star Wars BB-8 on the other hand was totally rounded. This meant really exploiting the options to panel the sides in clever ways. So, that left me wondering, what would Iron Man bring to the sculpting table? For all intents and purposes, it is a hybrid between the two styles. So let’s look at some of the techniques!
BASE FRAMING FOR LEGO SCULPTURES
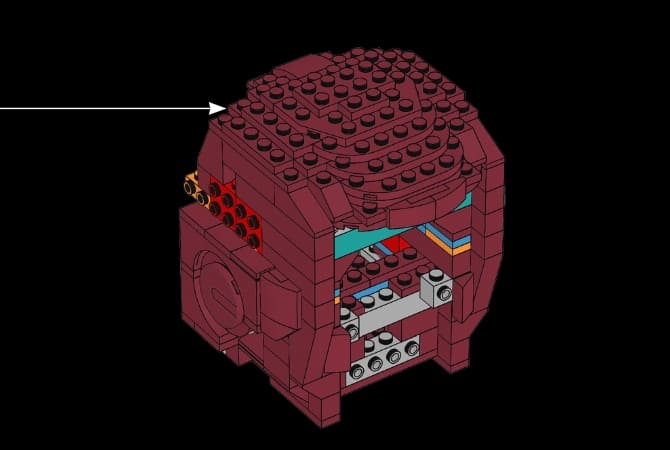
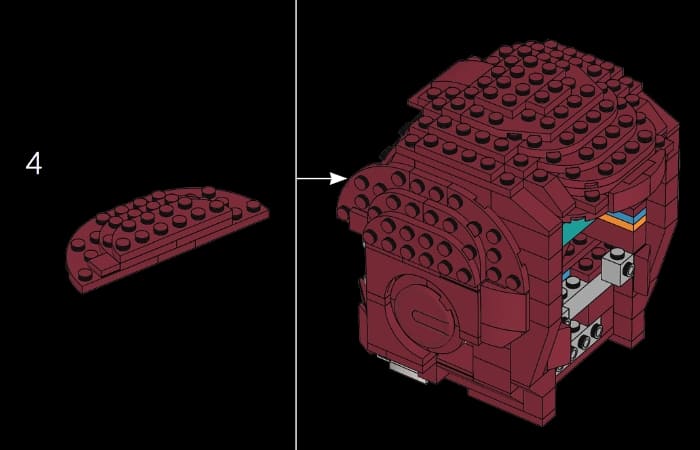
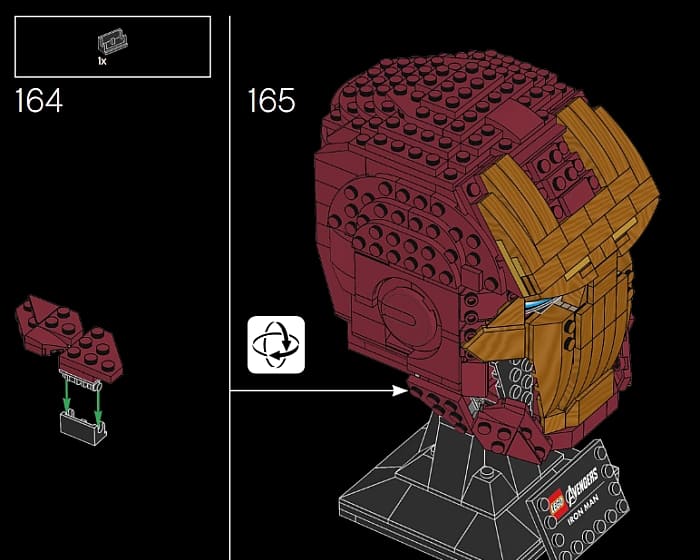
In every LEGO sculpture I’ve put together so far, the construction starts with a box shape. This box offers studs on each of its four sides as well as on top. This is the same in the Iron Man Helmet as well. However, it is important to point out that in the case of the Iron Man Helmet, LEGO designers did not make a straightforward box. There are a number of areas where bricks and slopes go beyond the box frame. This is partly due to the fact that these areas are meant to be seen. The takeaway from this is that it is important to be able to augment a box frame when necessary.
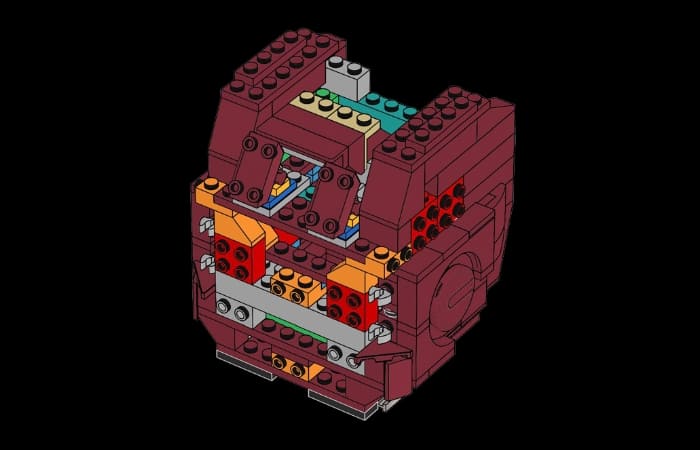
Another curious detail is that there are bricks to reinforce the model at the bottom, while there are more slopes to reinforce things near the top. This is not structurally necessary, but the slopes do cut down on the weight. By using this technique, you can center the gravity more dependably down low to make the sculpture more stable.
Now I should stop and explain a very basic way to make a box frame. In order to make all the studs on the side line up properly, you will typically use two plates and then a brick with studs on top of those plates. Then repeat this pattern layer after layer. There are alternate ways to add studs on the side like with brackets or bricks with studs that are indented into their surface as well as modified plates with studs on their edges. But the simplest frame has two plates with a brick with studs on top over and over again.
Fortunately, you don’t need massive amounts of studs to secure things so you can leave gaps. These gaps can often be easily bridged with plates or bricks for stability while at the same time keeping your model from getting too heavy. I recommend figuring out your box frame first before modifying it with extra slopes and bricks that go beyond it.
Here’s a simple way to think about it. Grab any object you wish to sculpt. Then imagine how much of the object you would need to cut away to create smooth boxy angles. This imagined shape is where you should start with your own box frame, since the other shapes can be added later.
PANELING FOR LEGO SCULPTURES
Here is the meat and potatoes of sculpting. You have your box shape and now it’s time to add in all the curves you imagined. To do this, you’ll be making panels that will attach to all those lovely studs you added to the sides of your box frame. Generally, there are two methods when adding parts to a panel.
Depending on how dramatic of a look you’re going for when shaping, you are either going to use a lot of slopes or plates for the outer look. Plates are often subtle in how they add curves. They are great for large areas that you may only want a bit of shaping for. Additionally, LEGO offers a wide range of curved and wedge plates to give you many interesting options when choosing where a slope begins to rise.
Iron Man’s Helmet has plate panels on the top sides of his head, as well as the top crown of his head. These are areas that are clearly shaped, but they don’t require a lot of attention.

Your other panel option is to use slopes. This is great when what is required is large dramatic shapes and features. Iron Man has this both on the back of his head to capture his dramatic rounding of the skull, and his face, which is very important to make a character recognizable. Forming distinct eye sockets and eye ridging requires sudden and abrupt elevation changes, hence slopes are perfect!
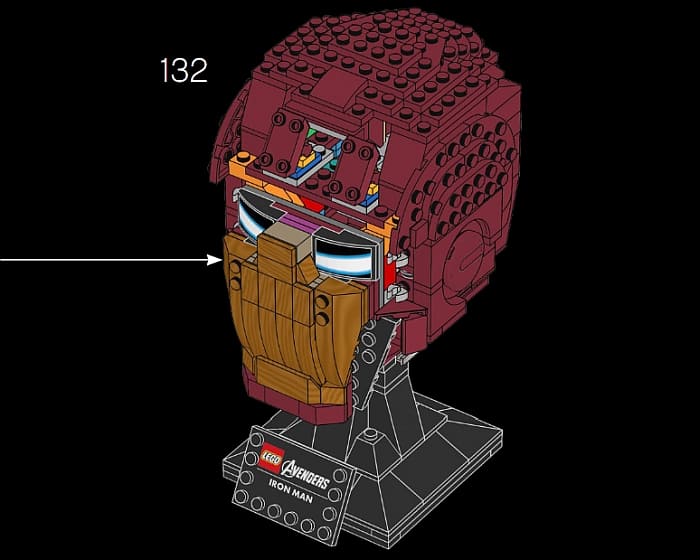
Keep in mind you can use a hybrid of these two techniques. Iron Man’s forehead is a decent example of this where slopes are on the outside and edges, but the inner middle section near the top reverts to plates. Just know that slopes are better at drawing the eye if that’s what you’re going for.
EXCEPTIONS FOR EDGES IN LEGO SCULPTING
This is the point where the Iron Man Helmet differs from the previous sculptures I’ve built. It is a complex shape that isn’t uniform. For this reason, LEGO designers added dedicated connection points on some of the trickier edges. The slope of the forehead, the temples, and the sides of the jaw are key features they didn’t want to mess up.
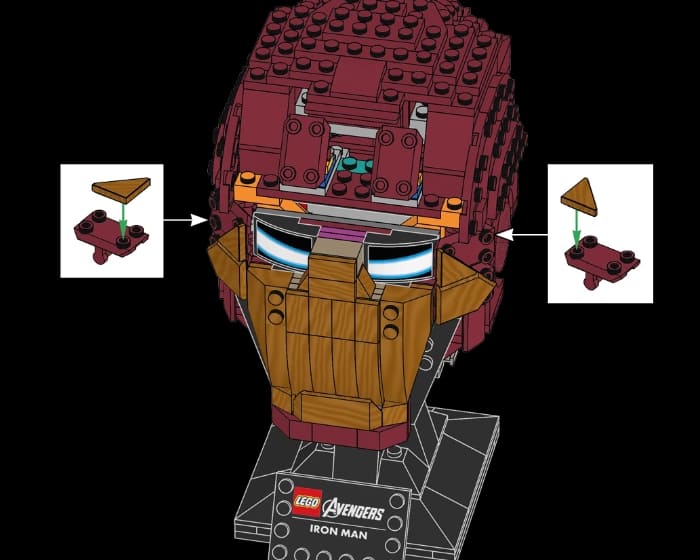
In the case of the forehead and temples, we need a smooth transition from the front of the face to the sides and top of the head. This means a tilt connection is necessary. LEGO designers could have used a tilt hinge brick for this purpose, but instead, they went with bars and clips. The bars are part of the piece that looks like a rectangular shield while the clips are mounted in the model in various ways. The toughest part of this is simply getting the pieces to remain at a fixed angle, and the shield elements are some of the easiest parts to secure in place given their design.
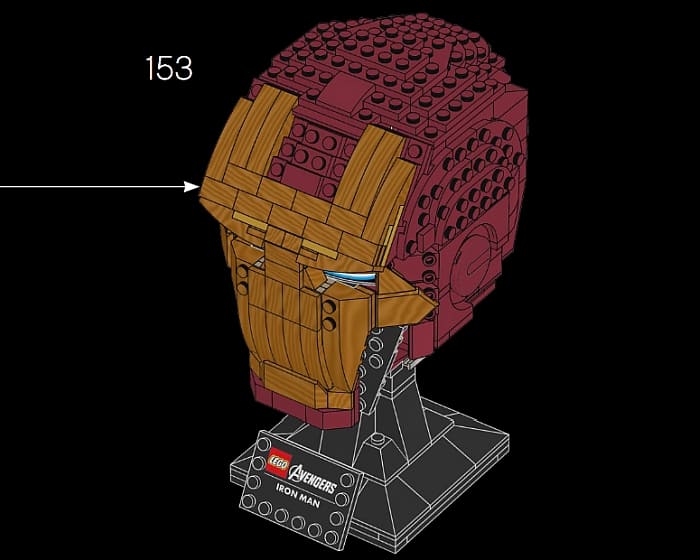
The sides of the jaw, on the other hand, need to have two angles in their construction. The cheek is simpler since it just needs a basic tilt. Here, LEGO designers did use a basic tilt hinge brick. The second angle needs to go in and angle down. For this, small ball joints are excellent choices. They have a wide range of directions that can far surpass a basic hinge and if the sections are lightweight, they can hold their position well.
By focusing on these edges, LEGO designers managed to create a precise shape for their model. Just know that this process won’t be seamless. You will have gaps throughout the model. But with proper color use and clever layering you can minimize the visibility of these gaps.
APPLYING WHAT YOU LEARN
Sculpting with LEGO bricks is practically a whole separate hobby all to itself. You can look up artists who have made careers doing almost nothing else. And truth be told, they use techniques which are closer to 3D printing than what you see here. Granted, their methods also require vast amounts of bricks that is often impractical for most LEGO fans to duplicate. This leaves us with a different style of sculpting.
The principles are pretty straight-forward; start with a frame, then mount the features. Augment this frame to bring out the features of your sculpt. And finally, detail the edges when necessary.
The skill portion comes into play as you learn when it is appropriate to augment the frame or leave connections for special edges. You will likely have to rebuild your sculpture several times if you want it to be perfect. This is another reason to leave gaps in your box frame. These holes not only make the model lighter in weight, but also easier to take apart when redesigning.
I also want to stress that sculpting is subjective. When you don’t have a minifigure around to add context to a build, you are more likely to get more greatly differing opinions on a piece. I’ve heard a wide range of opinions regarding the other helmets and the #43179 LEGO Disney Mickey Mouse & Minnie Mouse set in this regard. My advice is to be prepared for it. I’ve loved things that others have hated. Just like any form of art, it’s your opinion that matters to you. So if you feel it looks great, that’s how you know it is great! If you want to check out the Iron Man Helmet, it’s available at the LEGO Marvel Section of the Online LEGO Shop.

What do you think? How do you like the LEGO Iron Man Helmet and the other buildable helmets? Do you like sculpting with LEGO? Have you used any sculpting techniques in your own projects? Feel free to share and discuss in the comment section below!
And you might also like to check out the following related posts:


I want to like this helmet, but to me, it has a goofy appearance. Like Iron Man is pouting. There is something not right with the mouth. I don’t know. I learned about base framing and paneling from the brickheadz sets. They all had the same core and then you just built different hair, clothing, etc.
He’s a dour fellow, just like Batman…
I wish the helmet a little bigger. Otherwise, I like it. Especially the sides and the back. One of my new favorite pieces is that rectangular shield piece with the four studs at the front. It’s so useful!
I think they could have done the nose section better. It’s too flat. But I like the sides and the back of the head. I wanted to add that part of sculpting is to use studs or flat surfaces (plates, curved slopes, etc.), and even mix them. It helps to create shapes and shadows,a nd even mimic textures.
I really like the eyes. But like others said, the mouth is a little weird. I suppose it could be fixed fairly easily. My favorite is still the Boba Fett Helmet. That one is perfect.
Did they put a pink brick in the middle of Iron Man’s helmet to represent the brain, like they did with Brickheadz? I’m just wondering. 😀
Doesn’t seem like it. They’d need a lot more bricks on this size, anyway…
The forhead and the side cheek things make it look so weird…
I love this, just a bit lengthy but worth reading, I will be waiting for your next post/