(Written by William)
When it was announced that LEGO will release some of the rejected LEGO Ideas projects that achieved 10k votes via the BrickLink Designer Program, I was ecstatic. Then, I heard that not all of the selected projects that got a second chance will make it, I was sad (you can read about the selection and crowdfunding process via the links at the end of this post). But then, I heard that the Sheriff’s Safe designed by Il Buono would be a possible set and I was right back to being happy!
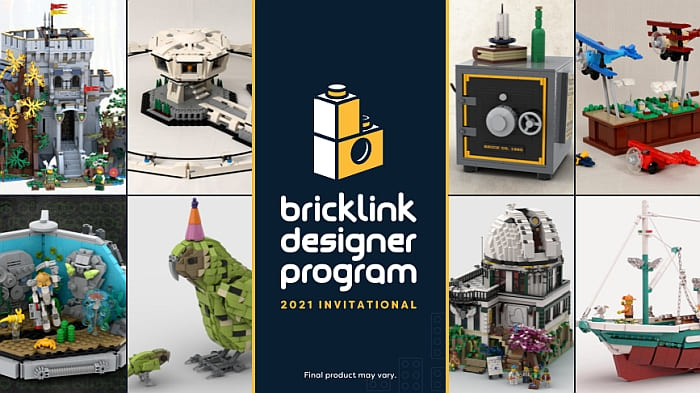
I told myself, at the end of this rollercoaster of emotions, that once I got all of the sets I ordered via the Bricklink Designer Program, the #910016 LEGO Sheriff’s Safe will be the first one I build. It was driving me crazy knowing that Il Buono was able to create a working combination lock. I couldn’t wait to get my hands on it and see what was involved!
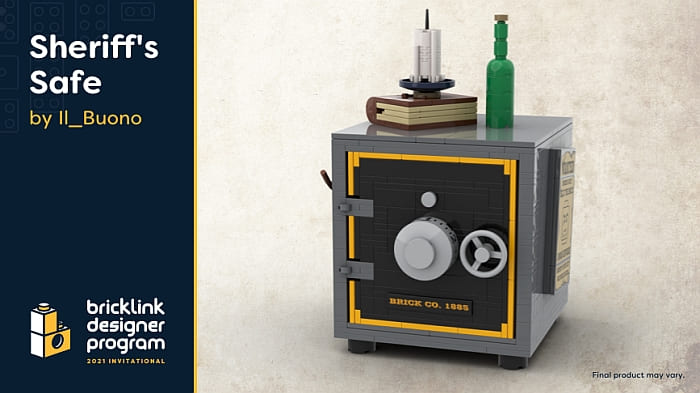
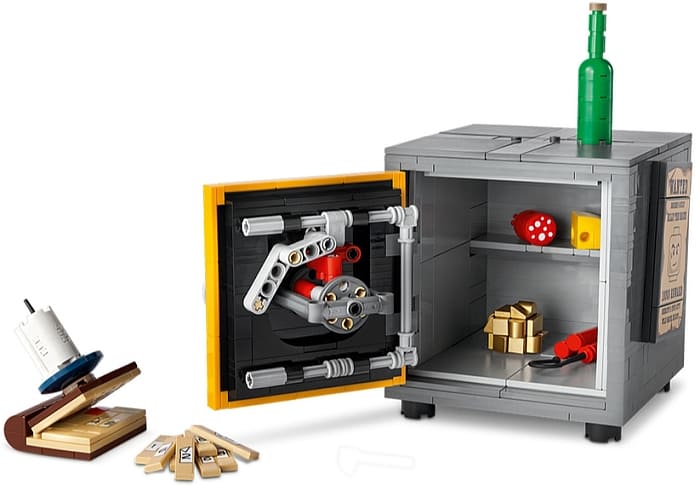
Having built the set, I have to say that the safe looks great, the little decorative elements are nice, but what we will be focusing on in this article and the accompanying video is the working lock. Because it is so genius. I’ll break down the lock’s mechanism into three distinct sections to make it more understandable how it works.
LEGO SHERIFF’S SAFE – THE SHACKLE
Let’s start with the least intimidating part of the locking mechanism, the shackle. This is the object that actually locks the door closed. In padlocks, it is the “U” shaped piece that you hook onto things and close shut.
In this model, the shackle does in fact has a “U” shape. Looking at the inside of the door, the shackle runs across the top, down the right side next to the hinge of the door, and along the lower edge. The left ends of the shackle are what will slip behind the edge of the door, preventing it from being opened.
A key part of the shackle is a small contraption hanging from the top section. This bit allows the door handle to interact with the shackle moving it left and right. In addition, this element also acts as a catch for the pieces that act as a latch for the lock.
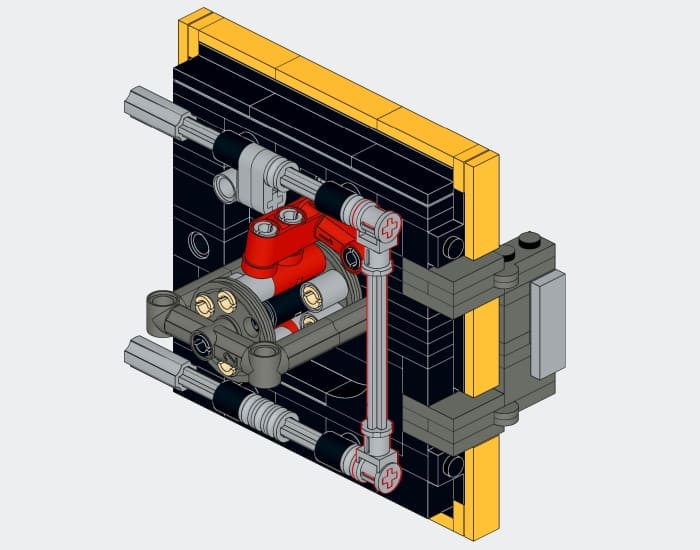
If you build just the shackle for a door, you can create a very elementary latch that would require turning a knob. Of course, that is less exciting since you could also do the same thing with any “L” shape. If the tall part of the “L” is your handle, and the bottom leg of the “L” is your latch, then you’re done. But in this case, we need the shackle for the next steps of the lock.
LEGO SHERIFF’S SAFE – THE GATE & LATCH
The catch on the shackle needs to run into something. In this case, a latch built out of red elements. This latch is built on a pin so that it has some mobility. It also has round tiles to prevent it from catching on elements. In general, this is a free-moving element that just needs to be in the way most of the time. As long as it is in the way, the shackle’s clasp can’t move past it.
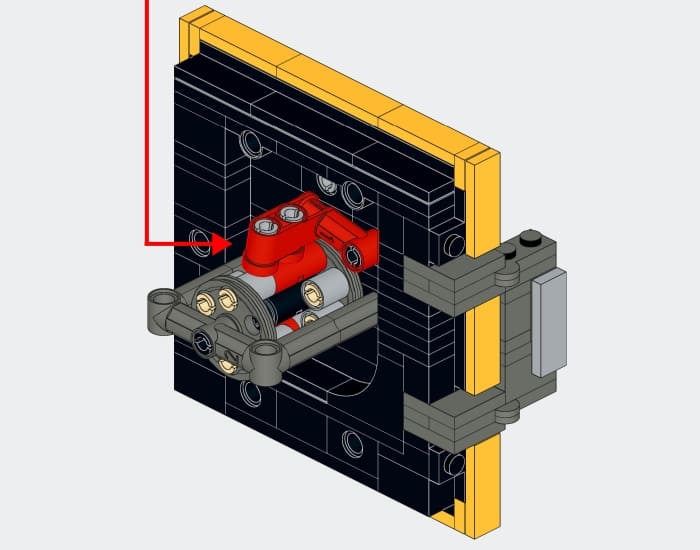
This is where the gate comes into play. A gate is nothing more than a carved-out space for the latch to drop into. Many locks use pins for this purpose in real-life. However, if the gates are aligned properly, the latch can fall into them, thus getting out of the way of the shackle allowing it to open.
LEGO SHERIFF’S SAFE – THE TUMBLERS
Now that we got some of the basics down, let’s talk about the tumblers. These are the round elements that contain several key components. First, the LEGO Technic reel element used here has six pinholes around an axle hole. Because it has six pinholes, the combination lock only has six numbers. Each hole matches the position of a given number.
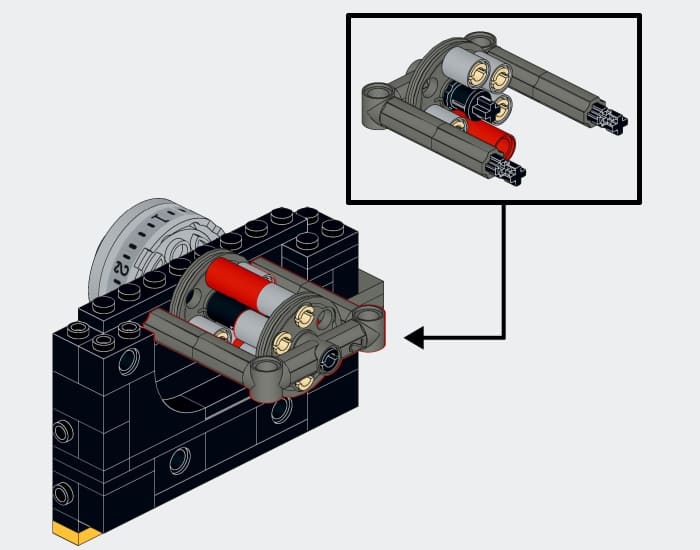
Next, we have short sleeves and long sleeves connecting into five of the six holes. The long sleeves are what allow the two tumblers to interact with one another. As you turn the dial, eventually, the long sleeves will run into one another and you can begin the process of aligning each tumbler.
The space that doesn’t have a sleeve is your gate. This is the space the latch will fall into. By having this empty space in different locations, you can associate it with different numbers, thus changing the initial combination. As for the small sleeves, these are the closed gates. This is what tells the lock which numbers don’t work.
I should mention, the designer did catch a mistake that LEGO made in the model. They changed out the half pins for ¾ pins for all the short sleeves. This does provide a more secure build, but due to how loosely the longer pins sit, they have a tendency to catch on the long sleeves, making the lock unreliable. So, if you have eight half pins, you can replace them and attach the stud side into the reel. What this does is make the closed gates sit more flush against the reel, preventing them from catching. As for the long sleeves, you can leave them as is. They can actually benefit from the added stability of the ¾ pin.
LEGO SHERIFF’S SAFE – FINAL THOUGHTS
Normally, I’d end a Brick Breakdown with how to apply newly learned techniques to your own models, but this is a rather specific mechanism. Plus, this set is a bit tough to get, if you didn’t participate in the first round of the Bricklink Designer Program crowdfunding session. Fortunately, instructions have been provided for all of the sets in the program. The instructions come in two formats. Either you can use the LEGO Instructions app or download (and even print out) the PDF version. You can access both via this BrickLink Designed Program page.

Even though I usually prefer physical instructions, I must admit there are some intriguing benefits to the app. For example, the parts and the model can be rotated for a better visual angle on what you are building. In addition, parts being added in a given step have a handy glow about them so you know clearly which parts are new. And if you like audio, there are plenty of cues in the app to get your attention.
However, there are a couple of issues with using the app. First, you will need to have a compatible device. Additionally, if you have no power and your batteries are dead, this is not an option for you. But the most glaring issue is where precision is necessary. In this model, half bushes were placed in the middle of axles. There is no way to have a 1 to 1 scale like in the paper instructions to make sure they are placed correctly. This means, in cases of precision, you will have to resort to trial and error.
Overall, I’m once again sad. I’m sad because this model won’t be widely available. I had such an amazing time building and playing with it that it’s a shame that most people will never even be aware of this set, and those who got it probably won’t ever open it in order to preserve its collectability. In the video below, I will show you how the safe works.
It has been a while since I’ve been so engrossed with a model and how it works. The last model I felt this way about was the #71374 LEGO Nintendo Entertainment System. Considering the Sheriff’s Safe was just a fraction of the cost of the NES, I feel bad for those who will miss out. Thankfully, the instructions are available and I don’t think any of the parts are too rare. So, if mechanisms interest you, definitely give this model a look!
What do you think? Have you gotten any of the BrickLink Designer Program sets? Which one is your favorite? And what do you think of the Sheriff’s Safe and its mechanism? Feel free to share in the comment section below!
And you might also like to check out the following related posts:
- BrickLink Designer Program Round 1 Final Designs
- BrickLink Designer Program Crowdfunding Round
- BrickLink Designer Program Round 1 Reopens Today!
- BrickLink Designer Program – Round 1 Update
- BrickLink Designer Program First Round Funding
- BrickLink Designer Program Details Revealed
- More LEGO Ideas Projects Coming via BrickLink!


Wow. I didn’t know this set was so complex. I skipped over it because I thought it was just a simple mechanism. This is really cool.
I might have mentioned this before, but the name “Il buono” is likely a reference to the Spaghetti Western “Il buono, il brutto, il cattivo” (The Good, the Bad and the Ugly). But it’s truly a classic movie, so it could warrant some referencing…
(Clint Eastwood plays “The Good” character, but since it’s a Spaghetti Western, it’s all pretty relative…)
I immediately though of the reference. Such a great film!
The little accessories are great too. I especially like the book.
Interesting mechanism. Thanks for breaking it down for us. I might build just the lock to see how it works.