

(Written by William)
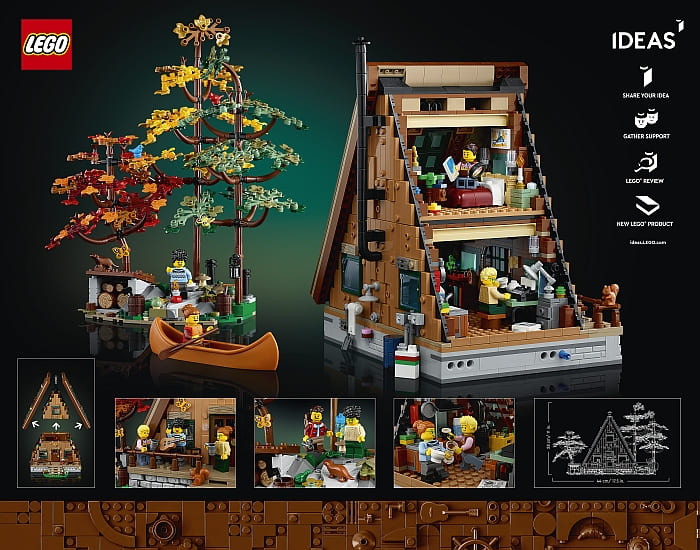
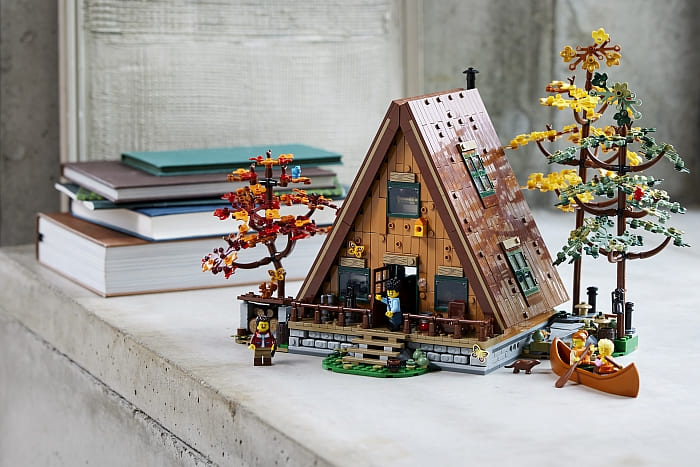
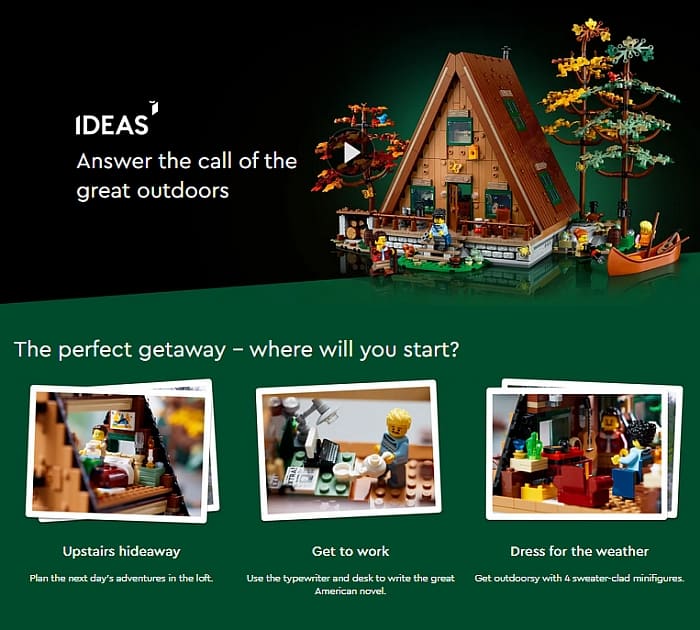
The #21338 LEGO Ideas A-Frame Cabin created a lot of excitement in the LEGO fan community. And I was excited too! A cabin in the woods with interesting architecture, pieces, and techniques – what is there not to like? So, let’s put on our good hiking boots and head out because we have some building techniques to explore!

LEGO IDEAS A-FRAME CABIN – REINFORCING WALLS
With a unique style of architecture come new building challenges. In real life, the A-frame is a very sturdy and efficient way to make a cabin. With the roof acting as both roof and walls, it simplifies the design without giving up stability. The only compromised feature is narrowing headspace as the walls tilt inward. As for building an A-frame with LEGO, the challenge is very different.
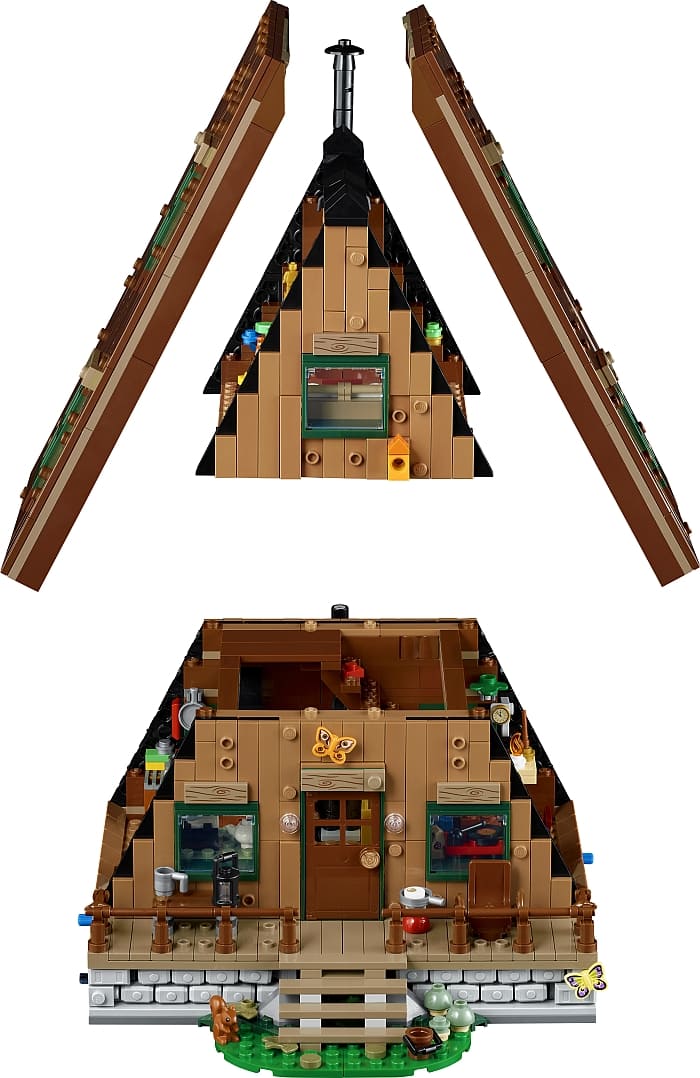
Angled LEGO roofs are often held in place by gravity (like they are in this set), or they are built using hinges of some sort. In either case, they don’t provide much in the way of structural support. This leaves the triangular walls at the front and back to handle the load of the structure. However, as most of us know, building walls straight up with no side support is not the most stable design. Sure, we can interlock the bricks so they stay together as one piece. But that just means the wall will fall over as one unit. It will still be together, just not upright like we need it to be.
One solution is to use long struts to connect the two walls together thus making them much more stable. And in most cases, this would be enough. However, this wall features a lot of detail work, which means it contains many small elements. Even interlocked together, walls built in this manner have lots of weak points.
This is why a heavy use of sideways building was incorporated in this set to regain some of the lost stability. And this also created some additional opportunities for even more details and textures for the face of the wall. By mixing brackets along with elements with sideways studs, LEGO designers were able to offset elements by a mere half plate thickness, which makes the overall detailing look subtle and stylish rather than heavy-handed and forced.

If you are planning to use this method, I recommend following the style used here. In other words, only really works with two additional layers at most. Building with LEGO, you learn that space can get eaten up really quickly. This is why advanced builds tend to make walls one brick thick. However, it is reasonable to play around with walls that are two bricks thick, especially if you’re adding texture and other details. Even if you build on a bracket face, which is half a plate thick, if you stick with the two-plate/tile thickness, you can exactly fit the two-brick thickness in your wall.
In the end, the vertical long connections that attach to the outside of the wall glue the inner wall together better than most other techniques. Plus, it allows for a decorative touch. The only thing you need to be aware of is the two-five rule. In short, every two studs equal five plates of thickness when building sideways. Or, if you prefer, every square 1×1-stud space measures 2.5 plates. You can see this by grabbing a 1×1 brick with one stud on the side. Place a 1×1 plate on the side stud. You’ll notice a small gap under the attached plate. That gap is half a plate thick. Add that gap 0.5 to 2.5 which is how wide a 1×1 plate is and you get 3, which is the number of plates a standard brick is. Fortunately, these days, there are many new pieces with studs on the side to help make the process easier. I highly recommend the 1×2 brick that is 5 plates high and has four studs on one side. This part is heavily used in the BrickHeadz characters. It’s an easy element to use that won’t require math.
LEGO A-FRAME CABIN – BUILDING SIGHTLESS GUIDES
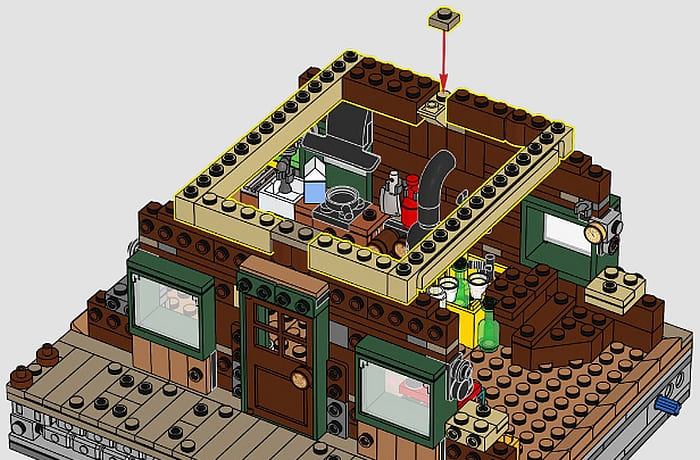
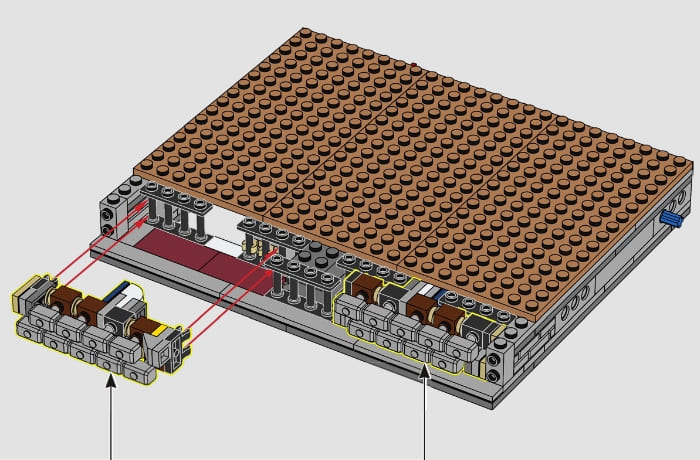
Early on in the building process of this set, you’ll add a number of spindle fences. They aren’t used for decorating but rather they are the grid of bars to clip decorative elements onto. Notice the sideways hammers at the base of the cabin used for some pretty fancy brickwork. The hammers are clipped into the bars of the fences. The one issue is that you can’t actually see where these elements need to be clipped.
I can say that even for me, used to living with vision issues, building techniques like this can be challenging. In my case, the problem is not that I can’t see what I’m doing, but rather I can’t feel every angle of the connection to know if I’m lining things up right. The solution offered in this set is to build a sightless guide.
A key feature of a sightless guide is the curved slope. The slope is added to the element that is going to be attached to the grid. The sloped edges prevent the piece from getting hung up on any unseen edge while gently guiding you to aim for the right space. I’ve never had an easier time attaching something that could have caused so much headache.
The only drawback to this technique is that you need to account for the space that the guide will end up taking. Not every design has that type of space to work with. Therefore, this type of method works great for foundations as this is the part of the model that tends to weigh the most. Plus, if you are clever, you can use the geometry of the guide to add even more stability, which is exactly what you want in a good foundation.
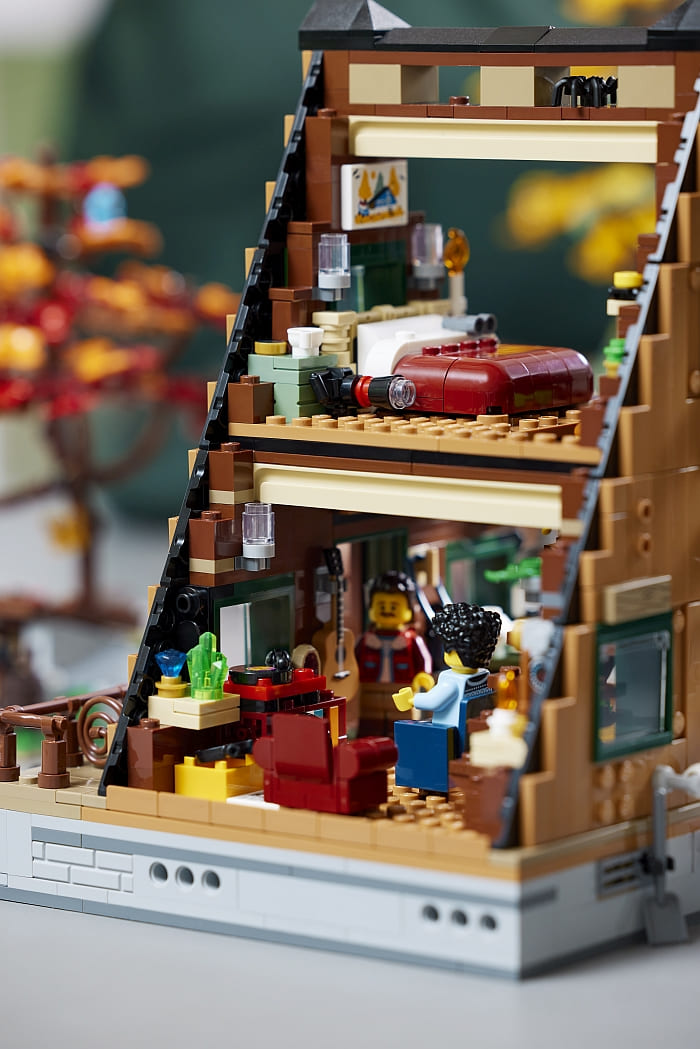
LEGO A-FRAME CABIN – 360-DEGREE PLAY
One of the features mentioned in the design notes of this set is that this model is designed with 360 degrees of play. So, what does that mean? Is it really a feature? To best explain this, let’s use the LEGO Modular Buildings as a secondary point of reference.
In short, the degree of play means the set looks good and is playable from several angles. For the LEGO Modular Buildings, this is usually only 180 degrees of play; the front and back of the model, or if it is a corner building, it is the two adjacent front-facing sides. The rest of the model does not have as much attention paid to it. So, to have a model that claims to have 360-degree play experience is a rather impressive feat and a good building challenge.
Here are some issues that you may run into when building a model that’s viewable and playable from all around. First, you need to make sure the model is structurally sound. Another issue might be that while a section may be the right size, shape, and color from one angle, but it may not look so good from another angle. And these issues only compound the larger the model gets.
There isn’t really one technique to solve these problems, and there is no right or wrong way to deal with them. Rather, having the ability to consider part-usage in a three-dimensional space comes from experience and not being afraid to try new techniques.
LEGO A-FRAME CABIN – FINAL THOUGHTS
When this set initially came out, I was excited for it just like many other LEGO fans. However, the price tag made me pause. Being interested in architecture kept it on my radar, but not being an outdoorsy person allowed me to hold off. After having the experience of building the set, I think my initial opinion was justified.
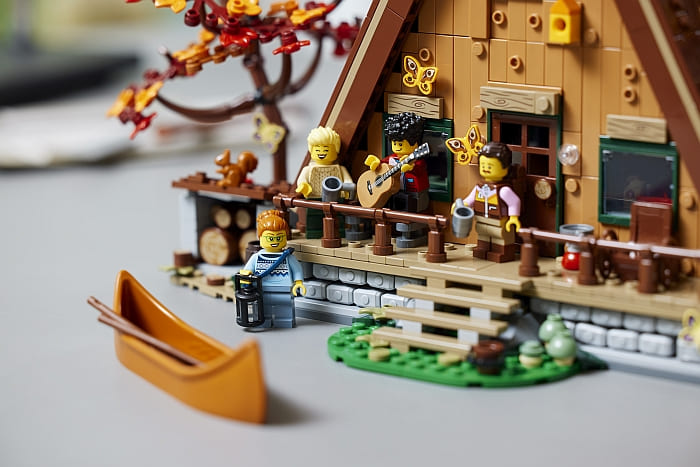
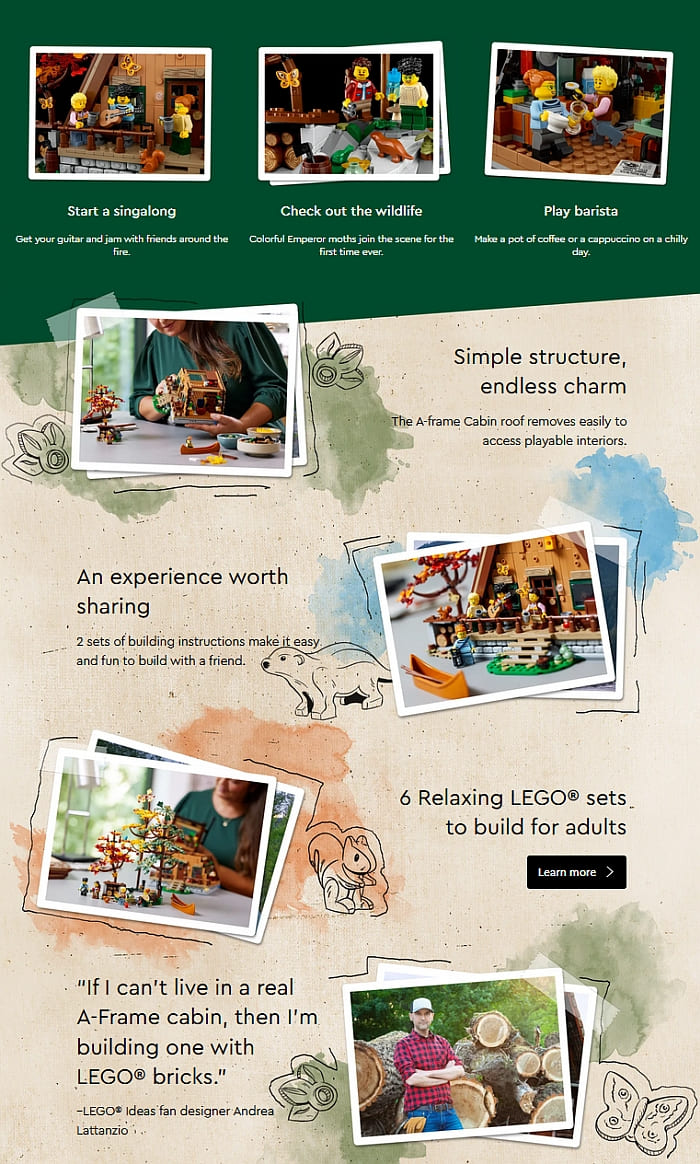
I had a blast building this model. Everything is extremely well thought out. Parts are cleverly used and the detail work is downright exquisite. However, I think the subject matter will really influence anyone’s decision. Relating to outdoor activities really elevate this set, if it aligns with your interests. From canoeing to rock collecting to outdoor photography, this set features a wide array of hobbies and interests. There are also a few indoor activities including writing, music listening/playing, and LEGO building, but these are coupled with the idea of going out to a cabin to enjoy the peaceful environment of nature. Because of my lack of interest in some of these activities, I felt like I was only resonating with half the model.
But I will say, that if you’re a big nature buff who likes getting away to a cabin in the woods, this would be a fantastic set. Despite it being a fairly advanced build, LEGO designers split up each numbered bag into more steps than normal. This keeps the building experience from feeling overwhelming. Some of the 15 numbered bag steps are so small you kind of wonder why they didn’t just roll it into the next numbered bag. But that’s all to keep the experience chill and relaxing, which is what you want, especially if you took this set out to your cabin in the woods to build! In the video below, I talk about the set in a bit more detail
If you want to check it out, the #21338 LEGO Ideas A-Frame Cabin is available at the LEGO Ideas section of the Online LEGO Shop.
What do you think? How do you like the LEGO A-Frame Cabin? Is this a set you’re interested in getting? Or have you gotten it already? Feel free to share your thoughts and own reviews in the comment section below!
And you might also like to check out the following related posts:


Ha! I didn’t see those hammers until you pointed them out. This technique was also used in one of the modulars.
I’m debating between this set and the Sanderson Sister’s cottage. They both seem to be great builds. Are you going to review that one too?
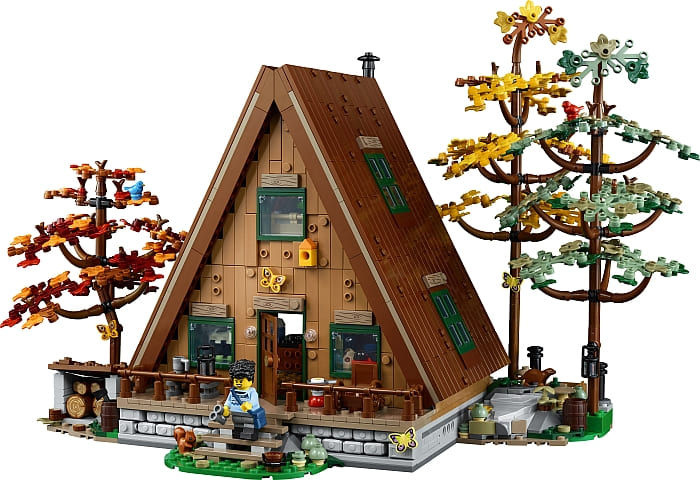
I like those trees. It’s a good technique for smaller trees. Similar to what we got in the modular book shop.
I love those printed butterflies! And all the other features too. My family has an A-frame cabin vacation home very similar to this. I’m getting this for Christmas to display in the cabin’s living room!