

(Written by William)
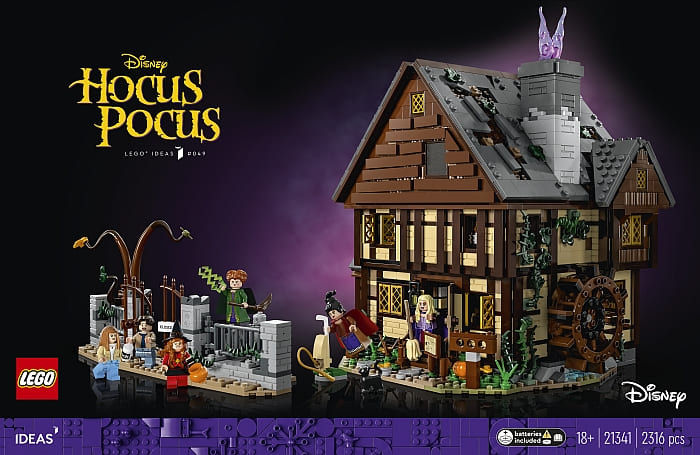
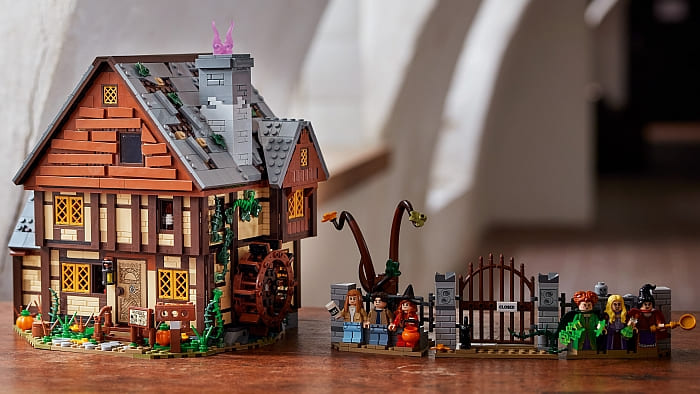
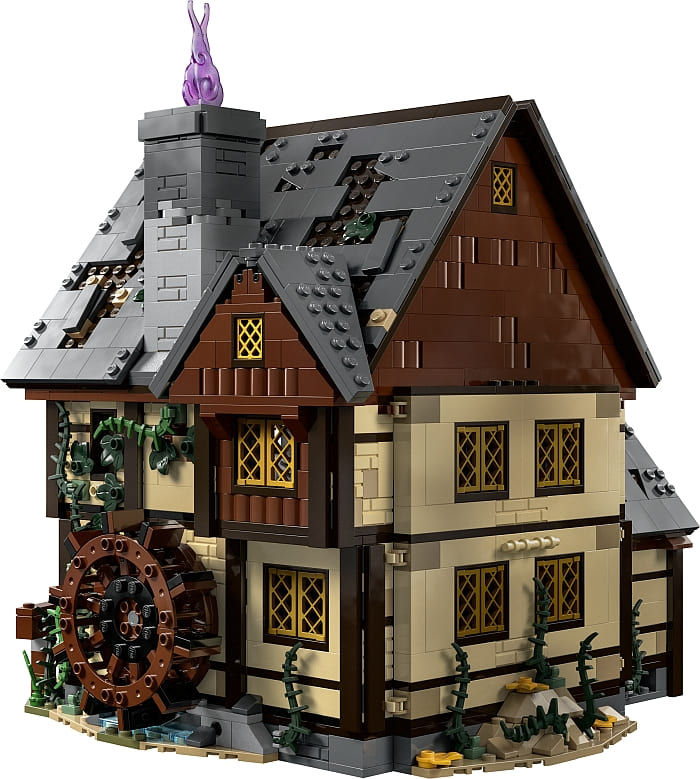
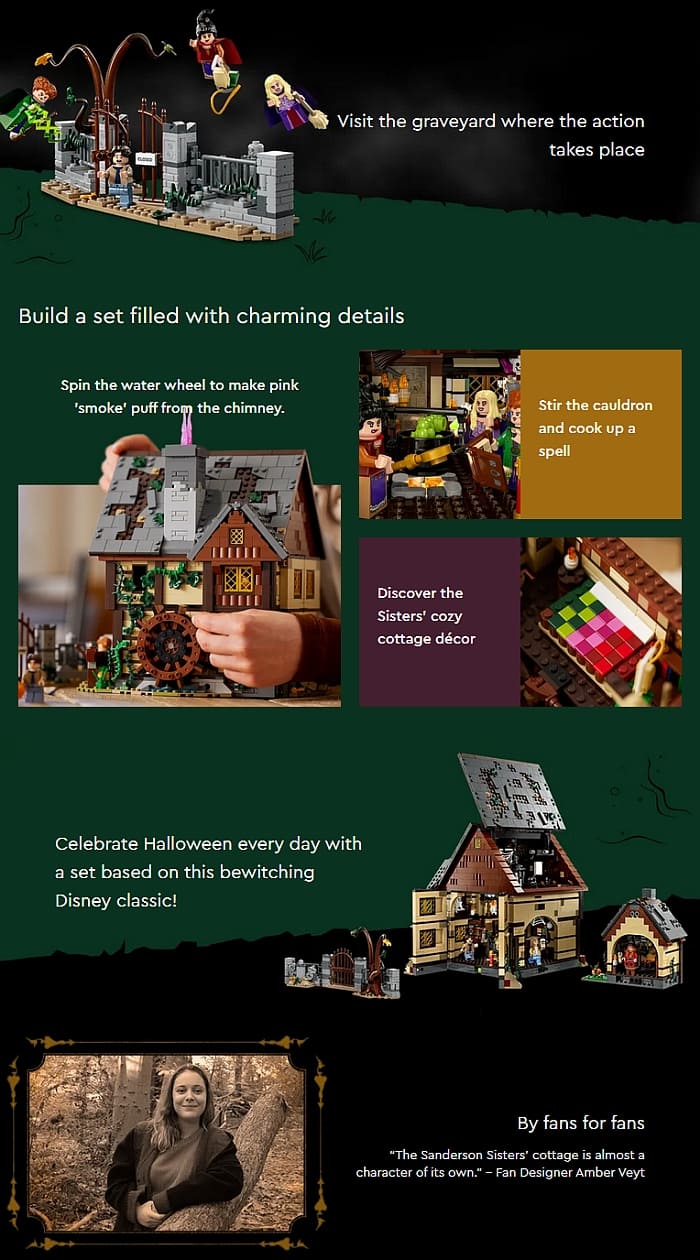
I wasn’t particularly familiar with Hocus Pocus, but I’m a big fan of LEGO buildings – the older style the better. Thus the #21341 Disney Hocus Pocus: Sanderson Sisters’ Cottage intrigued me. My wife knows the source material better than I do, so I thought this would be a nice set to build together.
I did watch the first Hocus Pocus film before finishing the model so I have an understanding of what we’re building, and I noticed some discrepancies. For example, the three tombstones were not on the cottage property, and the black candle in the model is connected to a wall in the film and not a freestanding fixture as in the set. In other words, the set is more about representing key elements of the movie and not trying to make a photocopy of the building’s features.
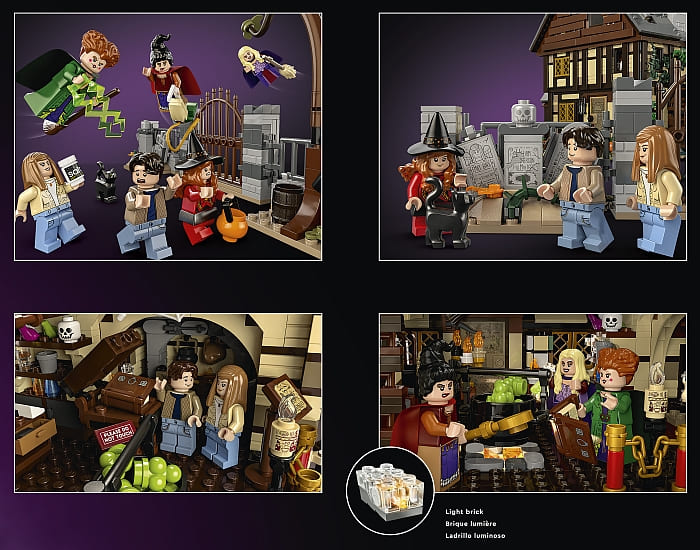
With that said, LEGO designers did a highly accurate job of representing some of the main characters in the movie. All six of the minifigures have hairpieces and expressions that really capture the film versions. From Mary’s sideways mouth to Winifred’s exaggeratedly small mouth. It is also worth noting that Bricklink.com lists three additional minifigures in the model compared to LEGO’s listing of six. This is because there are three skeleton minifigures.

Another key thing to point out is that there are some uniquely printed elements in the set. The black candle, the tile inside the spell book, and the Salt label printed on the container Alison holds. There are also some standard prints we’ve seen before, like some wood paneling on tiles. However, pretty much everything else that has printing on it is a sticker. I was actually surprised at how many stickers are in the set. I’ll try to cover as many of them as I can in the video below.
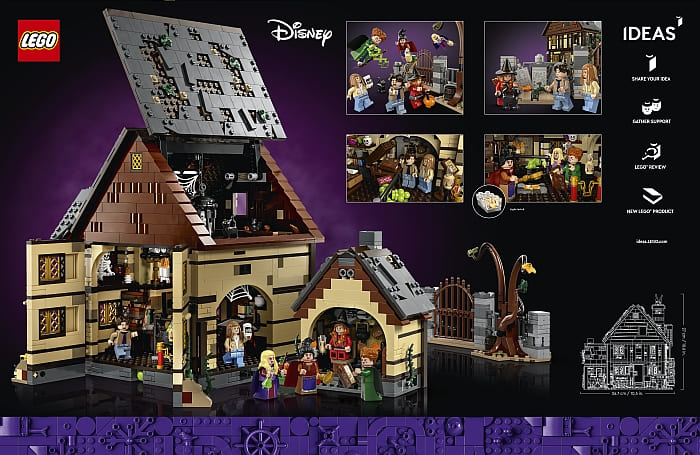
As for the build itself, it is not that difficult. Most of the set is devoted to detail work rather than a complex building experience. For that reason, it is highly approachable if not a bit crowded. Its major building feats include a pink smoke action element, a light-up fire action element, and a rather secure roof connection, which I’ll go about in detail further below. And I’ll cover in the video why I didn’t mention the action elements in this written portion.
I feel like the high price of the set ($229.99 in the U.S.) is related to the density of details, including the fact that the set looks good from every direction. And to the credit of the original fan designer, Amber Veyt, and the LEGO Ideas team, they did a pretty good job at giving you access to every section of the model. It’s not a great playset though and it’s only a so-so building experience. But let’s dig into some of the building techniques to see why I say this.
LEGO HOCUS POCUS COTTAGE – PANEL WALLS
For most buildings you will find in LEGO sets make sure the walls are interlocked for stability. Of course, there are instances where a wall needs to break away, and in those cases, a single wall section is created. Other times, the creation has to have a certain pattern or structure. Those are also instances where the wall is built as a separate piece and then integrated later through a transitional layering of plates.
Thus I found it quite odd that the majority of this cottage is built up in small wall sections. The obvious benefit is that this is an easier building style for those who may not have a lot of building experience. However, experienced builders might feel a little uneasy with the numerous weak points that exist in the building. With that said, LEGO designers did manage to have enough interlocking in the transitional layers to have the whole building stay together quite well.
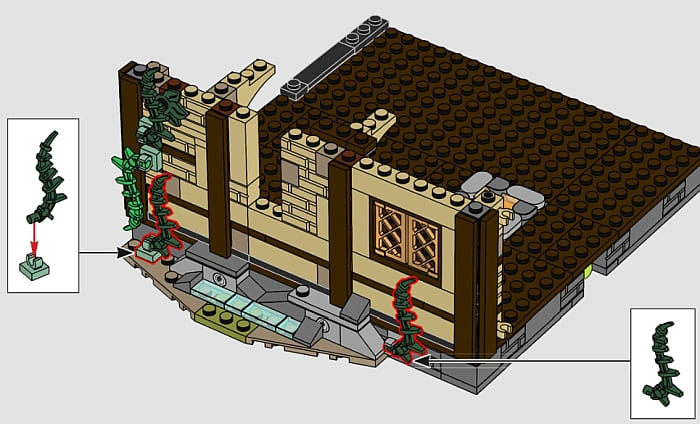
While building the set, I did have misgivings about the triangular sides of the roof at the front and the back. In fact, I didn’t follow the instructions for the back wall to build that section separately and then add it later. Rather, I built straight onto the building, since I felt if I tried to press things just a bit wrong, the walls would split apart and break the house.
Overall, this is not a style of building I’d recommend to an expert. Building small wall sections that just get added side by side and maybe interlocked later will create major stability issues if you are building anything larger than what this model offers. With that said, this is a good building style for those who feel they want to improve from a very basic level of building. Creating separate wall sections allows the builder to focus on the artistic style and texture of their walls. Plus, this technique breaks down the complexity of the build by focusing on bite-sized portions of a larger model.
To practice this style of building there is no real rule of thumb to follow or standard you need to worry about. Rather, if you are faced with a large building and feel overwhelmed by the scale, simply choose a small portion to work on and just build that. This makes this particular building style highly personalized and simple to implement.
LEGO HOCUS POCUS COTTAGE – LIFT-ARMS
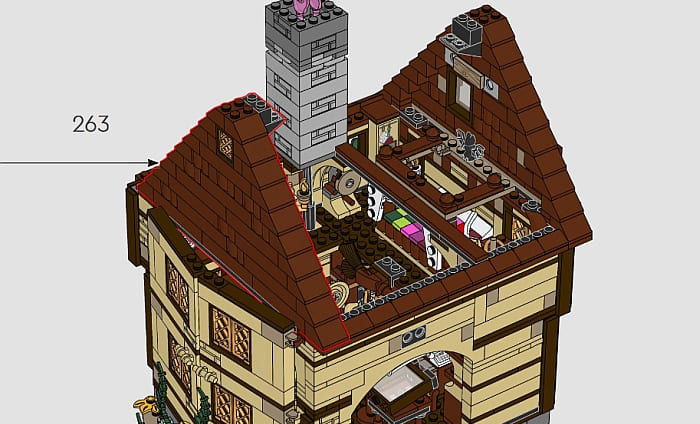
I don’t know about you, but I really have a tough time wrapping my head around angled roofs. Several decades back, LEGO actually created sloped elements with studs on the angled side of the piece. However, that didn’t give a lot of flexibility in how steep or shallow a roof could be. That’s why I’m very impressed with the technique used in this model.

It starts by building a frame for the roof to rest on. Often this looks like a rectangle, but it can have other features like a chimney. The important part is that there is something for the roof to rest on at the top, bottom, and both sides. Next, there is a LEGO Technic pinhole on the inside of the left and right frame. This is where one end of the LEGO Technic lift-arm will anchor.
Once the frame is done, the roof is built. This may need special angles or cutouts to conform to whatever the roof shape needs to be. Once that shape is just right, it is time to connect a modified plate or brick with a pinhole on the underside of the roof. This will be where the other end of the lift arm will anchor. It is wise to have two lift-arms of the same length for this technique. But once everything is put together, the roof will swivel into place and be one of the best and firmest connections for a roof you will ever see.
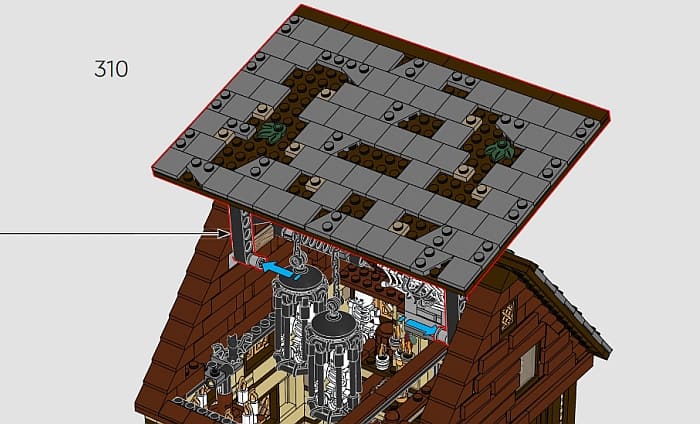
The added advantage is that the anchoring lift arms don’t care how steep the roof needs to be. The other nice thing is that you can use a wide variety of different lengths of lift arms. The only change is where you may need to place the LEGO Technic pinholes to accommodate the different lengths. Longer lift arms will be easier to connect but might not be as secure since they will connect to one end of the roof. I’d recommend trying to aim for a lift arm that will attach around the middle of the roof for best results.
LEGO HOCUS POCUS COTTAGE – FINAL THOUGHTS
With the price of this set, I can see only hardcore LEGO fans really giving it a good look. However, I think this was designed more for those with a lot of nostalgia for Hocus Pocus. On top of that, the building style is not very demanding, but it is time-consuming. In the video below, I discuss the set in a bit more detail.
Overall, this is the perfect set to get an intermediate builder comfortable with the concept of detail work. From the panel wall construction to the various artifacts inside the cottage, this set is all about detailing. For this reason, anyone who is a fan won’t have too much trouble putting it together. Though, I did have a few moments where I felt my hands were a little too big.
As for what more advanced builders can take away from this model, it’s the great roof construction. Again, it is simple and functional, but it’s so much better than other roofs I’ve worked with. In fact, this is how I’ll build roofs for myself in the future. Anchoring with lift arms takes all the stress out of oddly angled surfaces. Beyond the building techniques, this set does have a lot of stickers you may or may not find annoying. But it is a great source for various earth-tone colored elements and the minifigures are absolutely fantastic. It may still be hard to swallow the price tag on this one, but it is a solid build that will easily retain a good value. If you want to check it out, it’s available at the LEGO Ideas section of the Online LEGO Shop.
What do you think? How do you like the new Hocus Pocus set? And what do you think of the building techniques we discussed today? Are there any other interesting techniques you noticed in the set? Feel free to share and discuss in the comment section below!
And you might also like to check out the following related posts:


It reminds me of the stranger things upside down house. That was also too detailed for my taste. Dealing with a bunch of finicky decor pieces. Although that one had really cool techniques for the trees. They were super sturdy. But the roofs?! Dear Lord! This one seems to have a much better roof technique.
This is perfect as a medieval house. Only it was cheaper.
I like this a lot, but it’s too expensive. I wish Lego would release a medieval modular line. Maybe not as big as the real modulars, but like the blacksmith set from Ideas.
I think they have done the panel walls so they can do the dark brown timber lines. It makes flimsier buildings as not everything is interlocked, but there is no way around it as far as I know.
For the Western theme, Lego made timbered panels for sets such as Fort Legoredo. Probably a necessary evil.
That roof technique is great. I remember seeing this technique in some other sets but I can’t remember where. Anyway, I like it because it’s simple and logical. Some of the techniques they use these days I can’t even wrap my brain around. Too advanced and to complex