I recently had a chance to try out an interesting new product called Bakku Backgrounds. They are basically a combination of a playmat and a backdrop, and can be used with LEGO, or other toys and collectibles. 🙂

Bakku Backgrounds was created by Brian Woodman from Canada, who watched his own children play with LEGO. He thought that it would be useful for them to have a decorative surface they can build and play on, and also have a backdrop when they want to display their creations. To combine the two functions, Brian came up with a unique background that can fold up like an origami to offer different options as a play and display surface.
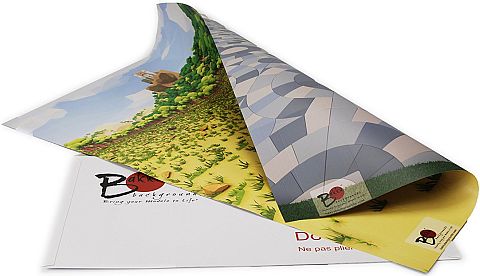
Bakku Backgrounds are made of a fairly thick, but still foldable paper, printed on both sides with different images to give you more options. The surface is nice and smooth, similar to a paperback book cover. The backgrounds ship flat, and come with instructions on how to fold them. The creases are almost invisible, so if you want to use the backgrounds simply flat, or folded up only at the edge at the back (to add a bit of a backdrop propped up against a wall), you can certainly do that.
However, the real unique feature of Bakku Backgrounds is that it offers a free-standing backdrop by having the back panel slightly curved, and the edges folded under. That’s where the origami folding techniques come into play. The step-by-step instructions to fold the backgrounds are well thought out and include clear pictures, but with little origami-folding experience, I had some trouble following them. I found the video-instructions (see below) much easier.
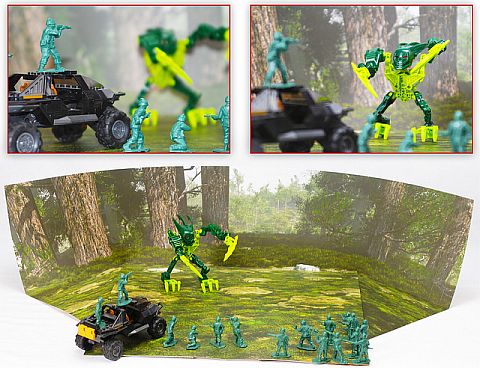
Once you fold the background, it provides a horizontal play and/or display surface, and a slightly curved free-standing backdrop (each background has two sets of angled creases, so you can adjust the steepness of the curves). Because of the origami folding techniques, no stapling, taping or gluing required. There are also some additional creases at the sides, which help with attaching several backgrounds next to each other for an even wider display-surface (see second video in the playlist above). This might require a little bit of tape to keep the two pieces together.
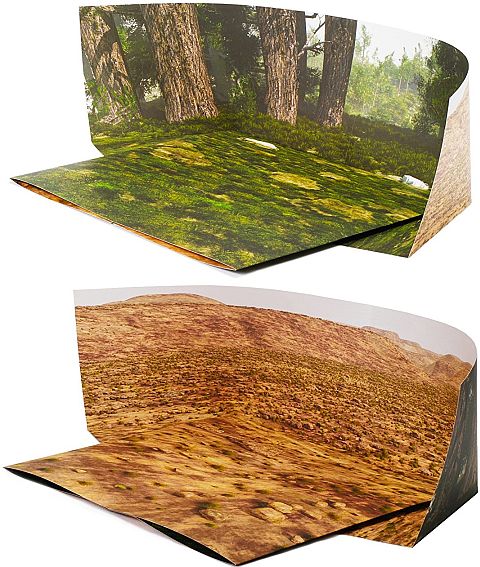
Bakku Backgrounds come in two different orientation; portrait or landscape (think “tall and thin” or “wide and short”). Both backgrounds are 36×24 inches when flat. When folded, the landscape orientation has an 8″ backdrop and the front comes out 16″, and the portrait orientation has a 13.5″ backdrop with a 22.5″ flat section. And, as I mentioned above, both orientations can be paired with other backgrounds to make the surface wider.
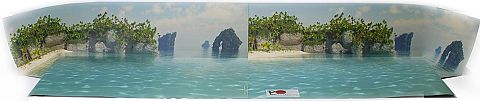
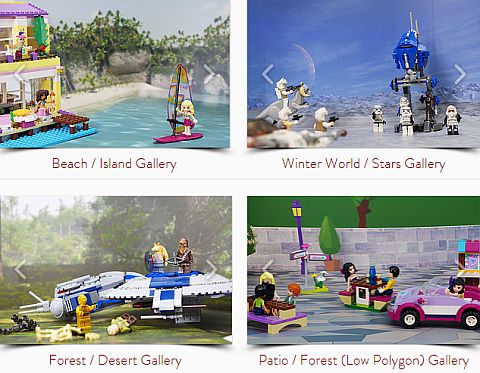
The images on Bakku Backgrounds are computer-generated by Brian using 3-D landscape modeling programs. Some of the designs are simple, while others are a lot more photo-realistic; depicting, forests, beaches, deserts, and other landscapes. You can use either the front or the back of the backgrounds, as they have different images. For example, I got the forest/desert double pack in landscape orientation, and the low polygon patio/forest in portrait orientation.
Bakku Backgrounds wasn’t made only with LEGO fans in mind, so the images are not very LEGO-ish. And, while they are made of high-quality paper, they are still paper, and I don’t think they are durable or play-friendly enough for younger children. However, I could see them working well as a backdrop for certain displays, particularly free-standing ones on a table at a LEGO show/convention. They could also work well for teen and adult LEGO fans as backgrounds for shelf-displays, either by using them flat, or by adding additional creases (or cut to size) to make the front sections narrower to fit standard-size shelves.
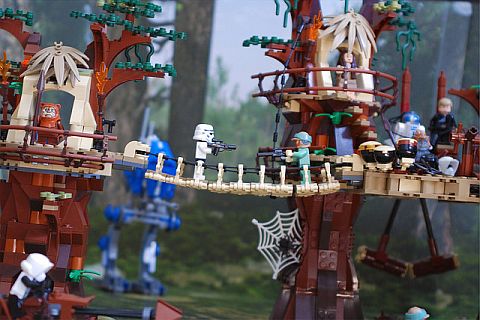
Where I see Bakku Backgrounds being the most useful for LEGO fans is in stop-motion animation and LEGO photography. The curved background offers a nice, seamless backdrop for taking pictures, and the surface is large enough for a variety of shots from different angles. The prices are reasonable enough that you might find some of the imagery useful for your own brickfilms and photo-shoots, instead of using standard posters or printed images. If you are interested, you can visit BakkuBackgrounds.com for more information and plenty of example images. All currently available Bakku Backgrounds are sold via Brian’s Amazon store, which you can find here: BAKKU BACKGROUNDS ON AMAZON
What do you think? How do you like Bakku Backgrounds so far? Is this something you would be interested trying yourself? What other products and techniques do you use to create backgrounds for your displays? Feel free to share and discuss in the comment section below! Also, if you have any suggestions, ideas, or requests for Brian, you are welcome to add those as well. He is very eager to hear from the LEGO fan community and see what we think. I already shared my feedback, so now it’s your turn. 😉
And you might also like to check out the following related posts: