The dream of owning your very own Ferrari F40 super sports car turns real with the highly detailed #10248 LEGO Creator Expert Ferrari F40. One of the most desirable sports cars of all time, the Ferrari F40, is now appearing for the first time as a LEGO product. Below is the official press-release and designer-video for the #10248 LEGO Ferrari F40, interesting facts about the original Ferrari F40, and more! 🙂
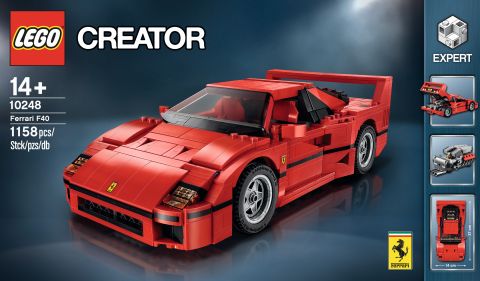
The LEGO set of the cult Ferrari F40 sports car, which was manufactured from 1987 to 1992, guarantees building fun across many generations. Just like the legendary original, the LEGO model fascinates with sleek, aerodynamic lines and a distinctive rear spoiler, as well as the bright red racing body. The super sports car replica is being released in the LEGO Creator Expert product line, and was developed by the LEGO Group in collaboration with Ferrari. The LEGO Ferrari F40 features numerous details, recreated with LEGO bricks. Looking through the car’s hinged doors, you can quickly see that even the interior of the sports car is originally equipped. From door loops and a steering wheel with a Ferrari logo, to two red racing seats. Below the lift-up bonnet lid, there is the luggage compartment with a toolkit. A special windscreen element with printed A-pillars and tailor-made, cast wheel inserts with road-going tires give this meticulously emulated model the final touches.
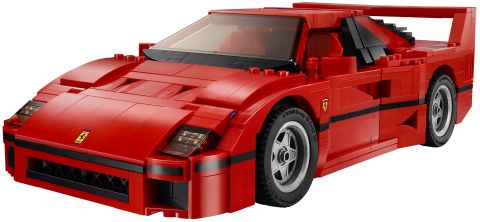
Get up close to one of the world’s greatest supercars—the Ferrari F40! This awesome LEGO Creator Expert replica of the iconic sports car with its sleek aerodynamic lines, distinctive rear spoiler and racing-red bodywork is packed with authentic brick-built details, including pop-up headlights, side air intakes and a vented rear hatch that opens to reveal a twin-turbocharged, 90-degree V8 engine! Open the doors and you’ll discover complete authenticity, right down to the crafted cabled door handles, steering wheel with Ferrari logo and 2 red racing seats, while under the hood you’ll find a luggage compartment and tools. A special windscreen element with printed A-pillars and custom-made, molded rim inserts with sturdy, road-gripping tires add the final touches to this intricately designed model, a must-have for all Ferrari fans! More LEGO Ferrari F40 product highlights for master builders aged 14 and above include:
- 1,158 LEGO elements
- Lift-up tailgate with vents
- V8 engine with two turbochargers and quick release function
- Flip-up headlamps
- Air louvers at sides
- The LEGO Ferrari F40 is 8 cm tall, 27 cm long and 14 cm wide
➡ DATA, FACTS & STORIES ABOUT THE FERRARI F40
A classic bright red racing chassis – the similarity of the LEGO model with its role model is immediately apparent thanks to the typical color. Of the original Ferrari F40, there were just two models in black and less than ten in yellow besides the classic red hue. One of the extremely rare white F40 productions went directly to the Ferrari Museum in Maranello (image from Wikipedia).
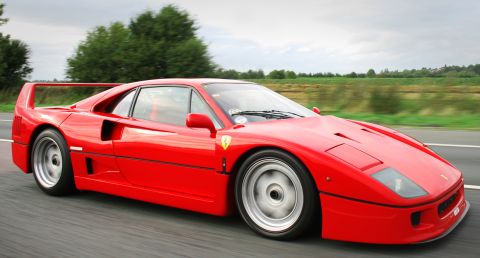
The Ferrari F40 is the last work produced under the direction of Enzo Ferrari. It is one of the most sought after models by the Italian manufacturer. With its 4.36 meters length, 1.97 width and 1.13 height, the Ferrari has a highly streamlined shape. The LEGO replica of the Ferrari F40 impresses with its 27cm length, 14cm width and 8cm height on a sporting scale.
The supercar owes its cult status to a number of prominent landmarks, such as the large rear spoiler and the pop-up headlamps in the contemporary style of the 1980s. With its distinctive rear-end and characteristic headlights, the LEGO Ferrari F40 faithfully copies these landmarks in great detail.
The LEGO Ferrari F40 costs just 89.99 Euros, making it a great way to fulfill your dream of owning a supercar. The selling price of the original was about 440,000 DM (about 380,000 Euros today).
The rear engine compartment on the LEGO Ferrari F40 opens to reveal the detailed V8 engine. It was due to this engine among other things that the F40 impressed as the fastest Ferrari for road use in its day. The fact that car accelerates from 0 to 200 km/h in 10.4 seconds, is still impressive performance today. This is also made possible by the low curb weight of the F40. 1,100 kg without operating fluids, it reaches a power/weight ratio of only 3.13 kg/kW, a very low value for a vehicle. The acceleration time of the LEGO Ferrari F40 is very much in the owner’s own hands.
The Ferrari F40 was a product to celebrate the 40th anniversary of Ferrari. It met with unexpectedly high demand, so that a total of 1,315 vehicles were built, instead of the planned 450. It was manufactured from 1987 to 1992. Productions at that time went exclusively to selected prospects such as long-standing Ferrari customers and celebrities.
➡ INTERVIEW WITH LEGO DESIGNER MICHAEL PSIAKI
Did the sharp lines of the F40 make it an easy car to recreate with LEGO bricks? – Actually, the more I worked on this model the more I noticed how many subtle curves there are in the car. The car gets slightly wider and taller as you move towards the back. We managed to pull this off with a clever angled section just behind the doors. It also allowed us to get a really small gap in the frame when the doors close.

Where is the spare wheel? – On the real F40 there’s a compartment under the hood that looks like it should fit an extra wheel in it, but it’s actually too small. Instead there is a can of spray that can be used to patch any flat tires. Just like the real car, the compartment on the LEGO model is too small for a wheel, so we also included the can of spray.
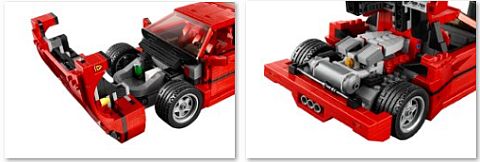
What is one of the more interesting parts used in the model that we can’t see in the images? – There is a tooth element used twice inside the hood of the car to provide a stop for the headlights. It fits perfectly around the wheel and provides just the right stop so the pop-up headlights rest at the correct angle when they are closed.
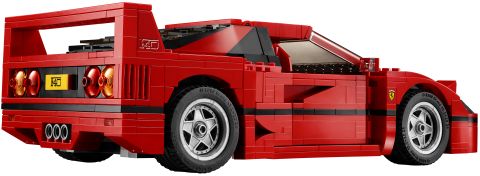
Where are the door handles? – The F40 was designed as a very light weight car, door handles were too heavy. Inside each door on the LEGO model you can see some bars that represent a cable on the car that would be pulled to open the door from the inside.
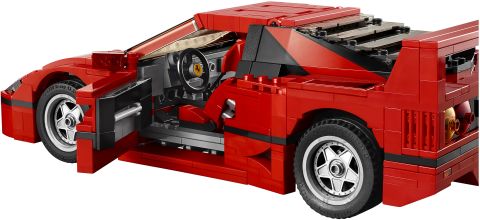
What is your favorite part of the model? – The front hood of the car. It has two built air intakes and is attached at an angle to the rest of the model. It was very tricky to figure out how to get that section built correctly and I was very proud that we found a way to build the air intakes from standard LEGO elements.
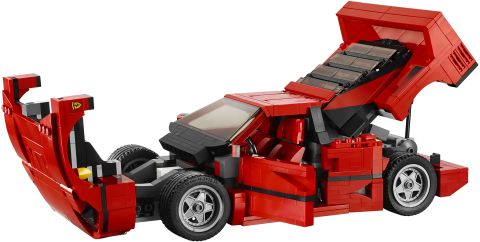
What was the most challenging part of the model to design? – The F40 has two opening panels, the engine cover and the front hood, they’re very large moving sections of the car and they were definitely the hardest sections to figure out how to make strong and look good at the same time. There’s a lot of advanced building techniques to make it all come together seamlessly.
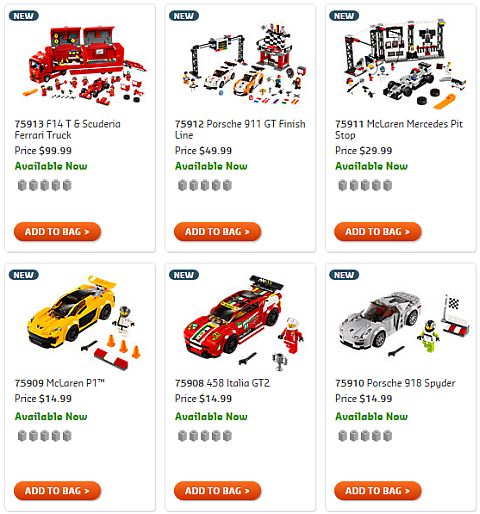
As you can see in the designer-video, the set also includes some new elements and new printed elements as well. A really well done model overall. The #10248 LEGO Ferrari F40 will be available mid-July for LEGO VIP members and on August 1st for every else. The price is US $89.99, €89.99, £69.99, DKK 799, which is excellent! While we are waiting for the release you can also check out the other LEGO Ferrari and other racer sets under the LEGO Speed Champions section of the Online LEGO Shop.
So what do you think? How do you like the LEGO Ferrari F40? Do you think it is a worthy representation of the original car? Are you planning to add it to your collection? Feel free to share your thoughts and discuss in the comment section below! 😉
And you might also like to check out the following related posts:


