(Written by benny)
LEGO Legends of Chima doesn’t just mean a TV series and LEGO sets, but there are also three fun games available. Chima Online is an MMORPG (Massively Multiplayer Online Role-Playing Game) that is currently in open beta for the USA and Canada on LEGO’s website, Laval’s Journey is a sandbox-style action-adventure video-game released on Nintendo DS, Nintendo 3DS and PlayStation Vita, and the Speedorz Game is a racing game available on LEGO’s website and on iOS and Android devices. You can read about all three games and play Chima Online (if you are in the USA and Canada) and the Speedorz Game on LEGO’s website here: LEGO Legends of Chima Games. This review is going to be about the Speedorz Game only, especially because it just had an update with a new cup added. 🙂

If you never played the Speedorz Game before, here is the official description to give you an idea on what it’s about: Customize your animal minifigure, hop on a Speedor, and race through the world of Chima! Battle through the Falling Jungle, the Rhino Canyon and the Swamps against the best Speedor riders in Chima. Win races to face new challenges and unlock more difficult routes. Face off against Laval and Cragger as well as other famous Chima characters. Unleash the power of CHI to boost your Speedor. Reach furious speeds and avoid obstacles to post the fastest times. Unlock new items to customize your character and collect studs to buy new Speedorz. Three cups available now with more coming soon!

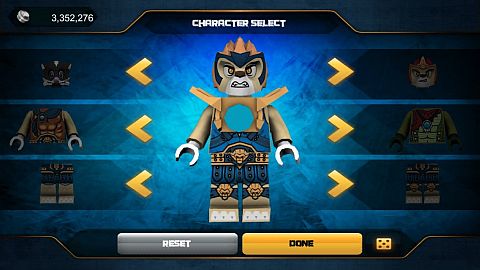
First, let’s look at the character creation and Speedorz shop. The character creation part of the game is my favorite (apart from racing); you can unlock the items the person you raced by getting certain times and stars. You can even mix and match character pieces, like have a fox head, Super Cragger’s body, and Gorzan’s legs. The Speedorz shop is like the cantina in LEGO Star Wars II (if you remember it); you collect studs in-game and spent them on the Speedor you want. Some Speedorz have different speed and handling skills; for example Super Laval’s Speedor has better speed and handling than Crawley’s. Some Speedorz cost a lot of studs and some just a few, so it is up to you to decide which one you want.
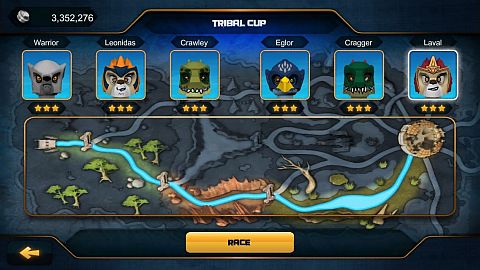
Now lets talk about the cups in the Speedorz Game. The first cup is the Tribal Cup with six different races. You race against Warrior, Leonidas, Crawley, Eglor, Cragger and Laval. These levels are easier than the others as the characters don’t have the best Speedorz, but neither do you – it can be hard if you have the starter Speedor.
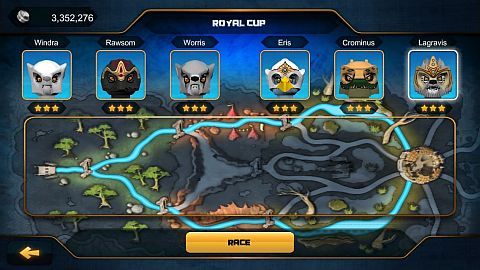
The second Speedorz Game cup is the Royal Cup. It t is just a bit harder than the first, and also has six races. You race against the leaders of the tribes; Windra, Rawsom, Worris, Eris, Crominus (even though he supposed to be dead) and Lagravis. Although this game is harder, with a better Speedor you will zoom through it in no time, like you are actually on the Speedor yourself! Especially if you have Laval’s Speedor!
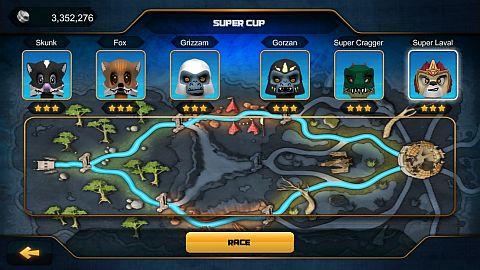
The latest and hardest cup is the Super Cup, also with six races. These are quite hard if you aren’t on a fast Speedor. I think you shouldn’t spend on these character’s Speedorz but save up for Super Laval’s, but it is your choice and I’m not stopping you. If you have a croc or lion body you could give your character a CHI-harness buy using Cragger’s or Laval’s body.
Below is a video walk-through of the various levels and game-features of the Speedorz Game. Please note that sometimes it looks like the video is buffering, but it is actually the game in the video that takes a bit of time to load. So no worries, just keep watching!
The Speedorz Game is my second favorite of the 2013 games for mobile devices (The Yoda Chronicles game being first). And it is awesome that you can also buy most of the Speedorz and characters at the Online LEGO Shop, and some of them are even on sale! 🙄

So what do you think? Have you played the Speedorz Game before? How do you like it? Do you have some tips and tricks for the game? Feel free to share in the comment section below! Also, I’m a TFOL (Teen-Fan-of-LEGO) and this is my third article here at theBrickBlogger. You can read my previous posts here: LEGO Galaxy Squad Eradicator Mech Review, LEGO Star Wars AT-TE Review. Thanks for reading! 😉
And you might also like to check out the following related posts: