As we are eagerly awaiting the new LEGO Hobbit sets under the LEGO Lord of the Rings license, I thought to explore the new LEGO The Hobbit characters a bit more in debt as a refresher. 🙂
As you probably know already, to coincide with the release of The Hobbit: An Unexpected Journey film by Peter Jackson coming out in December, LEGO is introducing a collection of LEGO The Hobbit: An Unexpected Journey building sets. One of these sets, Bag End, was recently revealed at the San Diego Comic Con. (See below.)
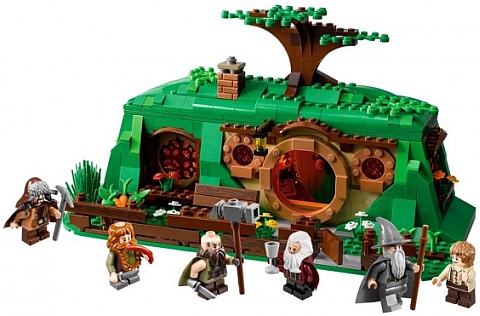
Along with the set there are also six new LEGO The Hobbit minifigures. From left to right we have: Gandalf, Dwalin, Bombur, Bofur, Bilbo and Balin.

➡ As far as Gandalf goes, if you have read the Lord of the Rings books or have seen the movies you know how important Gandalf is to the whole saga. Here we have Gandalf the Gray, the same minifigure as in the currently available #9469 LEGO Lord of the Rings – Gandalf Arrives set. (Please note though that his face is slightly different.) I like the new beard, although I really miss Gandalf’s long and flowing silver hair. Since LEGO put quite a bit of effort into all the other Lord of the Rings and The Hobbit minifigures I’m not sure why they didn’t work on Gandalf a bit more. He is a wizard after all, not just some old bald guy with a big hat. 🙄

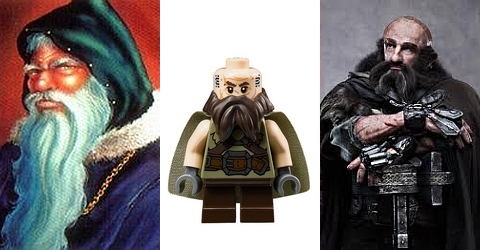
➡ Dwalin, the dwarf is one of the twelve companions of Thorin and Bilbo on the Quest of Erebor to challenge the dragon Smaug. He is the younger brother of Balin. According to the first chapter of The Hobbit: An Unexpected Party, he wore a dark green hood and a golden belt, and had a blue beard. It appears that the LEGO version of Dwalin is based on the upcoming The Hobbit: An Unexpected Journey film, rather than on the book.
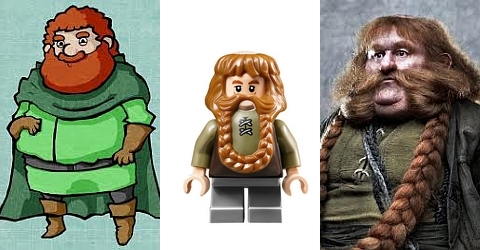
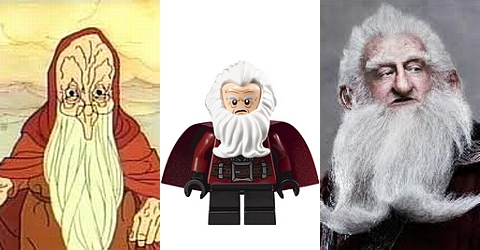
➡ Bombur, also a dwarf, and one of the twelve companions of Thorin and Bilbo on the Quest of Erebor. He was troubled by his weight and his sleepiness throughout the journey, but made it through and lived into old age. LEGO did an interesting new mold for him with a beard/expanded chest and tummy all in one piece. I think they did a good job, although by being so detailed and specific, they also limited the usefulness of the piece in other settings. But I guess a chubby dwarf is always welcome. 😀
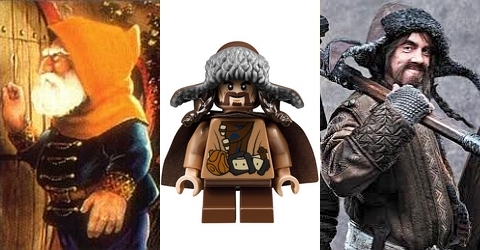
➡ Bofur is another dwarf who accompanied Thorin and Bilbo on the Quest of Erebor. If I remember correctly according to the book he was wearing dwarfish clothing and hood like the other dwarves. I’m not sure why in the upcoming film he is wearing a Russian hat, but it is obvious that the LEGO version of Bofur was designed after the film, rather than the book. It’s kinda cute, although I’m not sure how else the piece could be used with those two girly braids.
➡ Young Bilbo Baggins is of course one of the main characters of The Hobbit saga. Originally he was a quite normal hobbit; solid, sensible, unadventurous, and respectable with a weakness for good parties. But he was also enamored with Gandalf’s stories about dragons, elves, dwarves, and foreign lands, and got bitten by the bug of adventure, taking him into incredible journeys. Bilbo was also a ring-bearer, and he later gave the One Ring to Frodo. He made it to the age of 131 – the oldest hobbit in history – before departing to Valinor with the elves. LEGO’s adaptation is the same as the other hobbits, with that cute new hair-mold made just for them. Other than that he is quite simple – just like how a hobbit should be.

➡ Balin, a leader amongst the dwarves, and older brother of Dwalin, played a key role in on the Quest of Erebor by always looking after and protecting Bilbo. He made it back home, and reclaimed the Mines of Moria along with other dwarves. Their success was short lived though and they were eventually killed by Orcs. Later the Fellowship of the Ring found Balin’s tomb; this scene being depicted in the #9473 LEGO Lord of the Rings – The Mines of Moria set.
These are all the LEGO The Hobbit minifigures we know about at this point, and I’m sure there will be more to come. Besides the minifigures one other nice thing about the LEGO Bag End set is that this hobbit-hole is a key location in both the Lord of the Rings and The Hobbit, so there is plenty of play opportunities. You can even get several and with a little modification build the whole Shire! 😎
One thing I’m not sure about is if LEGO will continue to produce sets from the Lord of the Rings saga now that the focus is on The Hobbit. In the first wave of the Lord of the Rings sets they included quite a few of the main scenes, however many have been left out. Also many significant characters are still missing; including all the ladies. I’m wondering if LEGO is planning to go back to the Lord of the Rings to expand the sets offered, or will they just stay with The Hobbit story-line as the movies get released.
What do you think? Would you like to have some more LEGO sets from the Lord of the Rings? And how do you like Bag End, and The Hobbit minifigures revealed so far? What other Lord of the Rings and The Hobbit characters would you like to see LEGO make in the future? Share your thoughts and comments below. 😉
And for more LEGO Lord of the Rings new, reviews and discussions, check out the LEGO Lord of the Rings section, or select from recent posts below:


