≡ Menu

LEGO Super Mario 64 Question Mark Block Review

(Written by William)

Twenty-five years ago, the world was introduced to a 3D platforming version of Mario in Super Mario 64. This was one of the flagship titles of the beloved Nintendo 64 console. Thus, it is fitting that the next direct-to-consumer LEGO Super Mario set made for adults is a tribute to this video game icon!

Those familiar with any Super Mario title should recognize the question mark block. This block in-game was always filled with an interesting surprise. From coins to power-ups, to vines that led to new areas of a level, these blocks were always worth your time checking out in the game. So, it is appropriate that the #71395 LEGO Super Mario 64 Question Mark Block recreates this signature element from the games.

The only odd thing is that this set is called the Super Mario 64 Question Mark Block. Even the instructions admit there is no question mark block in the game. Instead, the game uses exclamation mark switches that activate other blocks to give Mario special hats. Regardless, the question mark block is still very much associated with the Mario franchise. You could even say that Super Mario 64 is finally getting its lost question mark block.

But wait! If the game version had surprises inside, does this mean the model also has nifty tricks inside it? You bet it does! So, let’s take a look and see what we get!

A WORLD OF POSSIBILITY

Press the box at the right spot on top and a transformation begins. You’ll have to help it along, but once it flips upright and you pull the sides apart, you will uncover a micro-scale Mario world. There are four distinct locations.

Located at the top is Princess Toadstool’s Castle. It features a tiny Mario and Princess as well as Likatu Bros., which acted as the cameraman for the game. Hidden in the back is even a micro Yoshi. You can open up the front of the castle by removing the wall with the drawbridge. Inside, you get tiny representations of three portraits. These are depictions of the other three levels found in the set. Plus, there is an additional interactive surprise (more on this feature later). Let’s move on to stage 1.

Welcome to Bob-omb Battlefields. This is the first level in which Mario can attempt to collect the power stars and return them back to the Princess’s castle. You get micro versions of some of the features of the level, including the Chain Chomp and King Bob-omb himself. Once you master this level, it is time to move to the next.

We skip ahead to stage 4, Cool, Cool Mountain. This slippery stage features a couple of penguin nasties to fight. You can even open up the mountain to see some interior slides. Watch your step and you can make it to the third treacherous terrain.

Lethal Lava Land is located right under the castle and recreates stage 7 of the game. You have a bully to push off into the lava as well as Mr. I to defeat. This level has some interactive elements, including a spinning volcano, and a moving feature in the bottom right corner. And it’s not a Mario adventure without a final boss!

Hidden away right in front is King Koopa! Slide open the hidden hatch and he is revealed on his throne. Press down on his body, and that unlocks a platform in which he and Mario can go toe to toe. Now if only you can play the game… or can you?

BRING OUT YOUR MARIO!

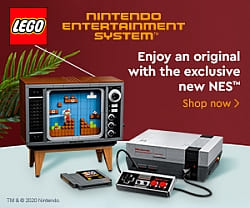
Just like the Nintendo Entertainment System model, the LEGO version also let’s you use your Mario from the #71360 LEGO Super Mario Starter Course. Or if you prefer, you can also use Luigi from the #71387 LEGO Super Mario Starter Course set. When you remove the front wall of the castle, there is a tile that is revealed. This is where you scan your selected Mario brother and begin the adventure.

According to the manual, this will take you on an adventure to find ten stars of power to return the castle to its former glory. This is very similar to the original game. You may be thinking, this should be simple, I built the set so I know where all the stars are hidden, right?

Well, the set only comes with two actual star pieces. The remaining stars will have to be obtained through other means. For instance, just like the game, you could obtain a star by finding enough red coins. Sadly, I can not verify more than these vague hints since, at the time of this writing, Mario can’t be updated yet to interact with this model.

FINAL THOUGHTS

This is a model that I feel won’t photograph especially well. The micro-scale makes it hard to appreciate the size of the question mark block and vice versa. However, in-person, this thing really pops. Between its bright cheerful color and design, people are going to want to see what mystery is hidden within the block. It is this mystery angle that really brings value to the model. It has the level of detail and intricate design to deliver on the surprise factor. I’m even happy to say that the building experience was fantastic.

Creating a box seems like a trivial task. However, when this block needs to be sturdy, look good, and hold some secrets, there is a lot of demands put on the model. In fact, I was expecting to be completely flummoxed by how everything worked. Turns out, the mechanism is kept very simple. That’s not to say things don’t get tricky. Most of the effort goes into creating three-dimensional terrain that can be folded in on itself. It’s easy to fold up a piece of paper, but how do you fold up a densely populated world?

What you end up with is a very intriguing decorative model that doesn’t skimp on its ability to be played with. I can’t even walk by the thing without unfolding and refolding it. Be sure to check out the video as I show how the model works since it’s definitely something that needs to be seen to believe!

The #71395 LEGO Super Mario 64 Question Mark Block is going to be available starting on October 1st for $169.99 at the LEGO Super Mario section of the Online LEGO Shop.

What do you think? How do you like this new LEGO Super Mario set? Are you planning to get it? Do you have any of the other LEGO Super Mario sets? Feel free to share your thoughts and discuss in the comment section below!

And you might also like to check out the following related posts:

{ 7 comments }

LEGO released several brick-built, minifig-scale reindeer for the holidays through the years. The #10245 LEGO Winter Village Santa’s Workshop from 2014 was especially popular as it came with five brick-built reindeer with printed eyes and fur. While brick-built reindeer were welcome, some people felt that LEGO should make a special mould for a deer. LEGO started releasing more moulded animals, so there was hope that this will eventually happen.

In 2016, LEGO finally released not one but two reindeer moulds. Both the adult and baby reindeer came with rounded features to match the aesthetics of LEGO mini-dolls. The larger reindeer appeared in dark-gray in two sets; the #41066 LEGO Disney Frozen Anna & Kristoff’s Sleigh Adventure, and the #41166 LEGO Disney Frozen Elsa’s Wagon Adventure. This second set is the only one to date featuring the baby reindeer. The adult reindeer is especially detailed, but because of the rounded features, they don’t match the aesthetics of standard LEGO minifigs and animals.

Then in 2019, we finally got a deer mould in a standard LEGO set! The #75945 LEGO Harry Potter Expecto Patronum features a glittering, transparent blue mythical stag representing Harry’s guide. A proper reindeer shouldn’t be far now!

The following year (2020), LEGO released the #10275 LEGO Elf’s Club House with the very first realistically colored reindeer. Unfortunately, only a single reindeer was included with this $100 set, so it remained a rare item.

But soon, you will be able to build a full herd of reindeer with the upcoming #40499 LEGO Santa’s Sleigh set, already referred to by fans as the “reindeer battle pack”. The set features four reindeer pulling Santa’s enormous sleigh. The sleigh is so big because it is full of presents as well as snacks for Santa and the reindeer to sustain them during their long trip.

The set comes with 343 pieces and two sets of bags. Bags #1 feature the pieces to build eight simple but colorful gift boxes and other gift items like a teddy bear, guitar, ski set, and a printed 2×3 tile with Santa’s Nice List. This printed tile and the guitar are the only printed accessories. By the way, the list includes 16 names that are printed really small and blurry, but some are a bit easier to read than others. I can only make out Claudia from the first row, and Pablo, John, Donald, and Oliver from the second row.

Bags #1 also include Santa, with a nicely printed torso (front and back), and dual-moulded legs, and hat.

The reindeer has two versions. They are of course one moulded piece, but the gap on their back can either get filled with a plain brick and tile (which is what you would use when you just want to let them roam freely), or when you yoke them up, you replace the first assembly with a slightly more complex one. This second option is provided to you at a later stage of the building process. I appreciate that LEGO gave us both options in this set. In the image below, the reindeer are yoked up, and you can see the four plain fillers on the side.

The sleigh itself is enormous. It is 8 studs wide and almost 14 studs long. Santa looks comically small riding it, but it is great for carrying all the gifts. In fact, besides the gifts included with the set, you could easily pile up even more. And if you want, you can also add Mrs. Claus or a couple of elves into the cockpit from previously released sets.

The interior space of the sleigh is split up into three separate sections; the cockpit where Santa sits, the slightly higher up cargo area for all the gifts, and a slide-out drawer at the back used for snacks. The entire sled is very sturdy and well built with no weak connections.

There are a total of nine stickers that come with the set. Five of those are for the sleigh, and the remaining four small stickers decorate the yoke of the reindeer. The stickers are nice, but if you don’t want to apply them, that’s fine too. The sleigh has plenty of nice golden decorative pieces. The two more unusual stickers are Santa’s dashboard screen plotting his worldwide route and the license plate that reads 54N74. I’m not sure what that refers to, but if you know, feel free to share in the comment section below.

Once you finish building the sled, it’s time to gather up those reindeer and hook them up! The connections are done with long rods and tubes as well as small pieces with clips and bars. I was worried that this will be a bit finicky, but once you connect everything, everything is very sturdy. There are also extra connections between each pair of reindeer, which makes the connections even stronger. In case you need to know, Santa’s sleigh, including the reindeer train, measures over 3 in. (8 cm) high, 11.5 in. (30 cm) long, and 2.5 in. (7 cm) wide.

I wouldn’t recommend picking up the assembly by grabbing the reindeer and trying to whoosh the sleigh around in the air because the sleigh is too heavy. Nor would I recommend grabbing the sleigh only, because the clips will make the reindeer bend down and the connections eventually separate. But if you hold the reindeer with one hand and the sleigh with the other, you can totally do some whooshies.

The #40499 LEGO Santa’s Sleigh is going to be available starting October 1st. Prices are as follows: Price: 36.99 EUR/59.99 AUD/34.99 GBP/36.99 USD/49.99 CAD. For a 343-piece unlicensed set that’s a little high, but I believe the reindeer and nice Santa figure makes up for it. If you want to check it out, the set is already listed at the seasonal items section of the Online LEGO Shop.

What do you think? How do you like Santa’s Sleigh? Are you planning to add this set to your Christmas shopping list? Feel free to share and discuss in the comment section below!

And you might also like to check out the following related posts:

{ 14 comments }