In tribute to Vincent van Gogh’s famous painting, the LEGO Group has revealed the #21333 LEGO Ideas The Starry Night set. This beautiful set was designed by Truman Cheng, a 25-year-old Hong Kong-based LEGO fan, through a submission on the LEGO Ideas platform, and has been created in conjunction with The Museum of Modern Art in New York.

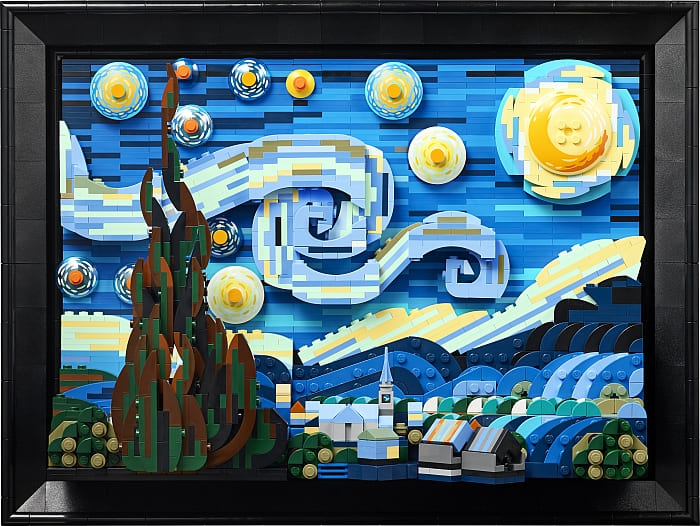
The three-dimensional set reimagines Vincent van Gogh’s renowned 1889 painting in LEGO form, with a strong emphasis on the artist’s striking brush strokes and color choice. Inspired by the view from his window at the Monastery of Saint-Paul de Mausole asylum in Saint-Rémy, France, where the artist spent twelve months, The Starry Night is one of the world’s most well known post-impressionist works and has been a visitor’s favorite at MoMA since it first arrived in 1935.
Art lovers can swap paint palettes for LEGO bricks and re-create one of the world’s most recognizable masterpieces. From the twinkling stars and mesmerizing moon to the sleeping Provence village below, van Gogh’s image has been brought spectacularly to life in brick, capturing the artist’s swirling brushstrokes.

To celebrate and inspire creativity, the LEGO Group has also launched a competition encouraging fans to submit their own mini LEGO builds inspired by the night’s sky. Winning designs will form part of an installation displayed in the lobby at the Museum of Modern Art this summer. Participants in Spain, the UK, Germany, France, the USA, Canada, Mexico, and Poland can enter by simply visiting LEGO.com/Starry-Night or select LEGO stores. Entries are open until the 30th of June.

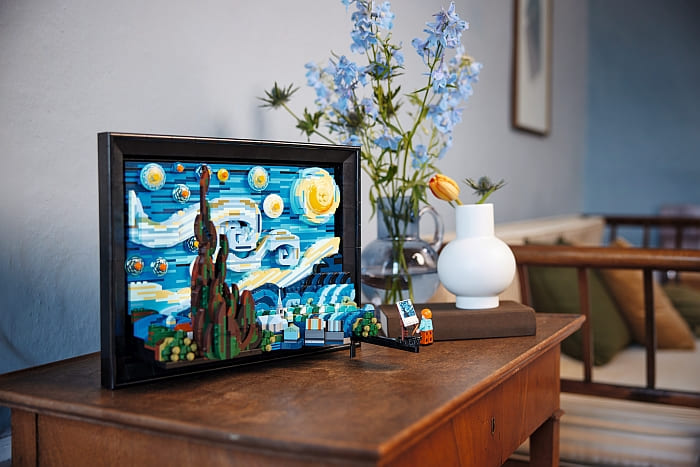
Honoring the celebrated artist, the set also includes a van Gogh minifigure, complete with a paintbrush, palette, easel, and mini painting on a printed tile, which can even be attached via an arm to show him painting the scene. The intricate set can be displayed standing or on the wall, thanks to the hanging feature.
When developing the original concept, Truman Cheng, a Ph.D. student and LEGO fan was just playing with LEGO bricks when he realized that stacking them together in random intervals looked like van Gogh’s iconic brush strokes. “It was a was a good brain tease to come up with tricks and techniques to capture the look of the original painting,” Cheng said, talking about his design “The brushwork goes into many directions in the moon and the swirling cloud, so there was some creative use of bracket and clip elements involved.”
Once Truman’s design had received 10,000 votes from the LEGO fan community, it was considered for development by the LEGO Group. Talking of the decision to turn the design into a real set, Federico Begher, Head of Global Marketing, said, “What makes The Starry Night so irresistible is the expressive brushwork and vibrant colors used throughout, which tell the story of humanity’s everlasting dream for better things. Truman’s design was a masterpiece in itself – showing how many different LEGO elements and techniques could be used to replicate van Gogh’s iconic painting. At the LEGO Group, we want to inspire the world to get creative, so we’re incredibly proud to have brought this set to life in partnership with such an iconic institution as MoMA, allowing fans to be artistic with bricks, and to create and display their own masterpiece.”

Founded in 1929 by three progressive women under an educational charter, The Museum of Modern Art is dedicated to being the foremost museum of modern and contemporary art in the world. MoMA manifests this commitment by establishing, preserving, and documenting a dynamic collection of the highest order that reflects the vitality, complexity, and unfolding patterns of modern and contemporary art; by presenting exhibitions and educational programs of unparalleled significance; by sustaining a library, archives, and conservation laboratory that are recognized as international centers of research; and by supporting scholarship and publications of preeminent intellectual merit. Central to MoMA’s mission is the encouragement of an ever-deeper understanding and enjoyment of modern and contemporary art by the diverse local, national, and international audiences that it serves.

“At MoMA, we celebrate the opportunity to connect art and audiences, and are thrilled to be part of a new way to experience van Gogh’s work, and to inspire the creative impulse in people of all ages,” said Sarah Suzuki, Associate Director, The Museum of Modern Art.
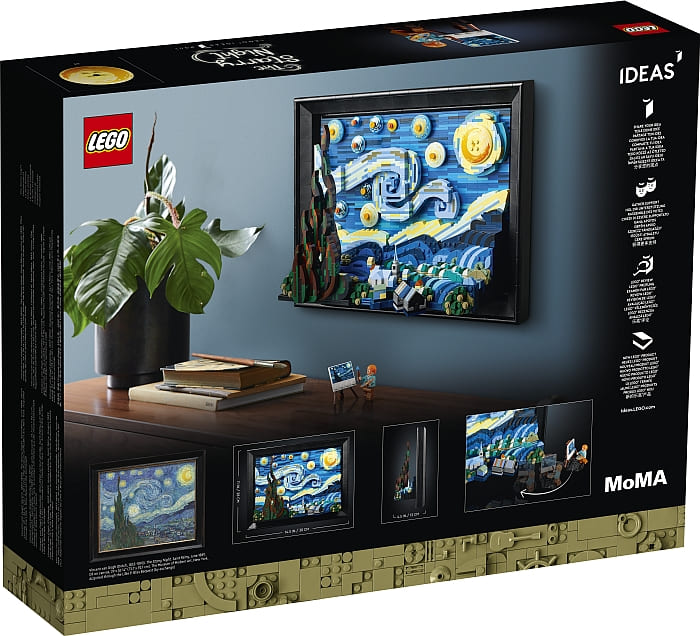
The #21333 LEGO Ideas The Starry Night set will go on sale on the 25th of May exclusively for LEGO VIP’s and MoMA members and then will be available globally from the 1st June at official LEGO stores, the Online LEGO Shop, with MoMA Design Store in New York City, and online at store.MoMA.org. Prices are as follows: £149.99 / €169.99 / $169.99 / 259.99 AUD / 219.99 CAD. For more details and information visit the LEGO Ideas section of the Online LEGO Shop.

What do you think? How do you like the LEGO Ideas Starry Night set? Are you happy with the final design? And are you planning to get it? Feel free to share your thoughts and discuss in the comment section below!
And you might also like to check out the following related posts: