A lot of new LEGO sets are getting released this month, so let’s take a look. Please note that some of these sets have already been available outside of North America, and others are brand new in all regions. So, let’s take a look at all the new sets and promotions this month has to offer.

FREE LEGO MASTERS’ BOOK OF SECRETS: During the entire month of August, you can get a free LEGO Masters’ Book of Secrets by DK Publishing with purchases of $60 or more. This offer is valid at official LEGO stores and the Online LEGO Shop.
FREE LEGO MARVEL SET: August 1-15, you can get a free #30454 LEGO Marvel Super Heroes Shang-Chi and the Great Protector polybag with LEGO Marvel purchases of $40 or more. This offer is also valid at official LEGO stores and the Online LEGO Shop.
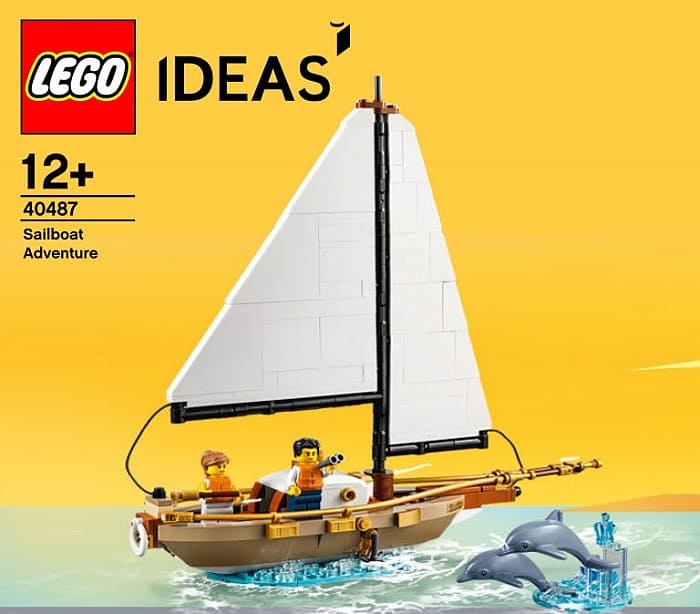
FREE LEGO SAILBOAT: August 1-29, you can get a free #40487 LEGO Ideas Sailboat Adventure set with purchases of $200 or more. Please note that that for the first three days, the set will only be available for LEGO VIP members, and after that, for everyone (while supplies last). This is a lovely and quite substantial set with a brick-built sailboat, two minifigs, and two dolphins. We will talk about this set in more detail in the upcoming days. This offer is also valid at official LEGO stores and the Online LEGO Shop.
FREE LEGO SUPER MARIO SET: August 16 – September 5, you can get a free #30389 LEGO Super Mario Fuzzy & Mushroom Platform Expansion set with LEGO Super Mario purchases of $40 or more. This offer is also valid at official LEGO stores and the Online LEGO Shop.
NEW LEGO BRICKHEADZ SETS: Four new LEGO BrickHeadz sets are now available: the #40480 LEGO BrickHeadz Ginger Tabby, the #40481 LEGO BrickHeadz Cockatiel, the #40482 LEGO BrickHeadz Hamster, and the #40492 LEGO BrickHeadz La Catrina set. We discussed all four sets already (see links at the end of this post), and you can find them at the LEGO BrickHeadz section of the Online LEGO Shop.


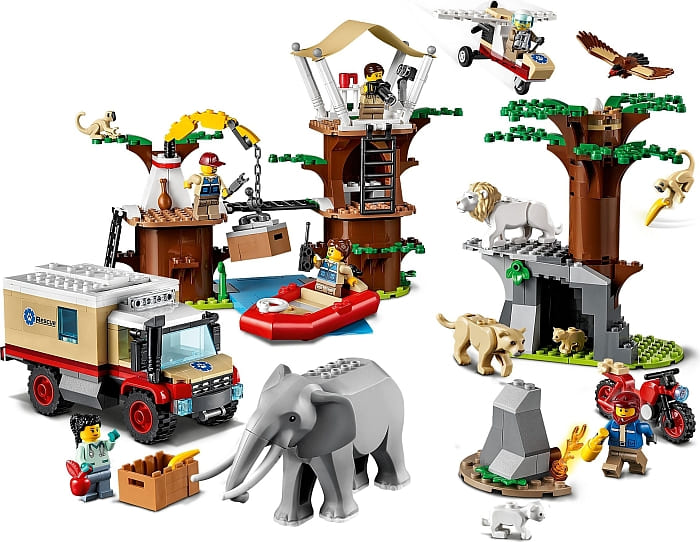
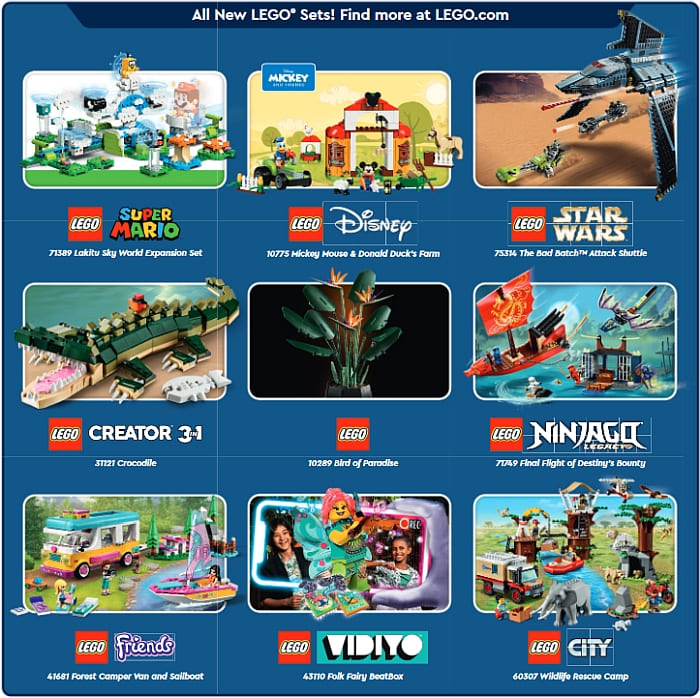
NEW LEGO CITY WILDLIFE RESCUE SETS: Four new LEGO City sets are available, all featuring wildlife rescue and cute new animals. The #60300 LEGO City Wildlife Rescued ATV with a couple of cute monkeys, the #60301 LEGO City Wildlife Rescue Off-Roader with two lions, the #60302 LEGO City Wildlife Rescue Operation with elephants, monkeys, and a crocodile, and the #60307 LEGO City Wildlife Rescue Camp with elephants, monkeys, lions and more! They are available at the LEGO City section of the Online LEGO Shop.
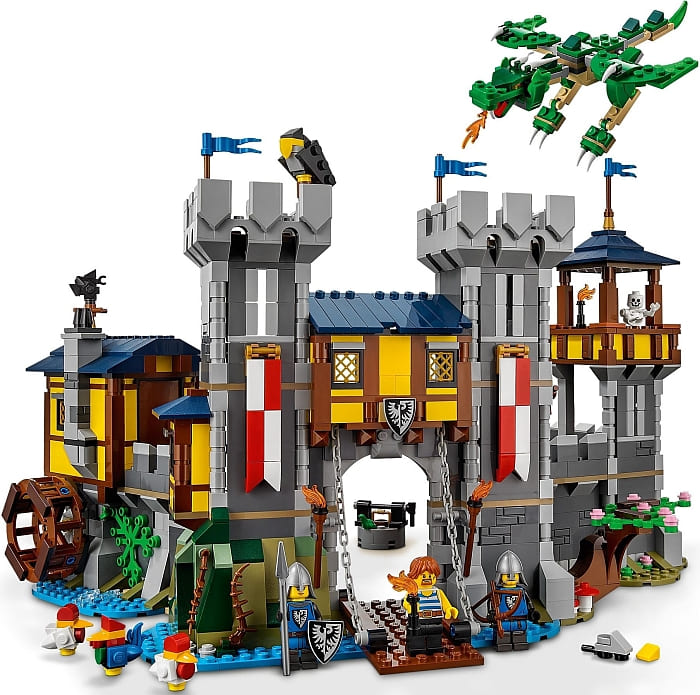
NEW LEGO CREATOR 3-IN-1 SETS: There are several highly popular LEGO Creator 3-in-1 sets are finally available in North America; the #31117 LEGO Creator Space Shuttle Adventure, the #31119 LEGO Creator Ferris Wheel, the #31120 LEGO Creator Medieval Castle, the #31121 LEGO Creator Crocodile, and the #31122 LEGO Creator Fish Tank. All of the sets come with alternate instructions for three different models and are available at the LEGO Creator section of the Online LEGO Shop.
NEW LEGO CREATOR EXPERT SETS: The recently announced #10279 LEGO Creator Volkswagen T2 Camper Van is now available, as well as the #10289 LEGO Creator Bird of Paradise from the Botanical Collection. They are available at the LEGO Creator Expert section of the Online LEGO Shop.


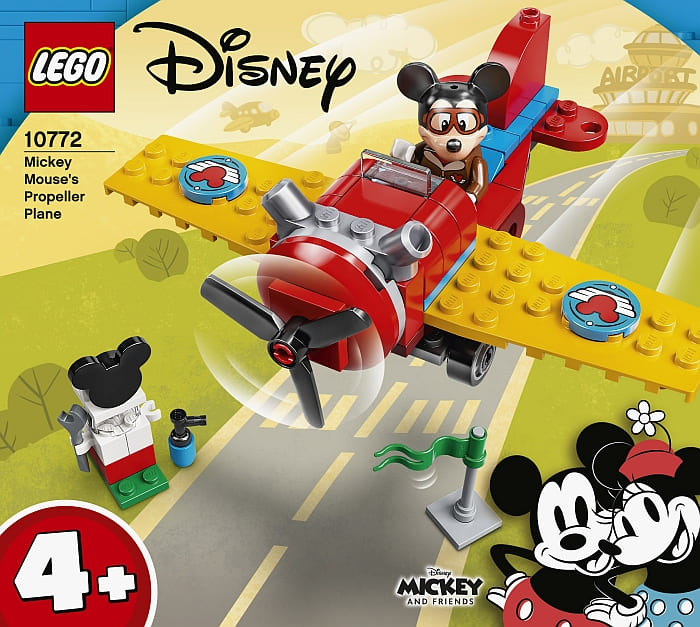
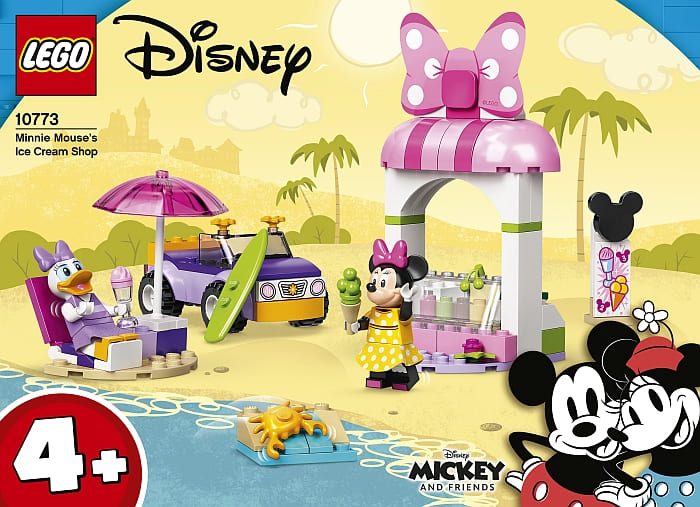
NEW LEGO DISNEY SETS: Five new LEGO Disney Mickey & Friends sets are available for younger builders, as well as five new LEGO Disney Princess sets. You can find them at the LEGO Disney section of the Online LEGO Shop.

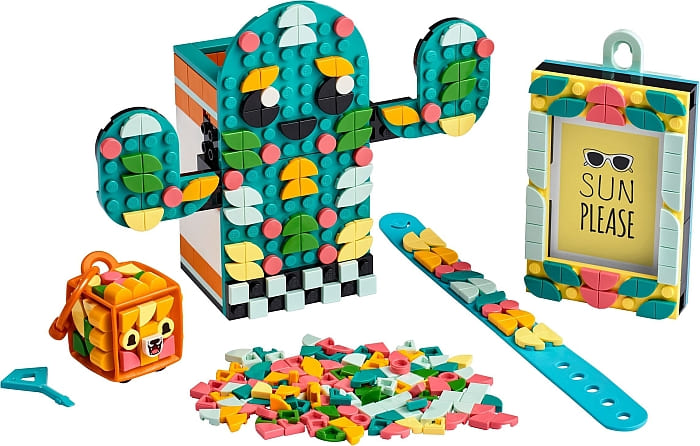
NEW LEGO DOTS SETS: LEGO DOTS continues with more stationary type sets, new customizable bag tags, and a couple of large sets with lots of tiles for customization. You can find them at the LEGO DOTS section of the Online LEGO Shop.
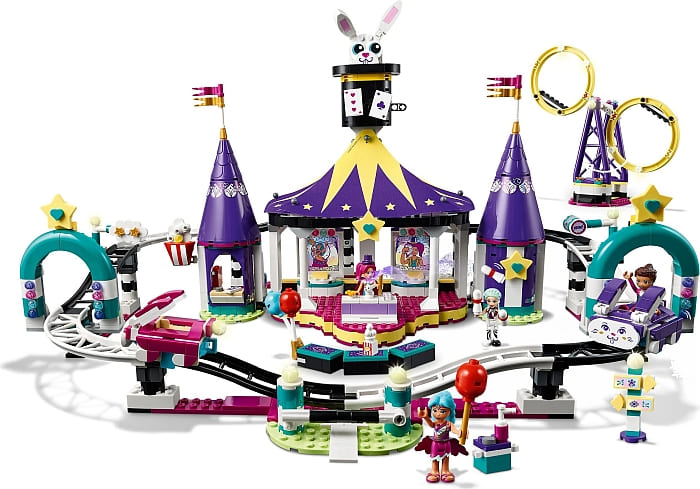
NEW LEGO FRIENDS SETS: A very large wave of LEGO Friends sets are now available. Some of the most notable ones are the LEGO Friends fairground sets featuring a roller coaster, Ferris wheel and other rides along with various fairground stalls and attractions. Some other interesting sets are the #41682 LEGO Friends Heartlake City School, the #41683 LEGO Friends Horseback Riding Center, the #41693 LEGO Friends Surfer Beachfront, and the #41684 LEGO Friends Heartlake City Grand Hotel. They are available at the LEGO Friends section of the Online LEGO Shop.

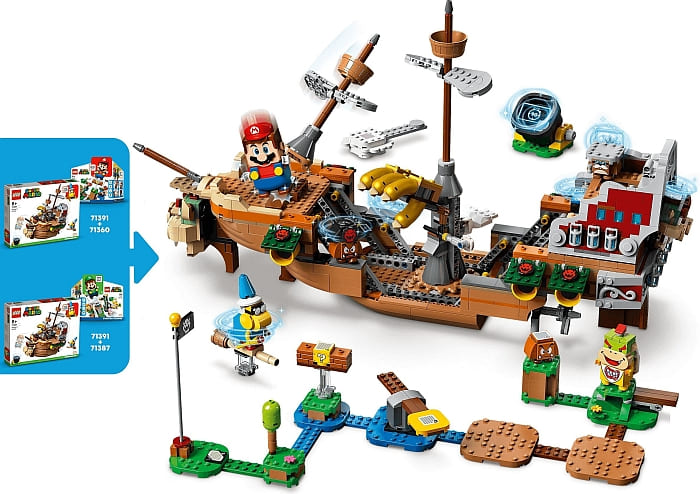
NEW LEGO SUPER MARIO SETS: The #71387 LEGO Super Mario Adventures with Luigi Starter Course is now available, along with a whole new collection of Expansion Sets, Power-Up Packs, and Series 3 Character Packs. They are available at the LEGO Super Mario section of the Online LEGO Shop.

NEW LEGO MARVEL SUPER HEROES SETS: A whole range of LEGO Marvel Super Heroes set is available as well. Some of the most noteworthy ones are the #76191 LEGO Marvel Super Heroes Infinity Gauntlet, the #76192 LEGO Marvel Super Heroes Avengers Endgame Final Battle, the #76193 LEGO Marvel Super Heroes The Guardians’ Ship, and three new mechs ( #76190 Iron Monger Mayhem, #76194 Tony Stark’s Sakaarian Iron Man, and #76201 Hydra Stomper). Another interesting set is the #76200 LEGO Marvel Super Heroes Bro Thor’s New Asgard with a highly detailed interior. All the sets are available at the LEGO Marvel Super Heroes section of the Online LEGO Shop.


NEW LEGO MINECRAFT SETS: Five new LEGO Minecraft sets are also available. Two popular ones are the #21171 LEGO Minecraft Horse Stable, and the #21176 LEGO Minecraft Jungle Abomination. You can find them at the LEGO Minecraft section of the Online LEGO Shop.

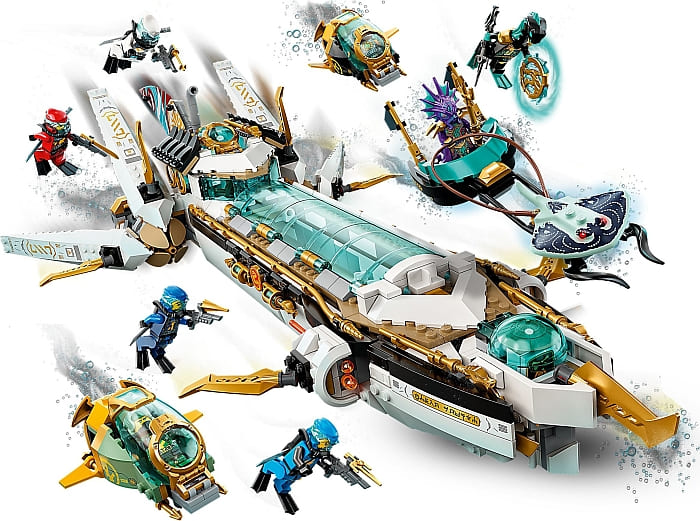
NEW LEGO NINJAGO SETS: We get several new LEGO Ninjago Legacy sets that celebrates characters and designs from earlier seasons. In addition we are also getting a full wave of sets inspired by the LEGO Ninjago: Seabound TV series including the #71750 LEGO Ninjago Lloyd’s Hydro Mech, the #71754 LEGO Ninjago Water Dragon, the #71755 LEGO Ninjago Temple of the Endless Sea, and the #71756 LEGO Ninjago Hydro Bounty. They are all available at the LEGO Ninjago section of the Online LEGO Shop.

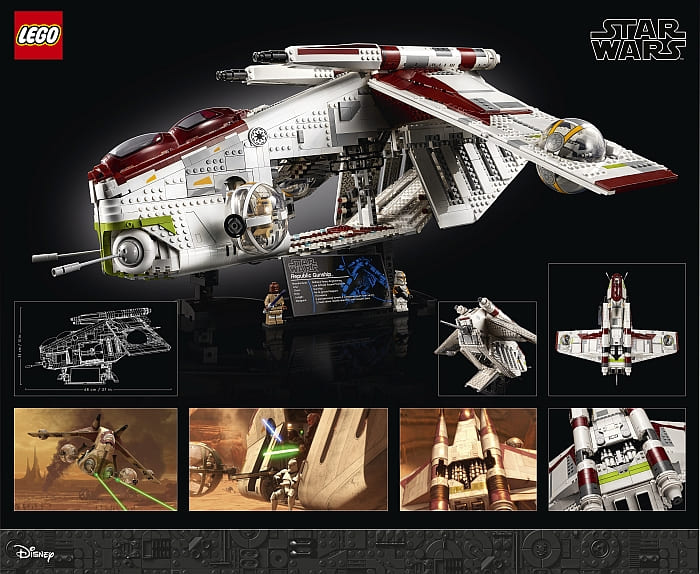
NEW LEGO STAR WARS SETS: The recently announced and huge #75309 LEGO Star Wars Ultimate Collector Series Republic Gunship is now available. Other noteworthy new sets are the #75312 LEGO Star Wars Boba Fett’s Starship, the #75314 LEGO Star Wars Bad Batch Attack Shuttle, the #75315 LEGO Star Wars Imperial Light Cruiser, the #75316 LEGO Star Wars Mandalorian Starfighter, and more. They are all available at the LEGO Star Wars section of the Online LEGO Shop.

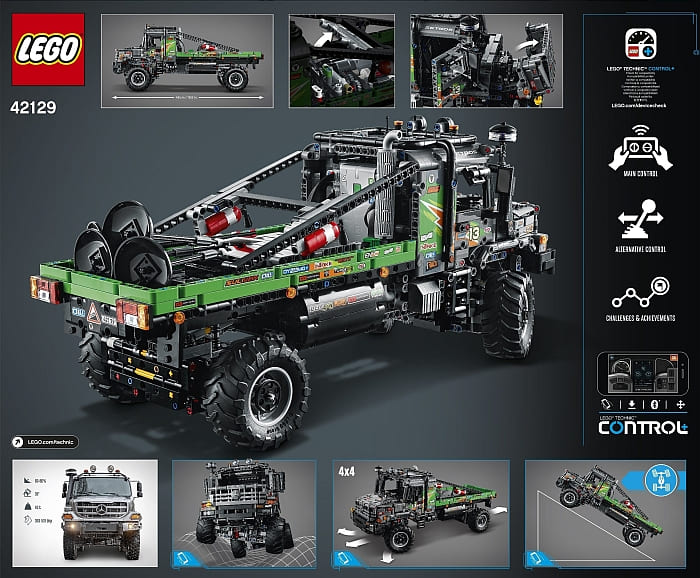
NEW LEGO TECHNIC SETS: Two new large LEGO Technic sets are now available; the #42128 LEGO Technic Heavy-Duty Tow Truck, and the #42129 LEGO Technic 4×4 Mercedes-Benz Zetros Trial Truck. We discussed both of them already (see links at the end of this post), and you can find them at the LEGO Technic section of the Online LEGO Shop.

And that wraps up all the new LEGO sets and promotions for the month. As you can see, there is a lot to choose from! What do you think? What are your favorite new sets this month? Feel free to share and discuss in the comment section below!
And you might also like to check out the following related posts: