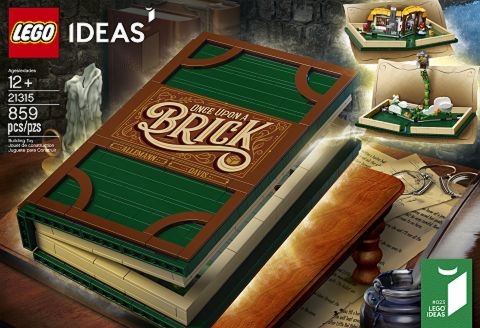
It seems that the #21315 LEGO Ideas Pop-Up Book that was first released back in 2018 wasn’t just popular with LEGO fans but also LEGO designers.
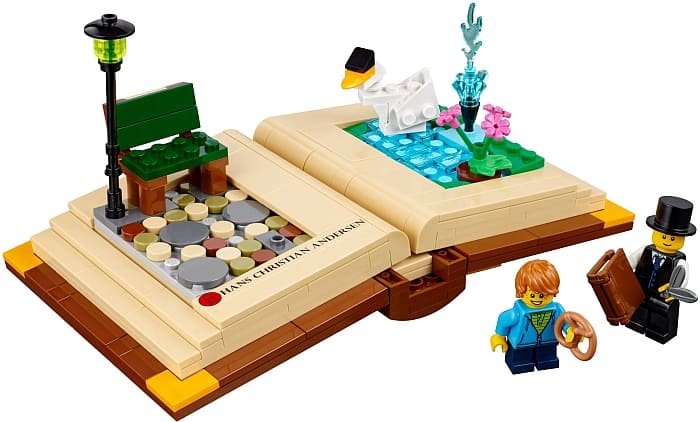
Since then, LEGO released a number of sets shaped like books. In the same year when the LEGO Ideas Pop-Up Book was released, we also got the promotional #40291 LEGO Creative Personalities set with an open book featuring Hans Christian Andersen and a lovely little scene. This book doesn’t pop up like the LEGO Ideas Pop-Up Book, but it does give that effect. Both of these books are fully brick-built.
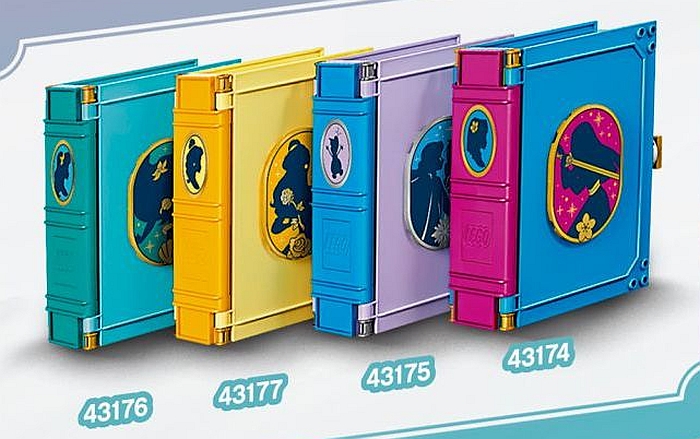
Then, earlier this year, we got four LEGO Disney Storybook Adventures sets (and at least one more is coming next year), featuring mini versions of Disney characters along with buildable scenes inside the books. The book covers for these sets are made of larger specialized parts that are easy to assemble, double as storage containers, and keep the cost of sets down. Each of them also features a beautifully printed image on a large oval tile that can be attached to the front of the book. I love these small sets and so far have collected them all. If you’re interested, they are $20 each, and available at the LEGO Disney section of the Online LEGO Shop.

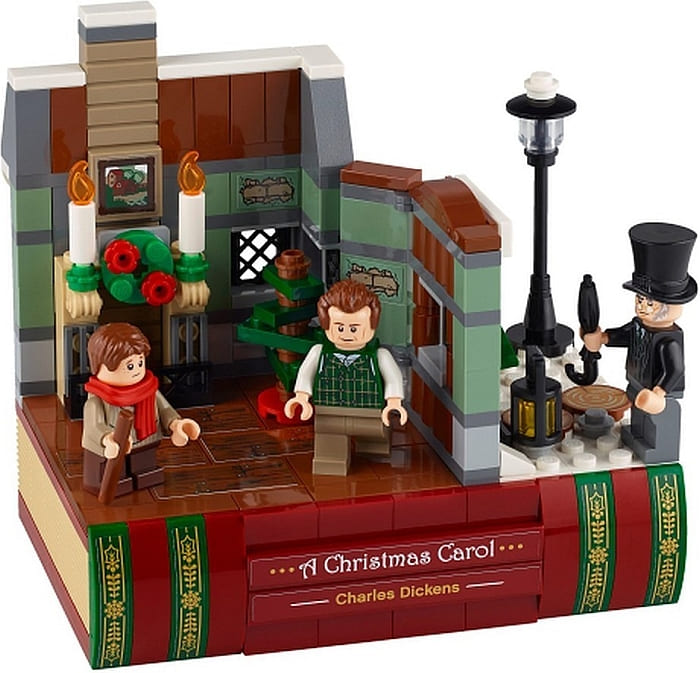
Then, we got two other promotional sets shaped like books. The #40410 LEGO Charles Dickens Tribute features a fully brick-built closed book with a hidden drawer in its spine, and a small vignette on its cover, along with three minifigs. It’s an attractive set with a nice color-scheme, useful pieces, and exclusive minifigs.
The other promotional set is the #30628 LEGO Harry Potter Book of Monsters. I’m not sure when and where this promo is going to be available, but the building instructions are already posted at LEGO’s website. It is also a fully brick-built book with a fun play-function.

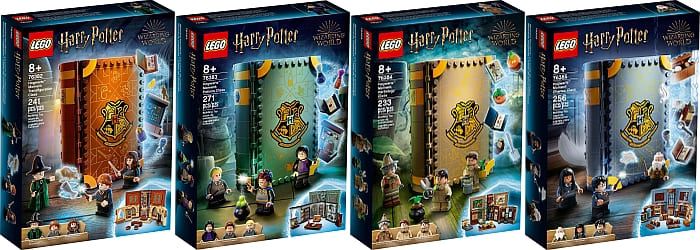
And this leads us to next year’s offerings; four more LEGO sets shaped like books, also in the LEGO Harry Potter collection. These books are collectively called the LEGO Harry Potter Hogwarts Moment series, featuring different classroom settings. There is a lot of thought that went into these sets, so let’s take a closer look.
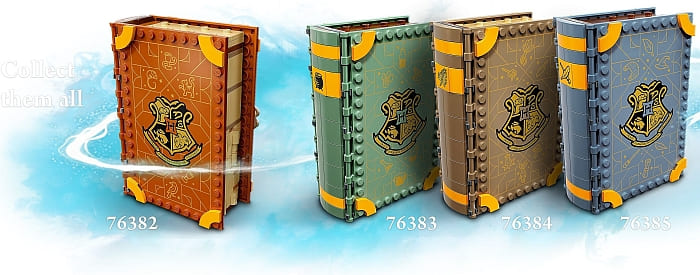
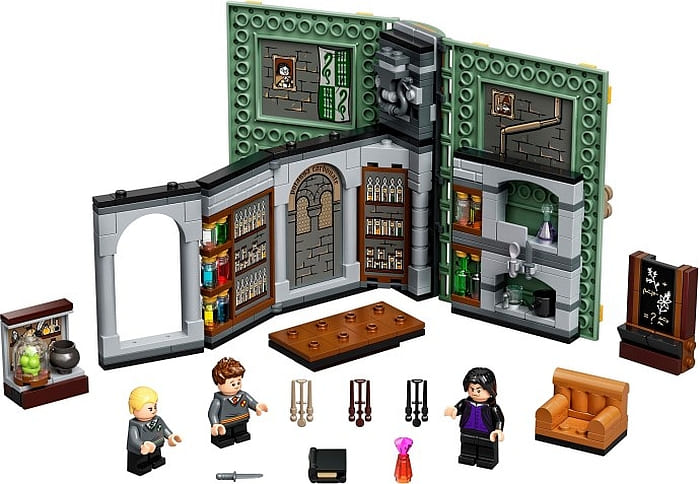
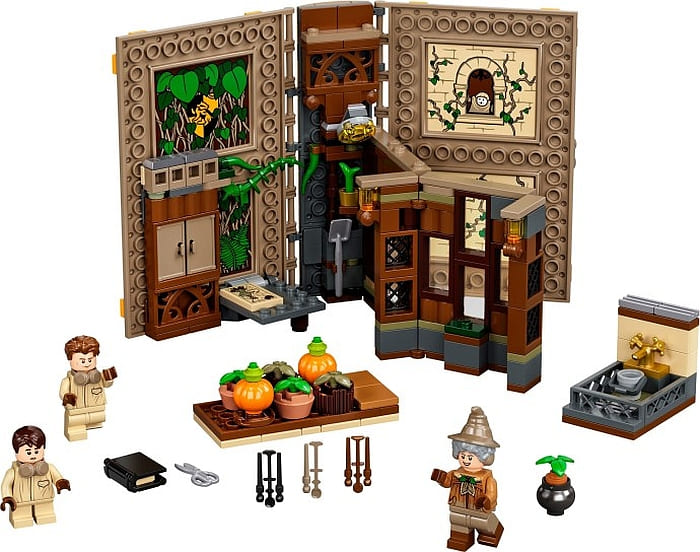
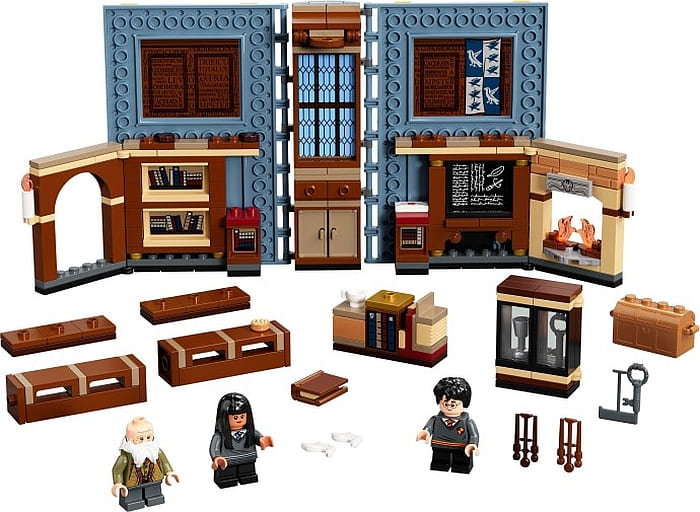
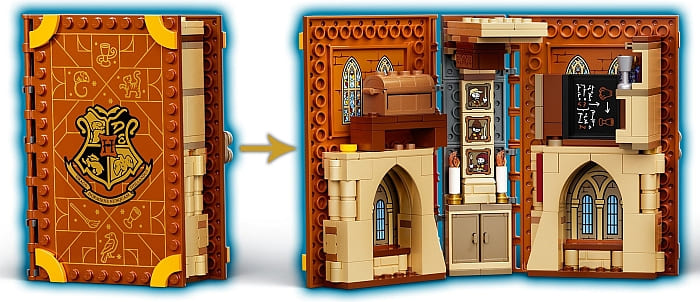
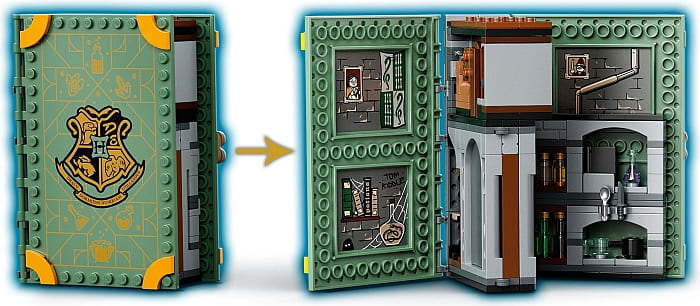
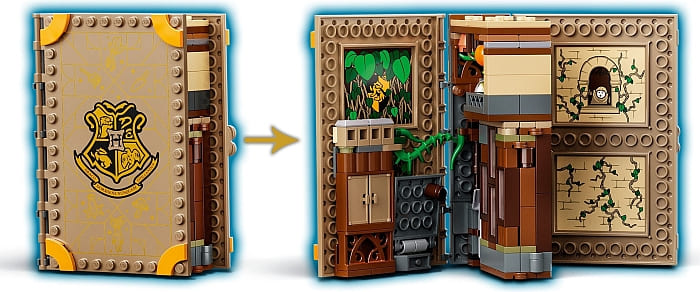
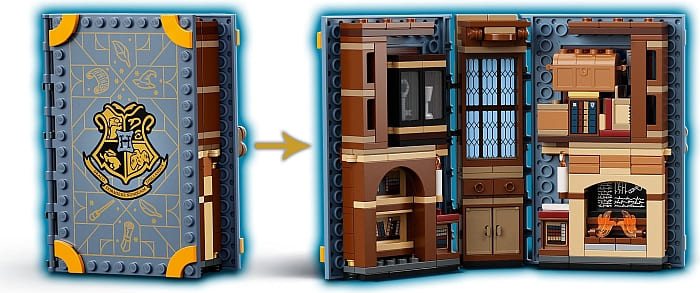
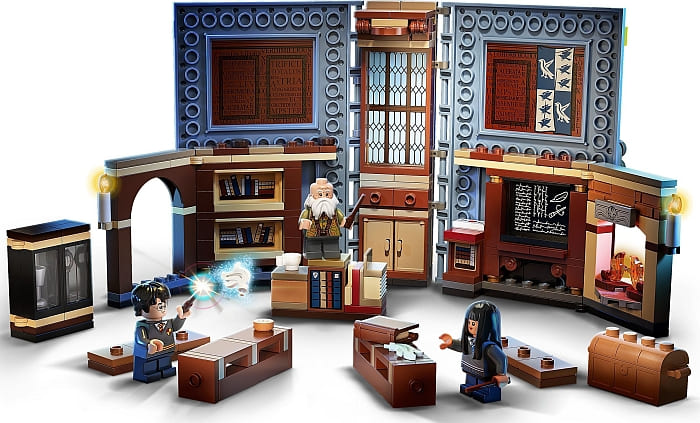
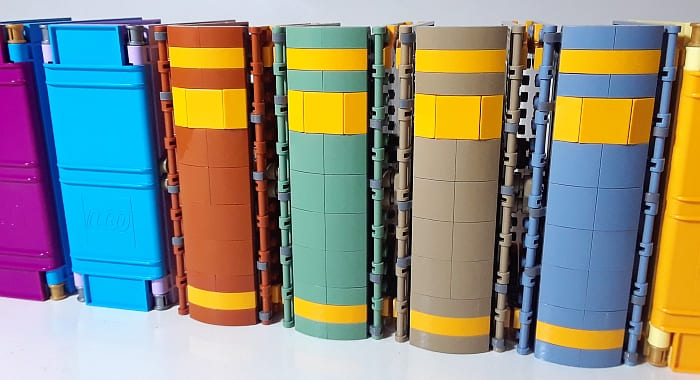
First of all, there is a lot of color-coding going on with these sets – some so subtle that you may miss it. The colors of the book covers match the color of the instructions. So, the book in the #76382 LEGO Harry Potter Hogwarts Moment: Transfiguration Class has a dark-orange cover, and the instructions book has light-orange pages. The book in the #76383 LEGO Harry Potter Hogwarts Moment: Potions Class has a sand-green cover, and the instructions book has light-green pages. Similarly, the #76384 LEGO Harry Potter Hogwarts Moment: Herbology Class comes with dark-tan book cover and light-tan (well, more like light-yellow) instructions, and the #76385 LEGO Harry Potter Hogwarts Moment: Charms Class comes with sand-blue book cover and light-blue instructions.
When you close the books and pack everything inside, two of the books have tan tops and brown bottoms, and two have brown tops and black bottoms. So, when you line them up according to set numbers, you will have alternating lighter and darker colors. Neat!
Some other interesting repeating patterns are that each of the sets comes with a minifig-sized book with a printed tile inside (two of the books are black and two are brown), and each of the sets come with three minifigs (one teacher and two students). Yet another pattern is that two of the sets have a larger fold-out section that attaches at the middle of the book, and two have two smaller fold-out sections that attach at the sides.
Yet another repeating pattern is that all of the books come with a beautifully printed front cover, each featuring the four house crests, and some subtle gold outlines indicating the subject of the class. The spines of the book as well as the corners are decorated the same way, so the four books look really nice together and clearly make a matching collection.
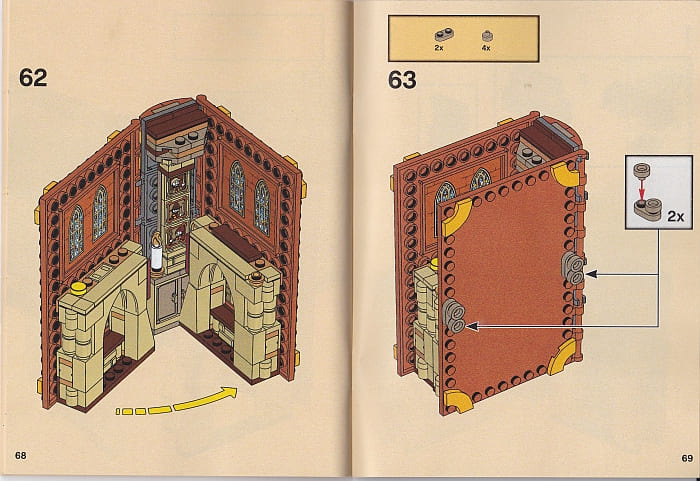
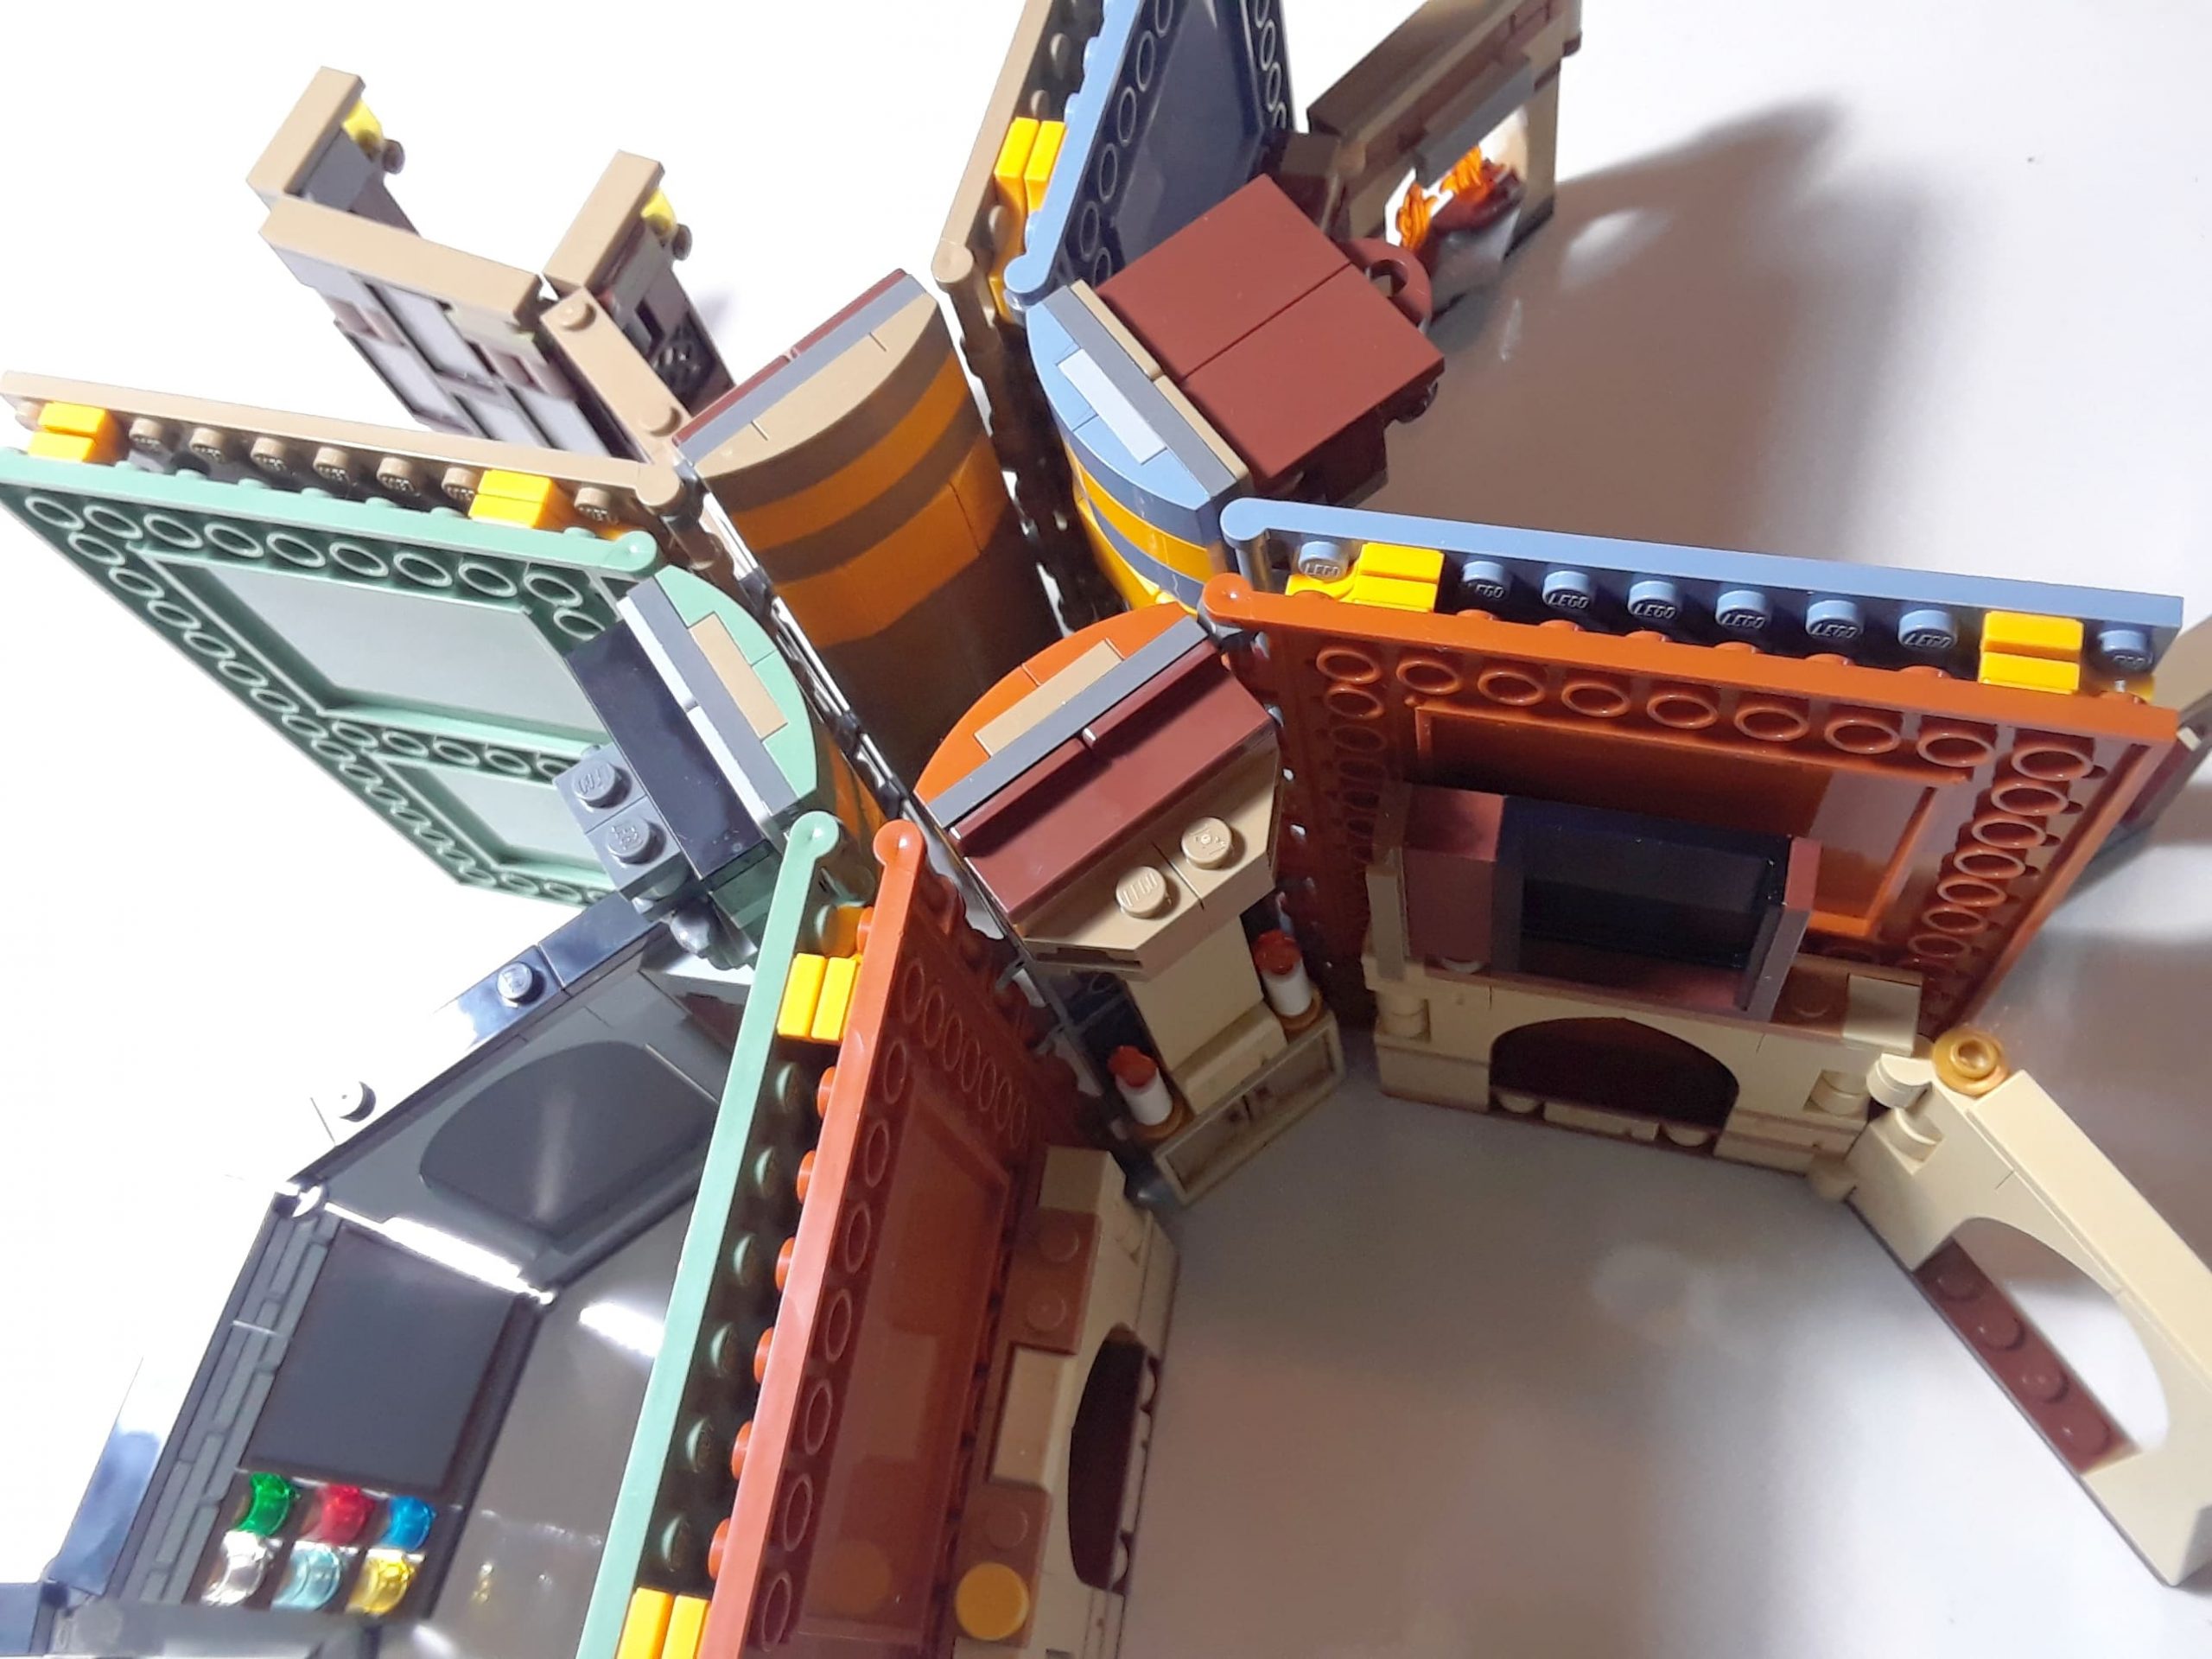
A curious detail is that all four books have a couple of small attachments at the back, each made with a rounded 1×2 plate and two modified 1×1 plates. The instructions do not show at all what these are for, which seems odd. However, there was an earlier image that was circulating on the Internet that showed that the books can be attached to each other with these small contraptions. The books can lined up and connected to each other with the attachments. Or, the books can also be attached to each other when open, creating a sort of star-shaped layout with the four classrooms.
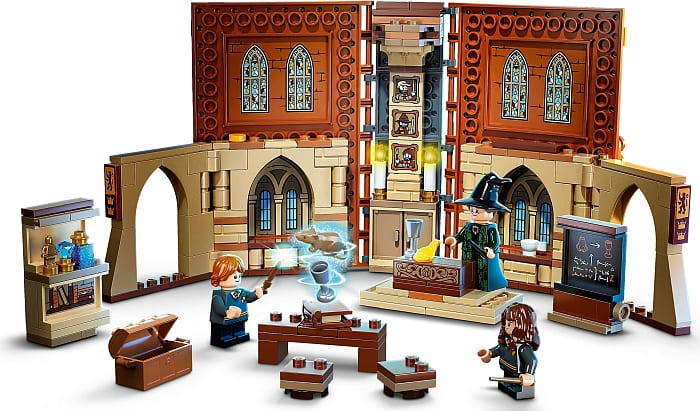
Now, let’s talk about the construction of these sets! The front and back cover of the books are modified 10×16 plates with studs around the top edges, tubes around the bottom, and bars at one side. All of these offer tons of attachment points. The spines of the books are built with standard pieces.
As mentioned above, each book has fold-out sections to increase the play area, and they also have removable sections that serve as additional accessories that you can spread around the classrooms. When done playing, you fold back the walls, replace the accessories, and close the book. Once the books are closed, they create a tight and secure unit. It’s really impressive how they are done.
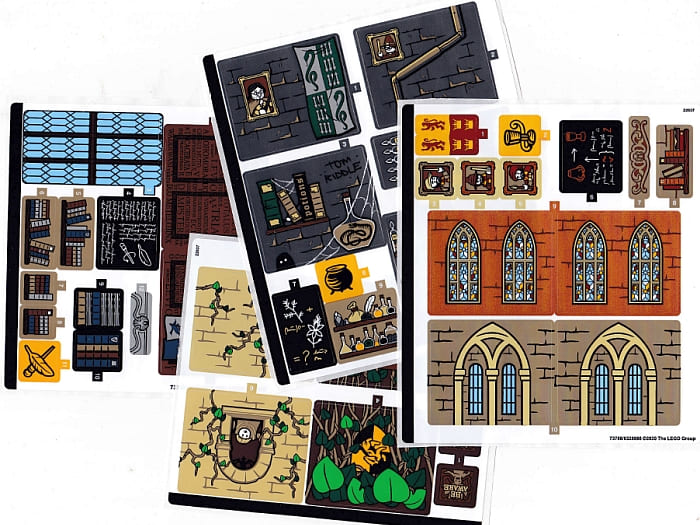
Although I’m happy with these sets overall, there are some features I don’t like as much. To start off, they heavily rely on stickers. I don’t mind some of the smaller ones as they don’t make too much of a difference on or off, but I feel that the large stickers inside the book cover and some of the larger wall elements should be printed. Without them, the interiors feel too empty and are thus essential.
A second issue I found is that although the removable accessories pack away nicely in each book, because they are configured differently. it’s hard to remember how and where to attach them without looking at the instructions. Thirdly, the minifigs don’t fit inside the closed books, so they will have to be carried/stored separately.
I also found a couple of issues with the building experience. The sets are recommended for ages 8+, which is fine from the perspective of play, however the two books with the longer center walls are actually pretty challenging to assemble. I could see kids having a bit of trouble with those. They are quite fragile during assembly, although they do end up as solid structures once fully assembled.
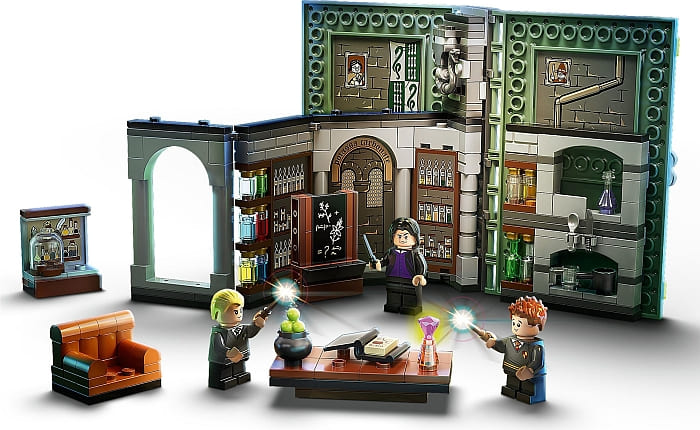

The set that relies most on stickers is the #76383 LEGO Harry Potter Hogwarts Moment: Potions Class. Most of the books, bottles, and other items on the shelves are stickers. And most of the brick-built bottles that would be fun to play with are permanently attached into the walls. So there are all these cool looking details but you can’t play with them. That’s disappointing. The other three sets have a better balance between purely decorative elements and playable features. The best in this regard is the #76384 LEGO Harry Potter Hogwarts Moment: Herbology Class.
Each of the sets comes with about 250 pieces and three minifigs, and the price is $30. I feel that’s not unreasonable for what you get, but a bit on the high side. I think $25 would be a more acceptable price, especially since most Harry Potter fans would likely want to collect all four sets.
Overall though, these are now some of my favorite Harry Potter sets. I love how they can be stored and carried around as compact unites and then unpacked for a play session. And I also like all the color-scheme of each set, the architecture of the rooms, the minifigs, minifig accessories, and removable furniture pieces. Oh, and this is just a small thing, but I also like the set boxes. They are really nicely designed both the front and the back. I’m not a box collector, but I’m tempted to save these.
Another interesting feature is that even though the LEGO Harry Potter classroom books and the LEGO Disney Storybooks are constructed differently, they are about the same overall size. So, all together they would make a nice collection of unique LEGO books to fill a bookshelf.
The sets will be available on January 1st, but if you would like to check out more pictures and other details in the meantime, they are already listed at the LEGO Harry Potter section of the Online LEGO Shop.

What do you think? How do you like these LEGO Harry Potter classroom sets? Are you planning to get any of them? Or collect them all? And what do you think of the features we talked about above? Feel free to share and discuss in the comment section below!
And you might also like to check out the following related posts: