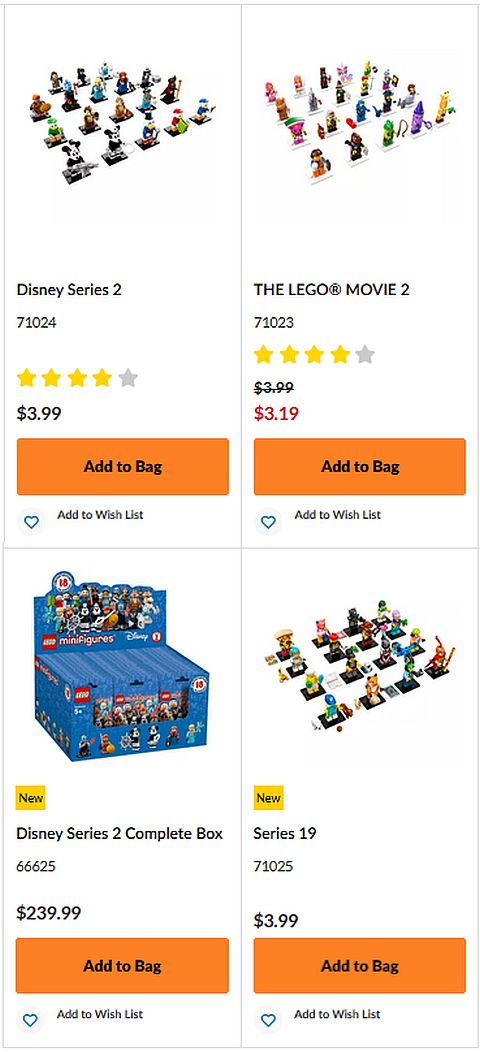
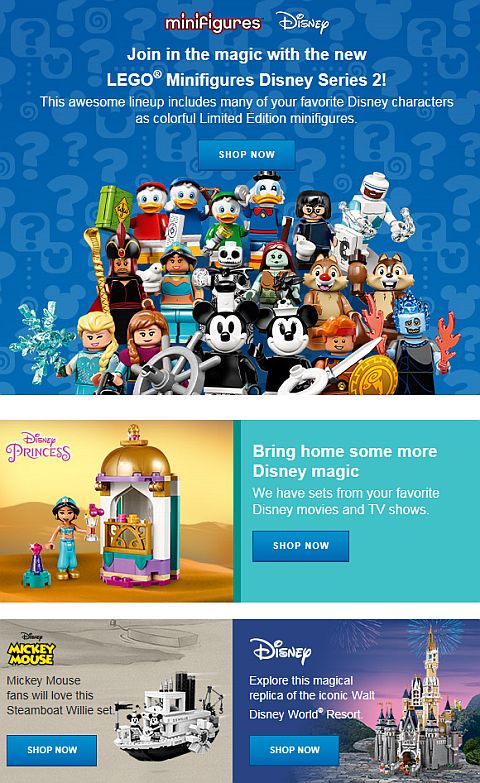
You may have noticed at the Online LEGO Shop that the LEGO Disney Series 2 Collectible Minifigures can now be purchased as a complete box of 60 minifigs! This is an excellent opportunity for those who can’t find the minifigures locally and want to get all the characters, or don’t want to spend time feeling through the boxes at a local store. Also, Series 19 of the LEGO Collectible Minifigures are now listed at the Online LEGO Shop. They series won’t be available until the 1st of September, but we can take a look at all the characters. Details below.
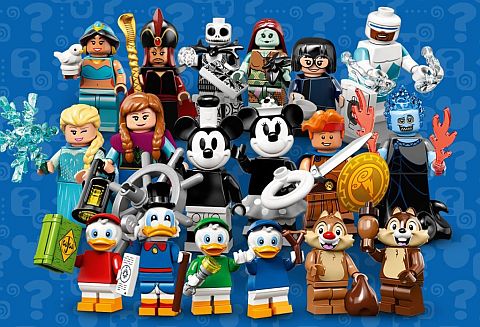
The LEGO Disney Series 2 Collectible Minifigures was originally released in May, and includes the following 18 limited-edition Disney characters: Vintage Mickey, Vintage Minnie, Hercules, Jack Skellington, Scrooge McDuck, Huey, Dewey, Louie, Chip, Dale, Jasmine, Jafar, Hades, Elsa, Anna, Sally, Edna and Frozone. Each Disney minifigure comes in a sealed mystery bag together with one or more accessory elements, plus a collector’s leaflet and a unique display baseplate. From the series, Huey, Dewey, and Louie are the rarest with only two of each appearing in a full box. The price of a sealed box is $239.99, so there is no discount from the regular price of $3.99/minifig, however you should be getting two full series of the 18 different characters, plus 1-2 extras of the non-rare ones. You can purchase a full box at the LEGO Minifigures section of the Online LEGO Shop.
The LEGO Disney Series 2 Collectible Minifigures can still be purchased separately for $3.99 each, however even when ordering up to the maximum of 60 packets, there is not guarantee you will get all 18 of the different characters. So, if you would like to get all the figures, it’s best to just get a full box and sell, gift, or trade the rest. You can purchase individual figures at the LEGO Minifigures section of the Online LEGO Shop.
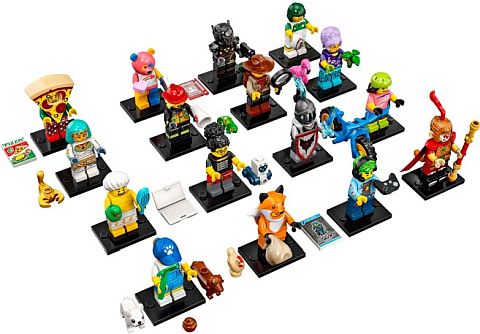
As I mentioned at the beginning, Series 19 of the LEGO Collectible Minifigures is also now listed at the Online LEGO Shop. This series is not tied to any IP, but includes the following 16 fun characters: Dog Sitter, Video Game Champ, Shower Guy, Rugby Player, Bear Costume Guy, Pizza Costume Guy, Galactic Bounty Hunter, Monkey King, Programmer, Gardener, Mountain Biker, Fire Fighter, Fright Knight, Jungle Explorer, Mummy Queen and Fox Costume Girl. Just like in the other series, each minifigure comes in a sealed mystery bag together with one or more accessory elements, plus a collector’s leaflet and a display baseplate.
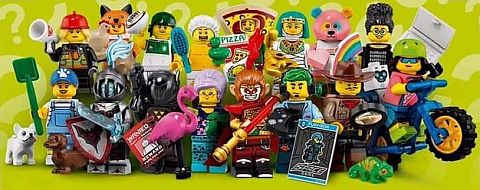
This is a fantastic collection with so many useful characters and accessories. I love the Dog Sitter’s printed cap, overalls, and two new puppies, the Gamer’s shirt, 2×3 printed tile, game controller, and green hair/headphone combo, the Shower Guy’s green rubber ducky and towel, the Rugby Player’s outfit and ball, the Bear Costume Guy’s rainbow tile and pink heart, the Pizza Guy’s pizza costume and 2×3 printed tile, and everything about the Bounty Hunter, and Monkey King. Also note that the Programmer’s shirt spells out LEGO, the Mountain Biker has a new style bike, the Firefighter has a new helmet/hair combo and megaphone, the Fright Knight has some awesome trans-blue accessories, the Explorer comes with a brand new chameleon and re-colored backpack, the Mummy has a lovely re-colored headpiece, and everything about the Fox Girl is super cute. This series will be available starting September 1st. at retailers and the LEGO Minifigures section of the Online LEGO Shop. They are currently only listed individually. According to preliminary reports, there should be 3-5 of each character in a full box. The price is going to be the usual $3.99/minifig.
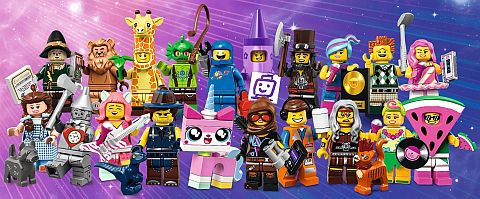
I should also mention that The LEGO Movie 2 Collectible Minifigures are currently on sale for $3.19 each. This series was released back in February, and includes the following 20 limited-edition characters: Emmet, Battle-Ready Lucy, Apocalypse Benny, Giraffe Guy, Crayon Girl, Sherry Scratchen-Post & Scarfield, Hula Lula, Watermelon Dude, Flashback Lucy, The Swamp Creature, Candy Rapper, Gone Golfin’ President Business, Apocalypseburg Abe, Vest Friend Rex, Kitty Pop, Dorothy Gale & Toto, Cowardly Lion, Scarecrow, Tin Man and Unikitty. Unfortunately, this collection is not available in a full box, so you will have to either feel for them locally, or try your luck at the Online LEGO Shop, and hopefully you will get the characters you want.
What do you think? How do you like Series 19 of the LEGO Collectible Minifigures? Which ones are your favorites? And how do you like the idea of being able to purchase a full box of minifigs directly from LEGO? Feel free to share your thoughts and discuss in the comment section below!
And you might also like to check out the following related posts: