The recently announced #75936 LEGO Jurassic Park: T. Rex Rampage set is now available for LEGO VIP members (general release will be on July 1st). You can read the full press-release as well as watch the designer-video here: LEGO Jurassic Park: T. Rex Rampage Coming! But that’s not all the dino news! There is also a new contest at LEGO Ideas, challenging LEGO fans to build their own generically modified hybrid dinosaur! Details below.
➡ LEGO JURASSIC WORLD CONTEST – INTRO: “Your scientists were so preoccupied with whether they could, they didn’t stop to think if they should”. Team-up with Dr. Wu and build your own genetically modified hybrid dinosaur, in LEGO bricks of course!
➡ LEGO JURASSIC WORLD CONTEST – HOW TO ENTER: Submissions may be in either physical bricks or by using a digital building tool such as LEGO Digital Designer. You’re welcome to use image editing tools, such as Photoshop, to enhance your photos/presentation. Take up to five photos of your creation and submit them to the contest. Make sure to show off all angles and any features or functions of your creation. Please submit your photos in as high a resolution as possible so that we can see all the details clearly. If possible, the shortest edge should be at least 1,080 pixels. Add a title and short description. Upload your entry to the contest using the blue Submit Your Entry button on this page.

➡ LEGO JURASSIC WORLD CONTEST – RULES: You must be the original creator of all creative work you submit (the model, images, photographs, description text, etc.) and you must have the exclusive right to submit your model to this LEGO Ideas contest. You may not submit a model or any other content made by, or on behalf of, someone else. Entries must be new creations and not previously posted online or submitted to any other contest. You are allowed to use any official LEGO element (LEGO System, LEGO DUPLO, LEGO TECHNIC/Constraction) in your entry. The LEGO elements must be genuine (not cut, glued, or otherwise modified). Entries should not contain copies or references to any other existing third-party work or creation or infringements of any third-party intellectual property right. The only intellectual property that your creation may be linked to for this contest is Jurassic World. You may use minifigures in your entry. Please only use LEGO Jurassic World or generic minifigures that do not use any third party intellectual property. You must be at least 13 years of age to participate and enter. There are some other rules, which you can read on the button on the contest page.
➡ LEGO JURASSIC WORLD CONTEST – DEADLINE: Submit your entry no later than July 17th, 2019 at 6:00 AM EST. If you’re not sure what time zone you’re in, you can use a time zone converter.
➡ LEGO JURASSIC WORLD CONTEST – JUDGING: A panel of judges consisting of members of the LEGO Jurassic World team will choose a grand prize winner and two runner-up winners based on the following: overall coolness and originality – 25%, most inspired details – 25%, relevance to contest theme – 25%, and best use of LEGO elements – 25%.
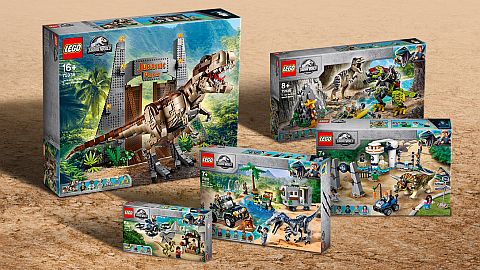
➡ LEGO JURASSIC WORLD CONTEST – PRIZES: The grand prize winner will get the following: #75936 LEGO Jurassic Park: T. Rex Rampage, and the full 2019 LEGO Jurassic World novelties ( #75934 LEGO Jurassic World Dilophosaurus on the Loose, #75935 LEGO Jurassic World Baryonyx Face-Off: The Treasure Hunt, #75937 LEGO Jurassic World Triceratops Rampage, and #75938 T. Rex vs. Dino-Mech Battle. Two runner-up winners will each receive the following: #75936 LEGO Jurassic Park: T. Rex Rampage.

➡ LEGO CONTEST – WINNERS ANNOUNCEMENT: Winners will be contacted on the email address associated with their LEGO ID account after August 7th, 2019. Winners will be announced on LEGO Ideas when all winners have returned the signed Winner’s Certification Documents. A winner who does not return their Winner’s Certification Document within one week (5 days) of receiving it will be disqualified, and a new winner will be selected.
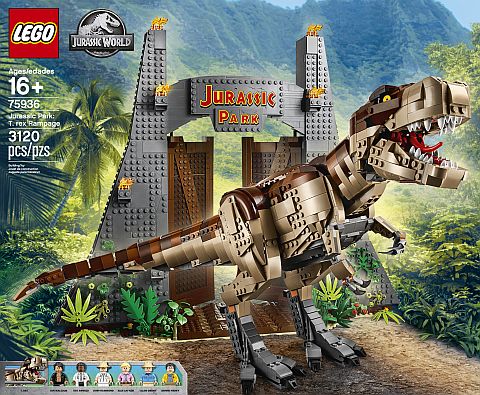
As I mentioned at the beginning, the #75936 LEGO Jurassic Park: T. Rex Rampage is now available for LEGO VIP members. Below is the official description of the set and some other details.
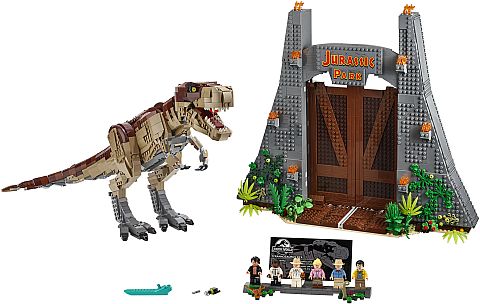
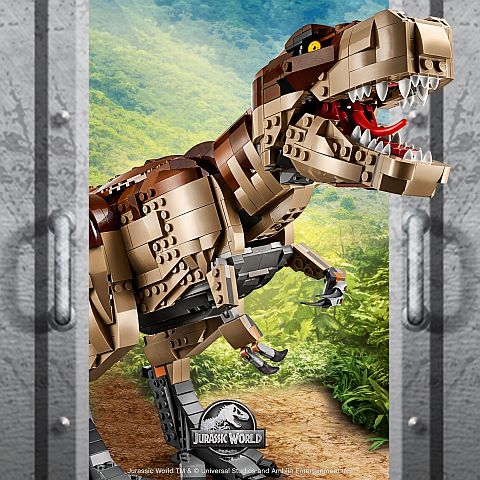
Enjoy an advanced building experience and relive classic movie moments with the #75936 LEGO Jurassic Park: T. Rex Rampage. This collectible construction toy includes 3,120 building bricks and features the original Jurassic Park’s iconic gate and a large, fully poseable, brick-built T. Rex dinosaur, which is ideal for display. The trigger-activated gate is framed by a wall incorporating seven detailed, brick-built scenes inspired by the movie, such as John Hammond’s dining room, Ray Arnold’s control room, and a bunker for Ian Malcolm. A must-have for Jurassic World fans, this construction set includes six minifigures and baby dinosaur figure, plus a minifigure display stand with T. Rex facts plate. Includes six minifigures: John Hammond, Ian Malcolm, Ellie Sattler, Alan Grant, Ray Arnold and Dennis Nedry, plus a baby dinosaur figure. Jurassic Park gate measures over 16” (42cm) high, 18” (48cm) wide, and 5” (14cm) deep. T. rex dinosaur measures over 8” (22cm) high, 27” (69cm) long and 6” (17cm) wide. 3,120 pieces. Price: $249.99 – BUY HERE

What do you think? How do you like the new LEGO Jurassic Park set? Are you planning to get it? And what do you think of the contest? Do you plan to enter? Feel free to share and discuss in the comment section below!
And you might also like to check out the following related posts: