Last year, LEGO Kids Special Editions released three awesome magazines for LEGO City, LEGO Friends, and LEGO Ninjago fans. The magazines are similar to the LEGO Club (now LEGO Life) magazines with tons of puzzles, games, posters, and comics that kids can enjoy. A unique feature of these magazines is that they also include a minifigure with accessories in a foil packet attached to the front. Today, a new magazine was added to the collection, this time focusing on The LEGO Movie 2. Below, you can find more information about the new publication, and I also included info about the previous magazines for your reference. 🙂
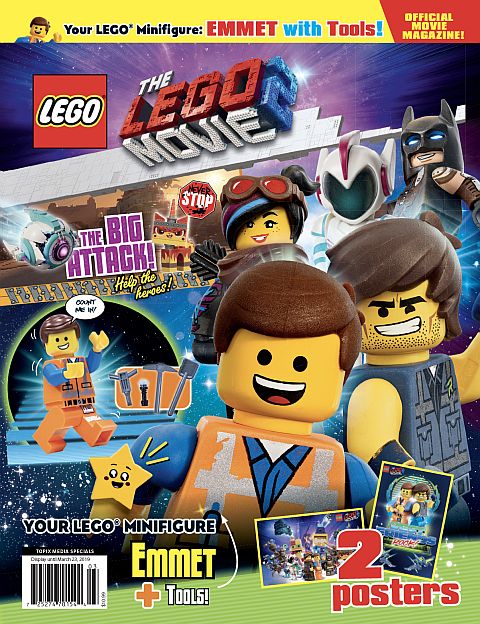
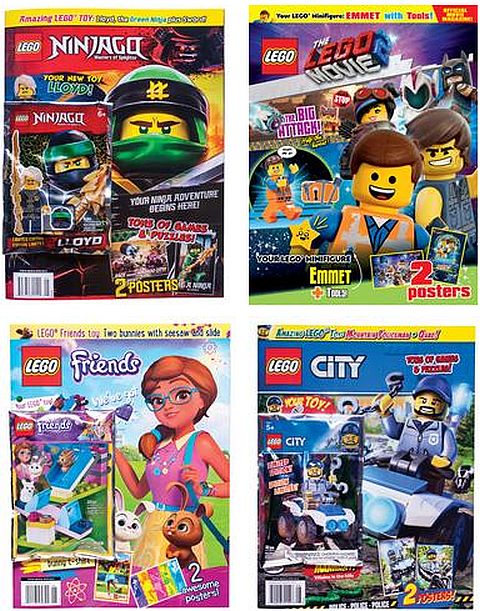
➡ THE LEGO MOVIE 2 MAGAZINE: The adventure continues! In The LEGO 2 Movie (releasing on February 8th, 2019 and featuring Chris Pratt, Elizabeth Banks, Charlie Day, and Will Arnett) magazine, young readers meet the famous heroes of the first movie – such as Emmet, Batman, and Lucy. Three funny comics, two cool posters, and exciting puzzles await the fans of the old and new characters. Comes with an Emmet minifigure with construction tools.
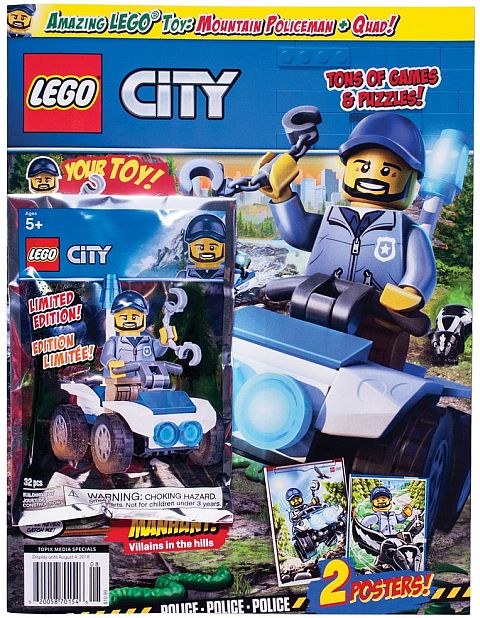
➡ LEGO CITY MAGAZINE: LEGO presents the official LEGO City Activity Guide! Featuring tons of puzzles, games, comics, a double-sided poster, and an exclusive toy. This guide is sure to be a favorite of LEGO City fans everywhere! Comes with a policeman minifigure riding a small ATV.
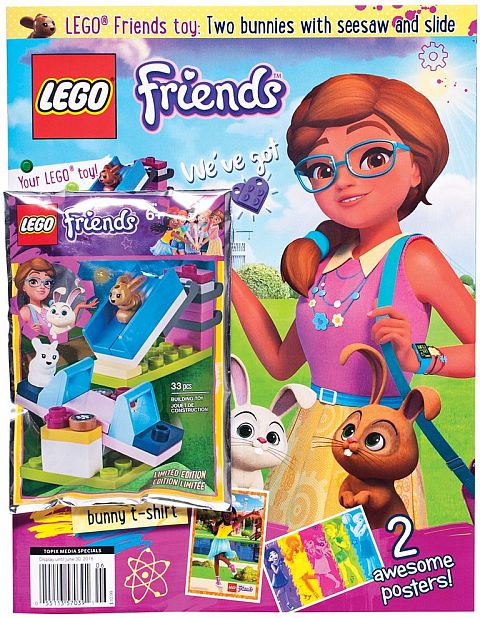
➡ LEGO FRIENDS MAGAZINE: Join the five LEGO Friends – Emma, Olivia, Stephanie, Andrea and Mia – on a magical adventure in Heartlake City in this fun-filled magazine! Filled with games, activities, comics, an awesome double-sided poster, and an exclusive toy, this magazine is a must-have for any LEGO Friends fanatic! Comes with two cute LEGO Friends bunnies, and a buildable slide and seesaw.
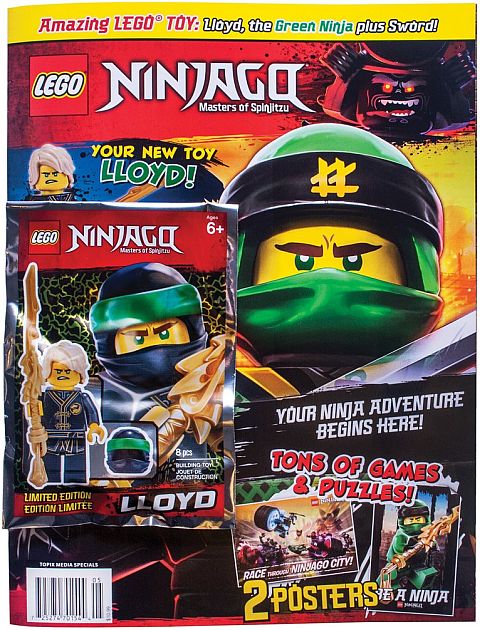
➡ LEGO NINJAGO MAGAZINE: LEGO presents the official LEGO Ninjago: Masters of Spinjitzu Activity Guide! Featuring tons of puzzles, games, comics, a double-sided poster, and a free toy. This guide is sure to be a favorite of Ninjago fans everywhere. Comes with a Lloyd minifigure with golden sword and a removable ninja hood.
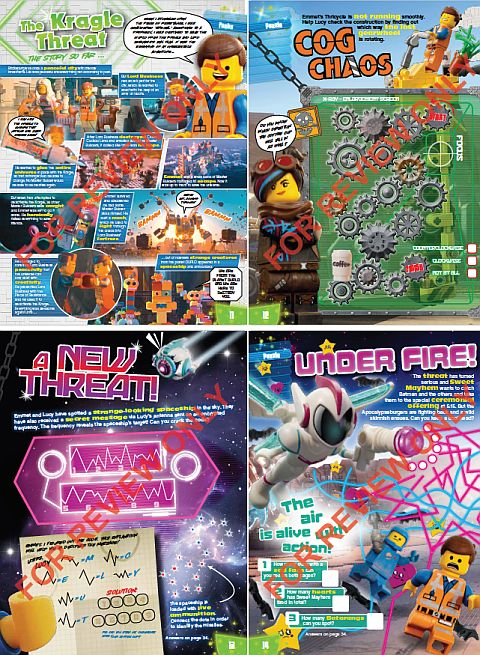
All four of the magazines released so far are standard magazine size, with thick and shiny covers. The full-color pages have nice quality printing. Speaking of printing, these magazines are printed on strong paper, not the thin magazine pages we are normally accustomed to. This makes them a lot more suitable for children, as the pages don’t tear easily. In addition, the matte finish prevents ink from smearing, and makes it easier to work on the included puzzles and games. Each magazine issue is 35 pages long, and includes comics, puzzles, games, and a removable double-sized poster (the posters are stapled to the middle of the magazine, so they need to be removed carefully to minimize damage). The minifig and/or accessories are in a foil packet attached to the front cover of the magazine, similar (but somewhat larger) than the packets for the LEGO Collectible Minifigures.
The LEGO Movie 2 magazine was released today, January 22nd, and should be available at newsstands nationwide. If for some reason you can’t find it, or you are looking for the earlier magazines, you can get all four of them online at OnNewsStandsNow.com (link will take you directly to the magazines’ page). The magazine issues are $10.99 each, which is not cheap, but considering that the packets are worth about $4, it’s not so bad. Keep in mind that if you are ordering online, there are shipping charges involved. Finding the magazines locally is your best option.
If you already got any of the magazines, feel free to share your thoughts and own reviews in the comment section below! 😉
And you might also like to check out the following related posts: