(Written by Stephen Collins)
I am a long time reader here and today I would also like to contribute a little by showing you my first LEGO do-it-yourself project. It is a display for my ever growing collection of LEGO minifigures. First I built a small bleacher from LEGO for my minifigs, which was okay, but as their numbers grew I had to come up with something else. So I decided to create a bulletin-board style display for them, which allows me to showcase 137 minifigs per board. 🙂
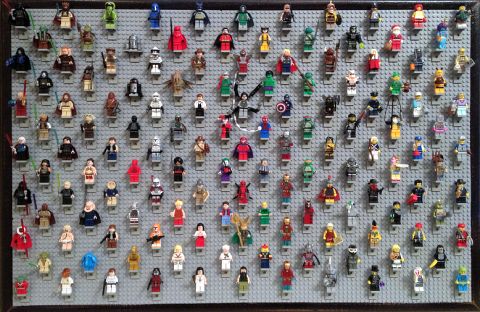
To build the LEO minifig display, I started out with a 35×23 inch bulletin-board. I sanded down the edges to remove the laminate and give the frame a distressed look. Then stained it with Espresso Stain by Minwax, and finished it off by polyurethane coating. I like the dark edge better than the original as it frames the minifigures nicely, but you can also keep the frame whatever color it comes in.
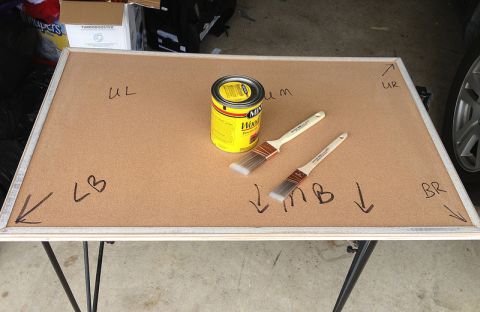
The next step was to add large LEGO baseplates to cover the surface of the bulletin-board. A total of four 48×48 stud X-Large Gray Baseplates were used. Two baseplates were left uncut and used in the upper right and middle of the board. One baseplate was cut and used for the bottom left and bottom middle of the board. The last baseplate was also cut and added to the far right of the board.
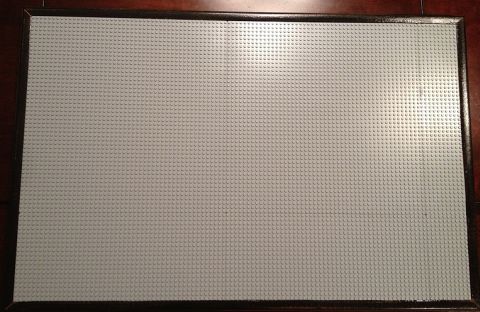
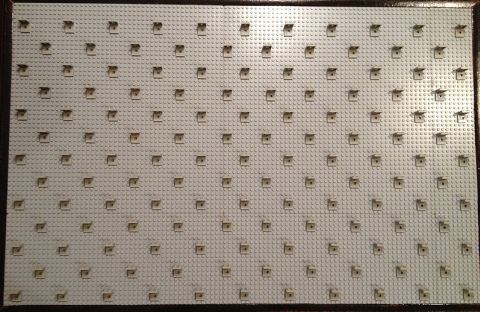
The baseplates fit in very snuggly, but since they are rounded at the corners, there is a small gap at the intersection of one of the uncut baseplates and three of the cut pieces. However this was not a big problem as in the next step the baseplates get covered with 137 2×2 angle-plates (item #3956). I added these in 11 columns of 7, and 10 columns of 6. They are 8 studs apart (top and to the right/left).
Here is close-up of the LEGO minifigure display-board with the minifigs added. All 137 of them! As there is enough space between the angle-plates, there is plenty of room for their accessories too. 😀
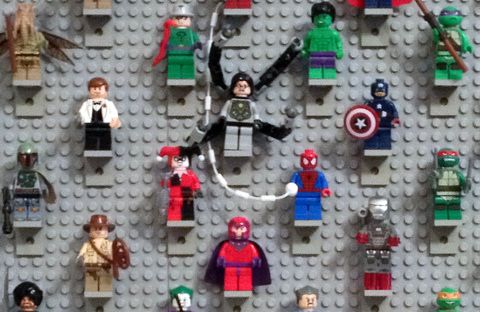
All in all this was a fun and easy enough project, and if I need room to display more minifigures I can easily make more boards. They don’t take up shelf-space like the bleacher did, and the minifigures are accessible and removable for play at any time.
What do you think? How do you like the LEGO bulletin-board display? Any suggestions for improvements? Feel free to share in the comment section below. Also, if you have any questions about building your own LEGO display, you are welcome to ask. 😉
You might also like to check out the Care & Feed of LEGO section for more storage and display ideas or select from the following related posts:
- LEGO Minifigure Display & Storage Ideas
- Building a LEGO Room – A DIY Project
- Building a LEGO Closet – A DIY Project
- LEGO Minifigure Display Cases with Style!
- The Ideal LEGO Room: Build a LEGO Wall!
- What is the Best Way to Store Your LEGO?
- What is the Best Way to Sort Your LEGO?
- LEGO Organization: the Portable Solution
- LEGO Storage: LEGO Sort & Store Head


A-M-A-Z-I-N-G!
dude, that is rad! 😀
hi guys! i’m still the same person but I changed my email! 😎
ok, I take back that last comment! I was just trying to get a avatar on here! 😕
yay! it works!
trying out my gravatar! sorry 🙁 but hopefully it works.
Nice..!
Wow, cool idea but way too much work for my taste 😉
That’s a pretty nice creation. Well designed. I would have issues with cutting my LEGO bricks, so I would have to make my own board that matches the dimentions of the baseplates, but the angled plates are great!
This is very nice, but I agree with the other commenter…too much work for my test. I prefer a pre-made product or something made entirely of Lego, like vignettes or shelves for each minifig made entirely of Lego bricks.
Love it. Looks wonderful.
Awesome idea! Thanks for sharing!
I’m currently working on something similar, but mine is a magnet board
Hm… interesting. I myself use a painted metal board with magnets from the magnet minifigs. I like that it is easy to move them around as I want. 🙂
hi, long time no see tbb. this is cool but I agree with chi-bacca. just if your interested I just e-mailed LEGO about another chima series where chima gets invaded by a similar land called khima with red chi called khi. I think its really good and so do some people I told. do u like it??
Hey, benny, long time no see! Is that khima and khi thingy your idea? 🙂
sure is…. just dont steal it!! XD
The concept of Chi seems inspired by East Asian philosophy:
https://en.wikipedia.org/wiki/Qi
Looks like a great project/display board!
Benny I love your idea :). Then all the Chima tribes could unite and there could be some suspense as to whether or not Cragger could be trusted. Or Cragger could turn good but his sister could join the khima tribes.
Saving this todo!! thanks
what kind of glue did you use? how is it holding up?
Jeremy, you can use any kind of glue that is recommended for wood-working projects. You can ask at your local home improvement or hobby store. There are many different brands that would work.
I can’t tell from the picture. Does the mini fig just have to sit on the bracket loosely, or does it have studs on the bottom “shelf” part?
Gary, I’m not sure if I understand your question, but those brackets have studs on the top, and that’s what the minifigs are standing on, so the connection is very secure.