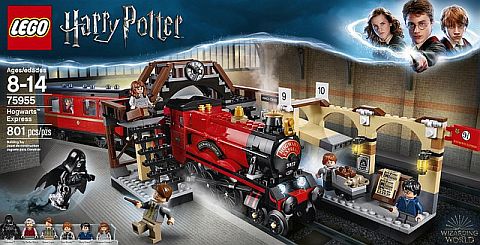
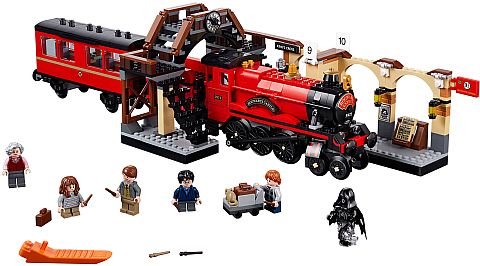
When we talked about the new LEGO Harry Potter sets, we mentioned that, unfortunately, the #75955 LEGO Harry Potter Hogwarts Express is not set up for motorization right out of the box. Some LEGO trains come with all Power Functions elements included (like the LEGO City trains we talked about previously). Some LEGO trains don’t include Power Functions, but they are designed with optional motorization in mind, with alternate instructions available in the building manual or at LEGO’s website (the #10254 LEGO Creator Holiday Train from 2016 is a good example). And some LEGO trains are just not meant to be motorized in their original form. However, since we are dealing with the highly adaptable medium of LEGO, and LEGO fans are a creative bunch, they will always find a way to motorize any LEGO train.

A couple of days ago, JANGBRiCKS released a video, demonstrating five different ways to motorize the #75955 LEGO Harry Potter Hogwarts Express using the old 9-volt system, Power Functions 1.0 with the regular battery box, Power Functions 1.0 with the rechargeable battery box, Power Functions 2.0 (also called Powered Up), and a LEGO Power Functions 1.0 M-motor or L-motor. You can watch the video below.
As you can see, each of the methods has some plusses and minuses. Using the 9-volt motor requires the least extra parts and modifications, however you have to have the whole 9-volt train system with metallic tracks, transformer, etc. If you are a dedicated 9-volt LEGO train fan, you should already have the parts needed, but if you are not familiar with the 9-volt system, and you don’t have any of the parts, it is not worth investing in it just for this train.

Most LEGO fans will have the LEGO Power Functions 1.0 components, as it has been around for a long time. Using this system, you will need to install the motor (under the tender is easiest), the battery box, and the IR-receiver (which communicates with the remote to turn the train on or off, and control the speed and direction). The battery box and receiver are quite large, but there are a few different ways you can hide them inside the train. This include enlarging the tender and fitting everything inside, splitting the Power Functions components between the engine, tender, and train car, or even building a separate car for the Power Functions components. All of these methods are fairly easy with some minor modifications, and JANG makes some helpful suggestions in the video.

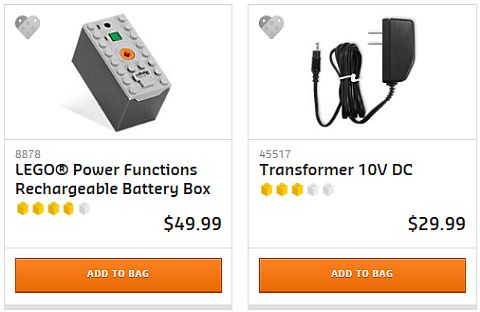
If you have the LEGO Power Functions 1.0 rechargeable battery box, you can get away with not using the IR-receiver and the remote, but instead turning the train on and off and controlling the speed directly from the controls of the battery box. The rechargeable battery box is a good long-term investment in general, but be aware that you also need to get the 10-volt DC transformer. The transformer is unique to LEGO (you can’t just use any easily available alternative), and is expensive. However, you only need one transformer even if you have multiple rechargeable battery boxes. It’s just something to consider if you really want to get into trains. You can find Power Functions components at the LEGO Power Functions section of the Online LEGO Shop.

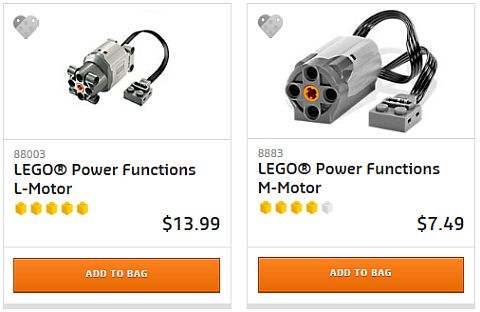
Another options you can use with Power Functions 1.0 is instead of using a standard train motor box that you put under the tender (or a train car), you can incorporate a regular M-motor or L-motor into the engine and, with the aid of some gears, power the back set of engine wheels. This method requires the most modification, but JANG explains in detail how to do it in the video above. This could be a good option if you don’t have a train motor, but you do have the other Power Functions 1.0 components (perhaps from a LEGO Technic set, or from the #8293 LEGO Power Functions Motor Set).

Finally, you could motorize the #75955 LEGO Harry Potter Hogwarts Express by using the brand new LEGO Power Functions 2.0 (Powered Up) system that is being introduced with the #60197 LEGO City Passenger Train and the #60198 LEGO City Cargo Train (available in North America in August, already available in many other countries). This system includes a train motor and battery box very similar to the previously mentioned ones. However, because the Bluetooth receiver is integrated into the battery box, you don’t have to hide that many components. The train can be operated by the redesigned remote control, or from the Powered Up app via a smartphone or tablet. The negative side of this system is that it is very new, and components are not yet available individually. So, you will have to invest in a whole other train just to power the Hogwarts Express. Please note that Power Functions 1.0 and Power Functions 2.0 components are not compatible due to the different wires and plugs. You can find the two new trains at the LEGO City section of the Online LEGO Shop.

From the different motorization options for the #75955 LEGO Harry Potter Hogwarts Express, probably the easiest and most realistic is going to be using the LEGO Power Functions 1.0 components. The system has been readily available in many LEGO sets through the years, and you can also purchase the components separately at the LEGO Power Functions section of the Online LEGO Shop. Also, don’t forget that you will need tracks for your powered #75955 LEGO Harry Potter Hogwarts Express. If you already have some LEGO train sets, you should have plenty of tracks, but if you don’t, you can get train track packs at the Online LEGO Shop.

The #75955 LEGO Harry Potter Hogwarts Express is definitely a great set, and the best version of the iconic train LEGO released to date. While it is perfectly fine right out of the box, if you want to make it even more awesome, I would highly recommend motorizing it. It just looks great running down the tracks and stopping at Platform 9¾. Here is the official description: Step aboard the iconic #75955 LEGO Harry Potter Hogwarts Express train from King’s Cross Station, featuring a railway bridge with a clock and steps leading to Platform 9¾, moving brick wall entrance, ‘Wanted’ poster and Daily Prophet newspapers, plus a train toy and carriage with 4 seats and removable side panel and roof. Order candy from the Trolley Witch, fly the Dementor into the carriage and recreate fantasy realm scenes from blockbuster Harry Potter movies. Includes 5 minifigures: Harry Potter, Ron Weasley, Hermione Granger, Remus Lupin, and the Trolley Witch, plus Dementor and Scabbers figures. Platform measures over 5” (13cm) high, 12” (31cm) wide and 6” (17cm) deep. Hogwarts Express measures over 3” (9cm) high, 18” (46cm) long and 1” (5cm) wide. 801 pieces. Price: $79.99 – BUY HERE

What do you think? How do you like the new LEGO Harry Potter Hogwarts Express? Do you have it already? Are you planning to motorize it? Which method of motorization do you prefer? Feel free to share your thoughts and own reviews in the comment section below!
And you might also like to check out the following related post:


I would love to get the rechargeable battery pack, but man, it’s so expensive! So, instead, I use rechargeable batteries in the regular battery box. It works well, but it doesn’t have the option to control things directly from the battery box.
I didn’t even know the rechargeable battery had onboard controls! It’s expensive, but it might be worth it with that additional feature.
Yes, for sure! For certain applications having the controls right on the battery box makes a lot of sense.
That’s what I do as well; regular battery box with rechargeable batteries. But yeah, it would be great to get at least once of those rechargeable battery boxes. Good thing is that you only need one converter, so that helps.
Did Lego ever make a train with the M or L motors, or they usually prefer the motorized wheelbase? I kind of like that option, but I haven’t seen it used in a Lego set.
Hm… I can’t think of any. All the ones I remember seeing use the standard train motor. But there is a lot of benefit using the other motors and they are often used in custom trains. They are small, and much more versatile than the train motor.
The Emerald Night included alternate directions to use an XL PF motor to drive the train.
Thanks for providing that info. 🙂
That train needs more cars! And a caboose! Seriously, great train, but why didn’t LEGO include the new PF? At least as an optional package?
That’s a good question, and I don’t know.
Pricing?
They could have included it as an optional upgrade. They have done it with other trains. My guess is that the PF 2.0 components were not quite ready yet when the design of the train was already done.
I just finished building the Hogwarts Express and I love it. I have about four of the five sets. I don’t have the great hall because, I still have a lot lot the older Harry Potter sets and i`m combining both old and new together.
Oh, that’s going to look really sweet! 😀
There’s no color clash, or would it look acceptable? (I guess you could bricklink replacement parts if you’d want a more uniform look, though…)
Both the old and new HP sets use tan mostly. The main difference is that the roofs are gray instead of sand-green, but since both are muted colors, they won’t really clash.
Some castles have been weathered over time and there color has been a bit discolored over time .
Shouldn’t be enough to clash, I think, and actually it doesn’t feel too unlikely for a real weathered castle. (Not that different areas would be unevenly weathered, either…)
Yes, that’s true as well. In fact, a castle that’s not weathered would be very unusual.
It works for me. In a magical world there are no rules. ( just like imagination). The fact that Lego didn’t keep the same sand green color . You have to make do with what you have/ get.
Could you create a powered baggage car to add to the train? Then you would not need to modify the Hogwarts express And the train would be a little longer.
Arthur, you can absolutely do that! I have done that with the Holiday Train, and explained the process here: http://thebrickblogger.com/2017/11/power-functions-wagon-for-small-lego-trains/
Please note that in the article, I focus on smaller LEGO trains, but you could do the same with larger trains as well. With larger train, you may need to add some weight to the engine (people often use pennies) to make sure that the weight-distribution is right and the train doesn’t derail (which could happen with larger trains if the engine end up being lighter than the cart where the PF elements are).
I just purchased the Hogwarts Express and plan to motorize it.
Awesome! Have fun! 😀
My wife and I just bought this train and are planning on getting tracks to put around our Christmas tree. I like the idea of being able to activate it from my smartphone (I’m a sucker for that kind of thing.) Are the PF 2.0 parts still only available as part of the sets, or are they now able to be bought individually? Also, are there any particular parts you recommend if we decide to go this route that would make the conversion process easier (assuming we don’t have a huge parts library to pull from?)
Tim, the PF2 components are still only available in sets, and I don’t expect them to be available individually any time soon. So, you will need to get one of the PF2 trains (#60197 or #60198) to power your Hogwarts Express. If you plan to use PF2, then it is worth getting one of the trains, as it includes all the components you need to power any train (motor, battery box, remote). The Passenger Train is cheaper, so you might want to go with that one. Hope this helps. Any other questions just let me know. 🙂
Just got this train for Xmas and google led me here for the first time!
Have motorised it with a 9V PF 1.0 train motor but changed it from 4-6-0 to 4-4-0, swapped the train base plates around so the “stalk” would fit, and move the middle “arch” and “Hogwarts Express” sign forward two units, removing the front arch.
Just 2 1×6 red or grey plates to replace a red 1×6 brick removed and a few things shuffled around behind and in front of the motor.
Woody, nice to have you over! Those sound like interesting modifications! 🙂
Would it be possible if you could list the additional parts you used to do to conversion in the video. I don’t really have any of the additional parts and the names or part numbers would really help when trying to find them on bricklink.
Jonathan, which conversion are you planning to use? In the video, five variations are mentioned.
1. This setup uses the old 9 volt system. I do not recommend this unless you already have all the parts for a 9v setup. It’s very expensive to get them so many years after the system was retired.
2. This setup uses the new Power Functions 2.0 Powered UP system. This is very easy to put into the train, but you do have invest in one of the new LEGO City trains, or get the train motor and the battery box from BrickLink. You can operate your train from your phone or tablet, so you don’t need a remote.
3. This setup uses Power Functions 1.0, which is also very easy, and the parts are readily available at the Online LEGO Shop. You need a train motor, the battery box, the IR receiver, and a remote is a good idea. Again, you can easily get these individually directly from LEGO.
4. This setup uses the same system as #3, but with the rechargeable battery, also readily available from LEGO, but is more expensive. Everything else is the same.
5. This setup uses a battery box, IR receiver, and remote, but instead of the train motor, uses a regular medium motor (readily available from LEGO). As you can see from the video, it’s kind of complicated to set up as you will have to partially take apart the engine, and rebuild the gearing. The benefit of this system is that you leave the cart free for passengers.
Personally, I would recommend using #2 or #3. It’s easy to set up and doesn’t require any special parts. You can put the train motor under the tender, and just insert the battery box (and receiver in case of #3) in the passenger car. Hook them up, and you are done. #3 is the cheapest to implement, as Power Functions 1.0 is very common and has been around for a long time. Power Functions 2.0 is still rare and parts can’t be purchased individually from LEGO until next year. But you should be able to find them on BrickLink.
Hope this helps some. If you let me know which modification you want to use, we can talk about it in more detail. 🙂
Hi
Buying the LEGO City trains set is more than I wanted to spend. I liked the approach that was they main focus of the video and is talked about from the 8 minute mark onwards. I liked how this left the passenger cart alone and it doesn’t seem super expensive.
Jonathan, all right, thanks for clarifying which version you would like to build. So, from the PF system, you just need the battery box, the M-Motor, the IR receiver, and the remote. You can get those from LEGO directly.
An essential part is the pin connector that attaches the small gears to the motor: https://www.bricklink.com/v2/catalog/catalogitem.page?P=48496#T=C
The gears are these little ones: https://www.bricklink.com/v2/catalog/catalogitem.page?P=6589#T=C
All the other non-essential modifications can be done in different ways. It just depends on what you have.
Hi, I already built the hogwarts express and want to build more but would I be able to motorise them all and could I attach them to one remote control and want do I need to do it.
Thanks for your help
Wendy Rutherford
Wendy, both the older Power Functions remote and the newer Powered Up remote can run up to eight trains at the same time. See more info here: https://www.lego.com/en-SG/service/help-topics/bricks-and-sets/themes/trains/using-the-remote-control
Jonathan, I am using your recommendation to motorize the Harry Potter Hogwarts express. I chose to use the M motor with the battery pack, remote control and receiver. The problem I have is that when I ordered the M Motor the connector to the remote receiver is a plug in and not a lego snap on like the one in your demonstration. Is there a connector I can get to modify this. Please advise.
Thank you,
David.
David, it sounds like you got the new LEGO Powered Up motor (with the plug), instead of the old Power Function motor with the stackable connector. Unfortunately, the two systems are not compatible, and there is no adapter to make them compatible. You will either need to have all your components to be Power Functions or Powered Up. (Please note that with Powered Up, there is no need for a separate receiver, as it is built into the battery box.)
If your battery pack, remote, and receiver are all the old type (Power Functions), and only the motor is Powered Up, I would suggest that you call LEGO’s customer service and arrange a swap to the older Power Functions M-motor. They are selling both the old and the new systems right now, and they are aware that this can be confusing to consumers, so they should be able to help you out with making an exchange.
Thank you, this is very helpful. Hopefully I can continue to use your expertise once I get the parts I need to fabricate this as I am not a Lego master. Thank you again.
David
David, sure stop by at any time if you have further questions. Have fun with your project! 🙂