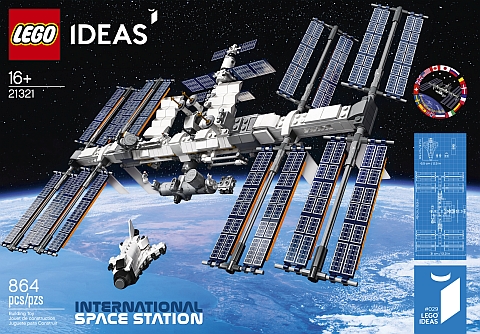
The recently released #21321 LEGO Ideas International Space Station has a long and twisty history, but it turned out to be an excellent set to the delight of LEGO fans. I was eager to get this set myself, as I love space exploration sets, and was also excited by all those solar panels and other printed pieces. So, let’s take a closer look at this awesome set!
LEGO IDEAS ISS – THE HISTORY
I would like to start by talking about the history of the #21321 LEGO Ideas International Space Station because it demonstrates what it takes to create a successful LEGO Ideas project. If you look at the LEGO Ideas profile of the creator of the model, Christoph Ruge, you can clearly see that he is a huge space exploration enthusiast. He has been submitting space exploration related projects to LEGO Ideas since 2014. This includes six different versions of the International Space Station from small desktop displays all the way to minifigure scale models.
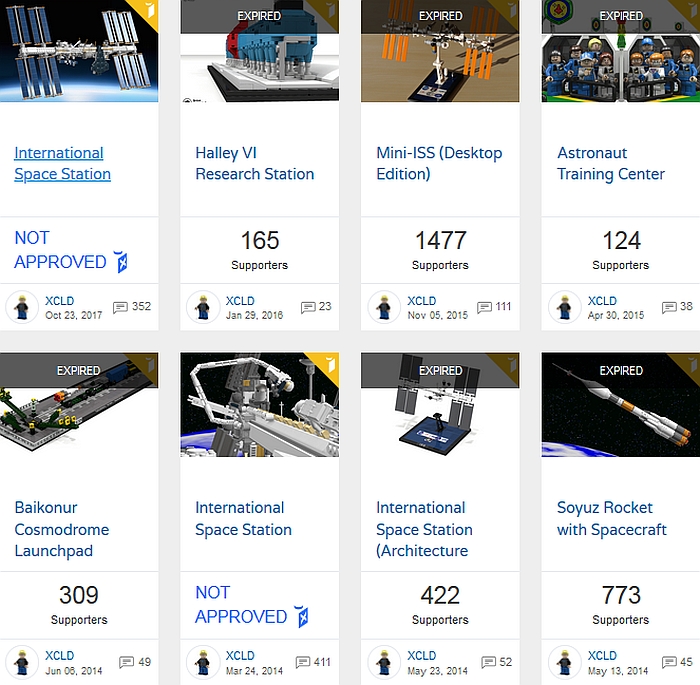
Most of the projects received 1,000 votes or less, but two of the larger versions of the International Space Station actually made it to 10,000 votes. However, after review, both were rejected by the LEGO Ideas team. Christoph is quoted in the instruction booklet of the #21321 LEGO Ideas International Space Station:
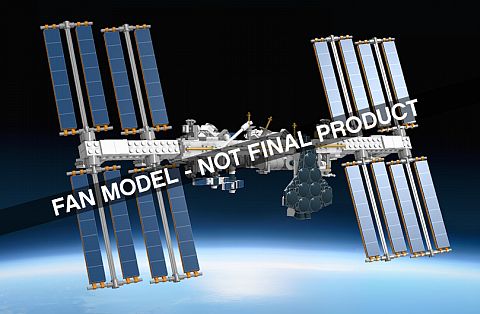
“In 2014, I got the idea to model the International Space Station using LEGO Digital Designer. Since I didn’t have the bricks to build it myself, I thought it would be cool if the LEGO Group would do that instead! Once it was ready, I set up an entry on LEGO Ideas. The project was well appreciated in the community and had a good start. Nevertheless, it was a long way to reach 10,000 votes. That gave me time to build other space-related models and continue my research about the station itself. So, I refined my model over and over again.”
“In the end, it looked nothing like the first version I posted. I continued and didn’t stop, even after the project finally reached the goal and got reviewed by the LEGO Group. All in all, I had worked for more than three years on the first model and probably knew everything about the space station at that time. This research and knowledge became very handy when the #21312 LEGO Ideas Women of NASA set came onto the market. That was the moment I got the idea to do another version of the space station in the same scale as the shuttle included in this set. So, I built a new model and set it up on LEGO Ideas. Again, it took a while to gather support and reach the review phase. Again, it got there. And again, it was rejected.”

But then, the LEGO Ideas team decided that to celebrate ten years of crowd-sourcing and collaboration between LEGO Ideas and LEGO fans around the world, they would dive into the archives of LEGO Ideas projects that had gathered 10,000 supporters but hadn’t made it into production. They selected four projects that they believed could still make great LEGO Ideas products, and they put them up for a fan vote. The International Space Station was the overwhelming winner of this process.
As you can see, it takes dedication, tenacity, positive attitude, belief in your project, as well as support by the community to make a project work. Christoph’s story is a great example of what it takes to push a project to success.
LEGO IDEAS ISS – THE LEGO DESIGNERS
Once the project was selected by LEGO fans, LEGO designers Samuel Johnson, Crystal Fontan, and Corvin Alexander Stichert got busy taking the already awesome ISS project to the finish line by refining the design, working on the graphics, and ensuring that the original model met the LEGO requirements for stability and quality. In the video below,
LEGO IDEAS ISS – PACKAGING & INSTRUCTIONS
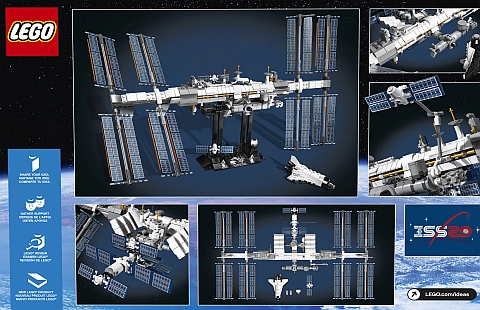
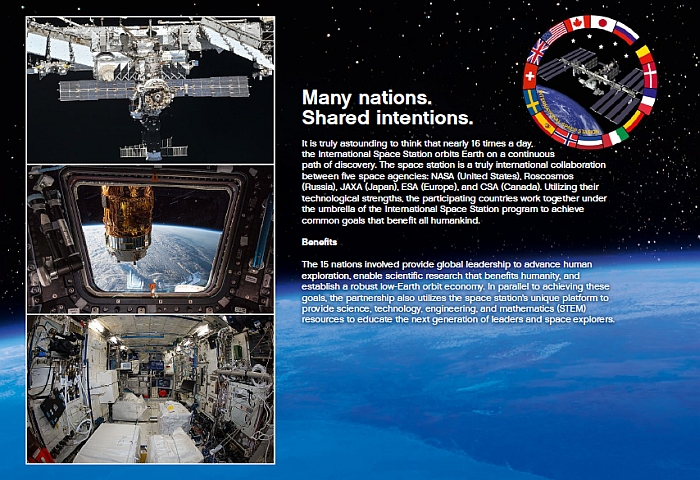
As usual with LEGO Ideas sets, the box is the higher quality flip-up lid kind, with impressive graphics of the space station at the front, the back, and the sides. The box also features the International Space Station logo, with the flags of the 15 nations involved in this truly collaborative project to advance human exploration, and enable scientific research.
The instruction booklet is 127 pages, and includes information about the fan designer, the LEGO designers, previous LEGO Ideas space projects, and the real International Space Station. One thing that I feel the booklet is lacking is more educational material about the space station. In some previously released LEGO Ideas and LEGO Architecture sets, there are small captions throughout the building steps with interesting facts and stats about the real life version of whatever is featured in the set. This would have been especially welcome for the International Space Station, as it is full of unusually shaped modules that non-space nerds would have trouble to identify. Sure, the info could be looked up on the NASA website or Wikipedia, but it would have been great if it is also included in the instructions, so LEGO fans can know what they are building.
LEGO IDEAS ISS – THE BUILDING PROCESS
The building steps of the #21321 LEGO Ideas International Space Station are broken down into six sections. From bag #1 you build the small space shuttle, and other small removable space modules that you see at the base of the set. It’s interesting to note that the space shuttle is almost the same as the one in the #21312 LEGO Ideas Women of NASA set with some minor differences.
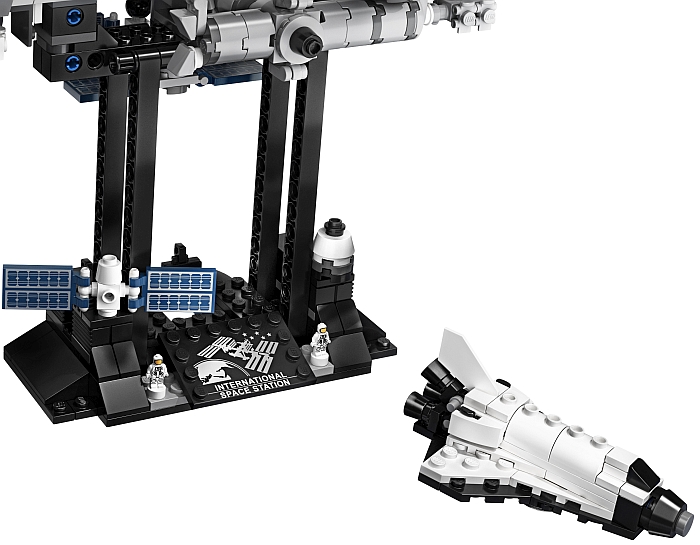
Parts from bag #2 builds the sturdy base that holds up the International Space Station, the other add-on modules, as well as the leaving space for a couple of space micro-figures. It’s a simple but super solid build that works very well for its intended purpose. At the foot of the base, there is a very nice 4×6 modified plate with silver and white printing of the International Space Station hovering over the Earth.
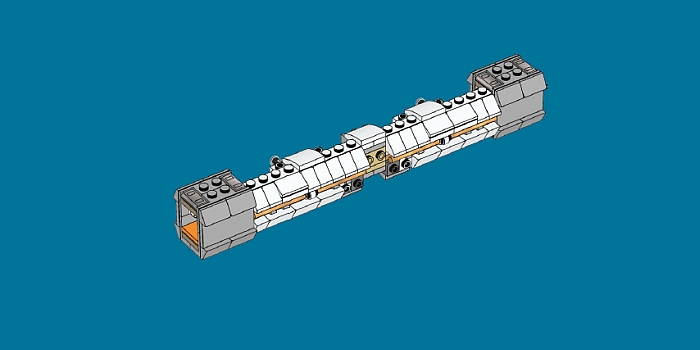
Parts from bag #3 are for building the main body of the space station that will be supporting all the solar panels and other add-on modules. Basically, it’s a long sturdy tube that starts with two 2×12 plates, capped with various slopes, and all kinds of attachment points sandwiched in between. Attachment points include LEGO Technic bricks with holes, bars (for clip-on modules), and large ball-joint receivers at the two ends that are especially well-integrated for holding up the solar panel modules. Everything is very sturdy up to this point.
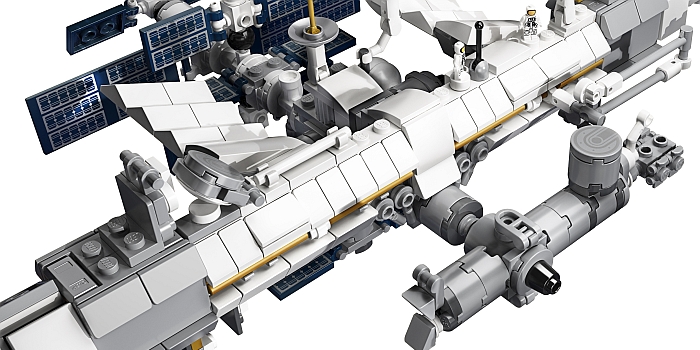
Parts from bag #4 are to build the greebly stuff that protrudes from the two sides of the space station, including various scientific instruments and attached cargo spacecrafts. Some of these are connected by LEGO Technic axles, while others use bars going through holes or attached by clips. This is definitely a section where some extra information to identify the different modules would have been very helpful. While all the modules are connected solidly, it is possible to knock them down by accident, and due to the unusual nature of the whole structure, it’s hard to identify where or how to put them back.
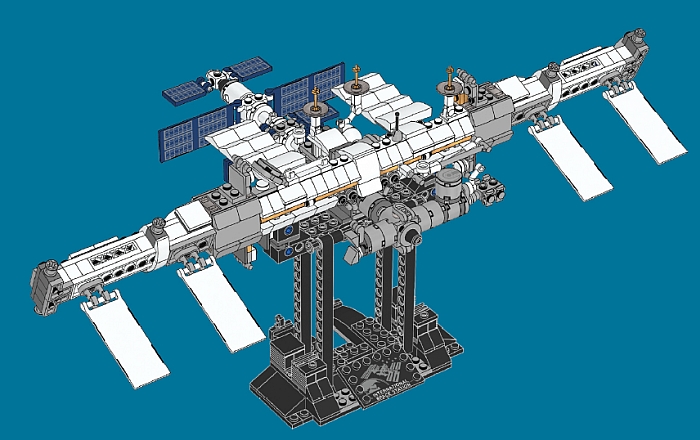
Parts from bag #5 are for building the cores at the two ends the solar panels attach to. They are connected to the main body with large ball-joints. These are extremely strong connections that prevent sagging and allow the cores to rotate independently from the main body. There is also some extra greebling added throughout the entire structure as finishing touches; antennas, satellite dishes, and more scientific instruments You’re basically building in every direction, so it’s a good idea to have the model attached to the base by this point.
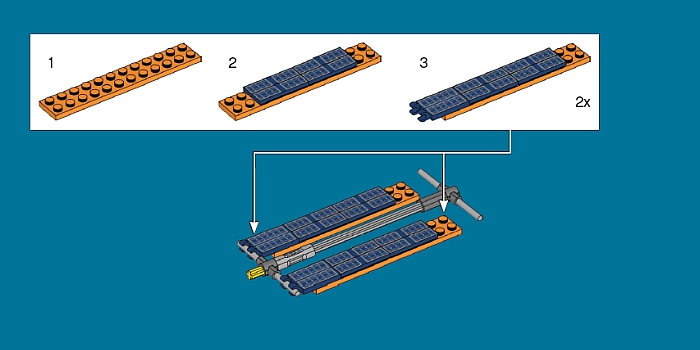
In bag #6 you will find the parts for the solar panels. These are eight identical builds, mainly consisting of 2×12 orange plates (two for each module), all those gorgeously printed dark-blue 1×4 tiles and 2×4 modified tiles with clips, and a LEGO Technic and frame. I recommend building all eight at the same time, instead of one by one just to speed up the process. The tiles are very nicely printed, but because there may be slight variations in printing, you may need to swap them out or turn them around here and there to achieve perfect alignment. Mine turned out beautifully, and I haven’t heard any complaints about the tiles not aligning properly.
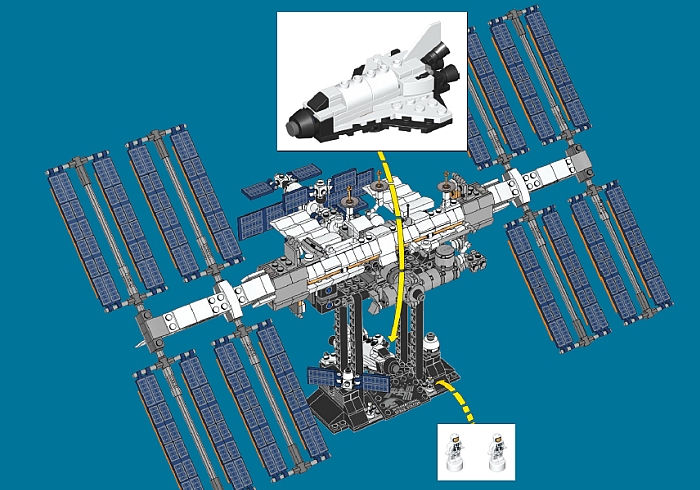
LEGO IDEAS ISS – PARTS SELECTION
The set comes with 864 pieces. I have to admit that my main interest in this set was all those printed solar panel tiles. You get sixty-four of the 1×4 dark-blue printed tiles, forty-six of the dark-blue printed 2×4 tiles with clips, and two of the large 3×8 dark-blue flag pieces (you also get four more plain white one of these). There are some other printed parts as well; 1×1 and 2×2 round tiles with some nice details. There are also tons of pieces for greebling, including small parts with bars, clips, and other interesting attachment points, mostly in white and light-gray. Also noteworthy are the four pearl-bold ski poles used as antennas. If you like parts for greebling, this set is a goldmine!
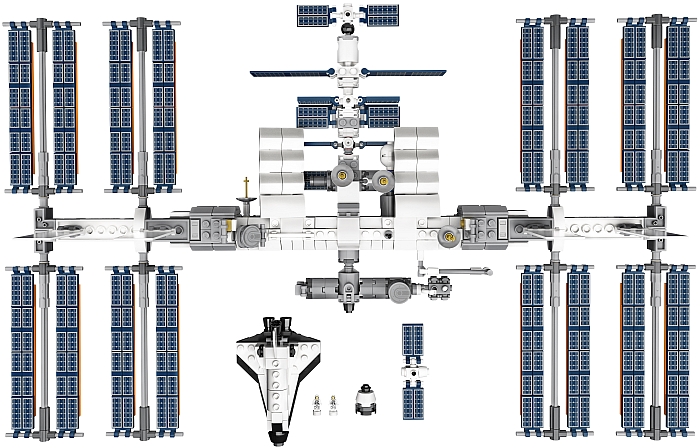
LEGO IDEAS ISS – THE FINAL MODEL
The final model is surprisingly large. From the bottom of the base to the top of the main body its about 7” (20cm), from end to end it’s about 19” (49cm), and the wingspan of the solar panels is 12” (31cm). It definitely looks impressive on display, and it’s an accurate and faithful representation of the International Space Station.
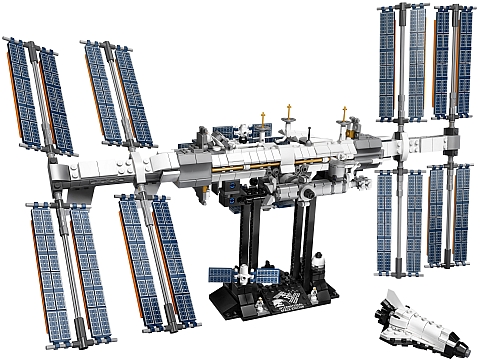
It’s not a playset though. Although the model is sturdy, due to all the greebling going in every direction, there is no easy way to pick it up and remove it from the base. It’s very easy to knock off the attached modules while handling, and then you will be scratching your head where and how to put them back. Once you build it, the only think you can safely do is to reposition the flaps at different angles, and whoosh around the space shuttle. Also, cleaning this model is going to be a pain due to all the small parts that want to fall off. I’m normally not a fan of putting a set inside a display cabinet, but this one may be worth it. In the video below, I will let JANGBRiCKS tell you more about the set.
LEGO IDEAS ISS – CONCLUSION
If you are a fan of space exploration and love LEGO sets based on real life space projects, I think you will be very pleased. It looks beautiful and impressive on display, but I suggest that you place it inside a closed display so you don’t have to deal with dusting. If you want to build your own space models and looking for solar panels and greebling pieces, this set is an excellent source. At 874 pieces for $69,99, the price/part ratio is so good, you may consider buying more than one just for the parts. If you want space sets for play or educational purposes, this is not the best option, as the final model is difficult to handle without knocking off parts. The recommended age is 16+ and I agree with that. It’s a display model for older kids and adults, not a play set. If you’re interested, you can check it out at the LEGO Ideas section of the Online LEGO Shop.
What do you think? How do you like the LEGO Ideas International Space Station? Is this a model you voted for on LEGO Ideas? Are you happy with the final set? Do you have it already? Feel free to share your thoughts and discuss in the comment section below!
And you might also like to check out the following related posts:


It’s good to hear that the printing on the panels is aligned properly. I read it was bad on the mustang. I like the set, and the price is right. It’s weird that we are so conditioned by expensive sets that something under 100 bucks feels like a relief.
It’s an elegant set for sure. I agree that some information about the modules would have been handy. Like, what is that balloon looking thing?
The set looks fragile. I’m glad it’s not the case and only the greebly pieces might fall off. I agree that cleaning it is going to be tough. Some soft brushes might work.
Why was the project rejected so many times? People clearly wanted it. And now it’s a popular sert. Kudos to the creator for sticking with it. I don’t think I would hav lasted that long. LOL.
It’s a fantastic set. A little boring at the end when you’re working on the panels, but you can do them all at the same time, which speeds up things. I agree with admin and other commenters that information about different parts of the ISS would have been helpful.
How secure is the connection to the base? Is the ISS attached by studs, or it’s just sitting there?
The ISS is solidly attached to the base with both studs and sort of a sliding/guiding section in the middle. Removing is easy, but it’s a little cumbersome reattaching it, because it’s hard to see where the studs should connect. But it works.