Remember when we talked about the LEGO Mixels characters back in the summer? If you don’t, you can read the original press-release here: Coming of the LEGO Mixels. In short, LEGO Mixels is a collaboration between The LEGO Group and Cartoon Network to produce a TV series, games, collectible LEGO sets and more. So let’s check them out! 🙂
The LEGO Mixels characters are crazy little creatures and you can combine them to create larger characters. With the original press-release we only saw three of the cute monsters, but thanks to the recent release of the LEGO retail catalog, and the update to the Brickset database, now we can see all of the sets scheduled for release this spring.
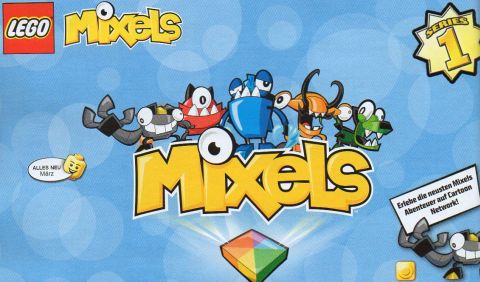
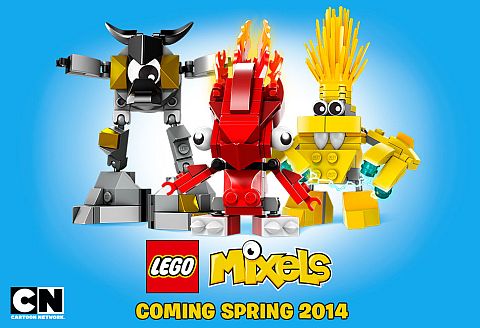
Each of the LEGO Mixels characters come in small bags and include a great selection of elements for some fun building. So far there are three sets of LEGO Mixels, with three characters in each: the red fiery Mixels, the gray rock Mixels and the yellow electric Mixels. There should also be some green and blue Mixels coming later, and there are likely going to be further series, as this one is numbered “Series 1”. And again, there will be opportunities to combine the models, as you can see on the picture below.

Also, here is the official description of the Mixels theme, which gives us more clues about who they are, plus hints at the badguys called Nixels: “The Mixels characters are fun little creatures who live the craziest adventures in their colorful world. Each tribe has its duty: The Infernits provide for the fire, the Cragster are builders and the Electroids bring light into darkness through electricity. The little Mixels are strongest and most creative when combining – then nobody can stop them! Almost nobody – as the uncool, colorless Nixels repeatedly try to hold off creativity in the Mixels’ world. Help the Mixel tribes defeat the Nixels! Collect all three Mixels of a tribe and create the tribe’s combiner model to face the Nixels. Or even better: Build the super-combiner from all tribes and turn the Mixel creatures invincible!”
So let’s see out all of the LEGO Mixel characters, as well as their combined models. As far as what the super-combiner looks like, at this point we don’t know, but judging from all the models, it should be really fun too!
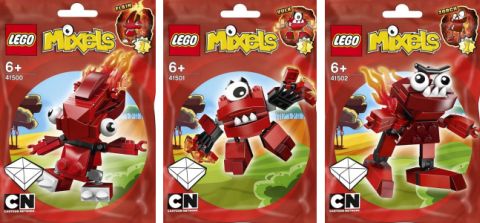
➡ LEGO RED MIXELS (combine all 3 to make Kombi Infernit)
- #41500 LEGO Mixels Flain
- #41501 LEGO Mixels Vulk
- #41502 LEGO Mixels Zorch
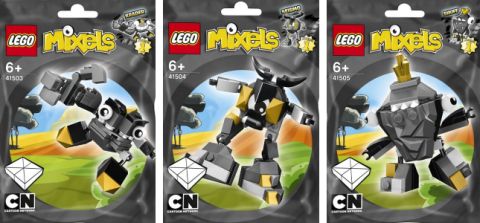
➡ LEGO GREY MIXELS (combine all 3 to make Kombi Cragster)
- #41503 LEGO Mixels Krader
- #41504 LEGO Mixels Seismo
- #41505 LEGO Mixels Shuff
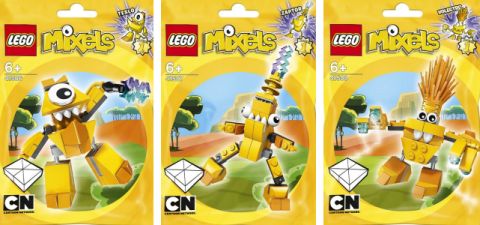
➡ LEGO YELLOW MIXELS (combine all 3 to make Kombi Electroid)
- #41506 LEGO Mixels Teslo
- #41507 LEGO Mixels Zaptor
- #41508 LEGO Mixels Volectro
So what do you think of LEGO Mixels? Do you like their look? How about the new elements? What could be the story behind them? Would love to year your thoughts on these bizarre little guys, so feel free to share and discuss in the comment section below! 😉
And you might also like to check out the following related article:
- Coming of the LEGO Mixels (press-release)