After a large wave of new LEGO sets in January, and a bit of a break in February, March is bringing us another big wave of new sets. So let’s take a look at all the new sets added to the Online LEGO Shop!

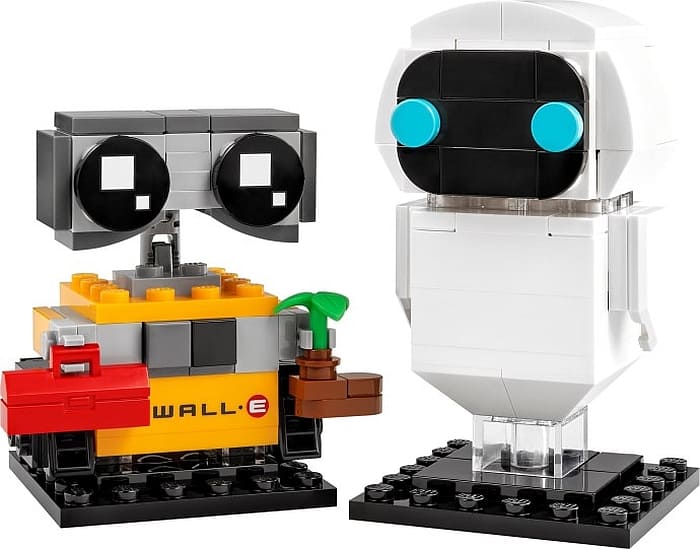
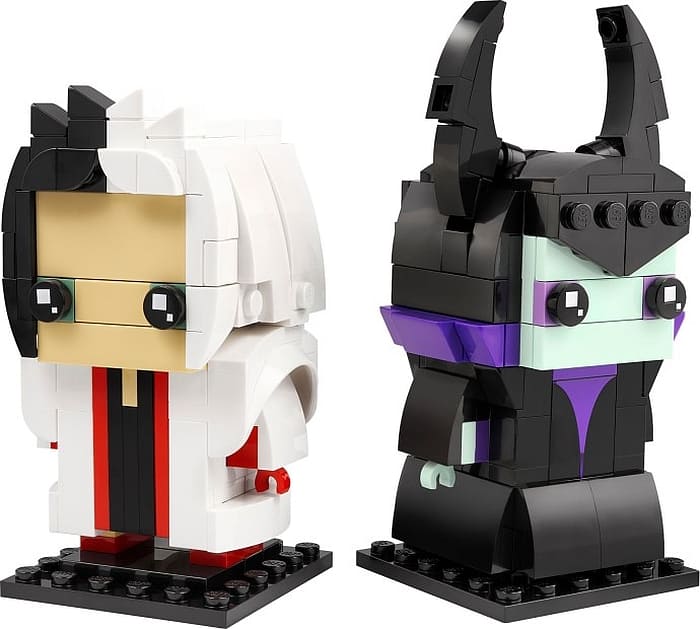
The three new LEGO Disney BrickHeadz sets we talked about the other day are now available. This includes the #40619 LEGO BrickHeadz EVE & WALL-E, the #40620 LEGO BrickHeadz Cruella & Maleficent, and the #40621 LEGO BrickHeadz Moana & Merida. They are available at the LEGO BrickHeadz section of the Online LEGO Shop.


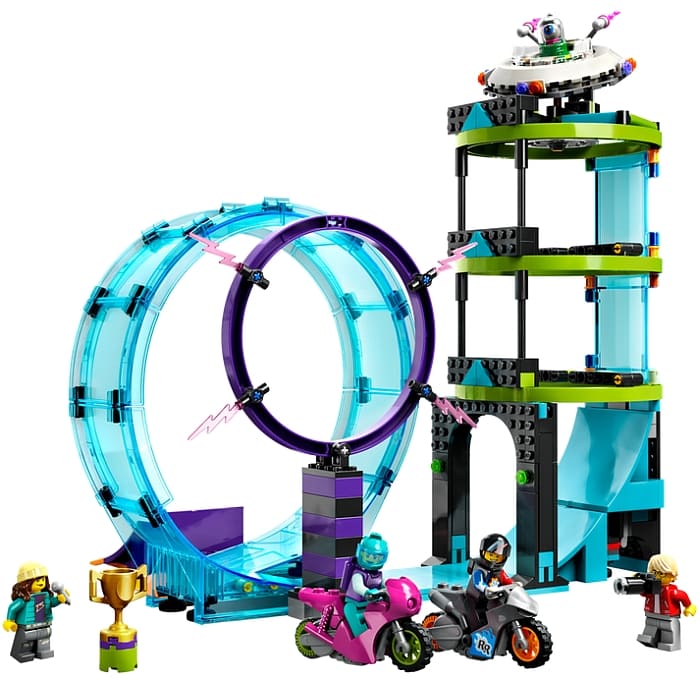
LEGO City Stuntz sets feature fun minifig-scale bikes powered by flywheel technology, as well as courses and challenges for the bikes. There is a whole collection of these sets, and two more were just added today; the #60357 LEGO City Stunt Truck & Ring of Fire Challenge, and the #60361 LEGO City Ultimate Stunt Riders Challenge. They are available at the LEGO City section of the Online LEGO Shop.
LEGO Classic sets are a great way to build up one’s collection of basic LEGO elements in a rainbow of colors. The sets also include some building suggestions, but they are mostly meant for creativity and free-play. Five new sets were just added to the line with beautiful color palettes! You can find them at the LEGO Classic section of the Online LEGO Shop.

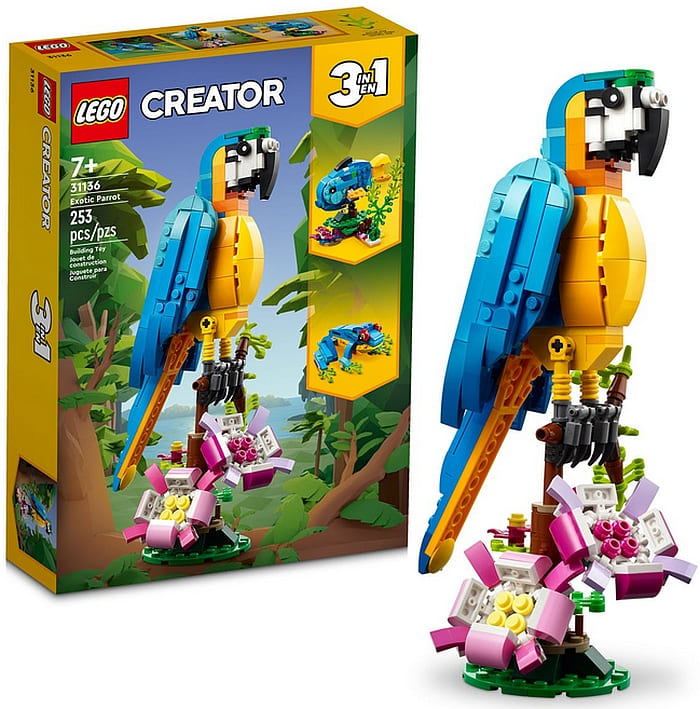
LEGO Creator 3-in-1 sets include instructions for three alternate models. Thus, they are great for building and rebuilding. The #31136 LEGO Creator Exotic Parrot is a particularly nice set, while the #31140 LEGO Creator Magical Unicorn and the #31137 LEGO Creator Adorable Dogs are super cute. The #31139 LEGO Creator Cozy House, and the #31138 LEGO Creator Beach Camper are minifig-size sets, while the #31135 LEGO Vintage Motorcycle and the #31134 LEGO Creator Space Shuttle are small model vehicles with some fun alternate builds. They are all available at the LEGO Creator section of the Online LEGO Shop.
The only new LEGO Disney set (besides the LEGO Disney BrickHeadz) is the #43219 LEGO Disney Princess Creative Castles that comes with Belle, Cinderella, Lumiere, and Gus, plus a storage box and instruction posters to encourage social building with family or friends. The set is available at the LEGO Disney section of the Online LEGO Shop.

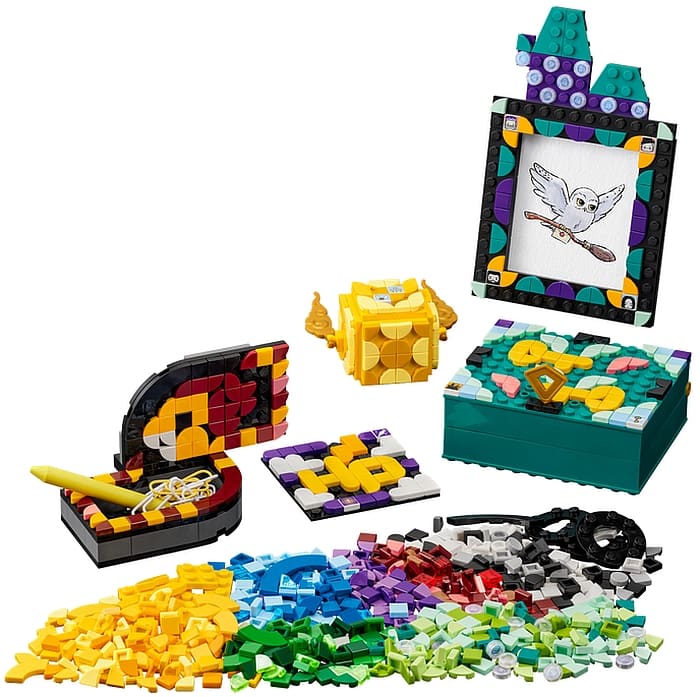
As we discussed previously, LEGO is discontinuing the wonderfully creative and colorful LEGO DOTS theme, but not before releasing three final sets, co-branded with the Harry Potter theme. The collection includes a pencil holder, a desktop kit, and an accessory pack. They are available at the LEGO DOTS section of the Online LEGO Shop.
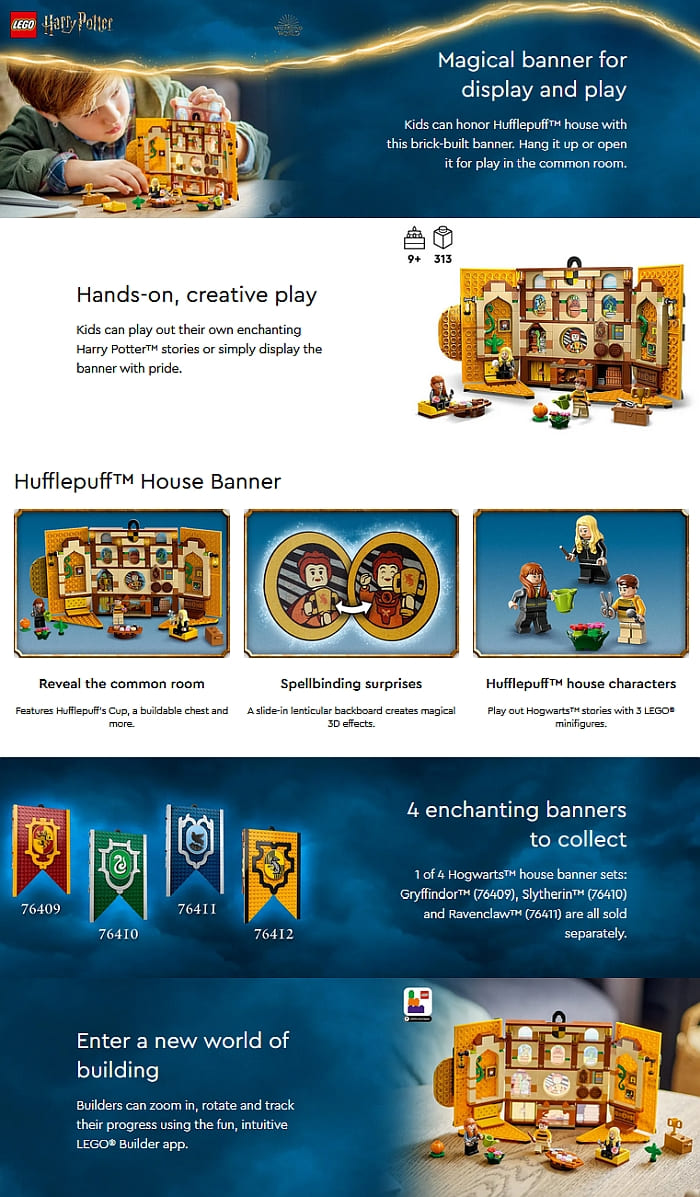
Speaking of Harry Potter, there is also a new LEGO Harry Potter House Banner collection. Each of the brick-built banners opens to reveal a detailed recreation of a place from the Harry Potter universe with tons if interesting elements, accessories, and minifigures. A couple of other new sets are the #76420 LEGO Harry Potter Triwizard Tournament The Black Lake, and the #76413 LEGO Harry Potter Hogwarts Room of Requirement. They are all available at the LEGO Harry Potter section of the Online LEGO Shop.
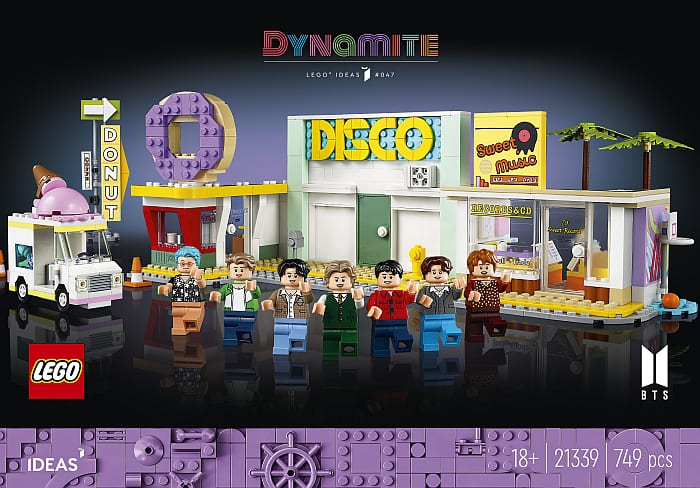
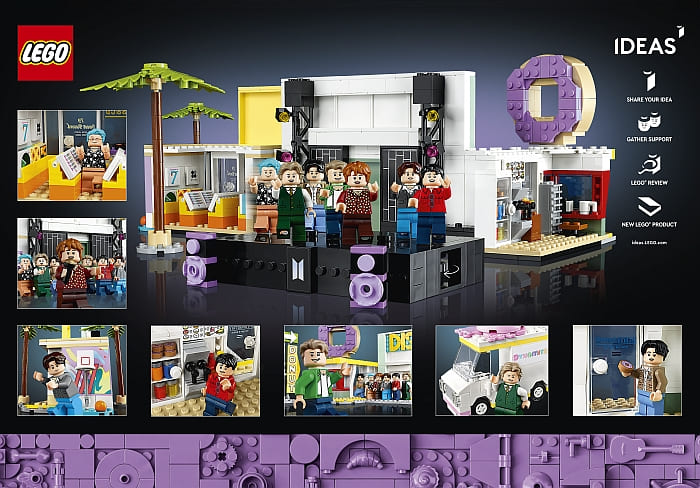
The recently announced #21339 LEGO Ideas BTS Dynamite set is now available, featuring the popular boy band, and scenes and props from their hit song. The set is available at the LEGO Ideas section of the Online LEGO Shop.
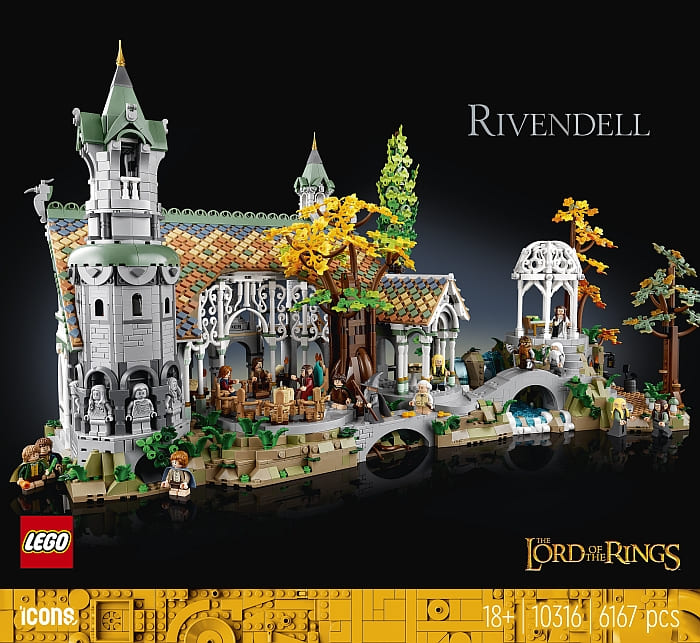
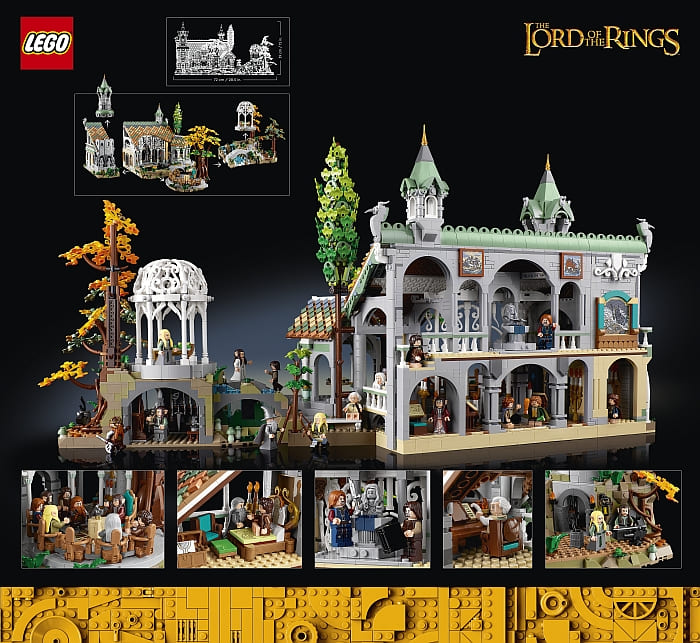
The absolutely beautiful and enchanting #10316 LEGO Lord of the Rings Rivendell set is now available. You can read more about this set via the links at the end of this post, and find it at the LEGO Icons section of the Online LEGO Shop.
Four new sets are now available for LEGO Speed Champions collectors. The #76915 LEGO Speed Champions Pagani Utopia, the #76918 LEGO Speed Champions McLaren Solus GT & McLaren F1 LM, the #76914 LEGO Speed Champions Ferrari 812 Competizione, and the #76916 LEGO Speed Champions Porsche 963. They are available at the LEGO Speed Champions section of the Online LEGO Shop.

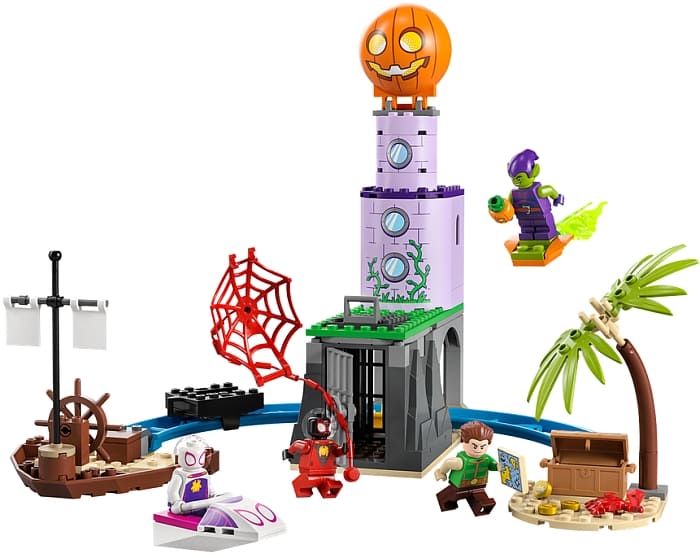
There are three new LEGO Spider-Man sets for younger builders featuring Team Spidey and their adventures. They are available at the LEGO Marvel section of the Online LEGO Shop.
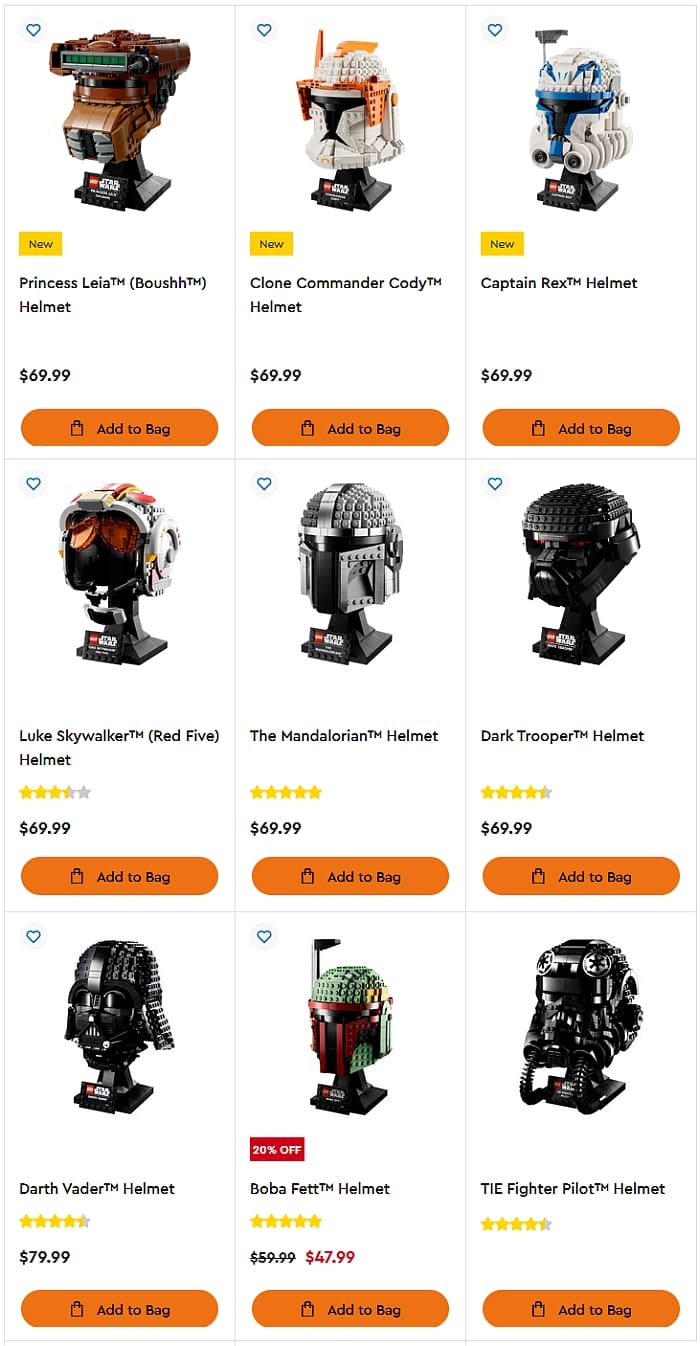
Three new LEGO Star Wars Helmets sets were just released; the #75349 LEGO Star Wars Captain Rex Helmet, the #75350 LEGO Star Wars Clone Commander Cody Helmet, and the #75351 LEGO Star Wars Princess Leia Boushh Helmet. They are available at the LEGO Star Wars section of the Online LEGO Shop.
LEGO Technic fans can enjoy four new sets; the #42152 LEGO Technic Firefighter Aircraft, the #42154 LEGO Technic 2022 Ford GT, the #42153 LEGO Technic NASCAR Next Gen Chevrolet Camaro ZL1, and the #42155 LEGO Technic Batman Batcycle. You can find them at the LEGO Technic section of the Online LEGO Shop.

I hope you find something that you like this month! What do you think? How do you like the new sets? Do you have any favorites? Feel free to share and discuss in the comment section below!
And you might also like to check out the following related posts: